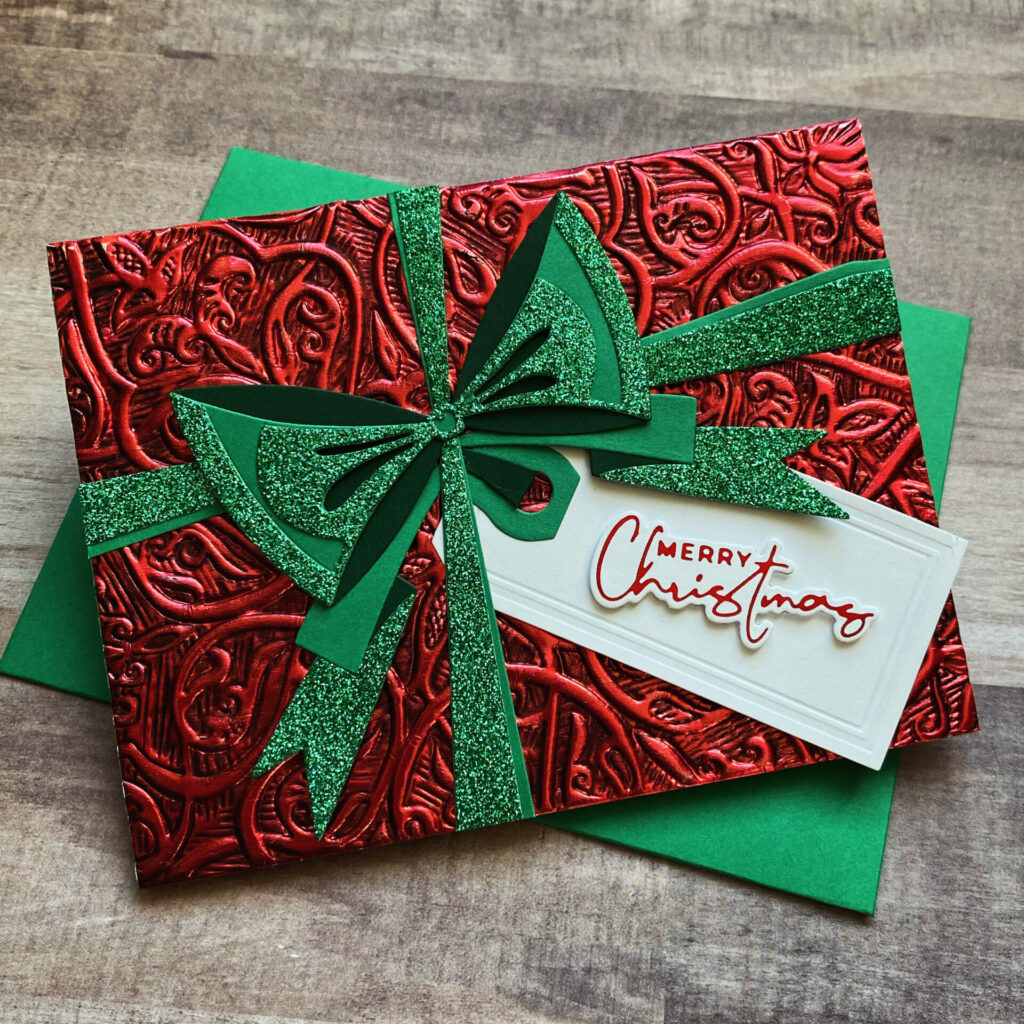
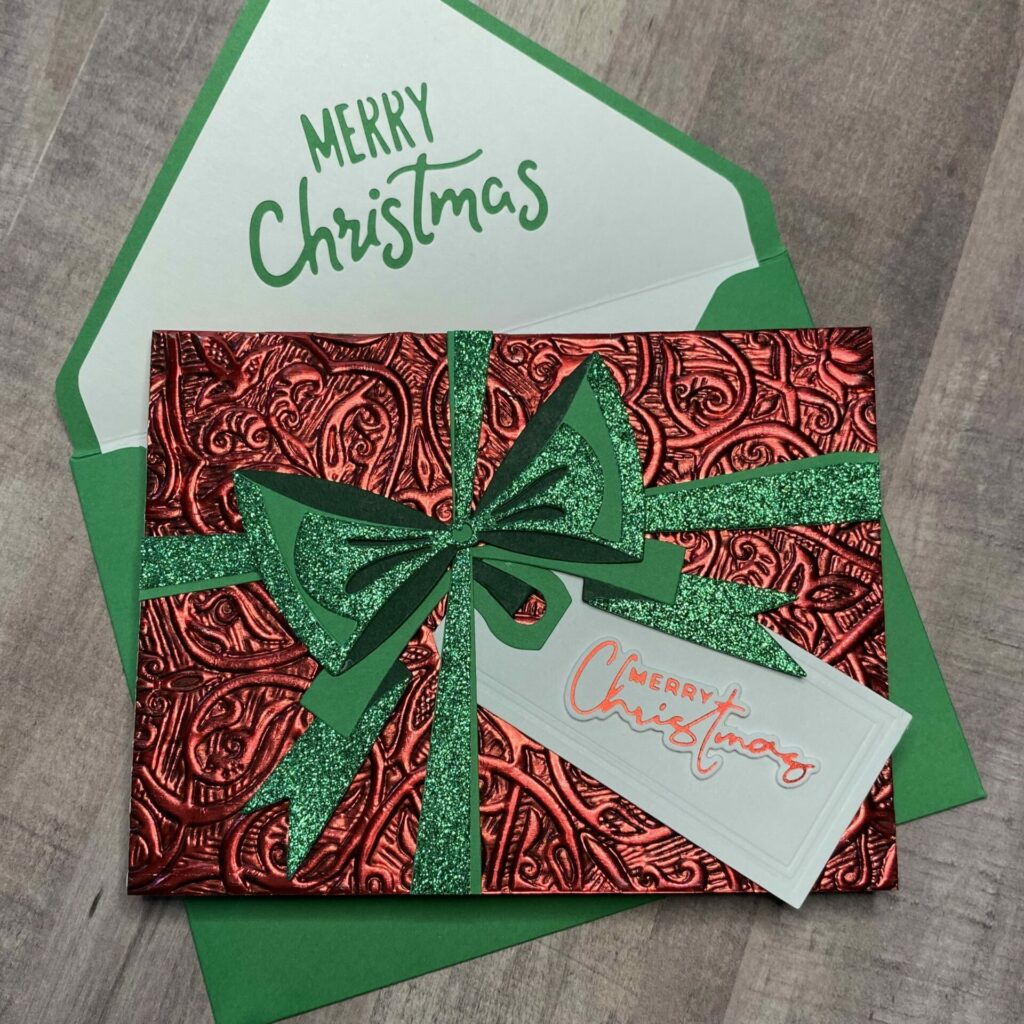
Present Holiday Card
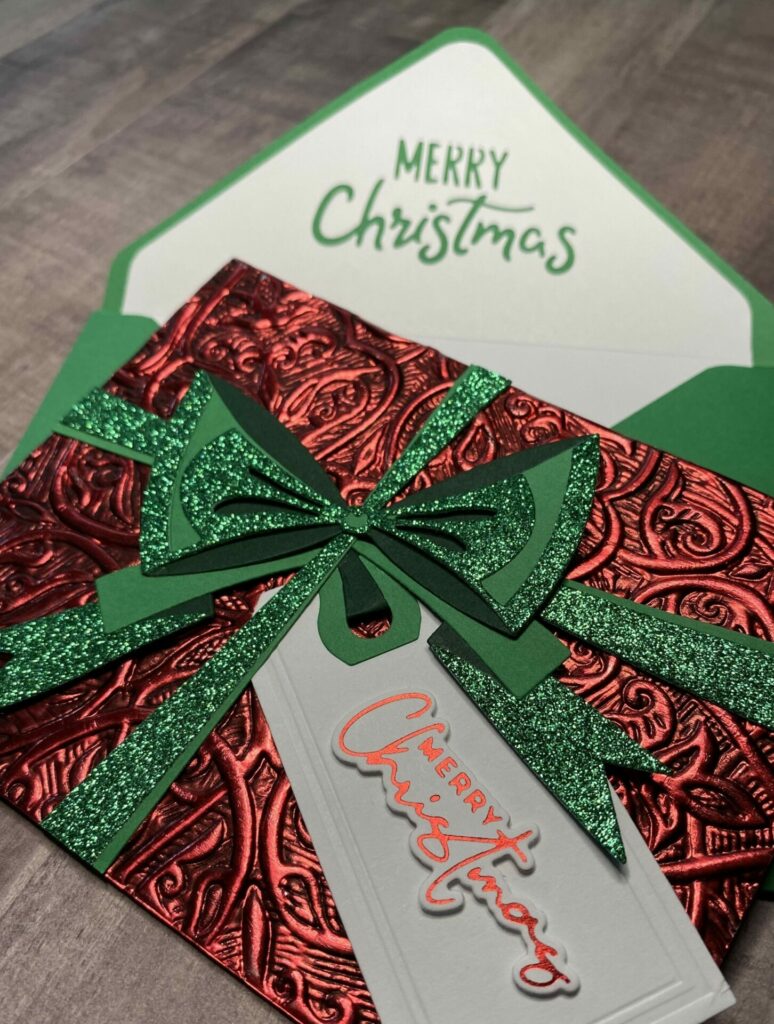
Hello there, fellow card makers! It’s time for Christmas in July! Today, I’m sharing how I made the present holiday card. This card involves some die cutting, dry embossing, and a touch of foiling. Featuring a beautiful and elegant design, this holiday card is the perfect way to spread joy and cheer to your family, friends, and coworkers. Its high-quality materials and craftsmanship ensure that it will be cherished and remembered for years to come.
This elegant card is ideal for any occasion. Originally designed for Christmas, the sentiment can be customized to suit your specific need. This present holiday card can also be used for birthdays with a simple change of sentiment, embossing folder, and color scheme.
Link Abbreviations
- AMZ – Amazon*
- Sb.com – Scrapbook.com*
- SB – Spellbinders*
- SIZ – Sizzix*
- SSS – Simon Says Stamp
- RI – Ranger Ink*
Full Disclosure: This post contains affiliate links which are indicated with an (*). If you click on an affiliate link and later make a purchase, I may receive a small commission. Clicking on an affiliate link which earns a commission does NOT result in additional charges to you or cost you anything extra. Money earned via affiliate links helps pay the fees to keep this blog up and running. Thank you so much for shopping through my links to show your support for the brands that we love and the products that I share!
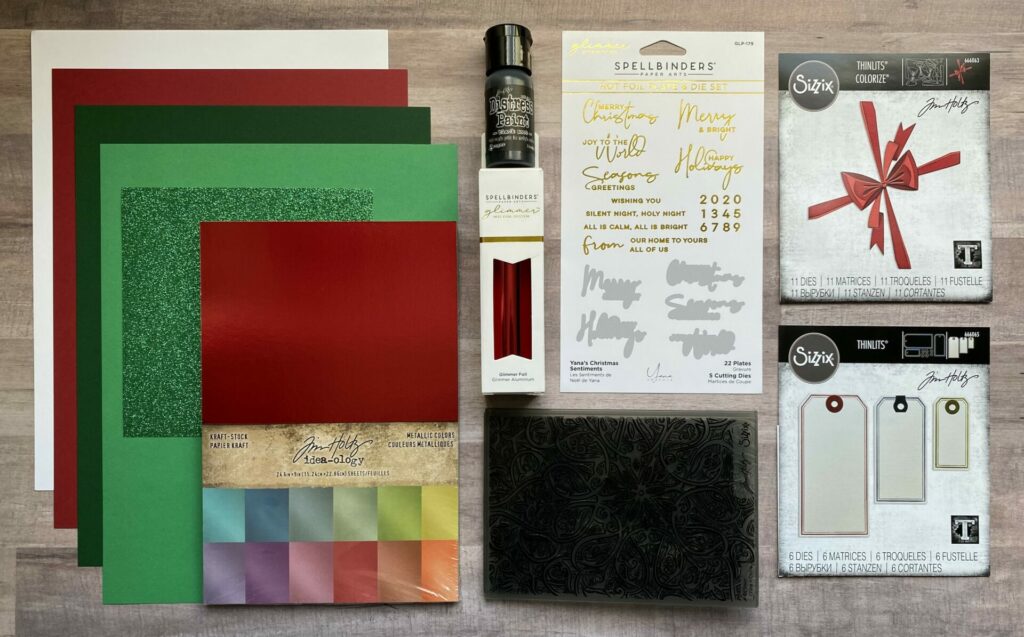
Supplies Used / Substitutions:
- Tim Holtz Sizzix Thinlits Dies – Bowtied, Colorize #666063 | Sb.com | SIZ | AMZ | SSS |
- Tim Holtz Sizzix Thinlits Dies – Framed Tags #666065 | AMZ / Any small tag die
- Sizzix Tim Holtz 3D Embossing Folder – Engraved #664249 | SIZ | AMZ | SSS / Any embossing folder
- Spellbinders Hot Foil Plate – Yana’s Christmas Sentiments #GLP-179 | Sb.com / Any sentiment plate or stamp
- Spellbinders Essentials Cardstock – Crimson | Sb.com | SB | AMZ / Any color cardstock
- Kelly Green Cardstock | MIC / Any color cardstock
- Dark Green Cardstock / Any color cardstock
- White Cardstock / Any color cardstock
- Tim Holtz idea-ology Metallic Kraft Stock – Red | Sb.com | AMZ | SSS / Any red metallic cardstock
- SSS Glitter Cardstock – Emerald | SSS / Any green glitter paper
- Spellbinders Glimmer Hot Foil – Red #GLF-007 | Sb.com | SB | SSS / Any color glimmer hot foil
- Distress Paint – Black Soot | RI | SSS |
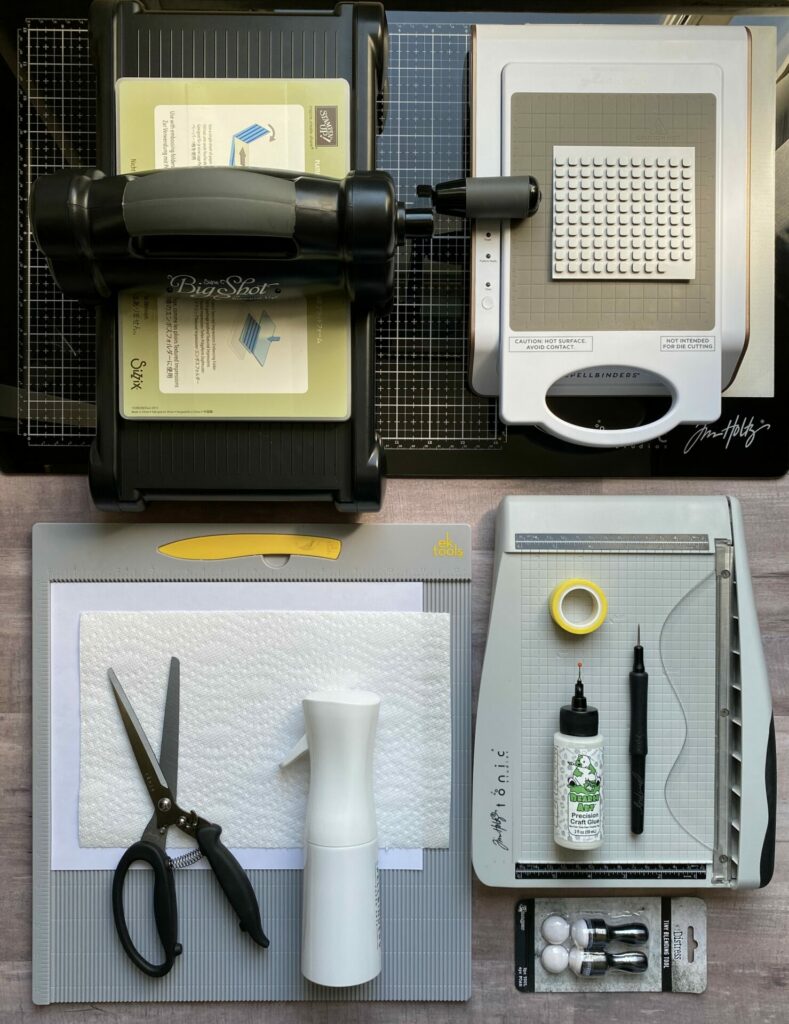
Tools Used / Substitutions:
- Sizzix Big Shot | Sb.com | SIZ / Spellbinders Platinum Six | Sb.com | SB / Any die cutting machine
- Spellbinders Glimmer Hot Foil System | Sb.com | SB / Optional
- Tim Holtz Tonic Guillotine Comfort Paper Trimmer | Sb.com | AMZ | RI | SSS / Any paper trimmer
- Tim Holtz Glass Media Mat | Sb.com | AMZ | SSS / Non-Stick Craft Sheet
- EK Scoring Board | AMZ | SSS / Any scoring board
- Bearly Art Glue | Sb.com | SB | AMZ | SSS / Any liquid adhesive
- Spray Bottle with water | Sb.com | SB | AMZ / Any spray bottle
- Tim Holtz Distress Tiny Blending Tool Sponge – tda84990 | Sb.com | RI | SSS |
- Tim Holtz Recoil Scissors | Sb.com | RI | SSS / Any scissors
- Die Pick | Sb.com / Toothpick
- Foam Squares – Black | SSS / Optional
- Best Ever Craft Tape – 5/8 in | Sb.com | SB / Any low tack tape
- Copy Paper – 1 sheet / Any scrap paper
- Paper Towel
Making The Card Base
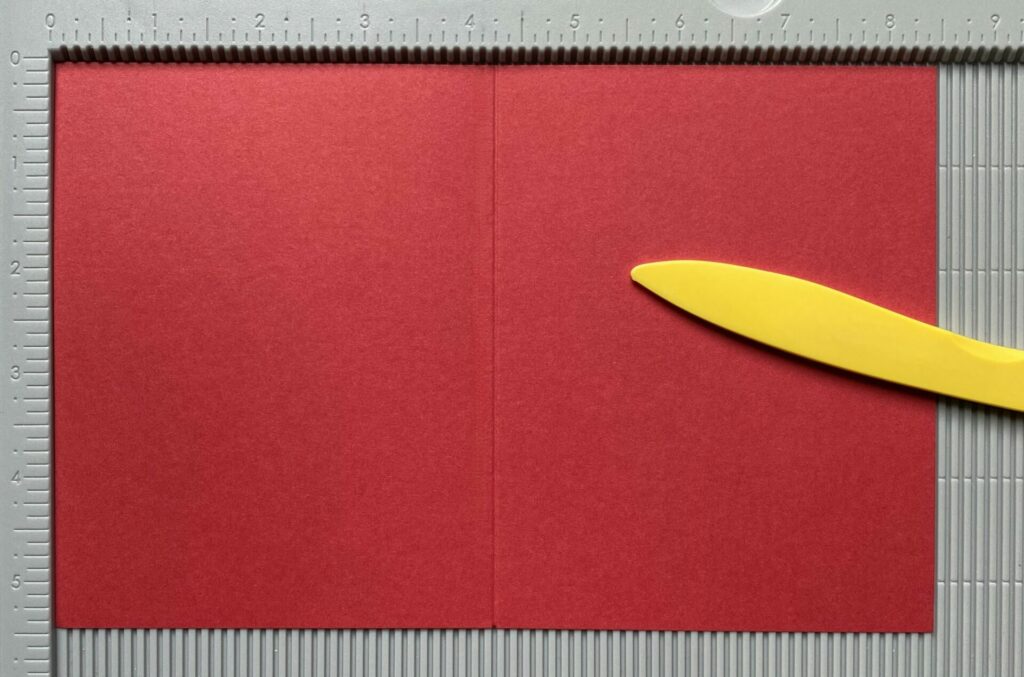
- Take a sheet of crimson cardstock and cut it in half using your paper trimmer. You should now have two pieces of cardstock measuring 8½ x 5½ inches.
- Score the half sheet of cardstock at the 4¼ inch line.
- Fold along the score line and reinforce the fold with a bone folder.
Your card base should now measure 4¼ x 5½ inches, which is a standard A2 card size.
Making the Engraved Panel
A Note About Kraft-Stock
I created this card using the older version of the Tim Holtz idea-ology metallic kraft-stock 8 x 8 paper pads. I have used the distressing technique with distress paint/crayon multiple times and it has always worked well. However, when I tried it with the newer version of the kraft-stock, the metallic coloring lifted off. I am unsure why this happened, so I will need to experiment to find a solution. If you are using the newer version of the kraft-stock, you may want to skip the distressing step to avoid this issue.
If you want to pick up the older version of the kraft-stock, I’ll link it below.
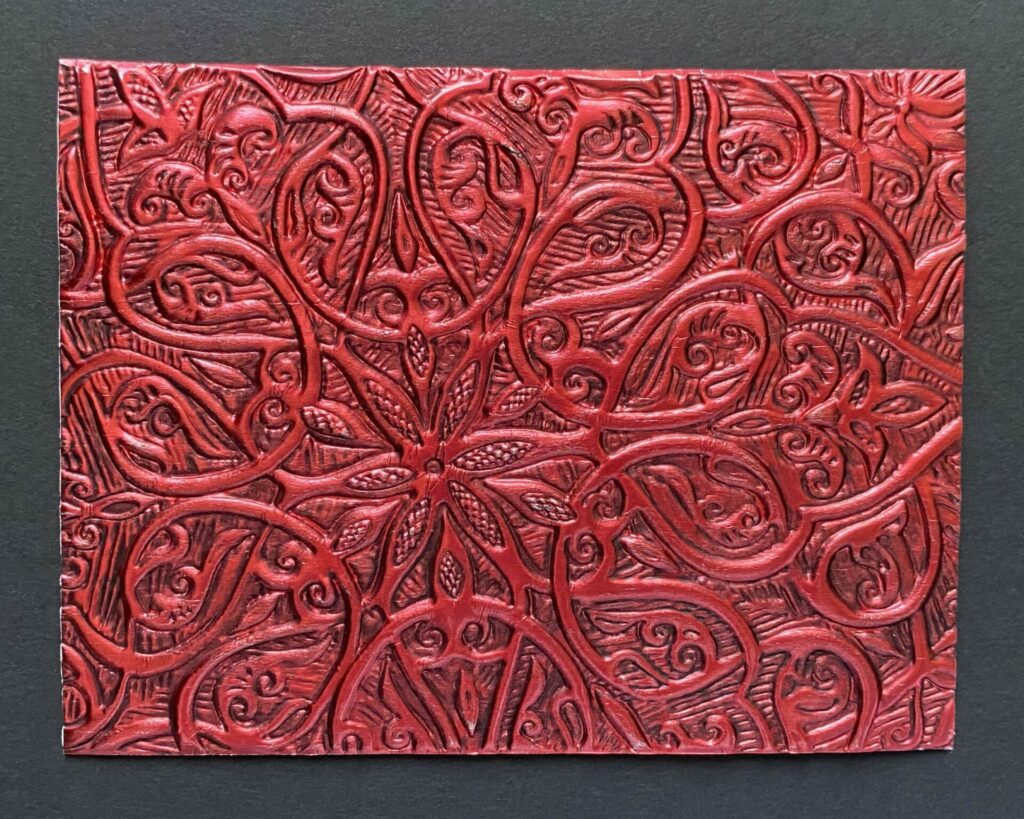
Embossing
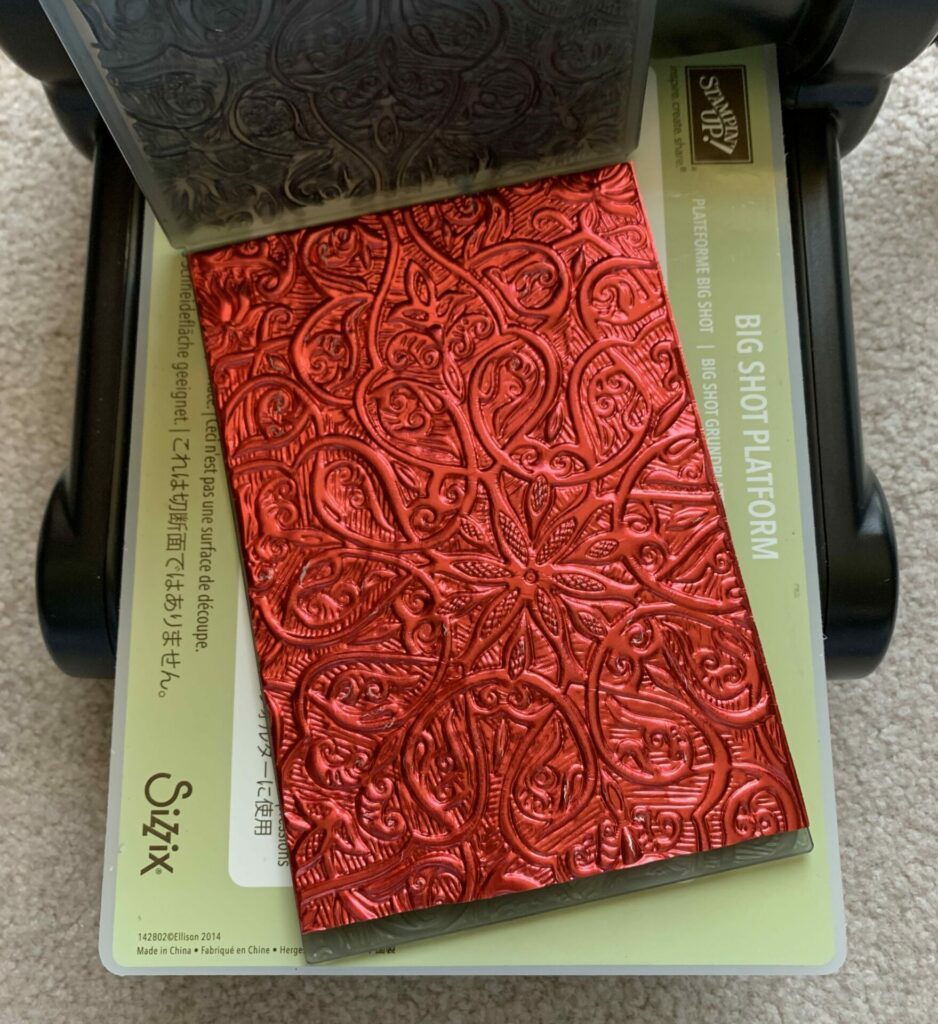
- Cut the metallic red kraft stock paper to a size of 4¼ x 6 inches.
- Lightly spritz back side of the paper with water.
- Then, place it in the Sizzix Engraved 3D embossing folder.
- After that, run it through your die cutting machine.
- Remove the paper from the embossing folder and let it dry.
Distressing
- Apply black soot distress paint onto your craft mat and pick it up with a small blending tool and foam.
- Spread the paint over the embossed panel, making sure to work it into all the lines and crevices using a pouncing motion.

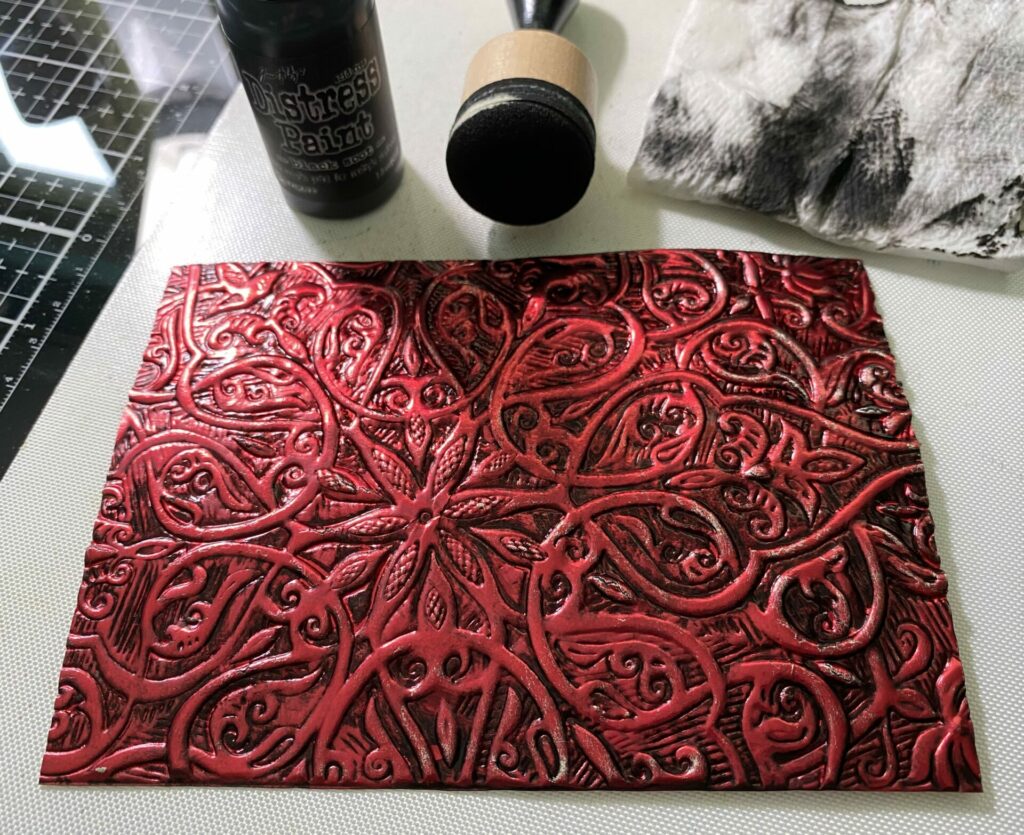
- Gently rub a damp paper towel over the panel to remove the paint from the raised areas.
- Then, set it aside to dry.
- Use a red sharpie to touch up any silver cracks.
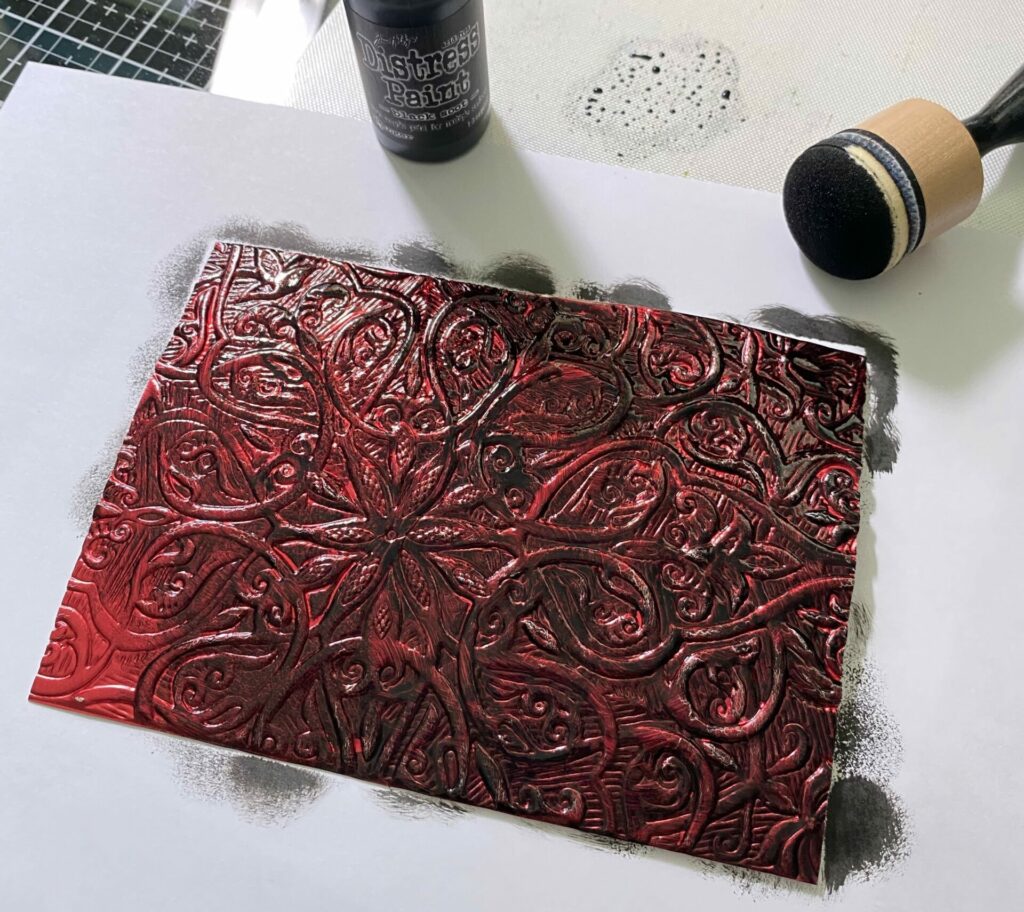
Tips: The wet paper towel removes the paint from all the high points of the paper. Please avoid rubbing too hard as it may cause the red metallic layer to come off the paper. Be sure to act quickly before the paint dries and becomes difficult to remove. Be sure to switch to a clean section of the towel as it gets dirty. If you accidentally remove too much paint, simply reapply and repeat the process.
Gluing
- Attach the engraved panel to the front of the card base using glue.
- Then, place something heavy on top of it while the glue dries.
- Trim off the excess with your paper trimmer or scissors.
Making the Tag
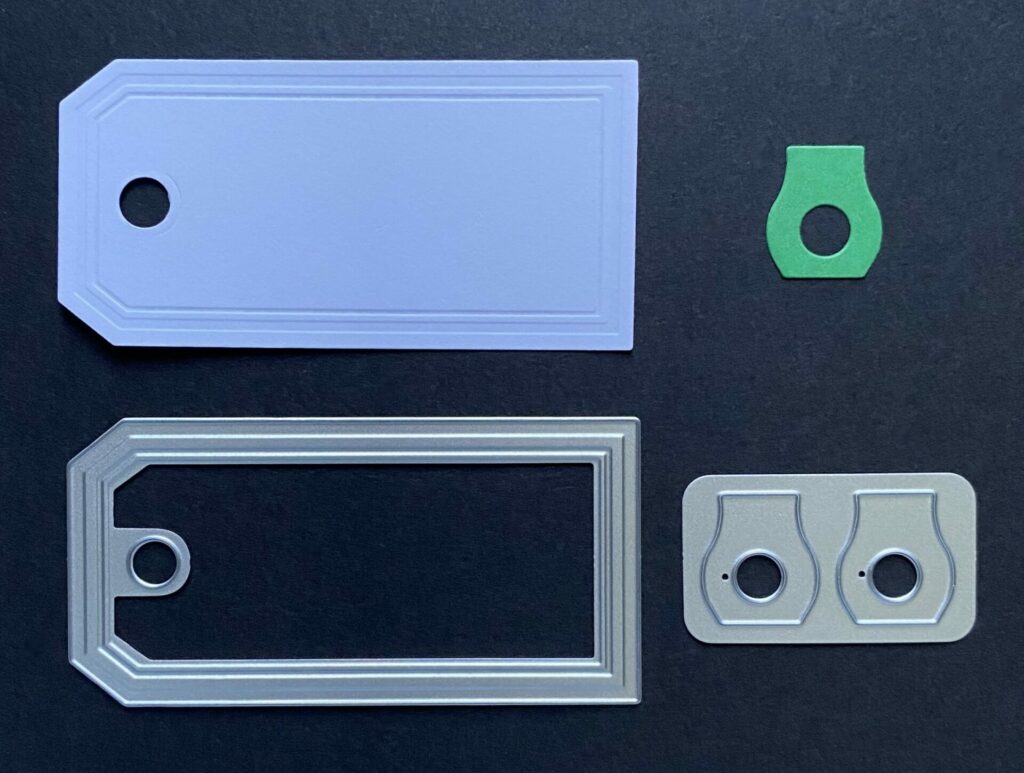
Die Cutting
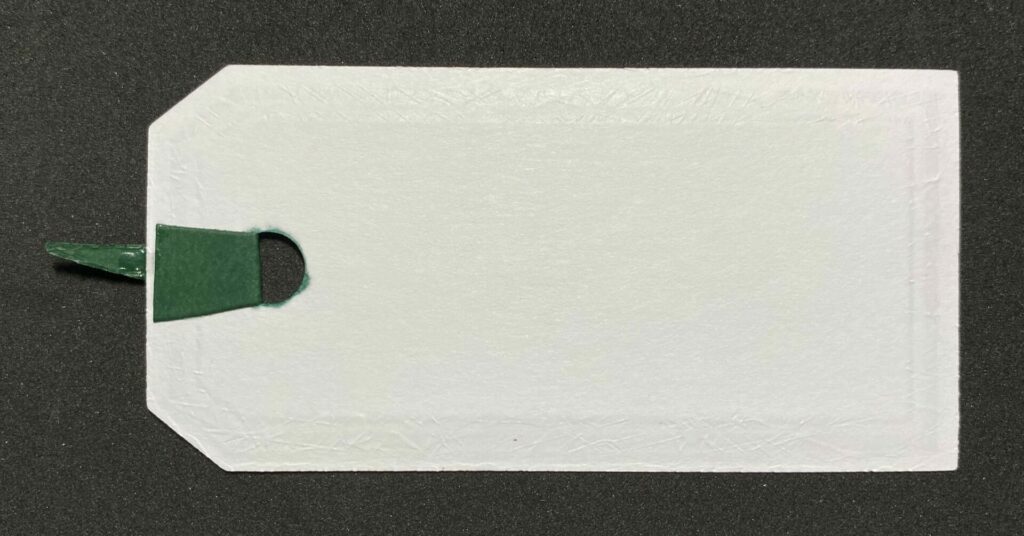
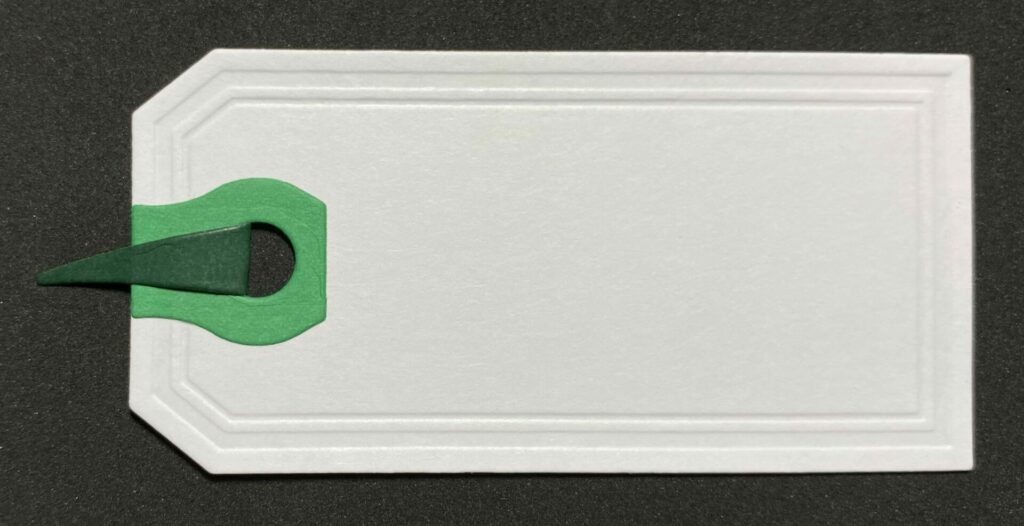
- Cut the smallest tag from white cardstock.
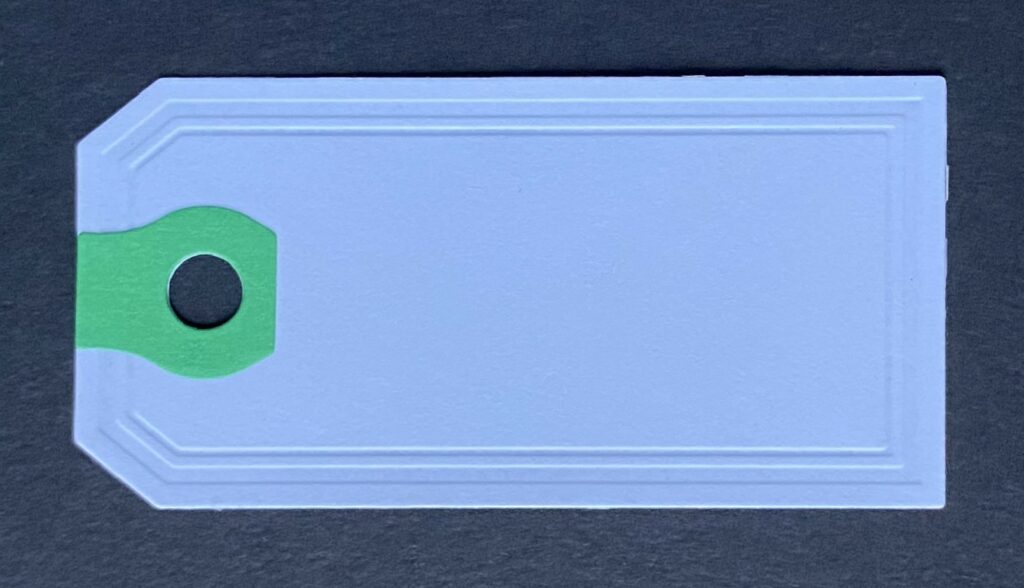
- Cut the tag reinforcer from kelly green cardstock.
- Glue the green tag reinforcer on top of the white tag.
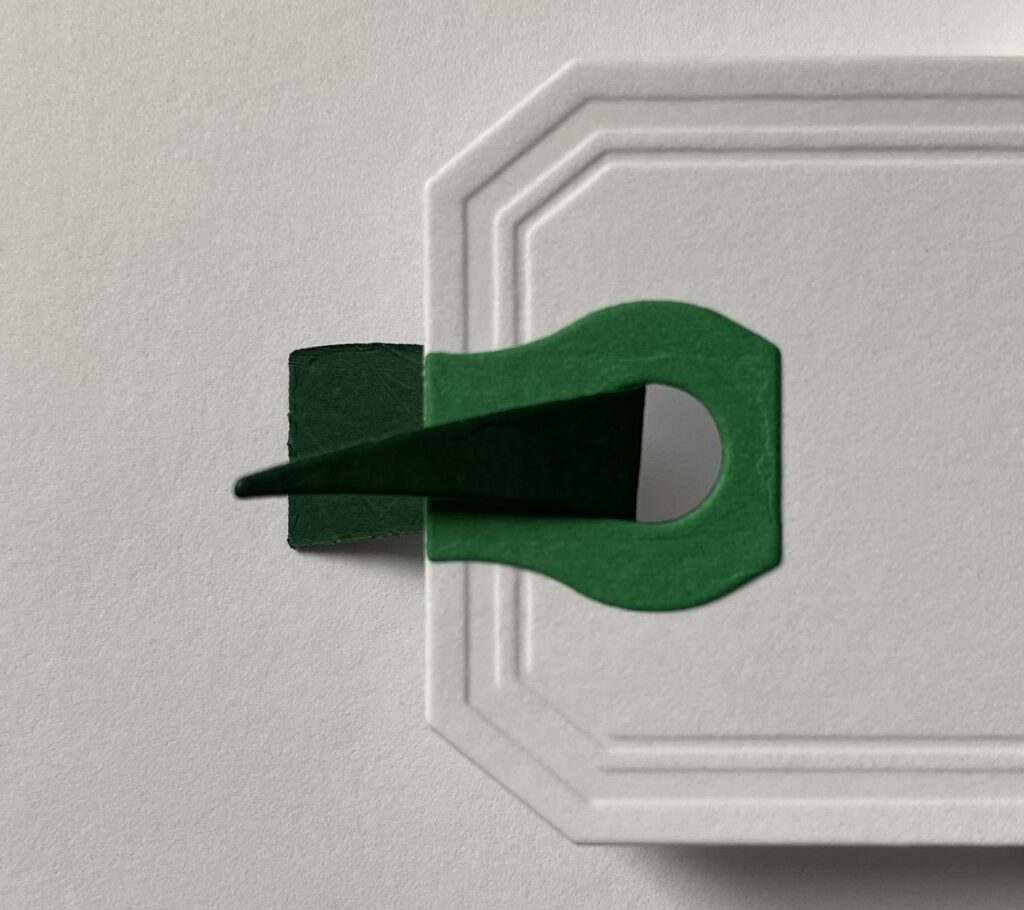
- Cut a ribbon tail from dark green cardstock with the ribbon-red-2 die.
- Put it through the tag hole and fold it in half.
- Trim off the excess on the back and glue it down.
- Then, glue it down on the front of the tag.

Adding the Sentiment
If you plan on replacing the glimmer plate with a stamp, be sure to stamp the sentiment on the tag at this time. You can opt for a minimalist look with ink or add some shine with heat embossing. The choice is yours.
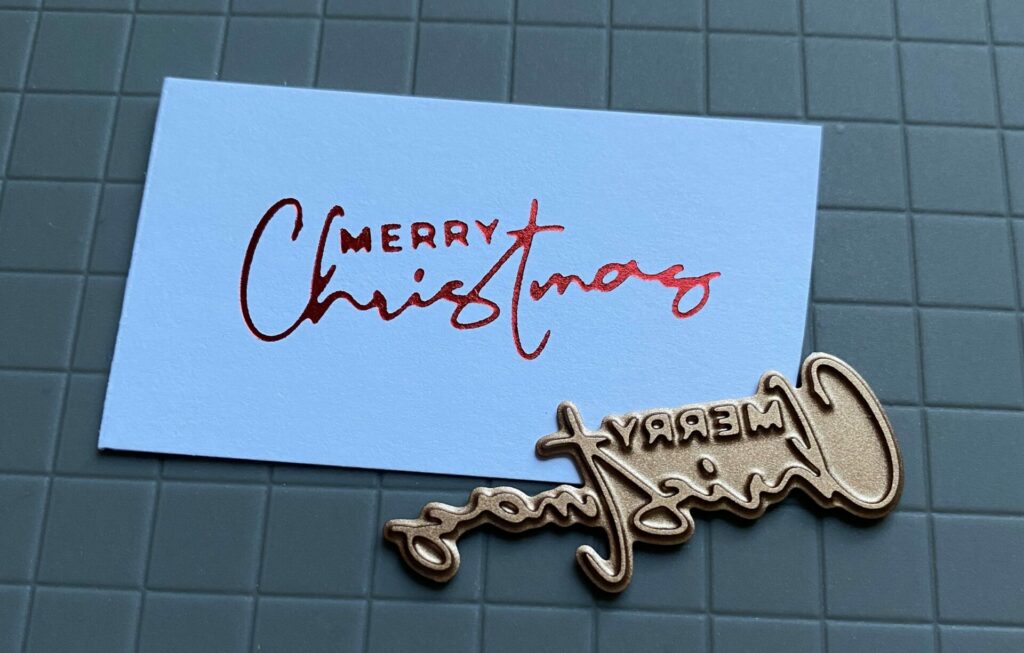
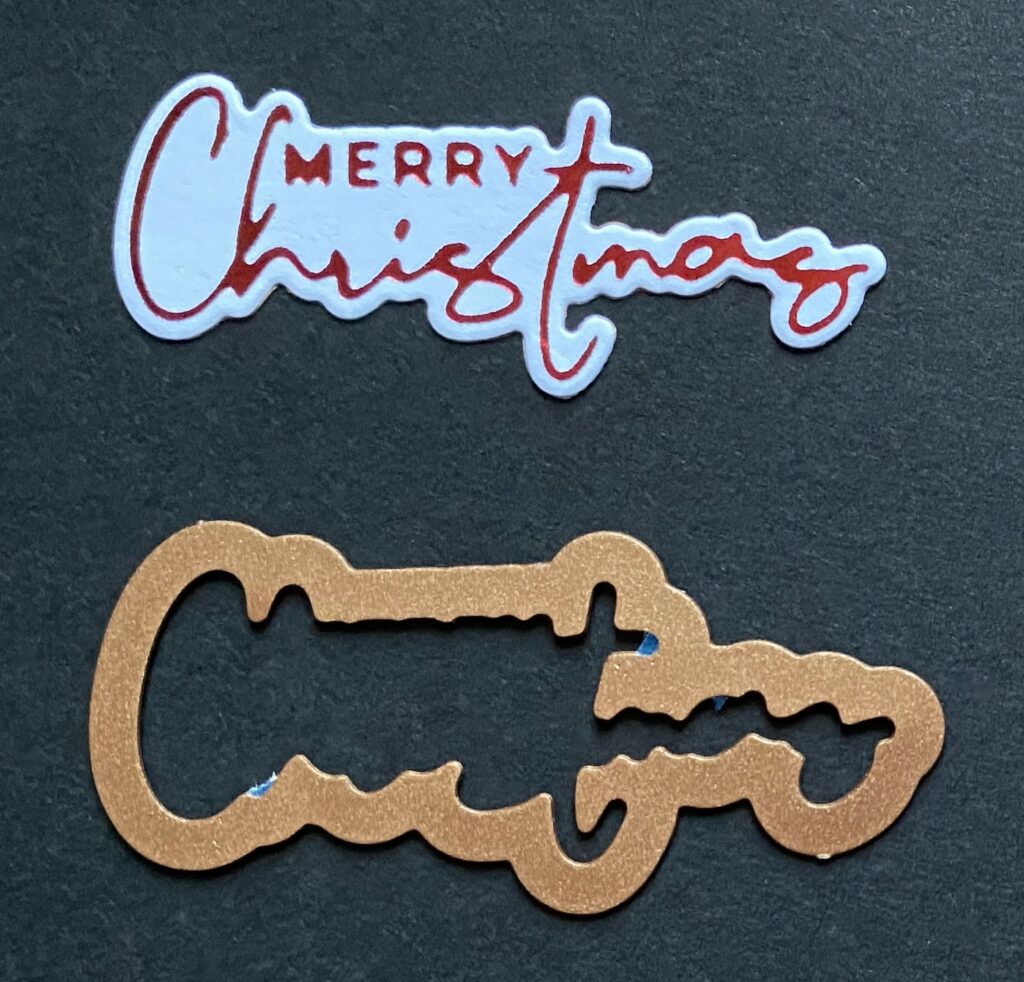
If you’re glimmering the sentiment follow the instructions below.
- Glimmer the “Merry Christmas” sentiment on white cardstock with red foil.
- Use the corresponding die and die cut the glimmered sentiment.
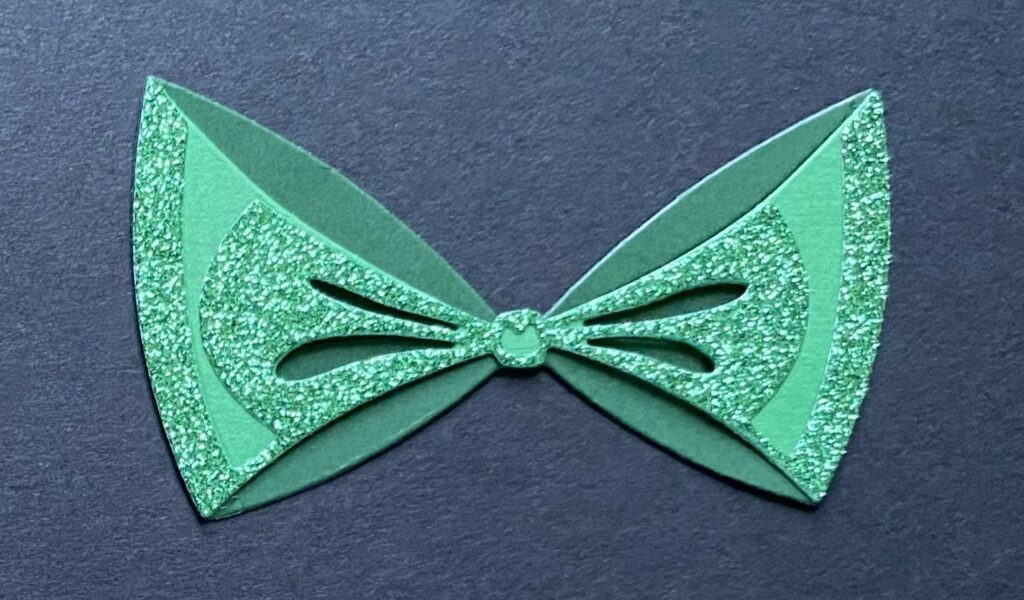
Die Cutting the Bow
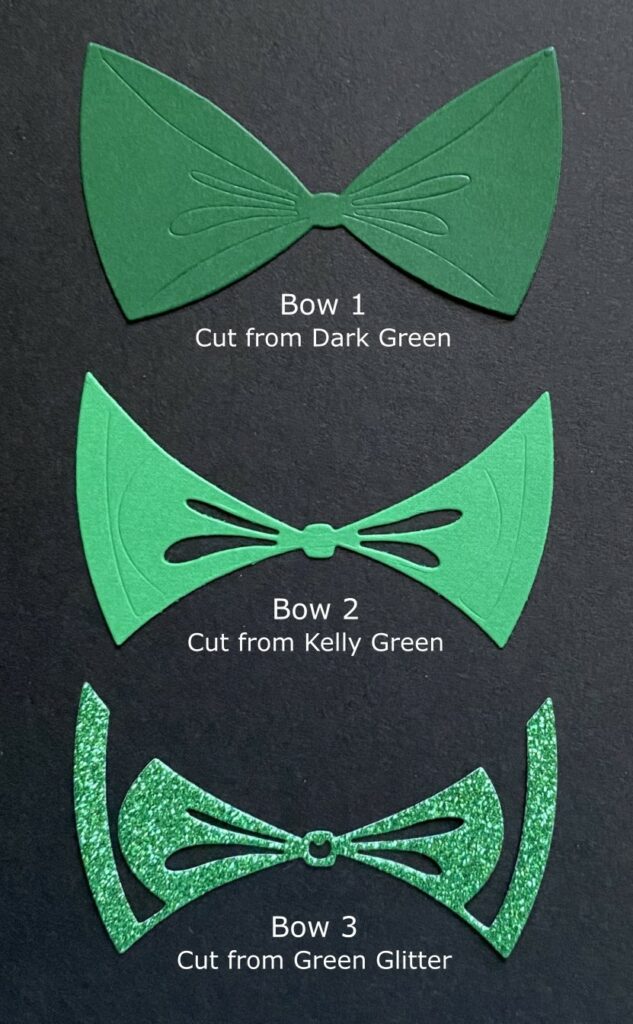
Bow
- Bow-1 – Cut from dark green cardstock
- Bow-2 – Cut from kelly green cardstock
- Bow-3 – Cut from green glitter cardstock
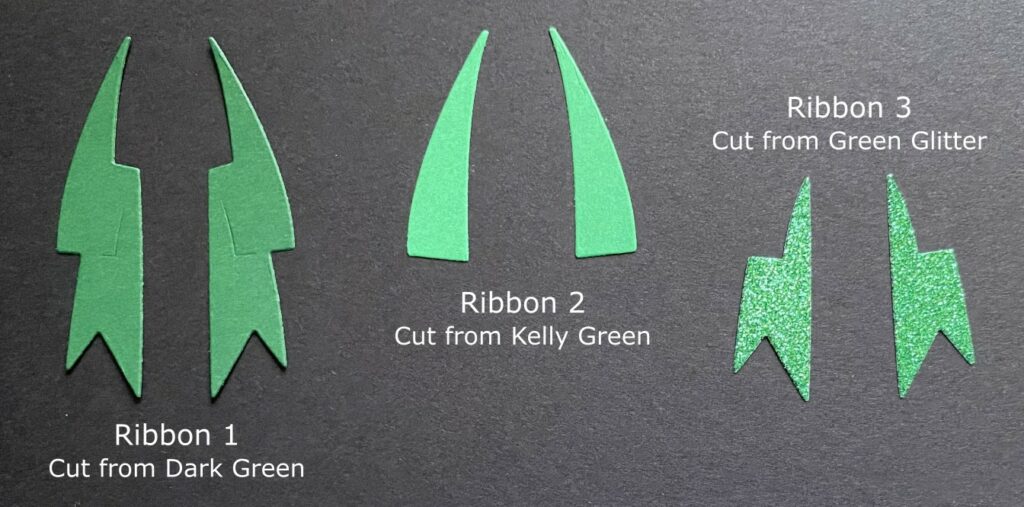
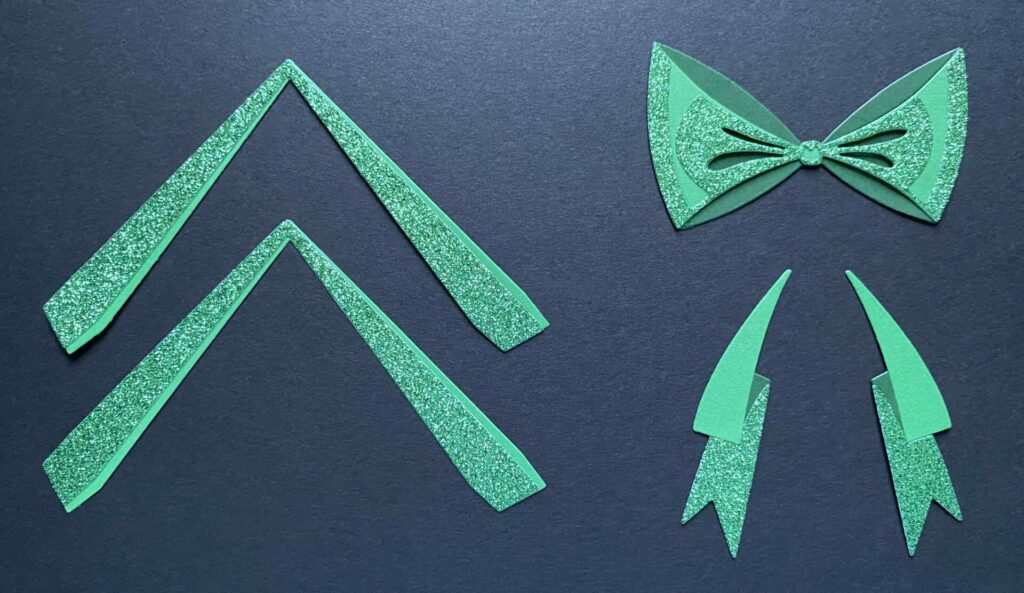
Ribbon
- Ribbon-1 – Cut both left and right from dark green cardstock
- Ribbon-2 – Cut both left and right from kelly green cardstock
- Ribbon-3 – Cut both left and right from green glitter cardstock
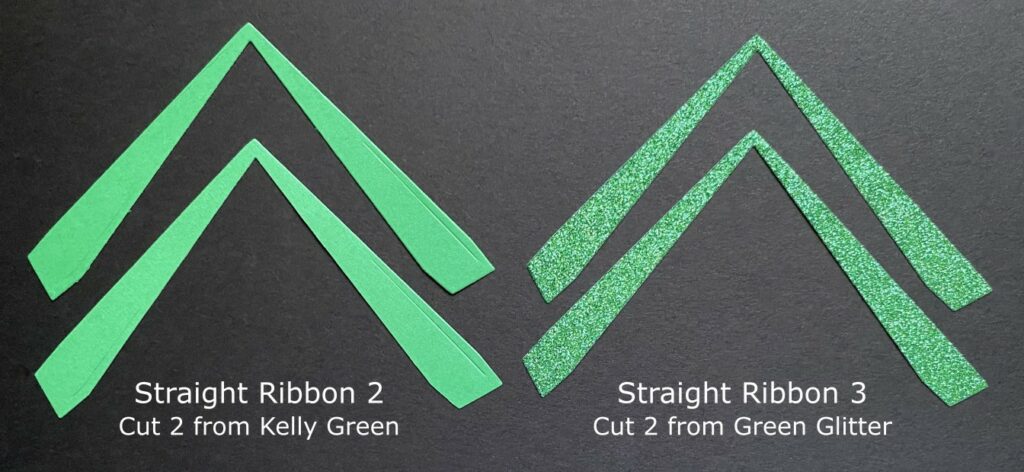
Straight Ribbon
- Straight Ribbon-2 – Cut 2 from kelly green cardstock
- Straight Ribbon-3 – Cut 2 from green glitter cardstock
Assembling the Bow
Bow
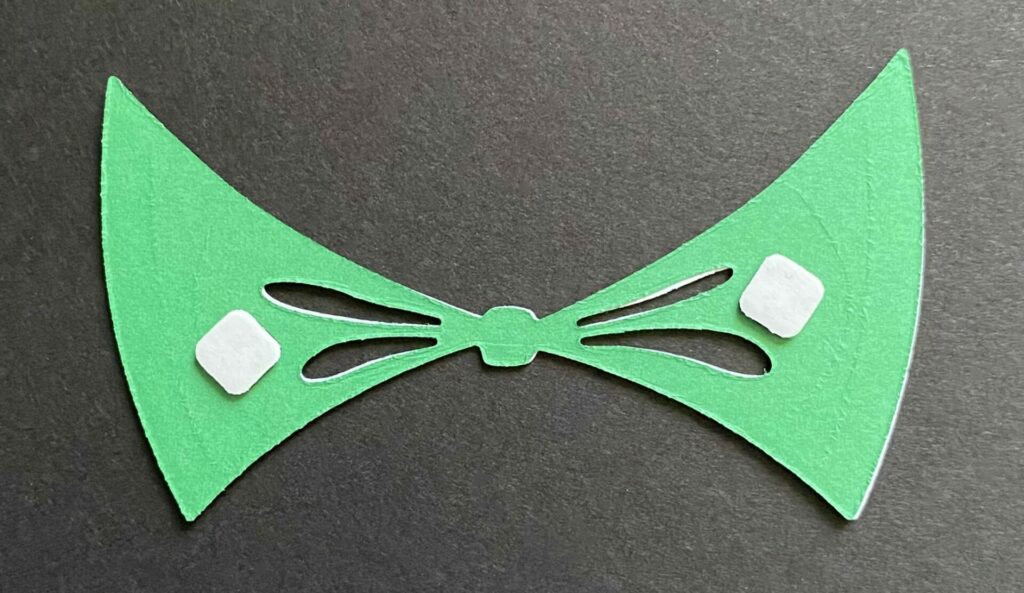
- Glue the glitter layer(bow-3) on top of the kelly green layer(bow-2).
- Add some foam squares behind the kelly green layer.
- Then, glue it on top of the dark green layer(bow-1).
Ribbons
- For the ribbon tails glue the glitter layer(ribbon-3) and kelly green layer(ribbon-2) on top of the dark green layer(ribbon-1).
- Do this for both the left and right ribbon tails.
- Then, glue the straight ribbon glitter layer(straight ribbon-3) on top of the kelly green layer(straight ribbon-2).
- Do this for both straight ribbons.
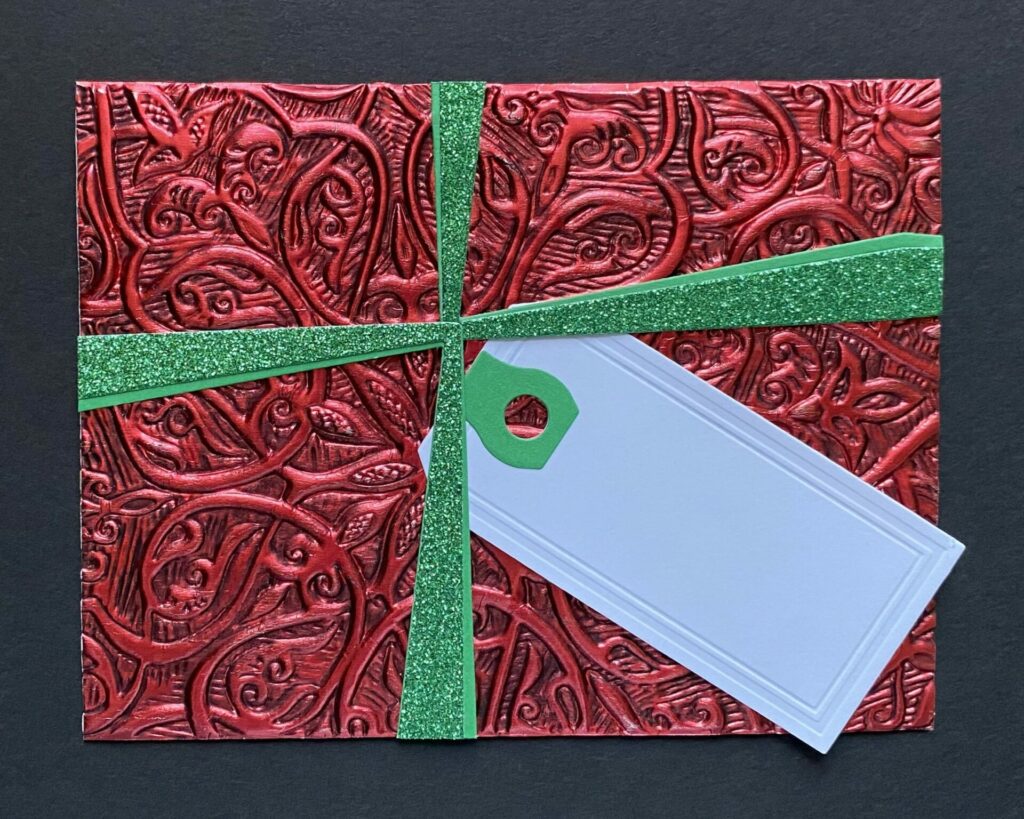
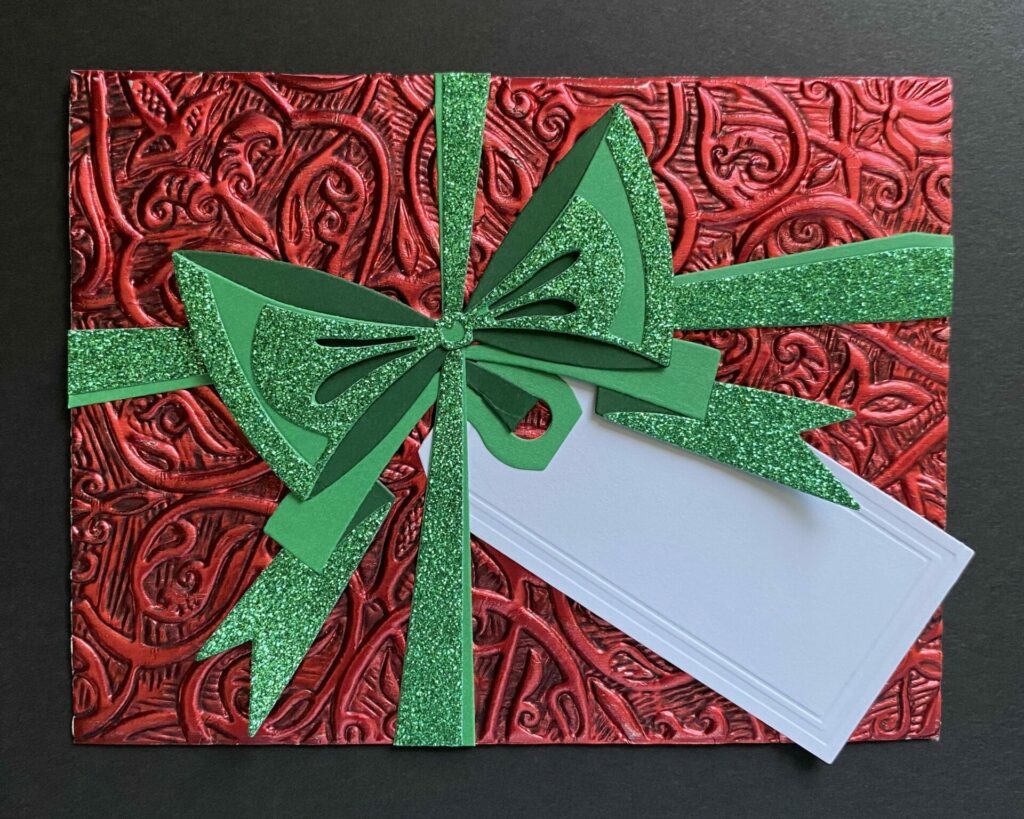
Attaching the Bow
- Attach the straight ribbons to the card using glue. Avoid applying any glue on the right angle of the ribbon in the bottom right quadrant, as this section will be used to tuck the tag under later on.
- After the glue has dried, trim off the excess ribbons hanging off the card.
- Then, put some foam squares on the back of the tag.
- Peel off the release paper from the foam squares. (I recommend applying some glue to the foam squares. This allows for flexibility in adjusting its placement on the card.)
- Tuck it under the ribbons and attach it to the bottom right quadrant of the card.
- Then, add some foam squares to the back of the bow and attach it to the card.
- After that, add some foam squares to the back of the ribbon tails and attach them to the card. Tuck them in underneath the bow.
- Add glue wherever it is needed for a more secure hold.
- Lastly, add some foam squares to the back of the “Merry Christmas” sentiment die-cut and attach it on top of the tag.

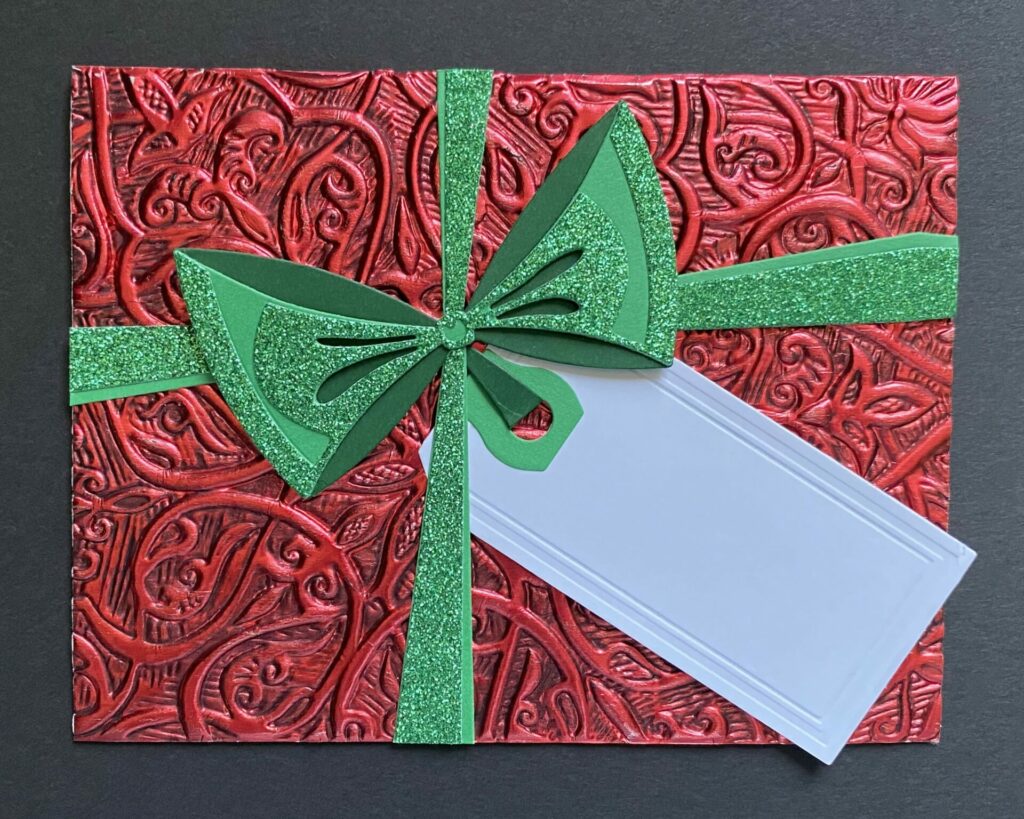
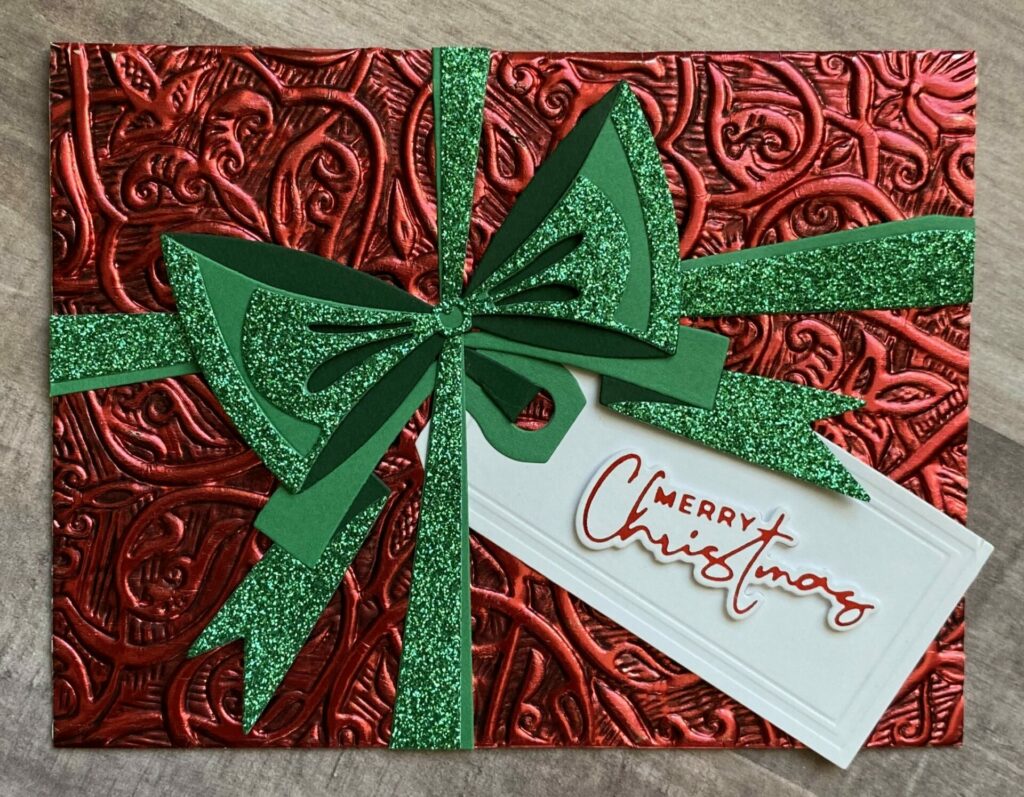
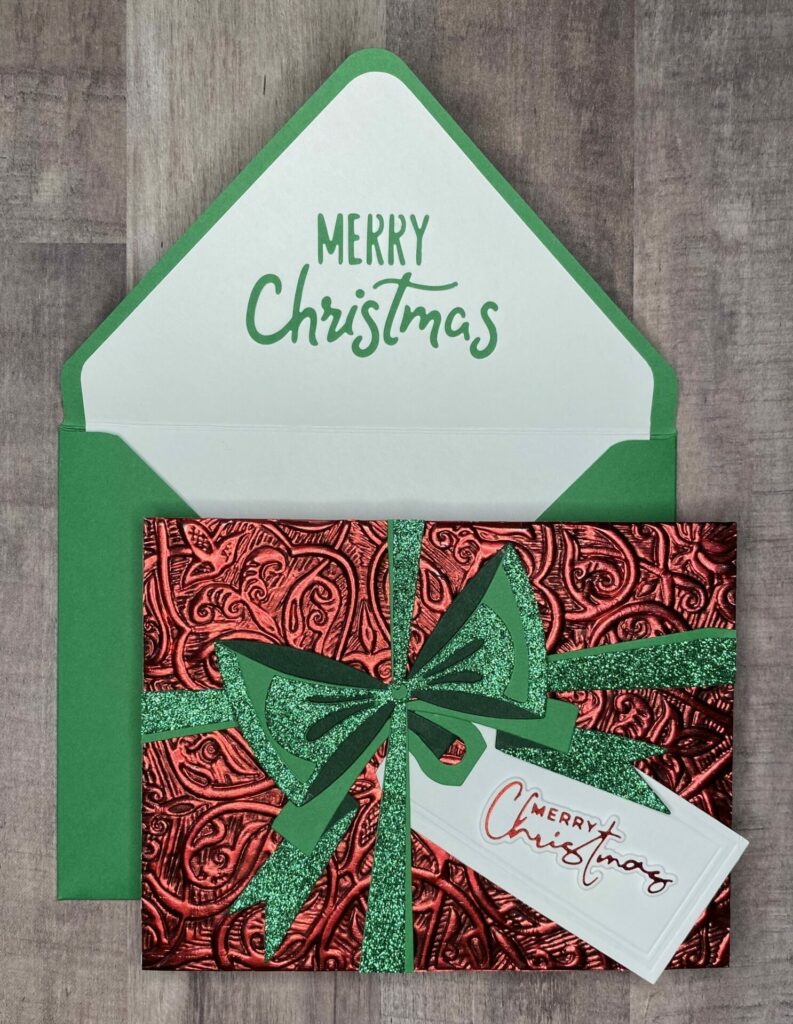
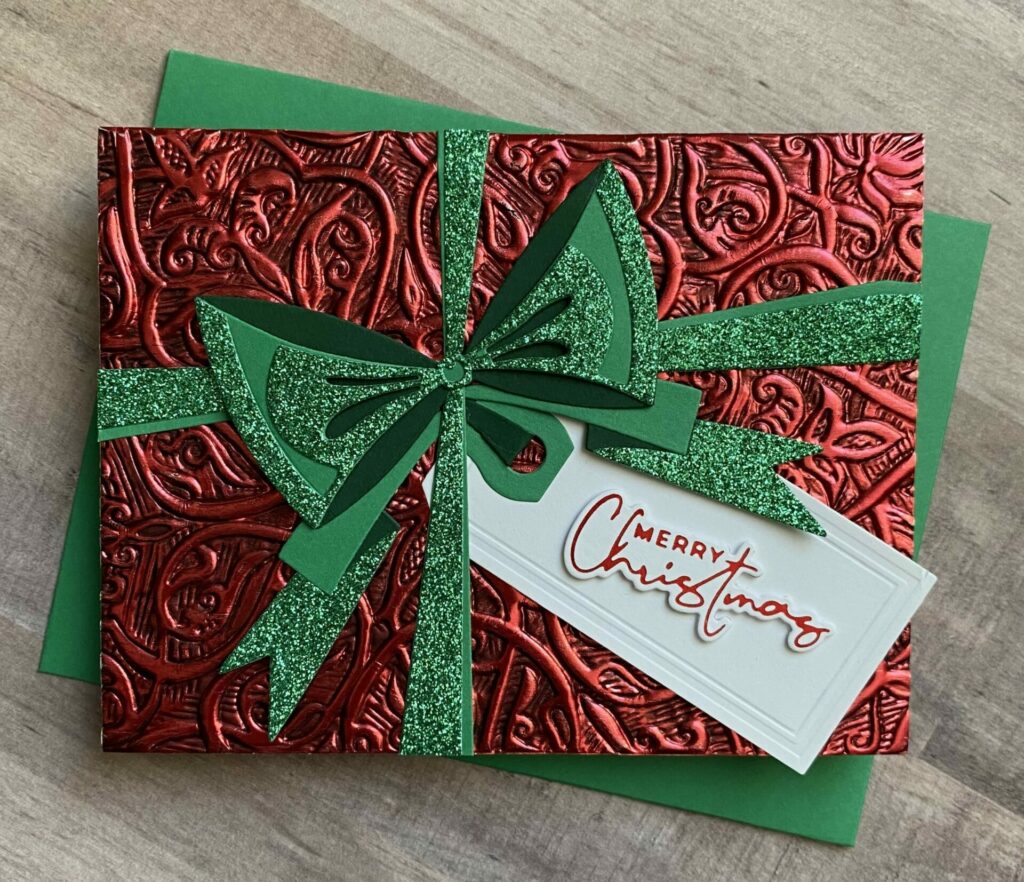
Present Holiday Card Complete!
Hey, congrats! You’ve finished making your present holiday card! I really hope you had a blast following this tutorial, just like I did. If you decide to give it a go, don’t forget to tag me (@silversgrove or @grovecrafted) on Instagram. I’m super excited to see what you’ve come up with! Thanks for checking this out, and I hope it sparked some fresh ideas for your own creations. Have a great time crafting!
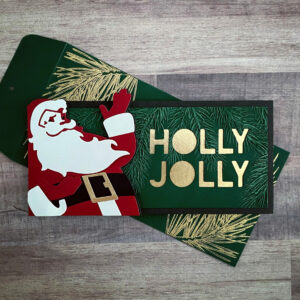
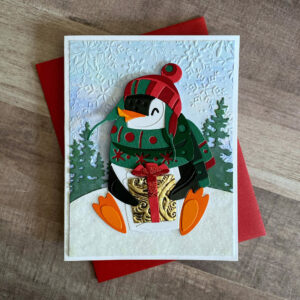
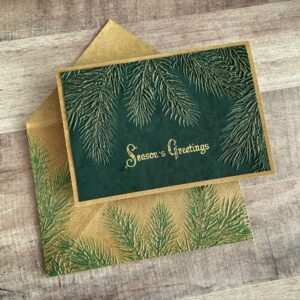
If you enjoyed making this present holiday card, check out my other Christmas/Holiday Card Tutorials for additional inspiration and ideas.


Wanted to take a moment to thank you for your unique style of blogging. The very detailed instructions including step-by-step pictures and links must take you hours to put together and is so appreciated! Generous souls like yourself make cardmaking possible for those of us who are captivated by the beauty of what can be created but are clueless as to the techniques and products required. Your work is inspirational, and I’ve found much joy as I learn from you. Grateful!
Wow, thank you so much for your kind and thoughtful message. It means so much to me! I’m thrilled my tutorials have been helpful and inspiring for you. They do take quite a bit of time to put together, but knowing they make a difference makes it all so worth it.