Springtime Mother’s Day Card
Spellbinders – Yana’s Tulips Collection
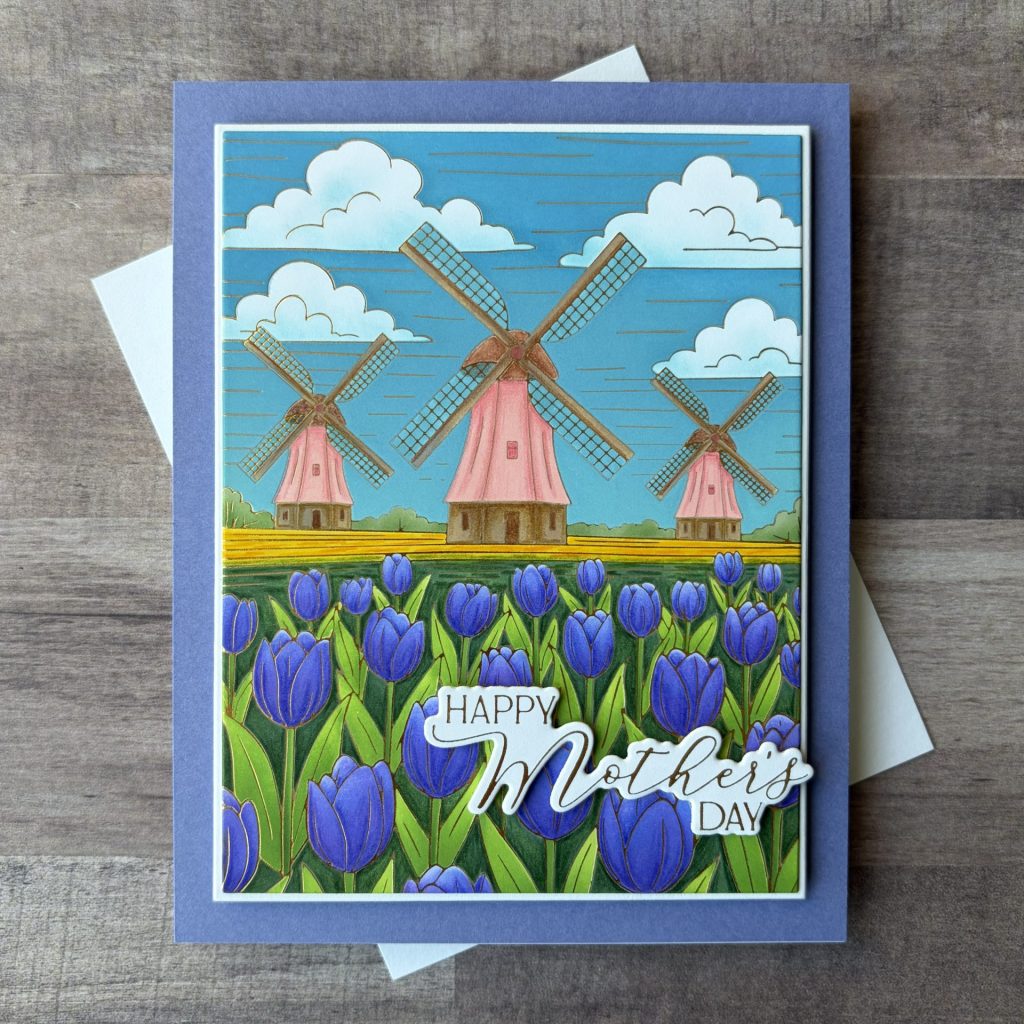
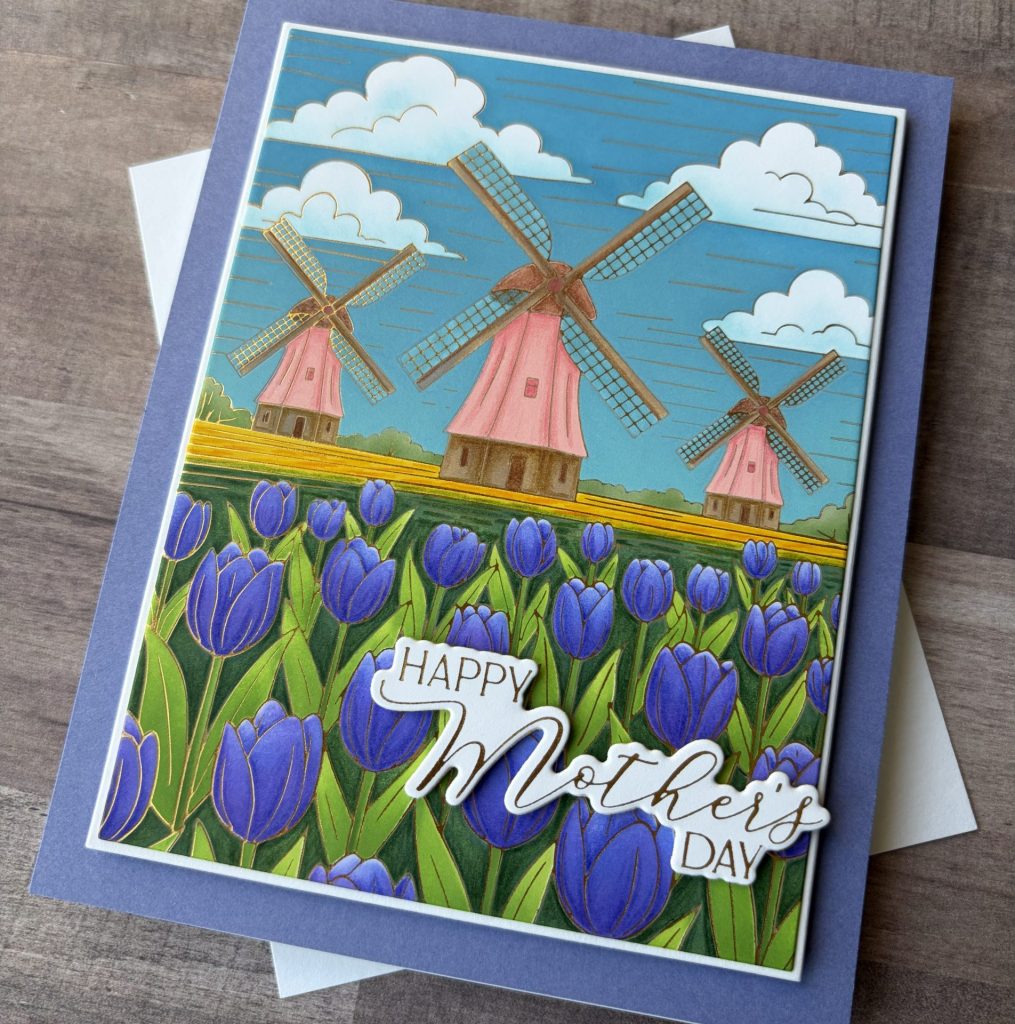
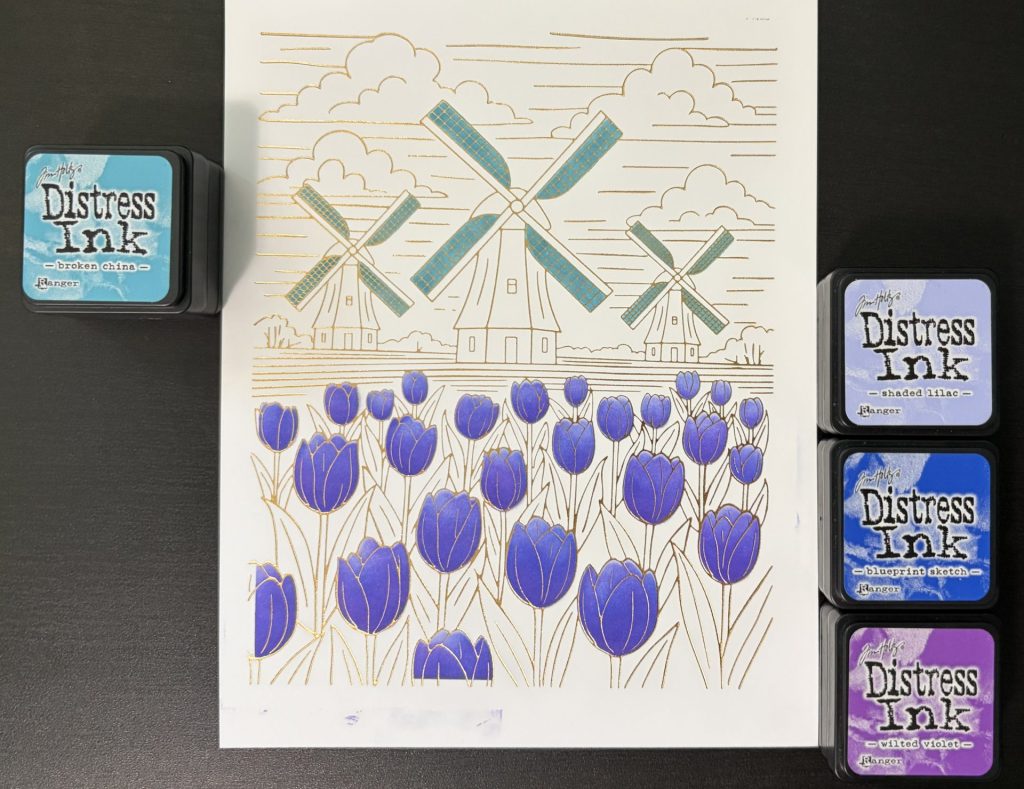
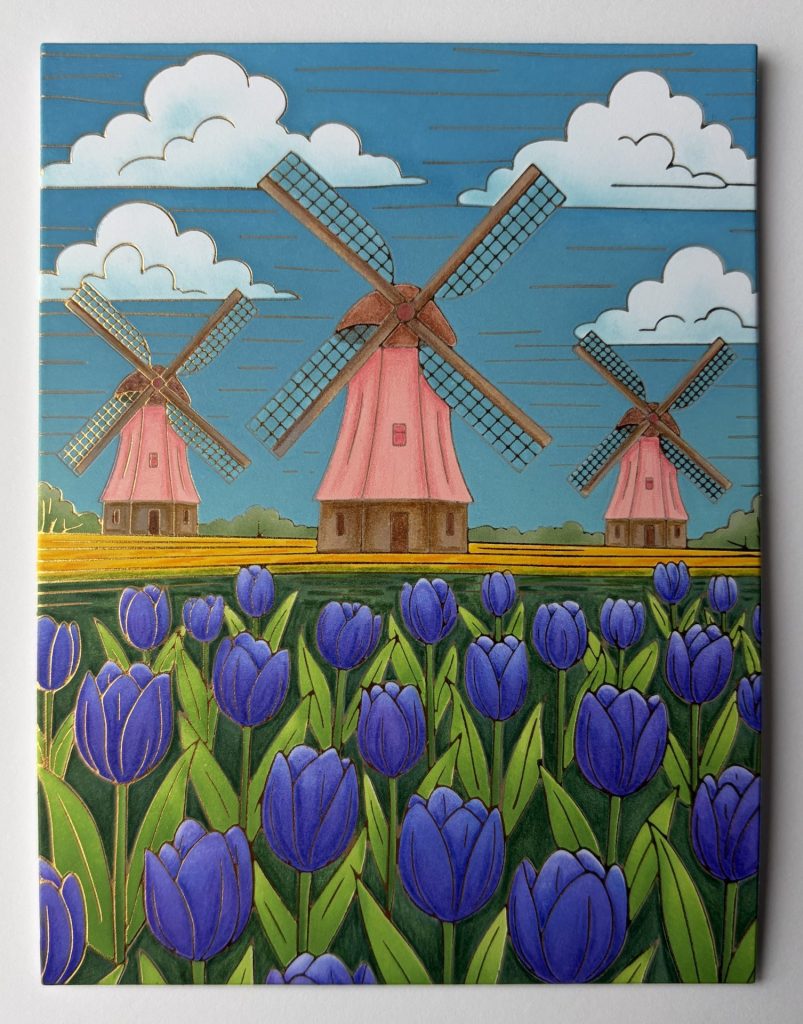
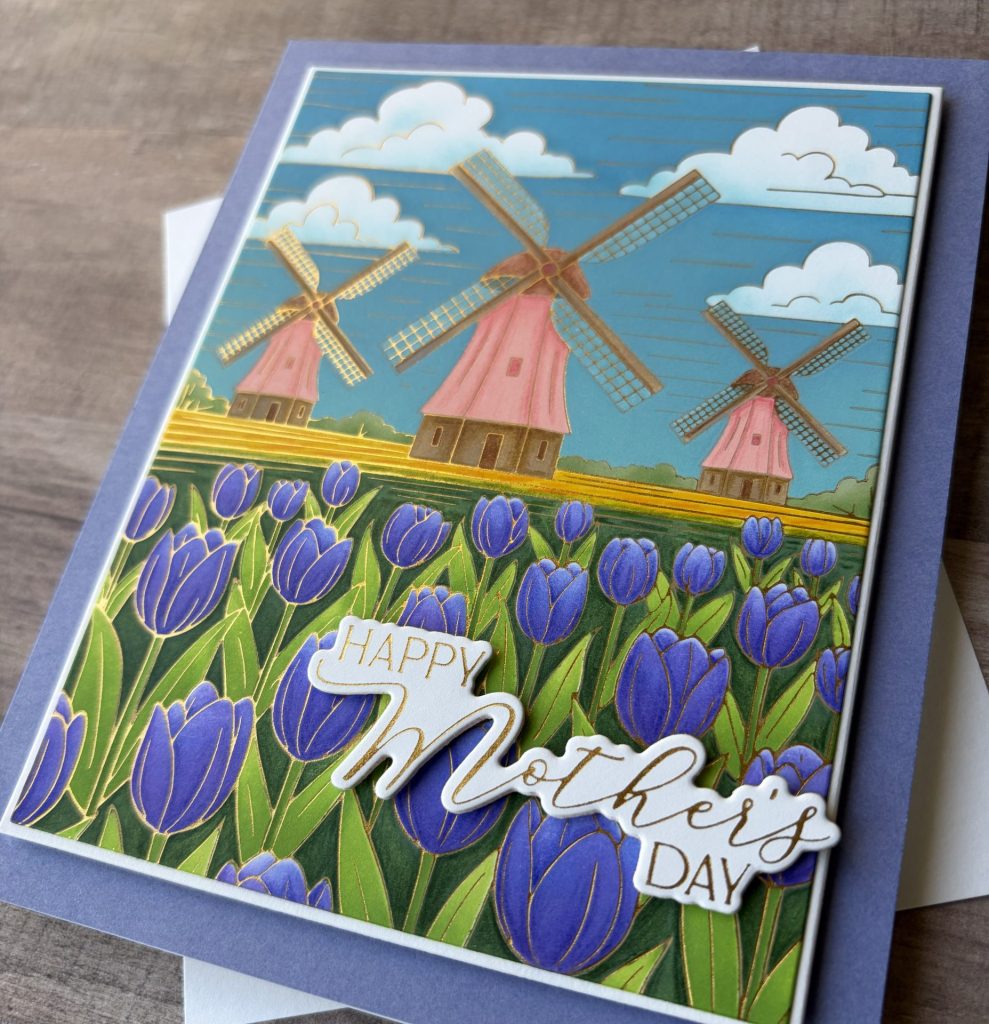
Hello, crafty friends! There’s something so peaceful about a field of tulips swaying under a bright blue sky, with windmills turning in the background, and this card captures that feeling perfectly. Using the Yana’s Tulips Collection by Yana Smakula for Spellbinders, I created a Mother’s Day card that feels like a little escape to the countryside. The combination of soft ink blending, detailed stenciling, and colored pencil shading really brings this springtime scene to life.
Disclosure
This post includes some gifted items and affiliate links—if you decide to shop through them, I may earn a small commission (at no extra cost to you). Money earned via affiliate links helps pay the fees to keep this blog up and running. Thanks so much for supporting GroveCrafted and helping me keep the crafty inspiration coming!
Yana’s Tulips Collection
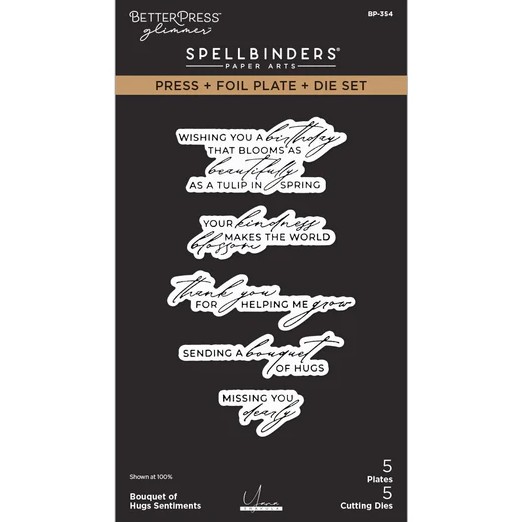
The Yana’s Tulips Collection by Yana Smakula for Spellbinders celebrates the beauty of spring with elegant tulip-inspired designs perfect for handmade cards and paper crafting projects. This collection features detailed press + foil plates, coordinating layering stencils, and a sentiment set that allow crafters to create stunning floral bouquets, scenic tulip fields, and heartfelt greetings.
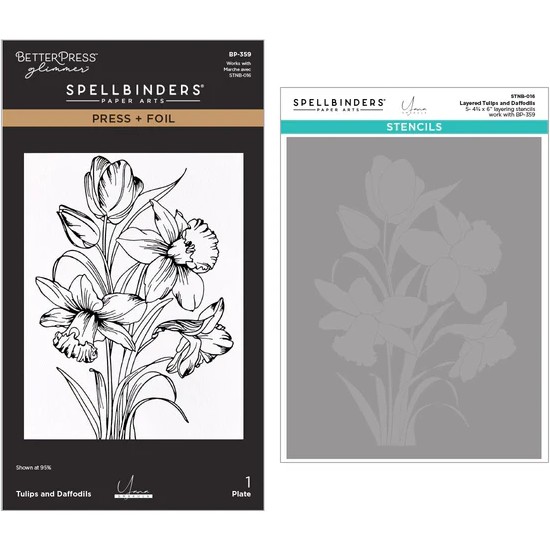
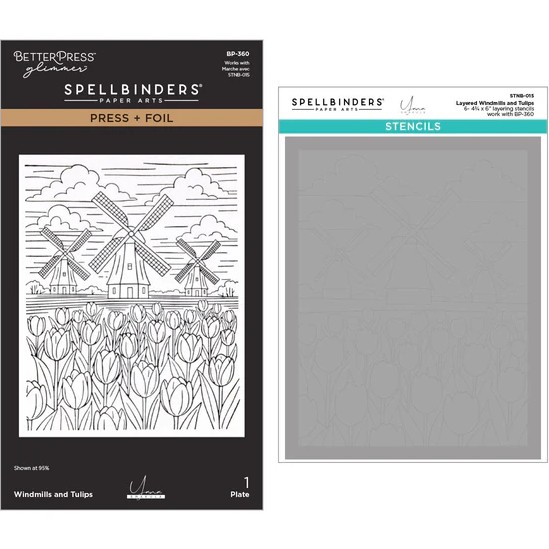
With designs like tulips paired with daffodils or charming windmill scenes, the collection captures the fresh, uplifting feeling of spring while making it easy to mix techniques like BetterPress, hot foiling, and stenciling for polished, elegant cards.
Be sure to explore the full Yana’s Tulips Collection to discover all the coordinating products.
Supplies Used
- Spellbinders Press Plate & Stencil Bundle – Windmills & Tulips #BD-1071 | SB | SB-UK | Sb.com |
- Spellbinders Press Plate – Mother’s & Father’s Day Sentiments #BP-111 | SB | SB-UK |
- Spellbinders Cutting Dies – Percision Layering A2 A #S5-487 | SB | SB-UK | Sb.com |
- Spellbinders Cutting Dies – Percision Layering A2 B #S5-494 | SB | Sb.com |
- Spellbinders ColorWheel Cardstock – Classic White | SB | Sb.com |
- Spellbinders Essential Cardstock – Periwinkle
- Hammermill Cardstock – Premium Color Copy Cover 100lb | AMZ |
- Spellbinders Glimmer Hot Foil – Polished Brass #GLF-024 | SB | Sb.com |
- Distress Ink Pads:
- Distress Oxide Ink:
- Faber-Castell Polychromos Colored Pencils | Blick |
Tools Used
- Spellbinders Platinum Six | SB | Sb.com |
- Spellbinders Glimmer Hot Foil System | SB | Sb.com |
- Tim Holtz Paper Trimmer | Sb.com |
- Best Ever Craft Tape – 5/8 in | SB | Sb.com |
- Bearly Art Glue | SB | Sb.com |
- Blending Brushes – Mini | SB | Sb.com |
- Blending Brushes – Small | SB | Sb.com |
- 1mm Foam Squares – White | SB | Sb.com |
- Craft Foam – White
Springtime Mother’s Day Card
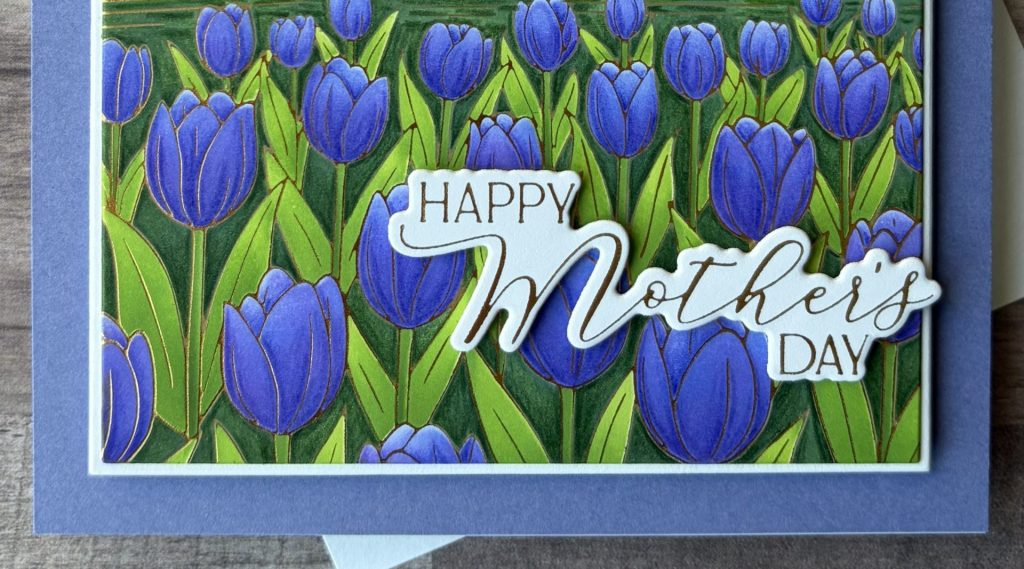
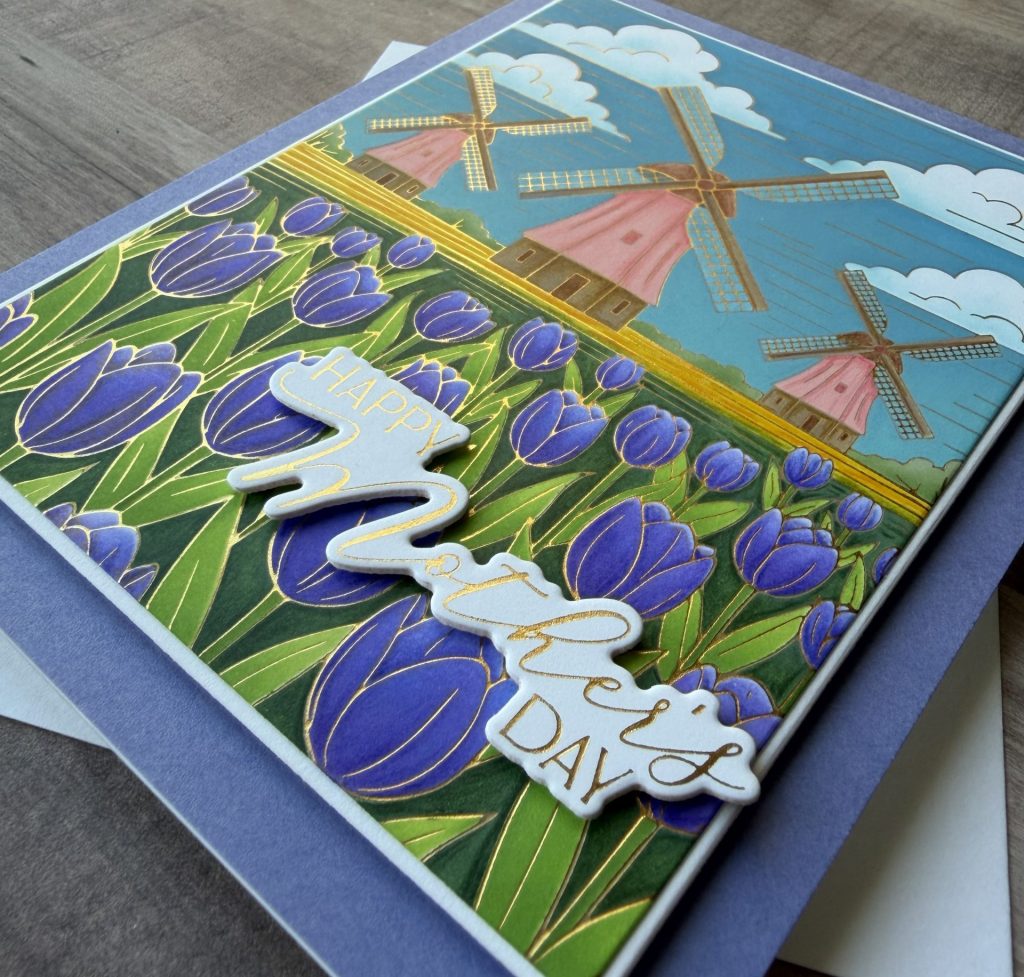
For this card, I ink blended a scenic background featuring soft blue skies, fluffy clouds, and a row of charming windmills in the distance. The real star of the show, though, is that vibrant tulip field in the foreground! I used layered stenciling to build up those rich greens and bold purples, then added extra depth with colored pencils to really bring the flowers to life. The windmills were softly colored for a slightly storybook feel, which pairs beautifully with the golden foil line details from the press plate. To finish things off, I added a foiled “Happy Mother’s Day” sentiment across the tulips, keeping it light so the background still shines.
Card Details
Card Base
- Size: 4¾” x 6”
- Cardstock: Periwinkle
Foiled Windmills
- Press Plate: Windmills & Tulips
- Cardstock: Hammermill
- Foil: Polished Brass
Stenciled Windmills
- Stencil: Windmills & Tulips
- Ink: Distress Inks & Oxides
- Tool: Blending Brushes
1st Stencil Layer
- Broken China Ink – windmill blades
- Tulips – 3 shades of purple distress ink
- Shaded Lilac – fill in all the tulips.
- Blueprint Sketch – shade half way up from the bottom of the tulips.
- Wilted Violet – shade the bottom of the tulips.
2nd Stencil Layer
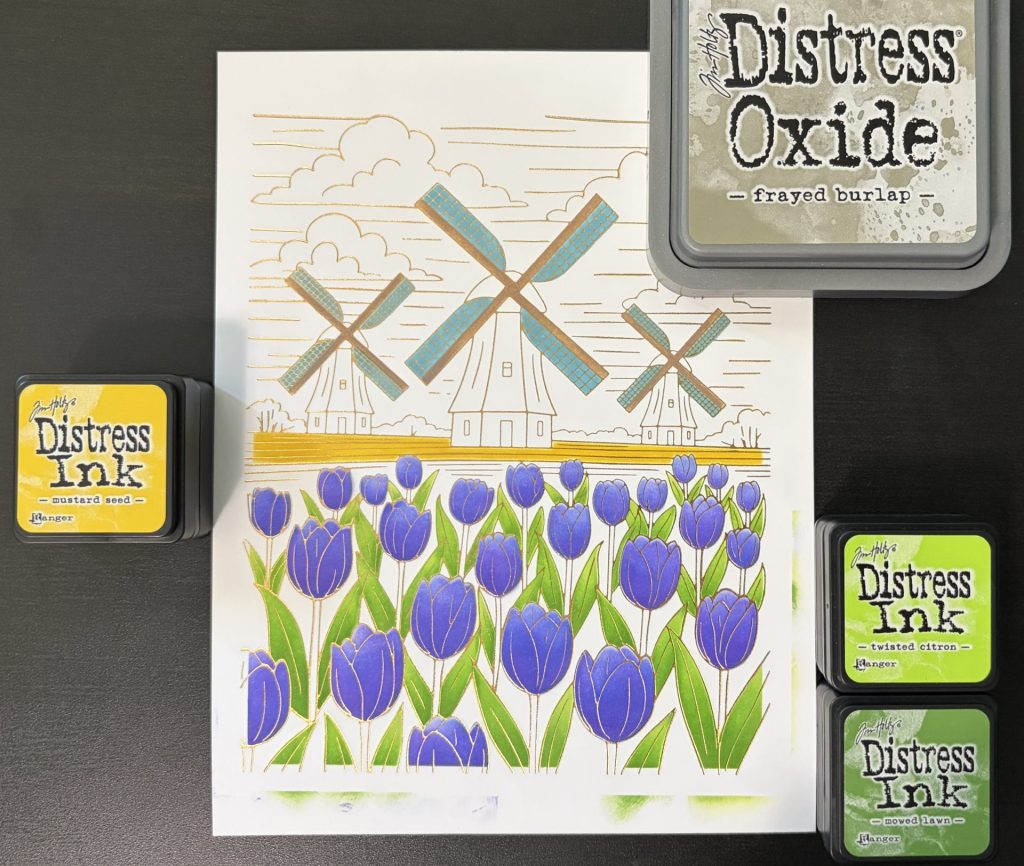
- Frayed Burlap Oxide – windmill blades
- Mustard Seed Ink – mid-ground tulip fields
- Tulip Leaves – 2 shades of green distress ink
- Twisted Citron – fill in all the tulip leaves.
- Mowed Lawn – shade the bottom of the tulip leaves.
3rd Stencil Layer
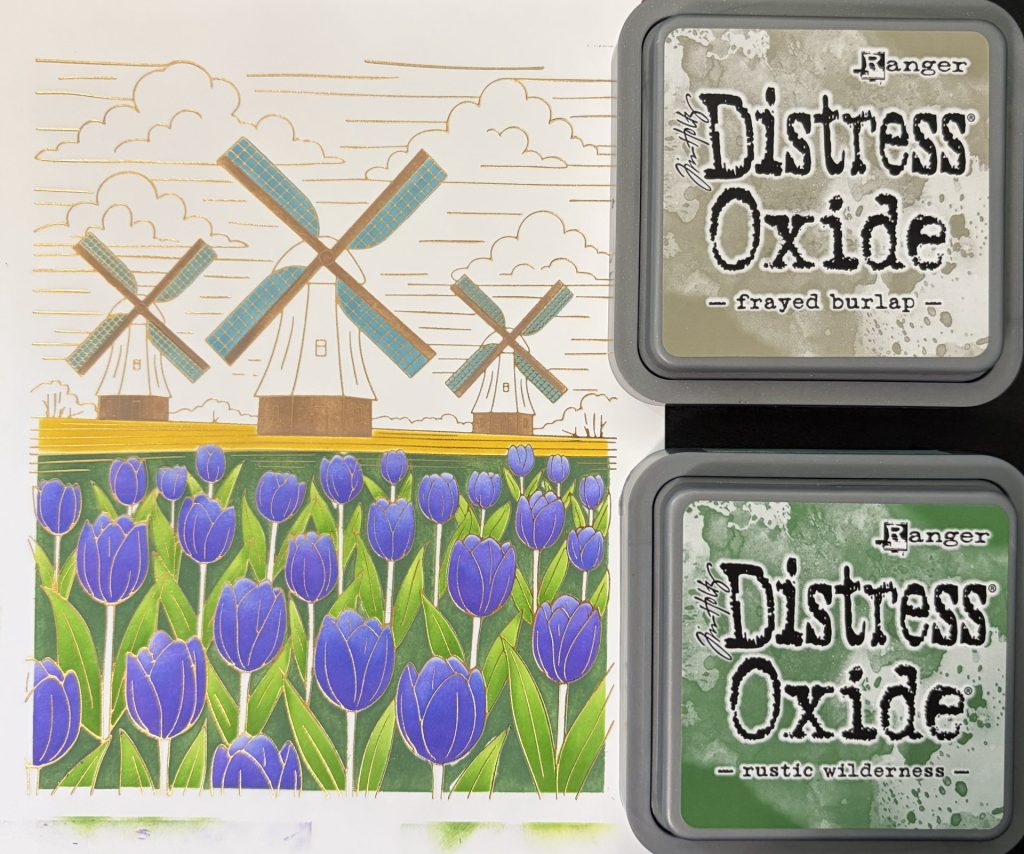
- Frayed Burlap Oxide – windmills
- My stencil had a slight defect, so I skipped the windmill tops here, but this layer is designed to add them.
- Rustic Wilderness Oxide – tulip field ground
4th Stencil Layer
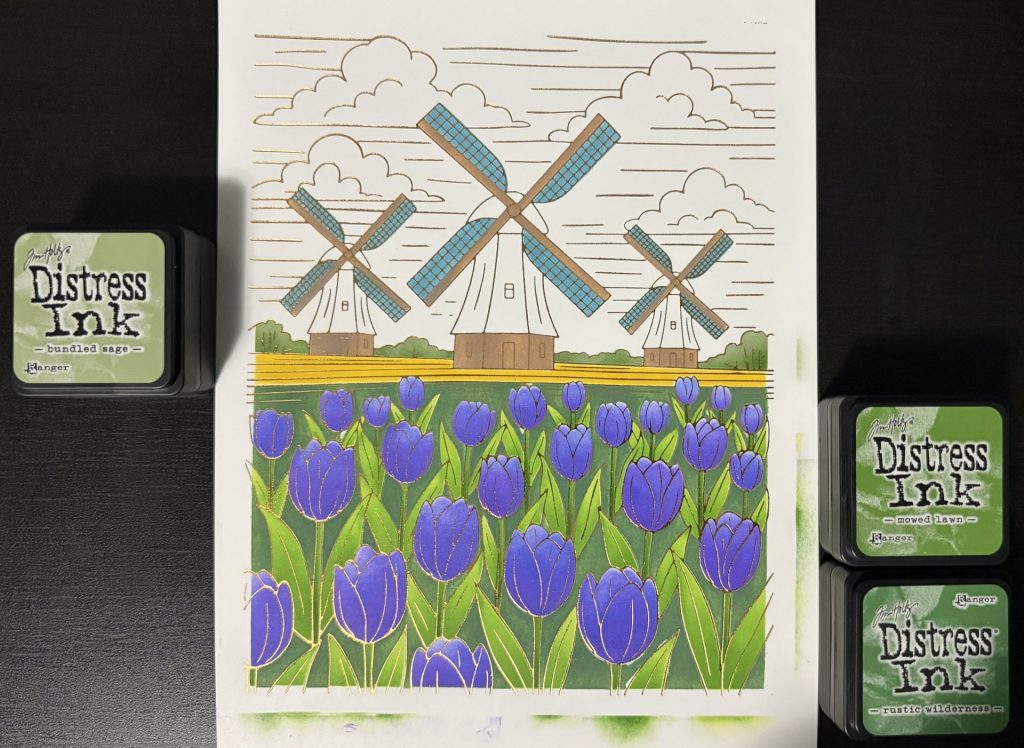
- Bundled Sage Ink – tree line
- Tulip Stems – 2 shades of green distress ink
- Mowed Lawn – fill in all the tulip stems.
- Rustic Wilderness – shade the bottom of the tulip stems. Then add a little shading to the tree line.
5th Stencil Layer
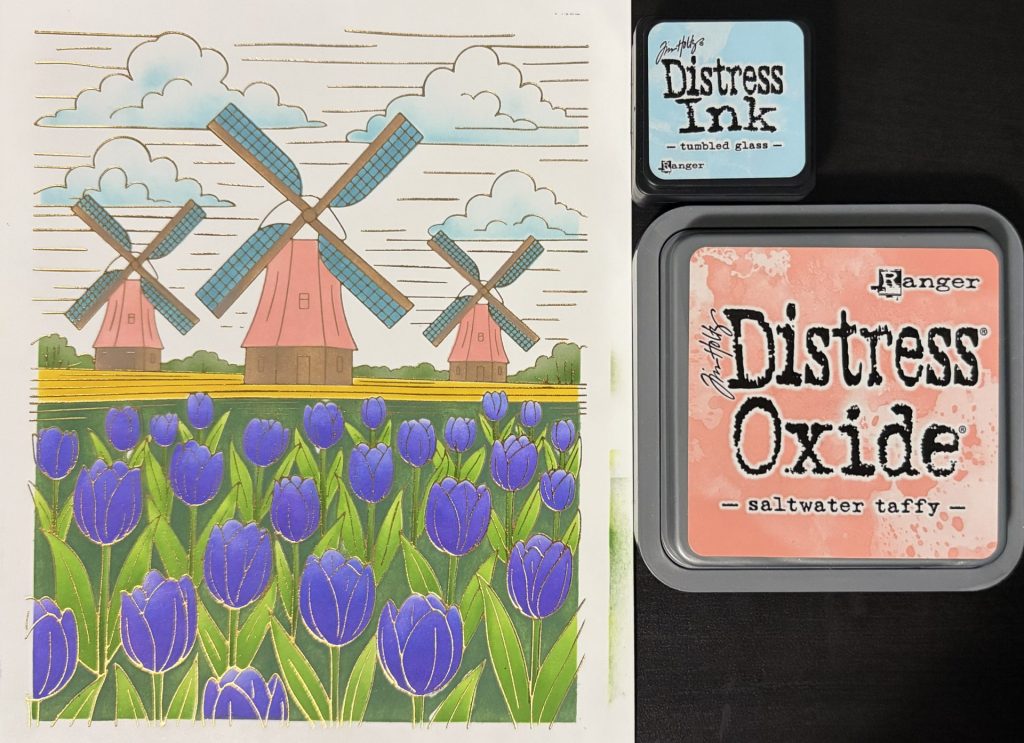
- Tumbled Glass Ink – shade the bottom of the clouds.
- Saltwater Taffy Oxide – windmills
6th Stencil Layer
- Sky – 3 shades of blue distress oxide.
- Salty Ocean – fill in the top of the sky.
- Broken China – fill in the middle of the sky.
- Salvaged Patina – fill in the bottom of the sky.

Colored Pencils
Enhance the shading with colored pencils. I used a mix of Faber-Castell Polychromos shades to add depth and dimension.
Die-Cut Windmills
- Die Set: Percision Layering A2 A – second largest die
- Cardstock: Windmill Panel
- I like to place a sheet of copy paper over the inked panel when die-cutting to help protect the surface.
- Die Set: Percision Layering A2 B – largest die
- Cardstock: Classic White
- Adhere rectangles panels together with glue.
- Attach to card base with craft foam.
Sentiment
- Press Plate: Mother’s & Father’s Day Sentiments
- Cardstock: Hammermill
- Foil: Polished Brass
- Cut a second sentiment from white cardstock and glue it behind for stability.
- Adhere with 1mm foam squares.
Where Creativity Blooms
I love how this design from Yana’s Tulips Collection feels both detailed and peaceful at the same time. This cards mix of hot foiling, stenciling, and pencil shading, adds so much interest without overwhelming the scene. It’s one of those cards that feels extra special and perfect for celebrating someone you love.
I hope this windmill and tulip scene inspires you to play with stencils, ink blending, and a bit of extra shading in your own cards. If it does, I would love to see what you create! Be sure to tag me (@silversgrove or @grovecrafted) on Instagram or at Grove Crafted on Facebook.
Now it’s your turn to ink with all the colors of the wind!
Happy Crafting!

Want more Mother’s Day card ideas? Be sure to explore all of my Mother’s Day Card Tutorials for even more inspiration. And if you’re loving all the florals, you can find plenty more flower-filled designs in my Floral Card Blog Posts here.🌸