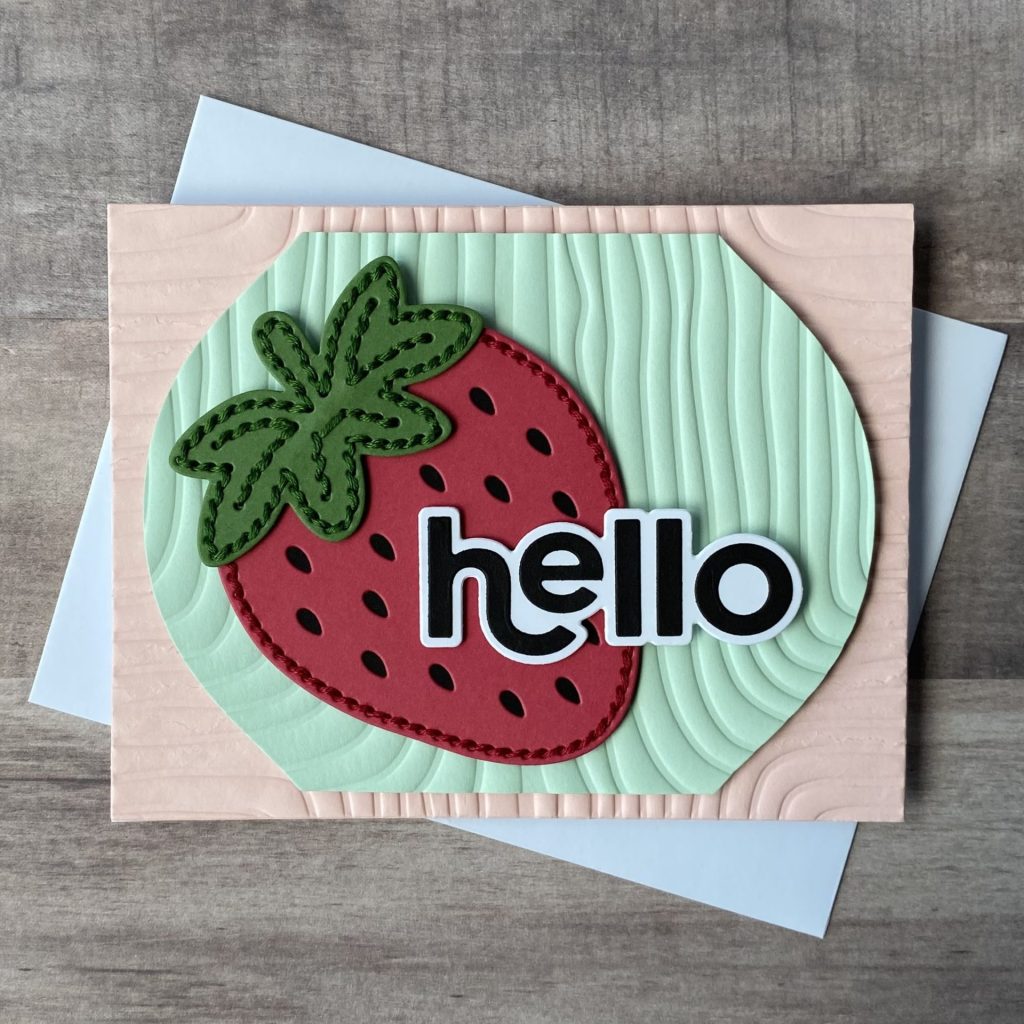
Stitched With Love: Strawberry Hello
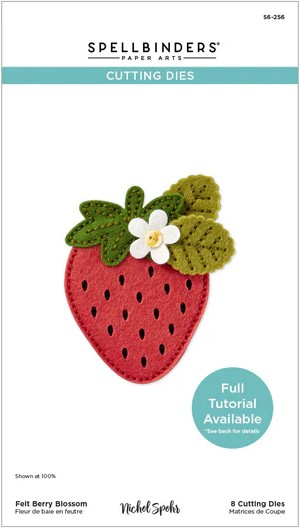
Spellbinders – Felt Berry Blossom
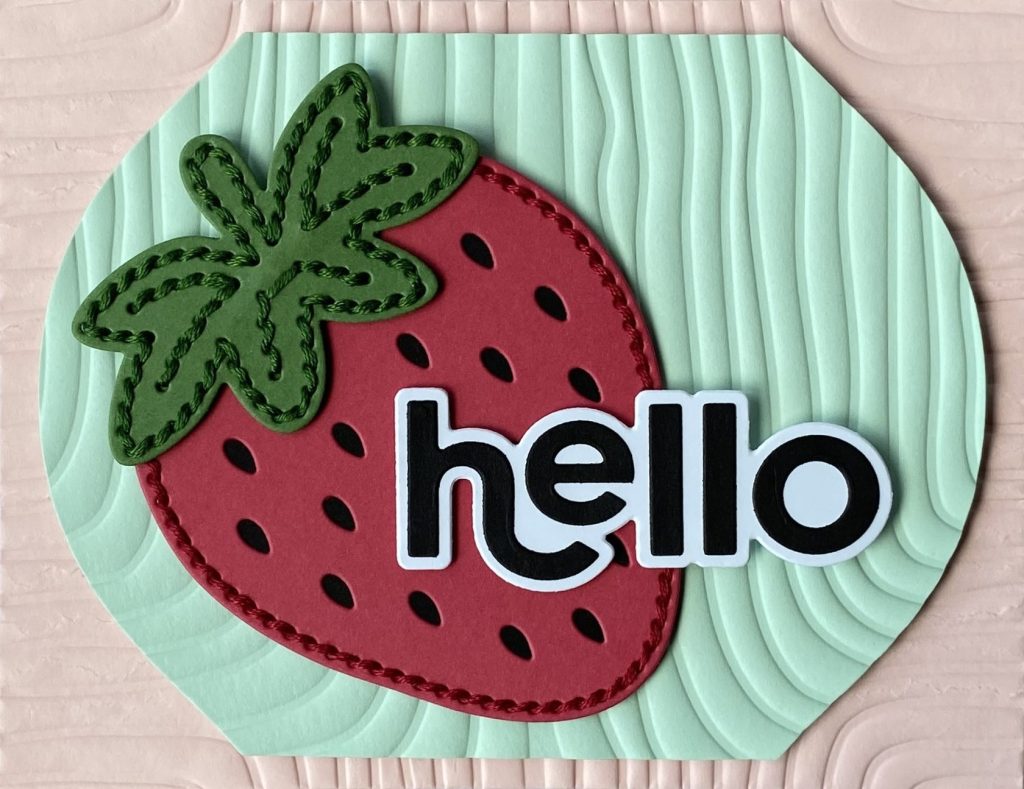
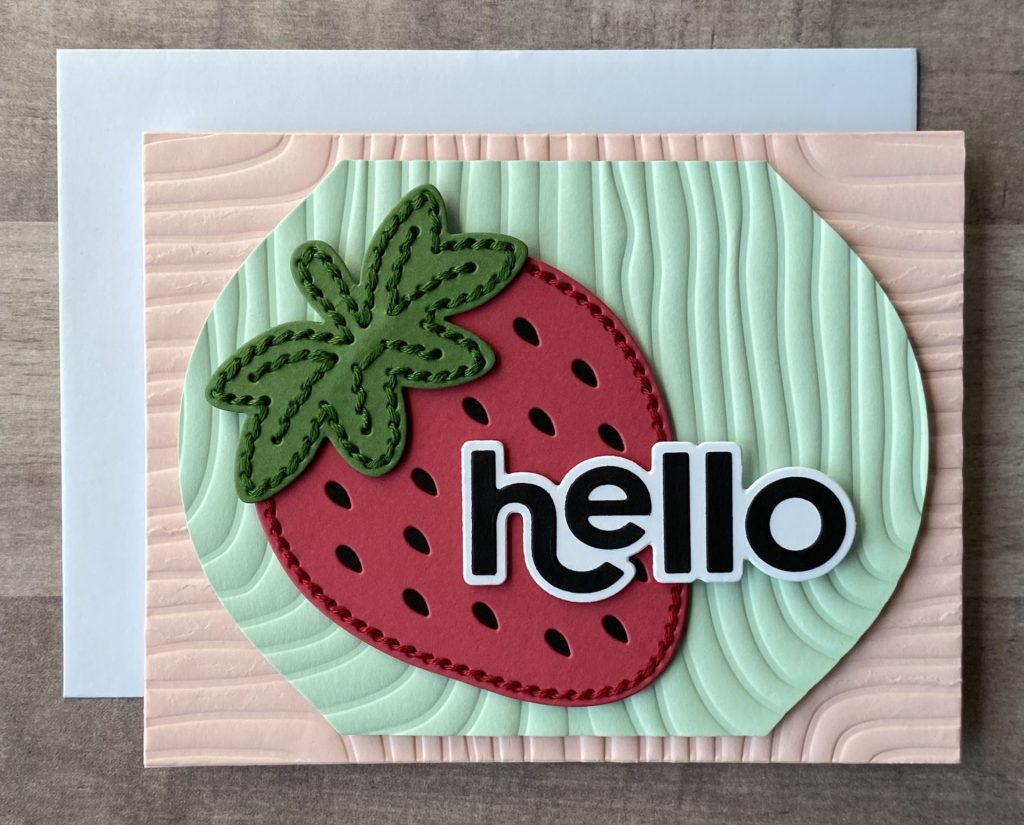
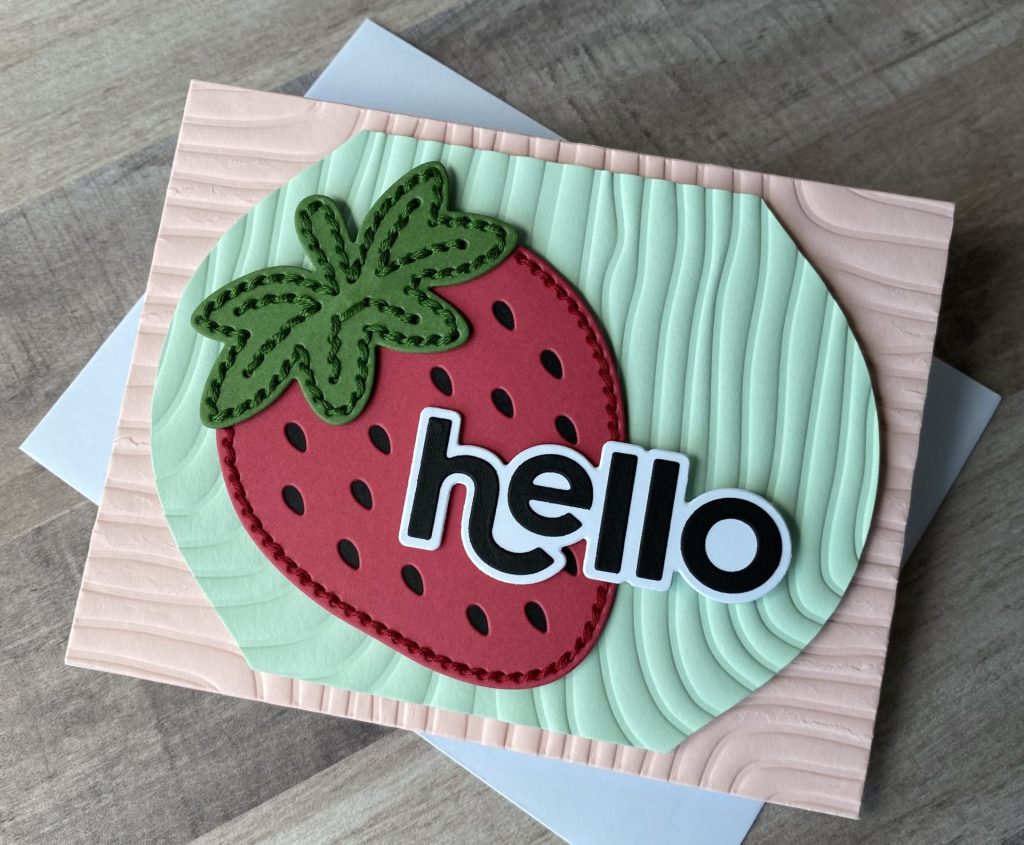
Hello, crafty friends! If you’re in the mood for something sweet and summery, you’re going to love today’s project—Berry Sweet Hello Card! This handmade card features the adorable Felt Berry Blossom die set from the Summer Felt Stitch & Create Collection by Nichol Spohr for Spellbinders. While these dies are designed with felt in mind, I decided to give them a paper-friendly twist by stitching my strawberries with cardstock instead! I love how the stitched detailing adds texture and charm, making this berry-themed hello just as delightful in paper as it would be in felt.
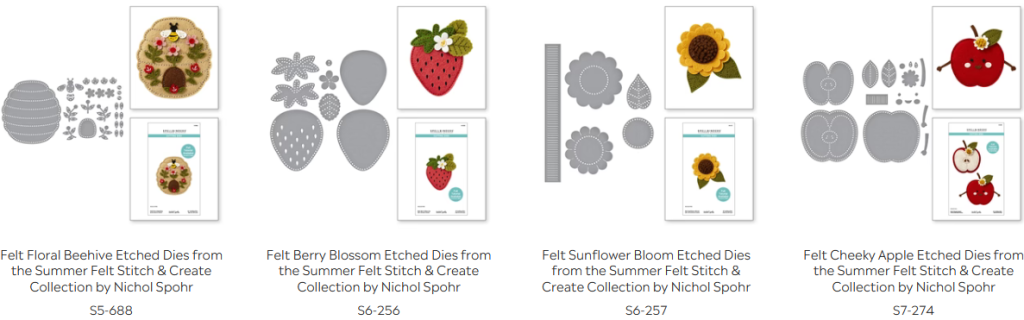
The Felt Stitch & Create Summer Collection by Nichol Spohr is a charming seasonal release featuring four whimsical etched die sets:
Each set is thoughtfully designed with stitched-edge guides to bring dimensional felt projects to life. Whether you’re crafting plush key chains, pillows, or decor, these dies are a delightful fusion of die‑cut precision and hand‑stitched charm.
Be sure to explore the full Felt Stitch & Create Collection to discover even more stitching die sets.
Link Abbreviations
- SB – Spellbinders*
- Sb.com – Scrapbook.com*
- SSS – Simon Says Stamp
- AMZ – Amazon*
Disclosure: I received this product to try out and share my honest thoughts with you. This post also includes affiliate links*—if you decide to shop through them, I may earn a small commission (at no extra cost to you). Money earned via affiliate links helps pay the fees to keep this blog up and running. Thanks so much for supporting GroveCrafted and helping me keep the crafty inspiration coming!
Supplies Used
- Spellbinders Cutting Dies – Felt Berry Blossom #S6-256 | SB | Sb.com |
- Spellbinders Cutting Dies – Mirrored Arch Labels #S5-613 | SB | Sb.com |
- Spellbinders 3D Embossing Folder – Lined Corners #E3D-124 | SB | Sb.com |
- Spellbinders 2023 Crafty Advent Calendar – Day 16 Hello Sentiment
- Spellbinders ColorWheel Cardstock
- DMC 6 Strand Embroidery Floss
- Garnet #816
- Vy Dk Forest Green #986
- Spellbinders Platinum Six | SB | Sb.com |
- Tim Holtz Paper Trimmer | Sb.com | AMZ |
- EK Scoring Board | AMZ | SSS |
- Mighty Mister | SB | Sb.com |
- Bearly Art Glue | SB | Sb.com |
- Foam Squares – White | SSS |
- Stitching Needle
- Scissors
Tips
Before you get started, here’s a quick heads-up: the Lined Corners 3D embossing folder can cause your cardstock to crack if you emboss it dry. But there’s an easy fix—just mist your cardstock with water first.
In the example below, the pink layer was embossed without misting, and you can see quite a bit of cracking. In contrast, I misted both sides of the mint layer before embossing, and it turned out beautifully smooth.
So, to get the best results, be sure to mist your cardstock before embossing with this folder.
Now, let’s jump into the tutorial!
Strawberry Card Details
Card Base
- Create an A2 card base (4¼” x 5½”) using Classic White cardstock.
- Cut Blush cardstock to 4¼” x 5½”.
- Mist the cardstock with water to prevent cracking, then emboss it with the Lined Corners 3D embossing folder.
- Adhere the embossed panel to the card front with glue.
Mint Panel
- Die-cut Mint cardstock using the third-largest die from the Mirrored Arch Labels set.
- Emboss the panel with the Lined Corners 3D embossing folder.
- Attach the panel to the center of the card front using foam squares.
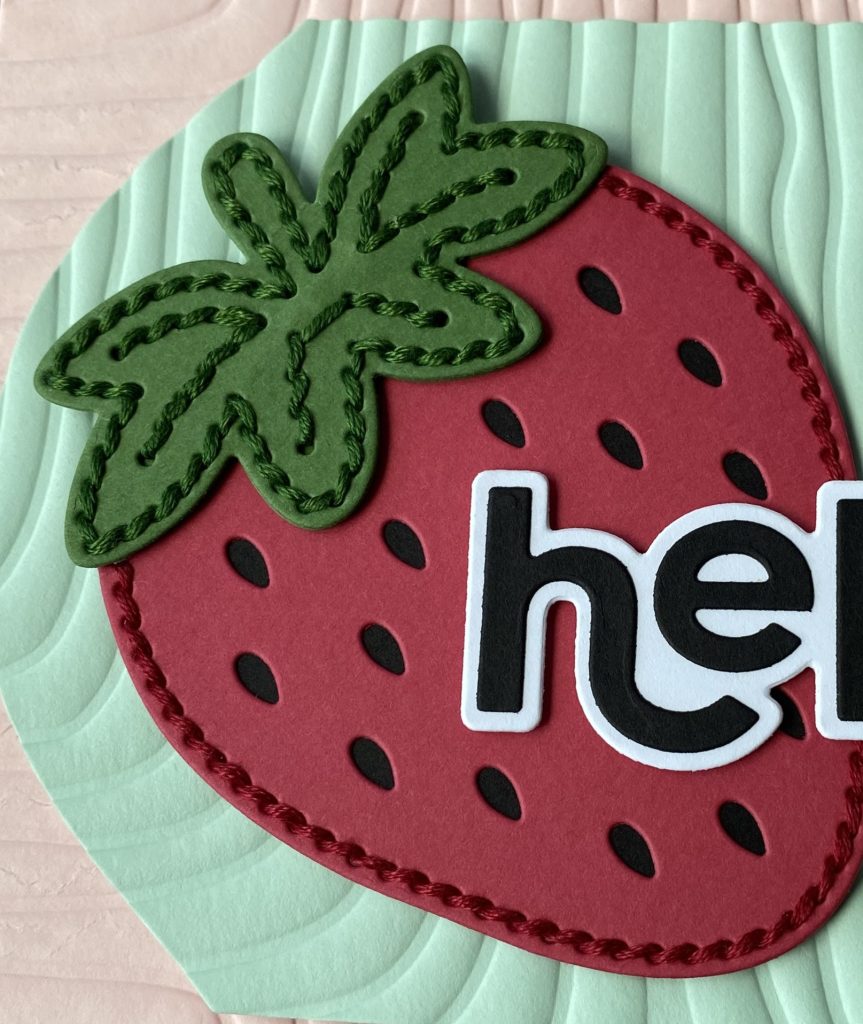
Stitched Strawberry
- Using the Felt Berry Blossom set die-cut the strawberry from Wild Berry cardstock.
- Die-cut the detailed stem from Fern cardstock.
- Die-cut the backer layer from Raven cardstock.
- Stitch the strawberry using Garnet #816 DMC embroidery floss.
- Stitch the stem using Vy Dk Forest Green #986 DMC embroidery floss.
- Assemble the strawberry with glue.
- Adhere it to the card using foam squares.
🎥 Need help stitching? Watch this video tutorial for helpful tips and techniques.
Hello Sentiment
- Die cut the “Hello” sentiment from Raven and Classic White cardstock.
- Layer the two pieces with glue for a shadowed effect.
- Attach the sentiment to the card with foam squares.
Time to Sew Your Creativity!
And that’s how I made this Berry Sweet Hello Card! I love how the stitched strawberry adds texture and charm, even when using cardstock instead of felt. The soft embossed background and layered sentiment bring everything together for a fresh, summery feel. This design is super versatile too—just switch up the colors or sentiment to fit any occasion. I hope it inspires you to try a little stitching on your next paper project! If you do, I’d love to see what you create! Be sure to tag me (@silversgrove or @grovecrafted) on Instagram. Sew long for now, happy stitching and crafting!
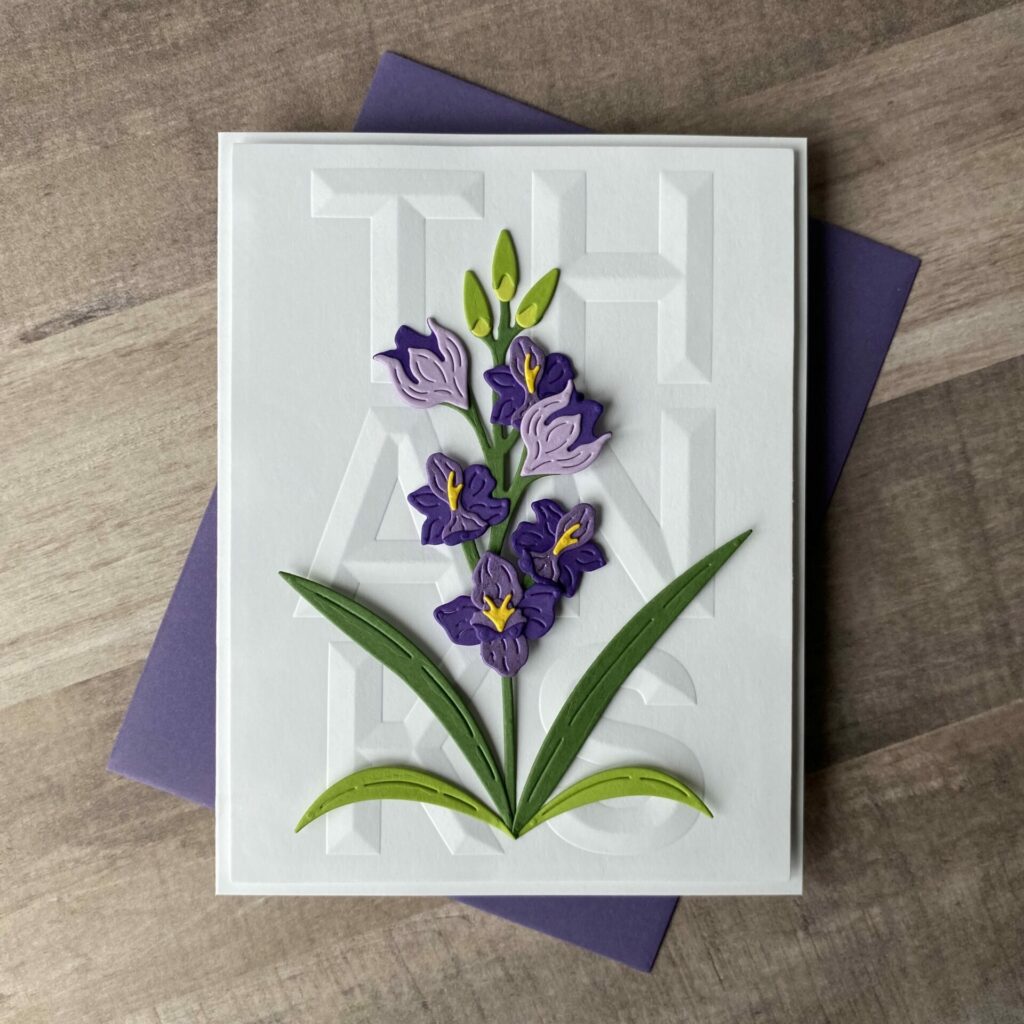
If you enjoyed making this Berry Sweet Hello Card, be sure to check out my Blooming with Thanks Card tutorial—it’s simple and floral-filled project you won’t want to miss!