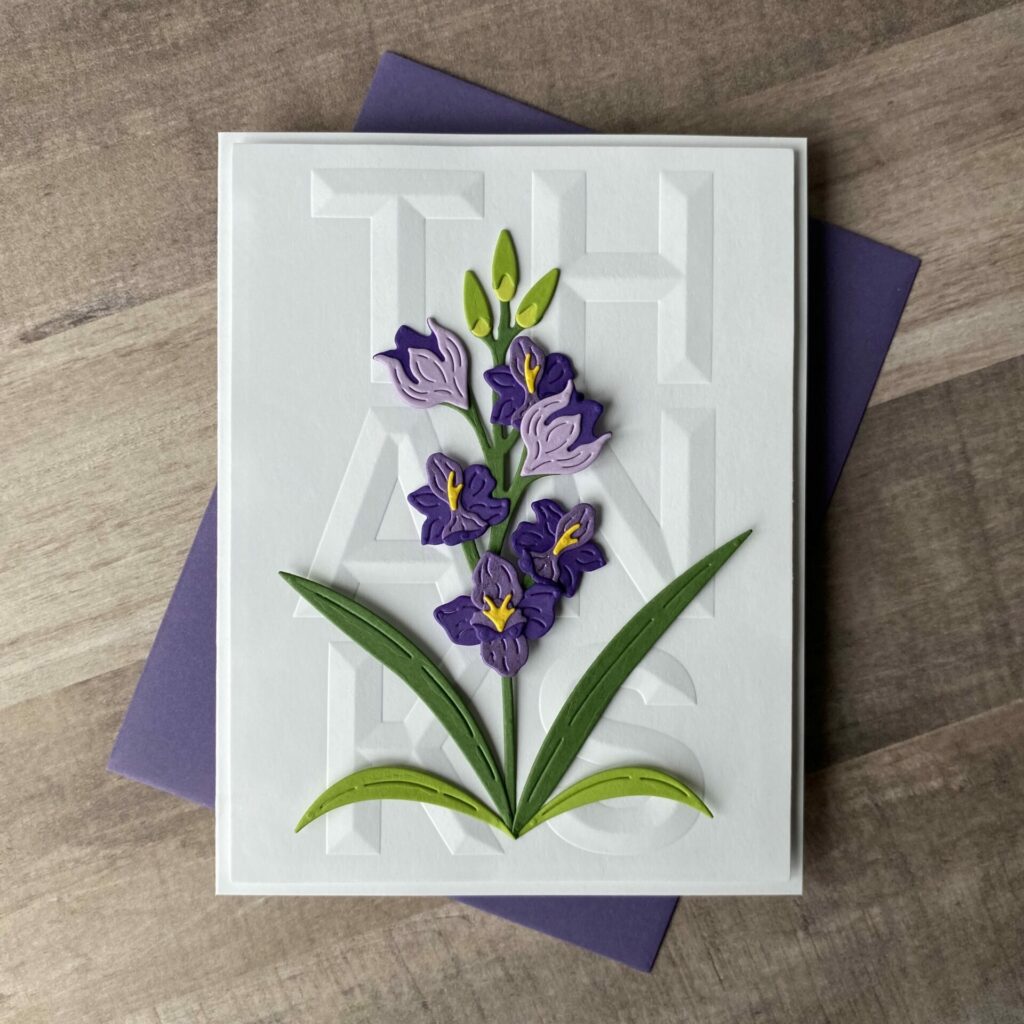
Blooming With Thanks Card
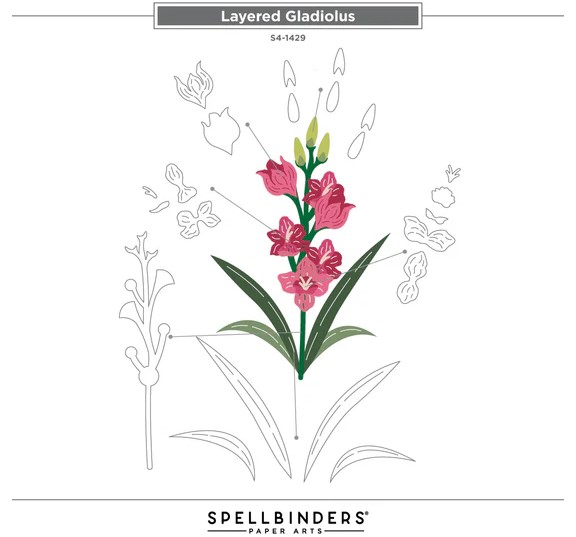
Spellbinders – Layered Gladiolus
Hello, crafty friends! If you adore soft florals and nature-inspired elegance, you’re going to love today’s card—Blooming With Thanks Card! This handmade thank you card features the Layered Gladiolus die set from Spellbinders. With its beautifully detailed petals and easy-to-layer design, this die set is perfect for creating graceful, dimensional flowers that add a heartfelt touch to your cards. Whether you’re sending a simple note of gratitude or crafting for spring, these delicate gladiolus blooms make every project feel fresh and full of life.
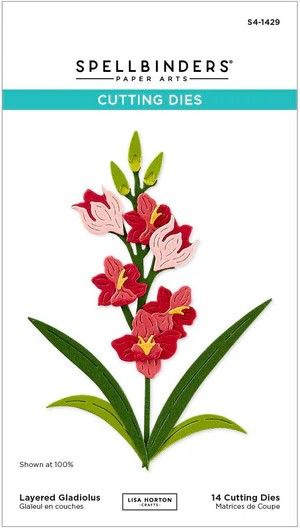
The Layered Gladiolus die set by Lisa Horton’s Wildflowers Collection from Spellbinders offer a delightful way to bring the elegance of gladiolus blooms to your paper crafting projects. This set includes intricately designed dies that allow you to create dimensional flowers by layering various petal and foliage elements. Perfect for card making, scrapbooking, and other creative endeavors, these dies enable you to craft realistic floral arrangements with ease.

The Wildflowers Collection by Lisa Horton for Spellbinders is a beautifully curated assortment of dies, BetterPress plates, and stamp sets that celebrate the charm of nature-inspired designs. This collection includes the Layered Wildflowers die set, which allow crafters to build intricate floral arrangements, and the Butterfly Silhouettes registration press plate & die set, perfect for adding delicate butterfly accents to projects. Complementing these are the Script Text and Splatters BetterPress plates, offering elegant backgrounds and artistic textures. Additionally, the Very Best Wishes and Sending Smiles Sentiments clear stamp & die sets provide heartfelt messages to complete your creations. Together, these elements offer endless possibilities for crafting personalized cards, scrapbook pages, and mixed-media art.
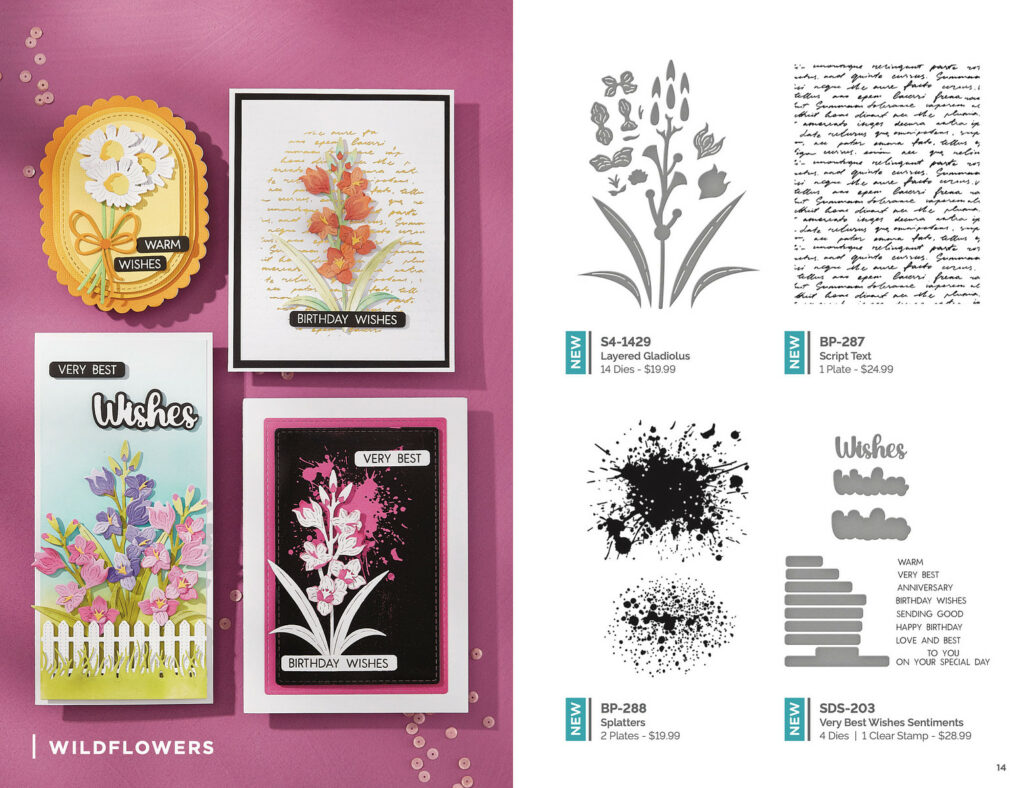
Explore the full Wildflowers Collection to discover more coordinating dies and press plates.
Link Abbreviations
- SB – Spellbinders*
- Sb.com – Scrapbook.com*
- SSS – Simon Says Stamp
- AMZ – Amazon*
Disclosure: I received this product to try out and share my honest thoughts with you. This post also includes affiliate links*—if you decide to shop through them, I may earn a small commission (at no extra cost to you). Money earned via affiliate links helps pay the fees to keep this blog up and running. Thanks so much for supporting GroveCrafted and helping me keep the crafty inspiration coming!
Supplies Used
- Spellbinders Cutting Dies – Layered Gladiolus #S4-1429 | SB | Sb.com |
- Spellbinders Cutting Dies – Percision Layering A2 A #S5-487 | SB | Sb.com | AMZ |
- Spellbinders 3D Embossing Folder – Beveled Thanks #E3D-091 | SB | Sb.com |
- Spellbinders ColorWheel Cardstock
- Spellbinder Essentials Cardstock – Sunkissed
- Spellbinder Essentials Cardstock – Lilac Blossom
- Spellbinders Platinum Six | SB | Sb.com |
- Tim Holtz Paper Trimmer | Sb.com | AMZ |
- EK Scoring Board | AMZ | SSS |
- Bearly Art Glue | SB | Sb.com |
- Embelishment Wand | SSS |
- Craft Foam – White | SB |
- Foam Squares – White | SSS |
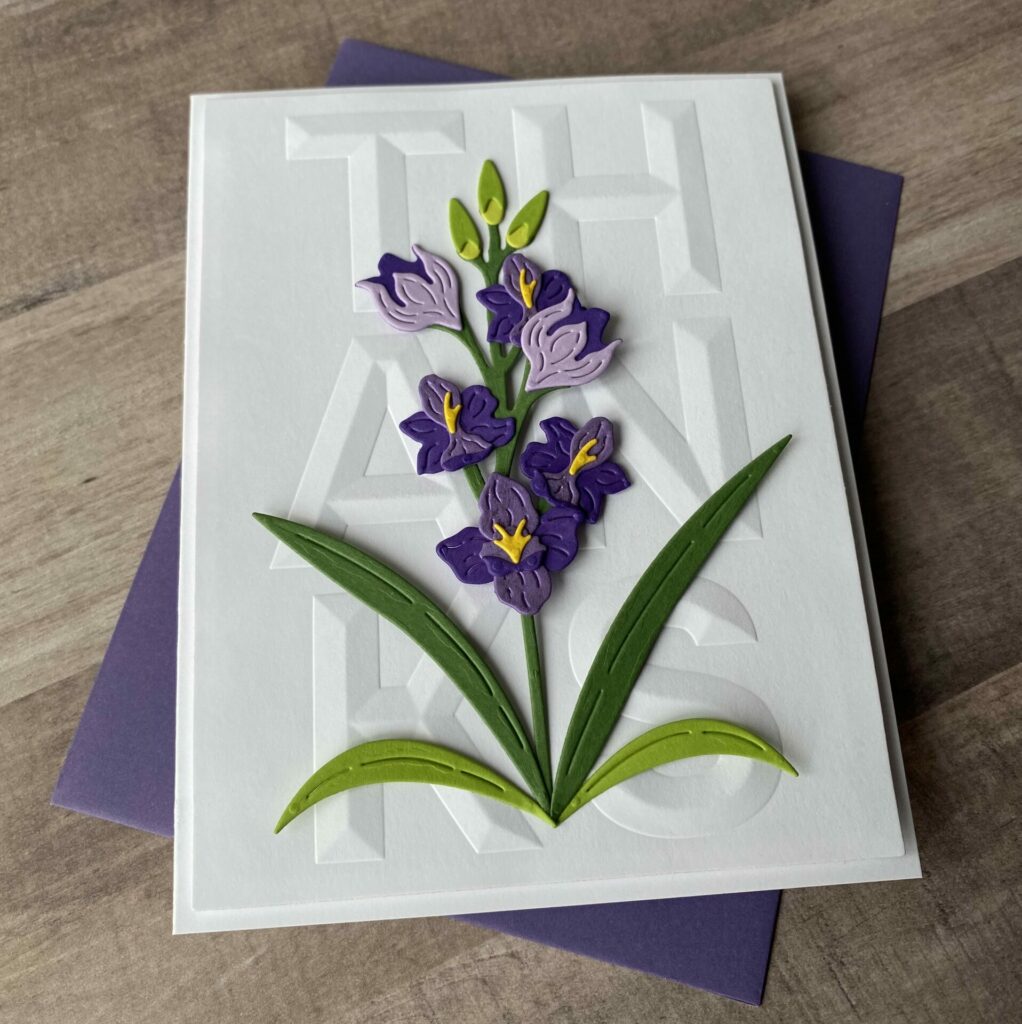
Making the Card Base
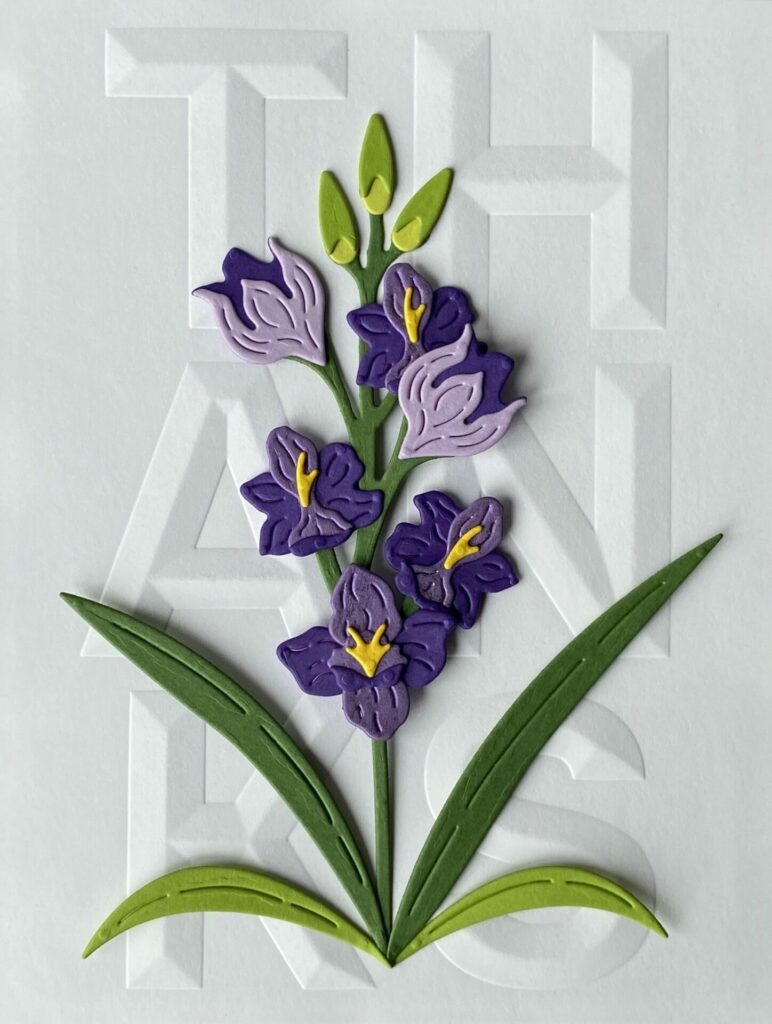
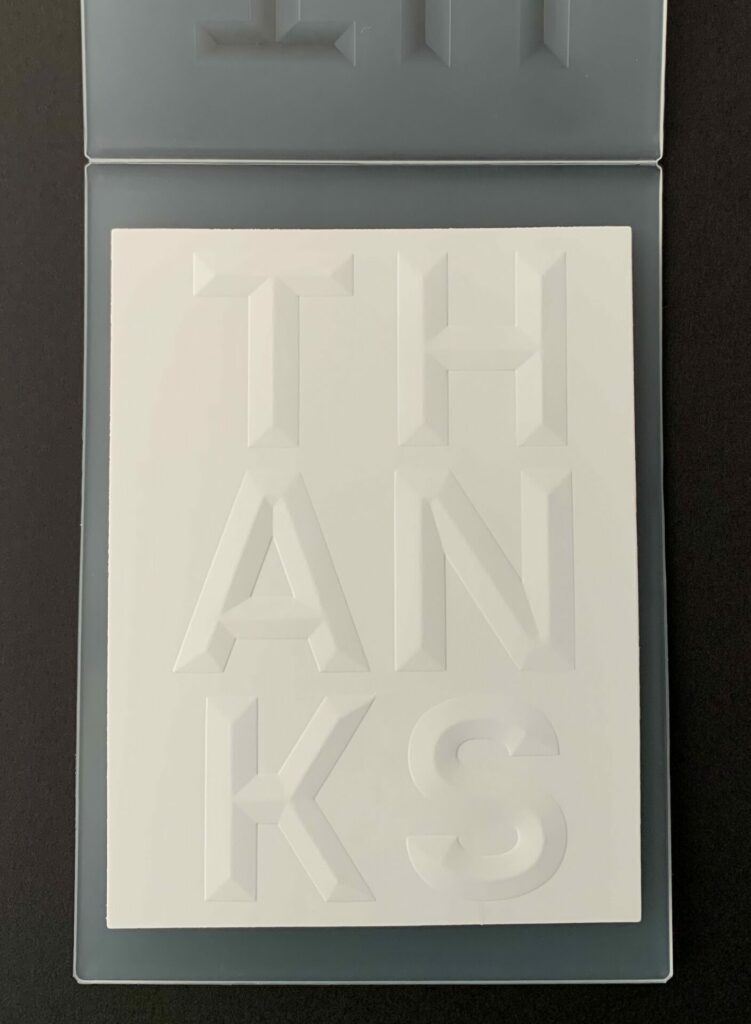
To begin, I created an A2 side-folding card base using white cardstock. For the front panel, I die cut a piece of white cardstock using the second largest die from the Precision Layering A2 A die set. I then embossed this panel with the Beveled Thanks 3D embossing folder. To give the card extra dimension, I adhered the embossed panel to the card base using white craft foam.
Die Cutting the Gladiolus
Next, I brought the florals to life using the Layered Gladiolus die set by Lisa Horton for Spellbinders.
I die cut all the flower and foliage pieces from a variety of cardstock colors:
- Fern – stem and large leaves
- Rainforest – small leaves and top layer of tiny buds
- Peridot – bottom layer of tiny buds
- Lilac – back layer of flowers and thin tiny shadow layer
- Lilac Blossom – middle flower layer
- Lavender – top layer of large flower buds
- Sunkissed – flower centers
Tip: Some flower pieces need to be cut multiple times—up to three—for a full, layered look.
Assembling the Gladiolus
With all the die-cut pieces ready, I assembled the gladiolus using liquid glue. (Refer to the guide below for detailed assembly instructions.)
Once the flower was complete, I added foam squares to the back of several blooms and adhered the arrangement to the front of the card. I carefully centered the flower so it fit within the embossed “THANKS” sentiment. To finish, I added foam squares behind the upper parts of the leaves and positioned them at the base of the stem for extra dimension and balance.