Sealed with Love: Butterfly Blooms
Spellbinders – Butterfly Mini Wax Seal
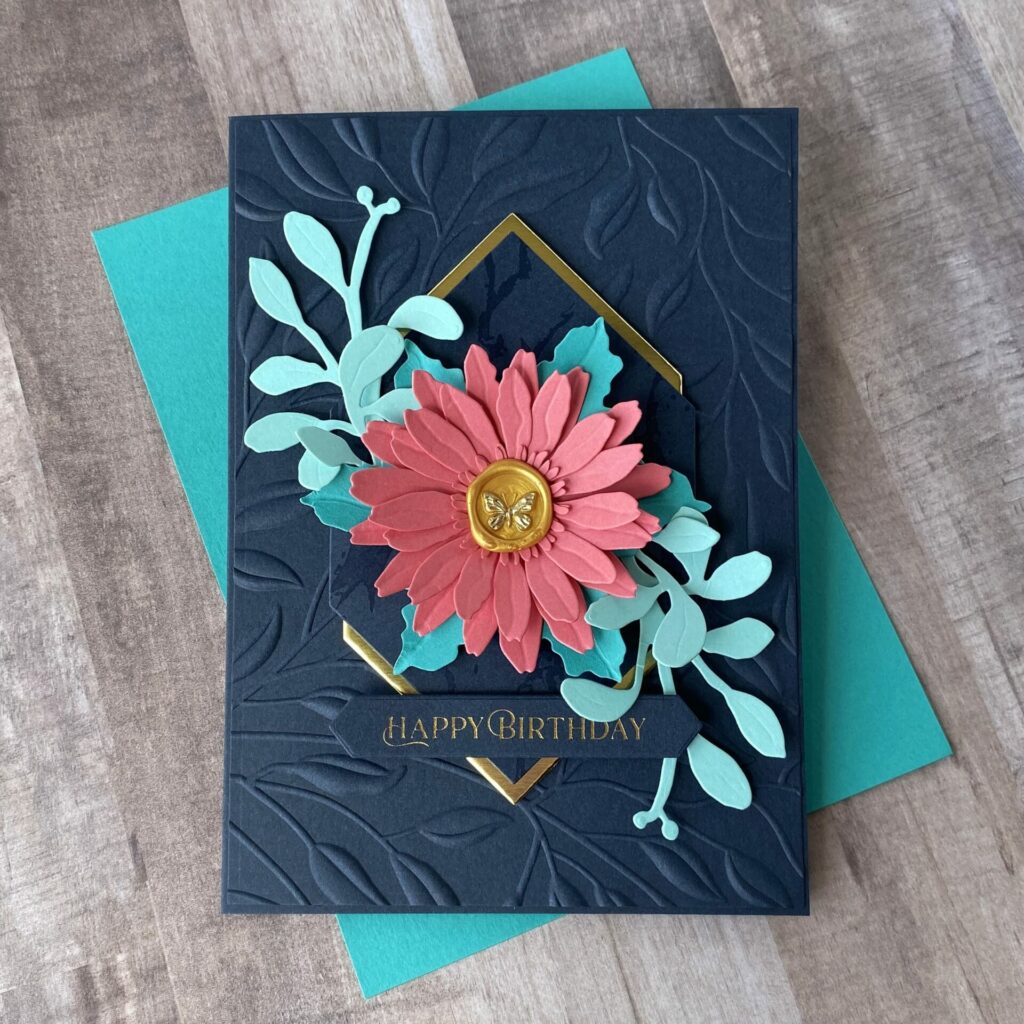
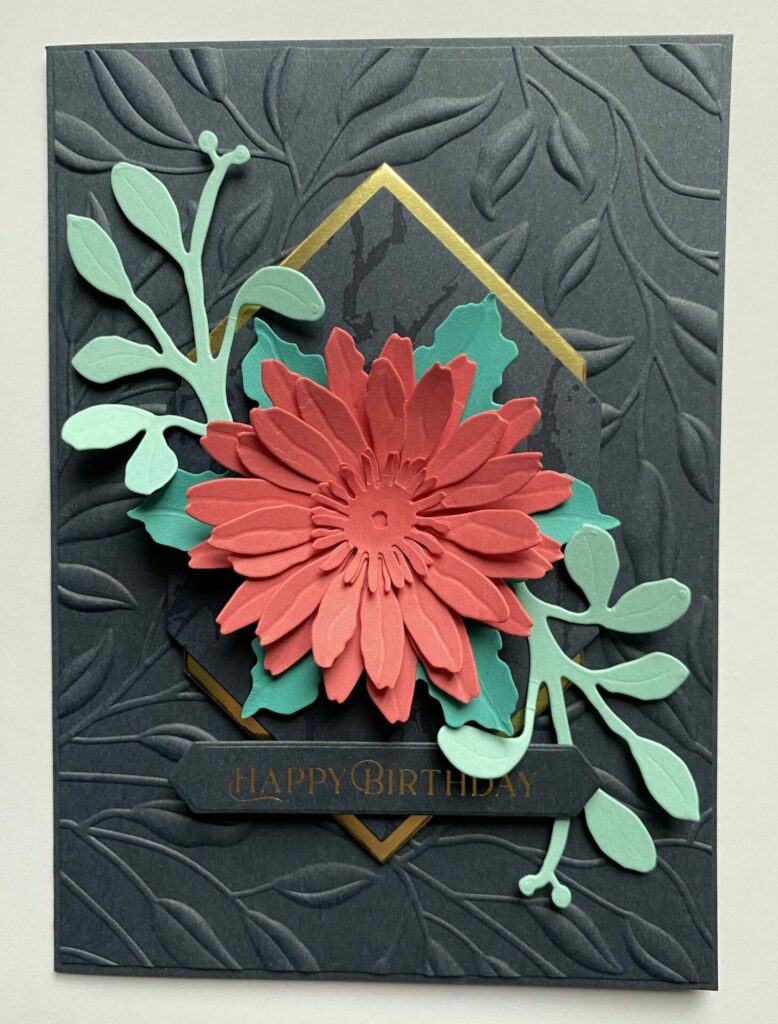
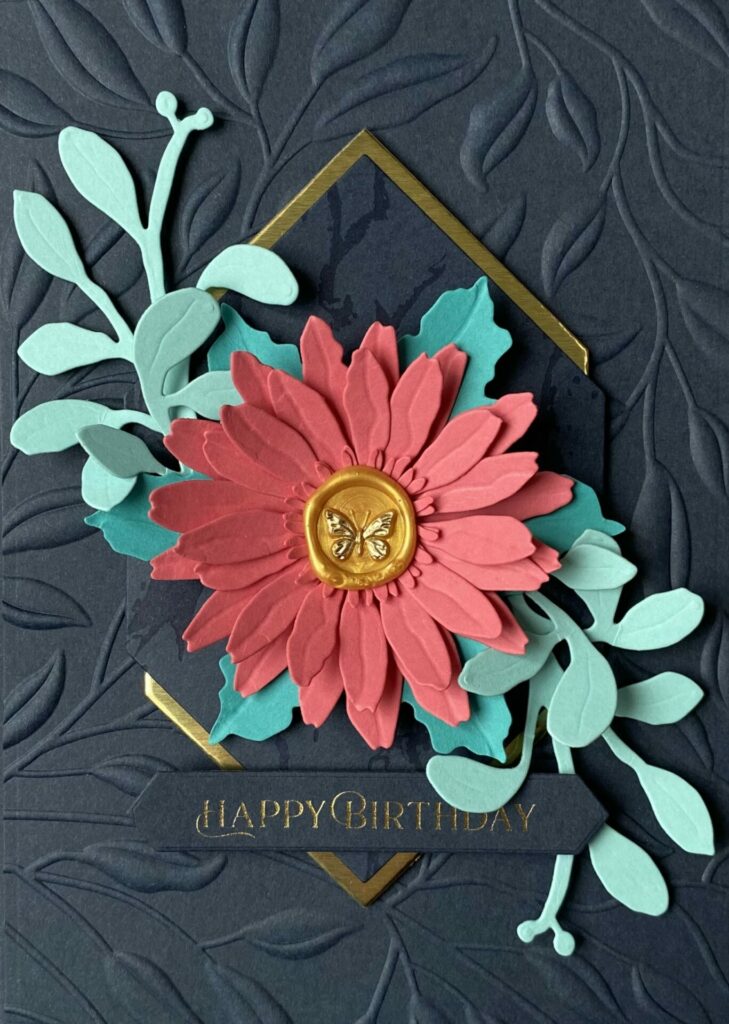
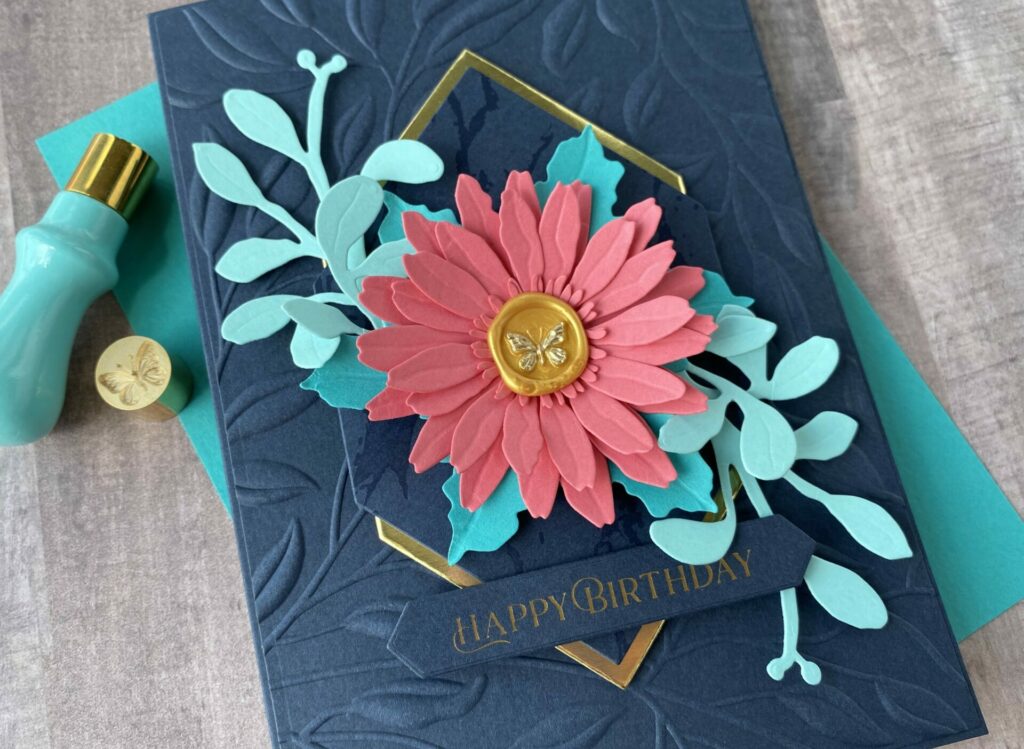
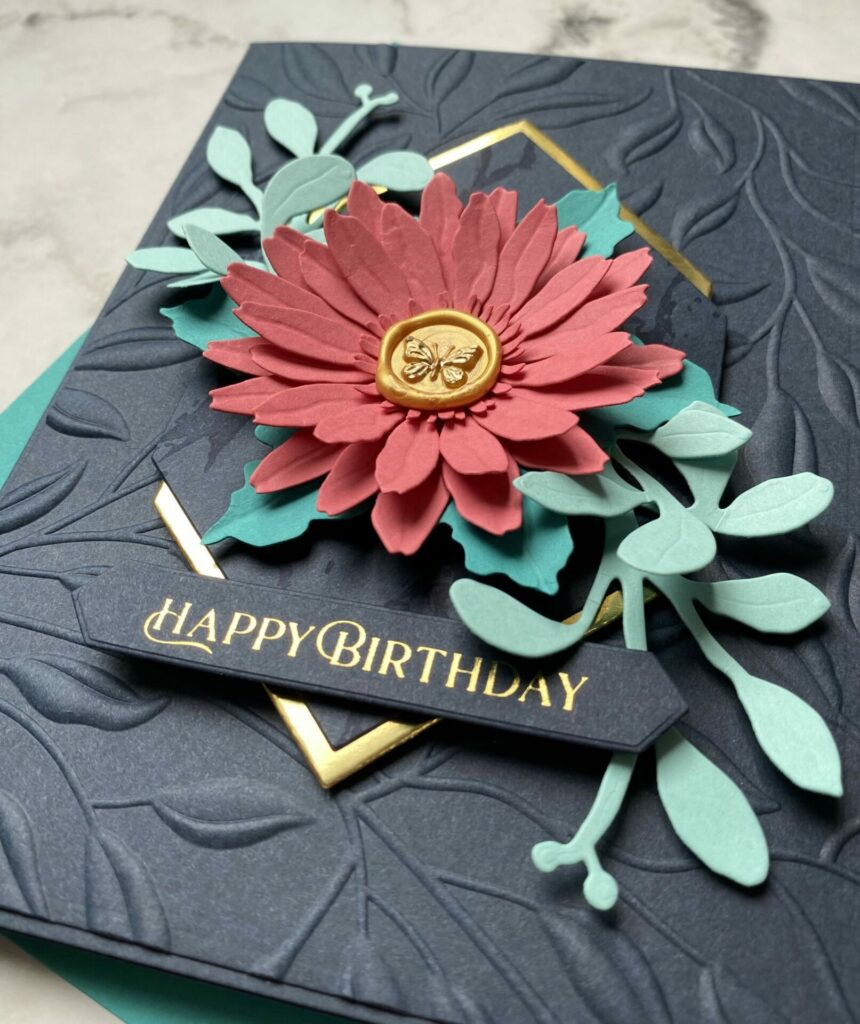
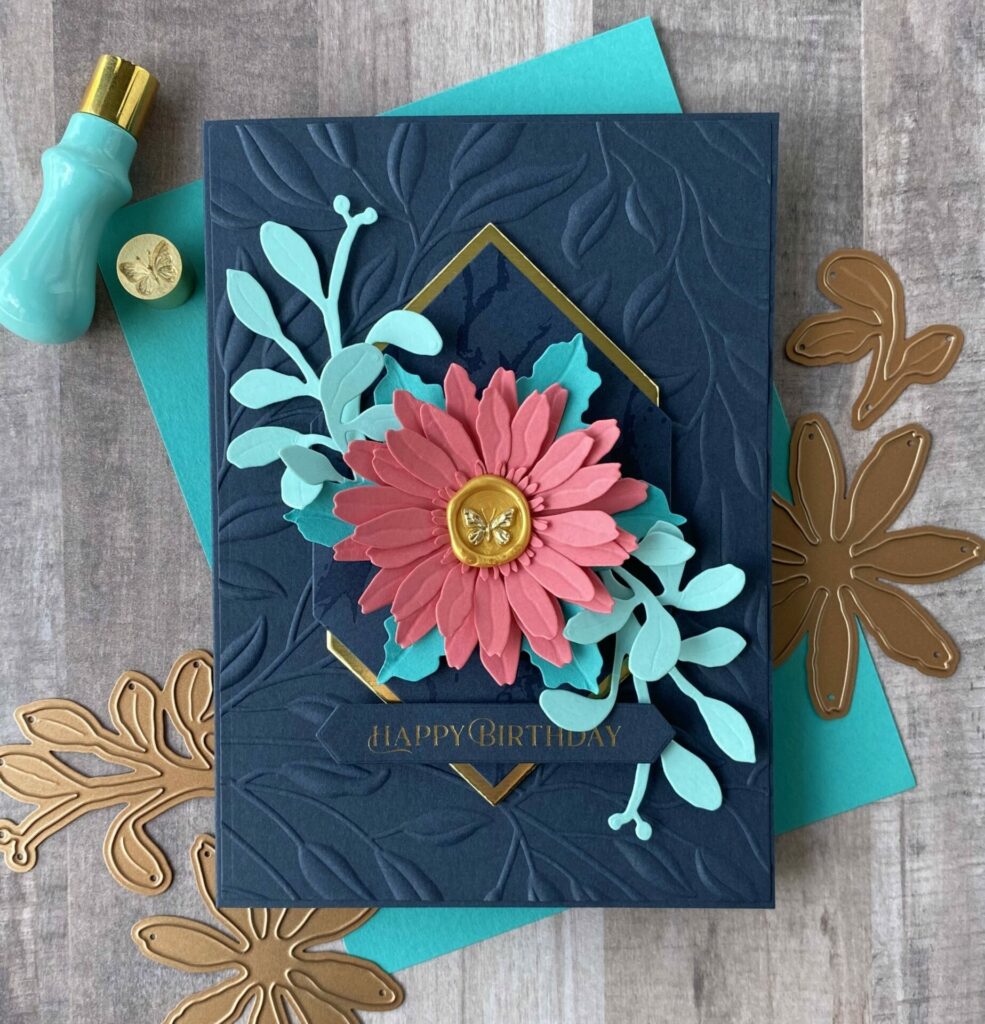
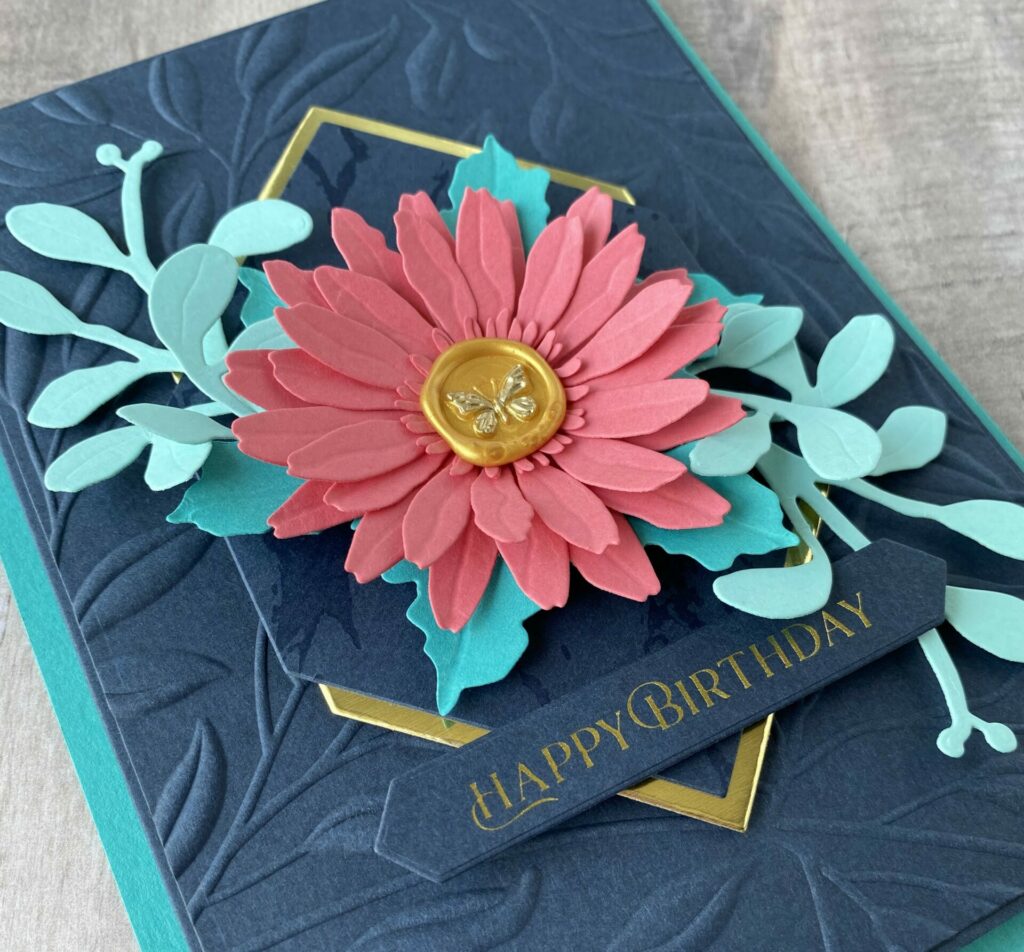
Hello, crafty friends! Today I’m excited to share a bold and beautiful handmade birthday card I’ve created, called “Butterfly Blooms.” This card is all about layers, texture, and those little details that make a big impact. One of my favorite elements—a charming wax seal that adds a touch of elegance! For this design, I used the Butterfly mini 3D wax seal from the Mini 3D Wax Seals Collection by Spellbinders. It’s such a lovely way to bring a soft, nature-inspired detail to your cards.
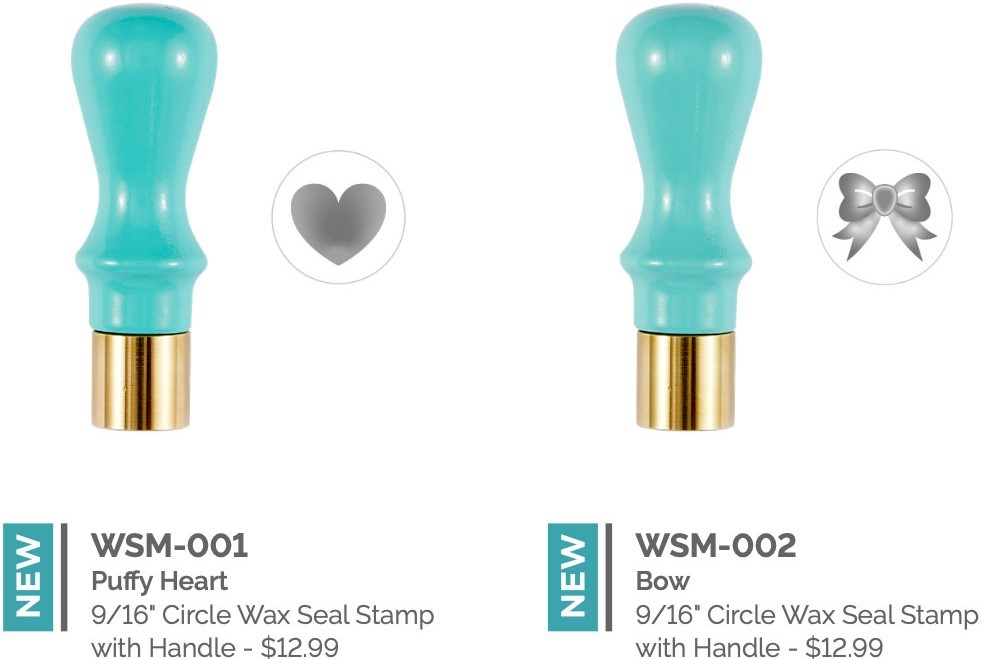
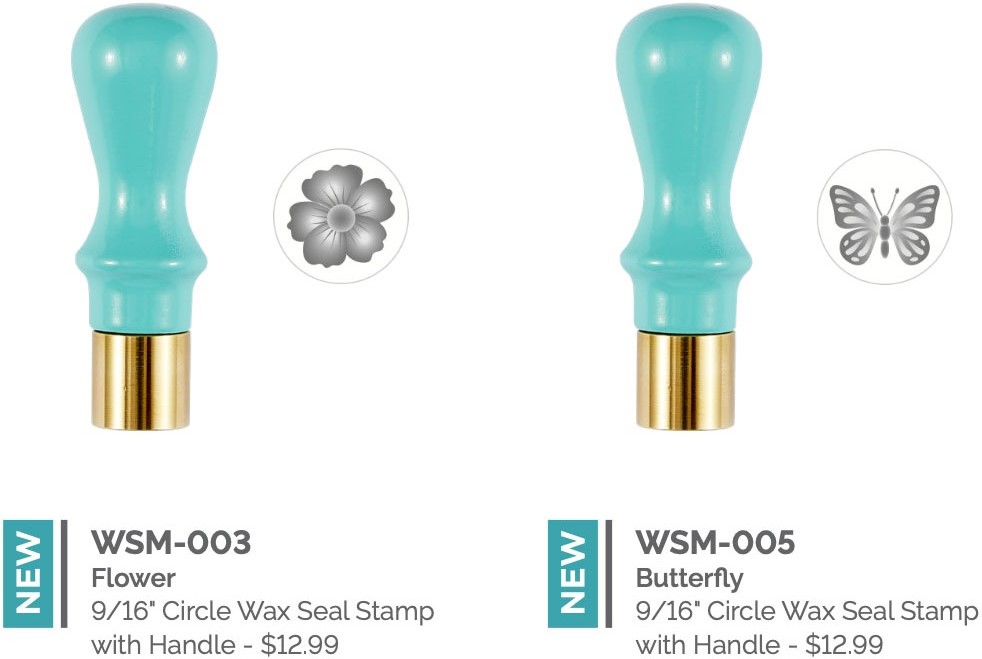
The Mini 3D Wax Seals Collection by Spellbinders offers a delightful range of miniature wax seals, each featuring intricate three-dimensional designs that add a charming touch to any project. These seals, including the Puffy Heart, Bow, Flower, and Butterfly designs, are perfect for embellishing envelopes, cards, and gift packaging. Each seal comes with a sturdy teal wooden handle and a 9/16-inch round brass stamp, ensuring crisp impressions with every use. Pair them with Spellbinders wax beads to create personalized and elegant accents for your creative endeavors.
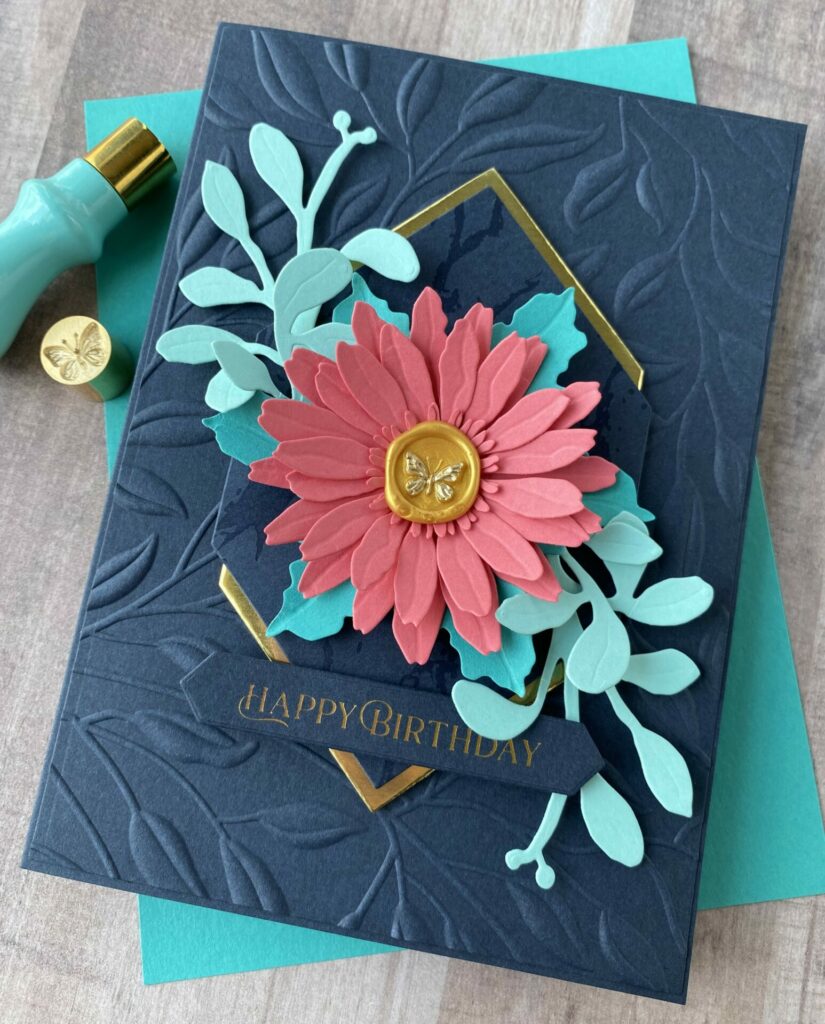
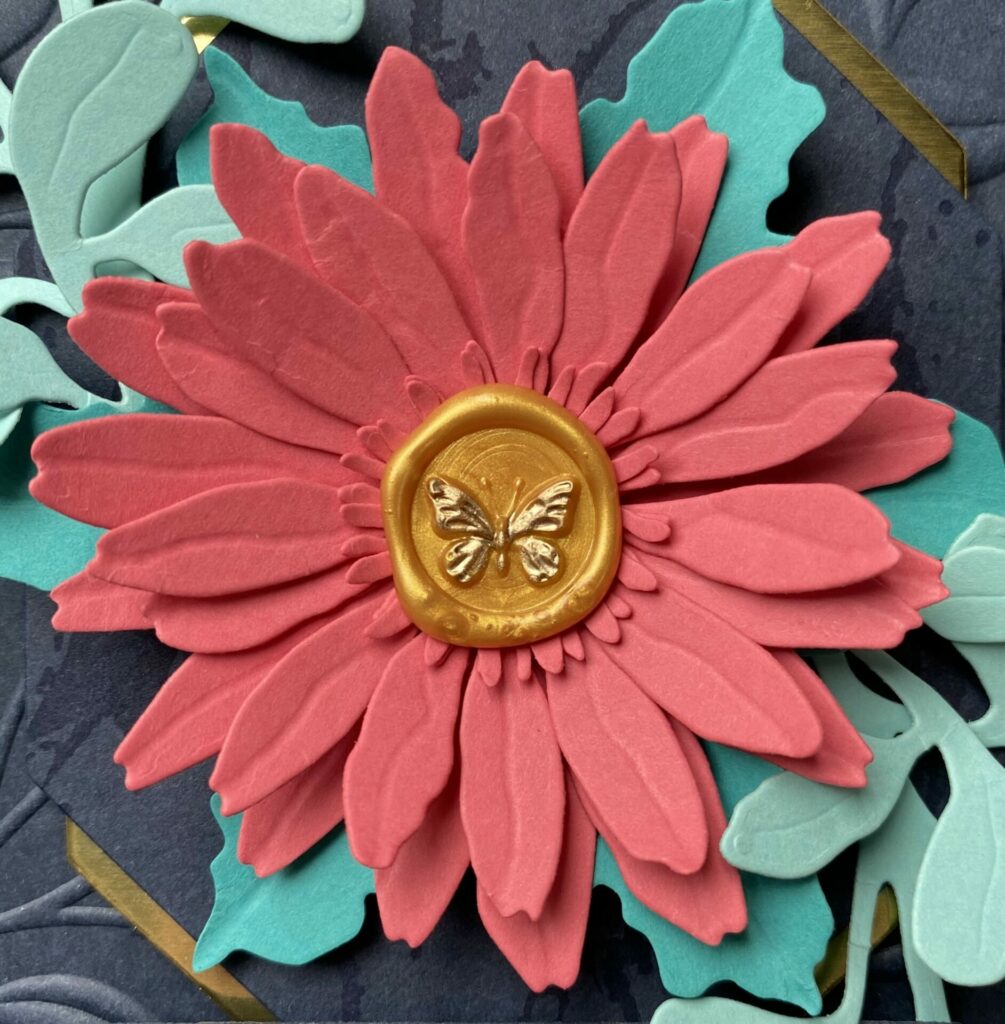
I love how that mini golden wax seal adds a pop of shine and sophistication right to the center of the flower. It’s a lovely way to blend timeless charm with modern papercrafting, and it’s surprisingly easy to work with.
Stay tuned—I’ll walk you through how it all came together!
Link Abbreviations
- SB – Spellbinders*
- Sb.com – Scrapbook.com*
- SSS – Simon Says Stamp
- AMZ – Amazon*
Disclosure: I received this product for free to try out and share my honest thoughts with you. This post also includes affiliate links*—if you decide to shop through them, I may earn a small commission (at no extra cost to you). Money earned via affiliate links helps pay the fees to keep this blog up and running. Thanks so much for supporting GroveCrafted and helping me keep the crafty inspiration coming!
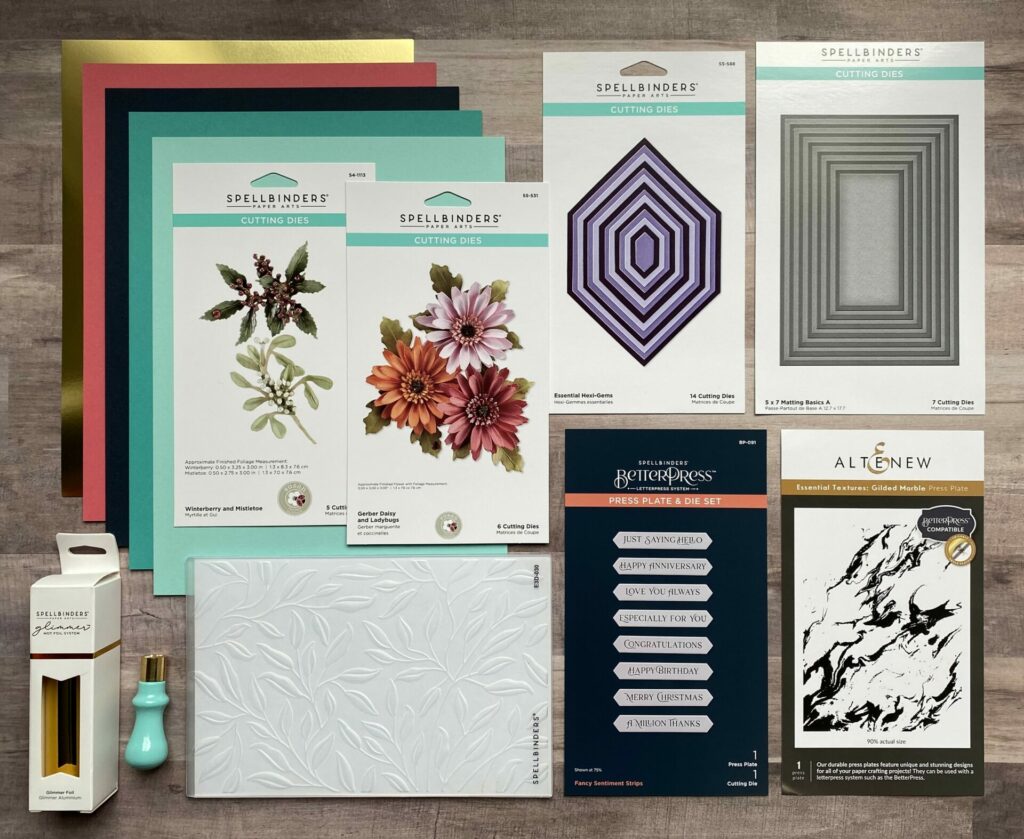
Supplies Used / Substitutions:
- Spellbinders Mini 3D Wax Seal Stamp – Butterfly #WSM-005 | SB | Sb.com |
- Spellbinders Cutting Dies – Gerber Daisy & Ladybug #S5-531 | SB | Sb.com | AMZ |
- Spellbinders Cutting Dies – Winterberry & Mistletoe #S4-1113 | SB | SSS | AMZ |
- Spellbinders Cutting Dies – Essential Hexi-Gems #S5-588 | SB | Sb.com | AMZ |
- Spellbinders Cutting Dies – 5×7 Matting Basics A #S6-001 | SB |
- Spellbinders BetterPress Plate – Fancy Sentiments Strips #BP-091 | SB | Sb.com | AMZ / Any sentiment plate or stamp
- Altenew Press Plate – Gilded Marble #ALT10048SB | SB | Sb.com / Optional
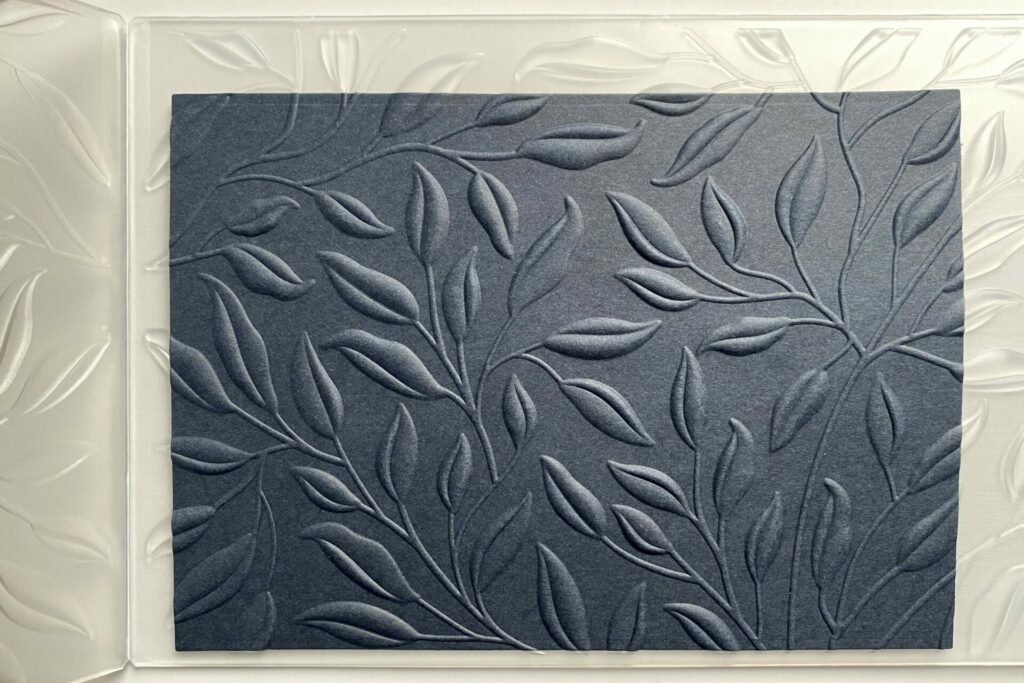
- Spellbinders 3D Embossing Folder – Leafy #E3D-030 | SB | Sb.com | AMZ / Any embossing folder
- Spellbinders ColorWheel Cardstock / Any cardstock in any color
- Spellbinders Mirror Cardstock – Gold #SCS-118 | SB | Sb.com | AMZ / Any metallic cardstock
- Spellbinders Glimmer Hot Foil – Gold #GLF-014 | SB | Sb.com / Any color glimmer hot foil
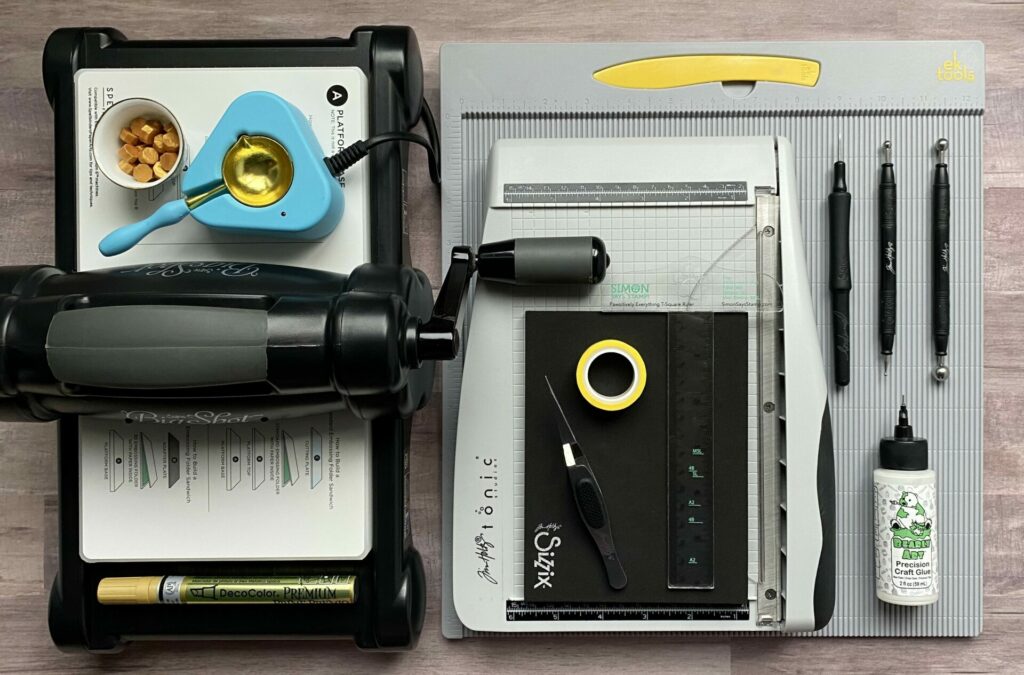
Tools Used / Substitutions:
- Spellbinders Platinum Six | SB | Sb.com / Any die cutting machine
- Spellbinders Wax Seal Starter Kit | SB | Sb.com / Any wax seal warmer
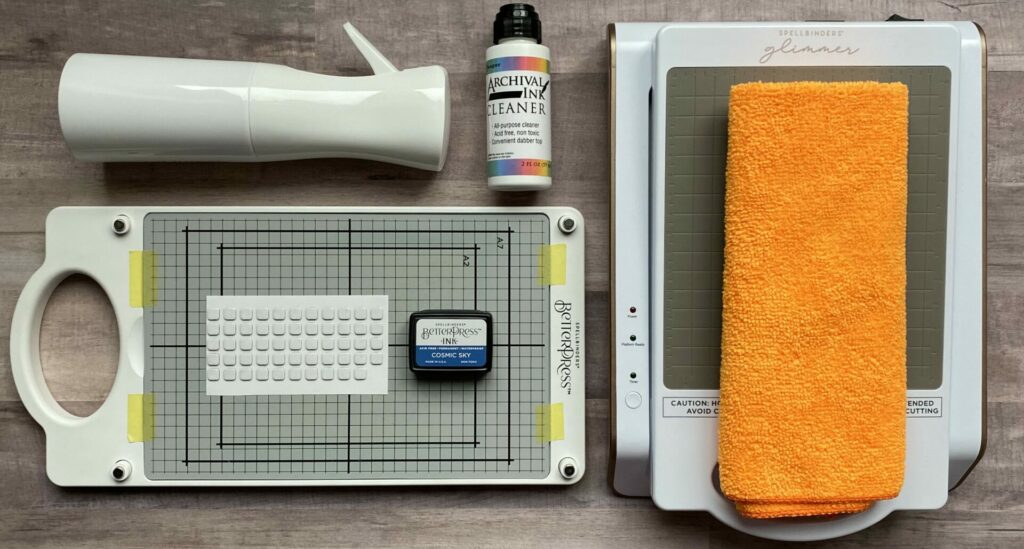
- Spellbinders Glimmer Hot Foil System | SB | Sb.com | Optional
- Spellbinders BetterPress Letterpress System | SB | Sb.com | AMZ / Optional
- Tim Holtz Comfort Paper Trimmer | Sb.com | AMZ | SSS / Any paper trimmer
- EK Scoring Board | AMZ | SSS / Any scoring board
- Bearly Art Glue | SB | Sb.com | AMZ / Any liquid adhesive
- Spray Bottle with water | SB | Sb.com | AMZ / Any spray bottle
- Tim Holtz – Shaping Kit #665304 | Sb.com / Any shaping tools
- Die Pick | Sb.com / Toothpick
- Spellbinders Wax Beads – Gold #WS-030 | SB | Sb.com | AMZ / Any color wax beads
- Uchida DecoColor Premium Metallic Marker – Gold | SB | Sb.com |
- BetterPress Ink – Cosmic Sky #BPI-003 | SB | Sb.com / Any dark blue ink
- Archival Ink Cleaner | SB | Sb.com | SSS |
- Microfiber Cloth | SSS / Any old small towel
- Foam Squares – Black | SSS / Craft foam
- Best Ever Craft Tape – 5/8 in | SB | Sb.com / Any low tack tape
- T-Square | SSS |
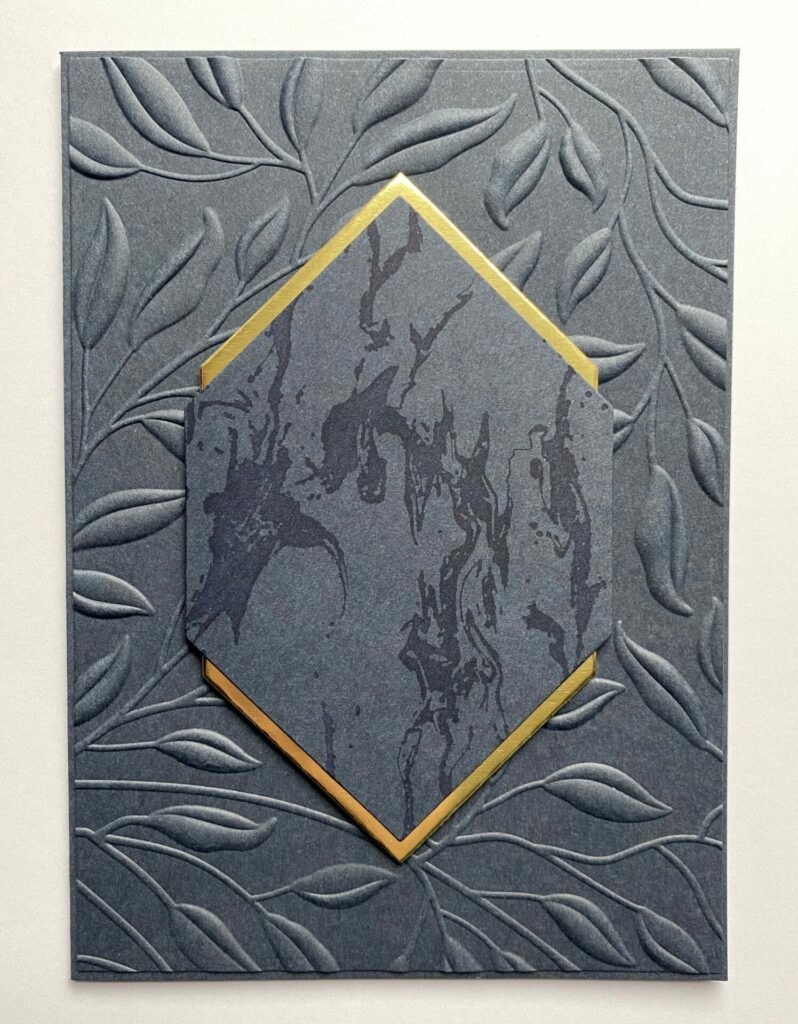
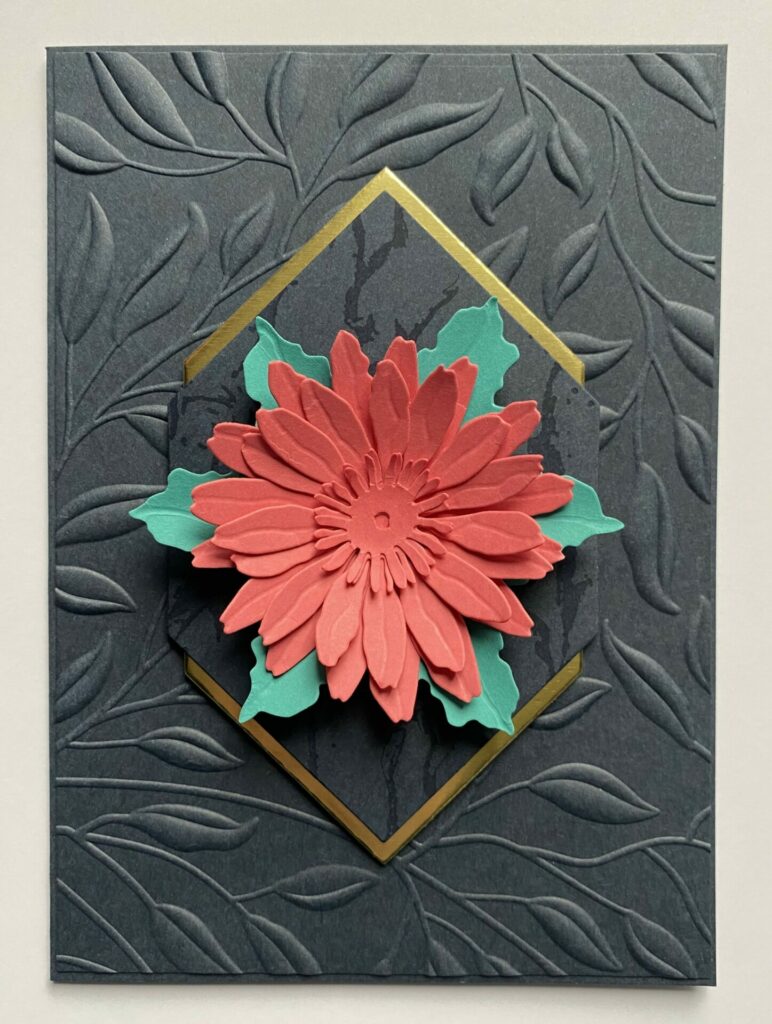
Making the Card Base
- Score the indigo cardstock at the 5-inch mark, then fold it in half.
- Use a paper trimmer to cut the folded cardstock to a 5×7-inch card base and set it aside.
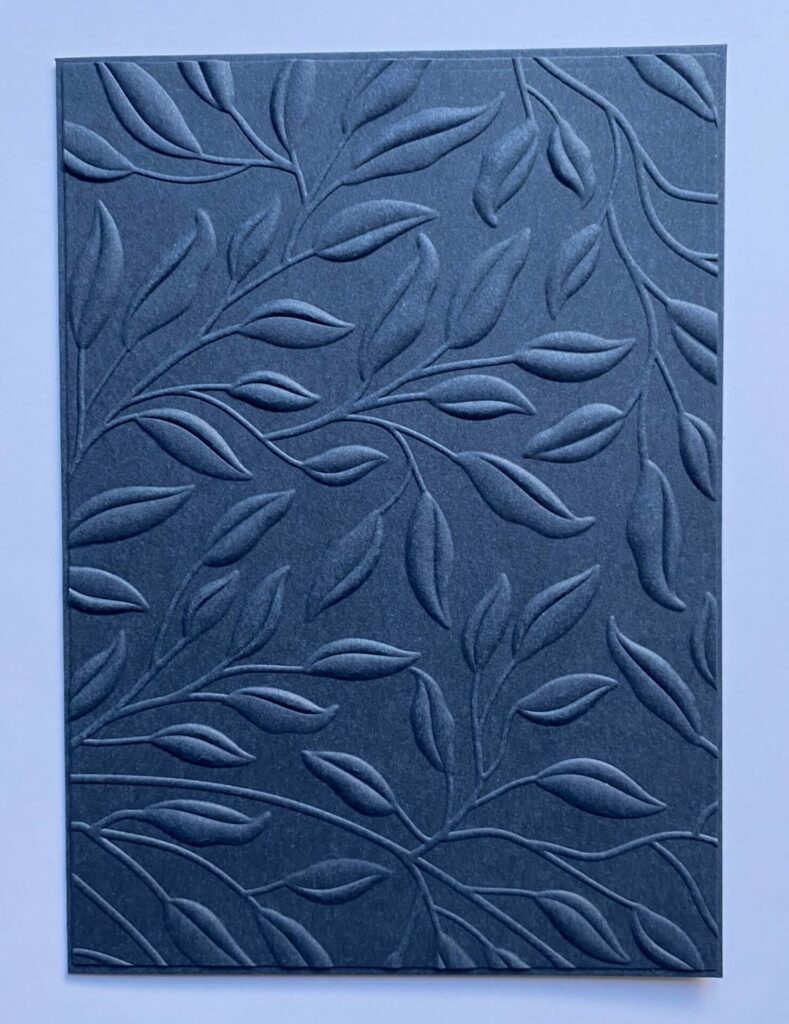
- Die cut a panel from indigo cardstock using the largest die from the 5×7 Matting Basics A die set.
- Lightly mist both sides of the die-cut panel with water, then place it inside the Leafy 3D embossing folder.
- Run it through your die-cutting machine, then set a flat cutting pad on top while it dries to prevent warping.

- Once dry, glue the embossed panel to the front of the 5×7 card base and place a heavy object on top to ensure a secure bond.
Creating the Gilded Marble Background
Tips
To start, securely attach the magnetic insert to the chase using best ever craft tape. This will prevent any movement of the magnetic insert, enabling you to repress your design again. Why is this important? It allows you the flexibility to re-ink the BetterPress plate if needed, experiment with color combinations, or achieve a gradient effect.
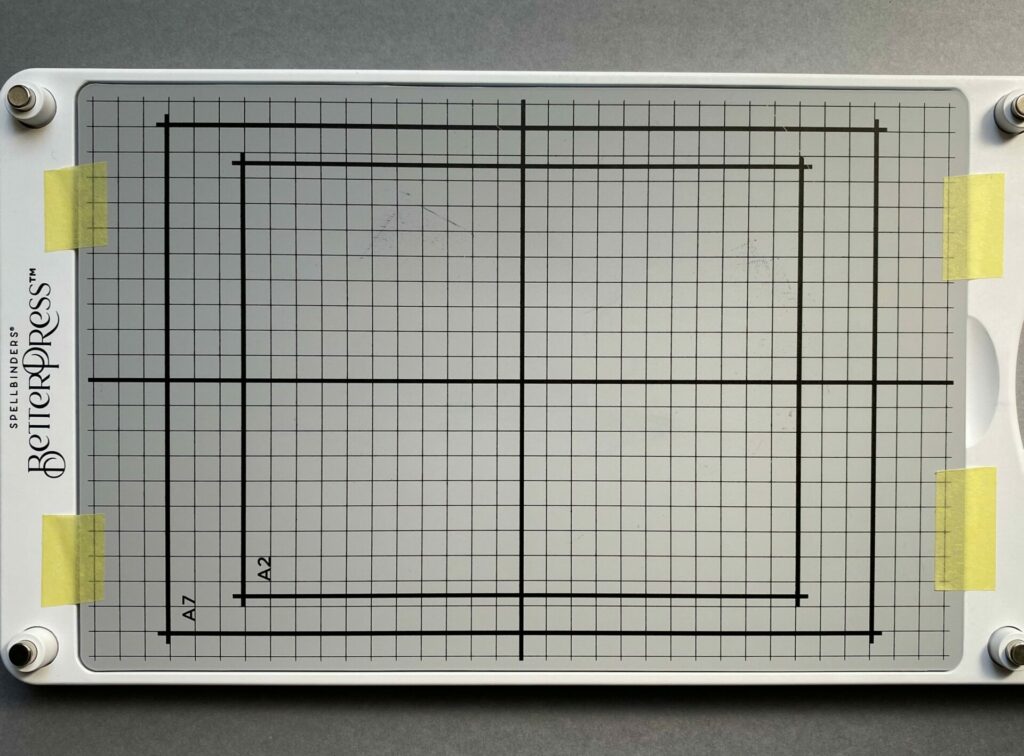
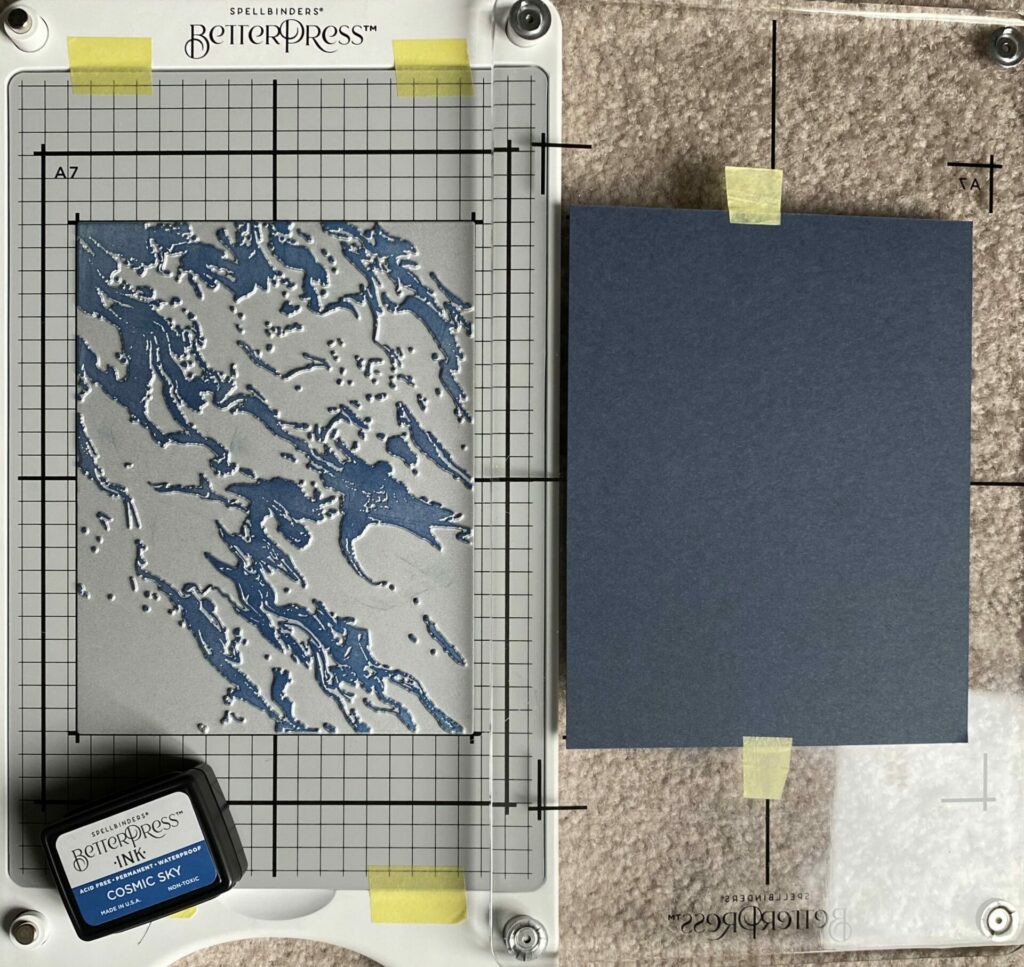
- Position the Gilded Marble press plate in the center of the A2 grid lines on the chase.
- Trim a piece of indigo cardstock to 4¼ x 5½ inches and secure it to the platen with tape, aligning it with the A2 guidelines.
- Ink the press plate with Cosmic Sky BetterPress ink.
- Place the platen onto the chase, ensuring the paper faces downward. You’ll hear a clicking sound when the magnets align—DO NOT PRESS DOWN.
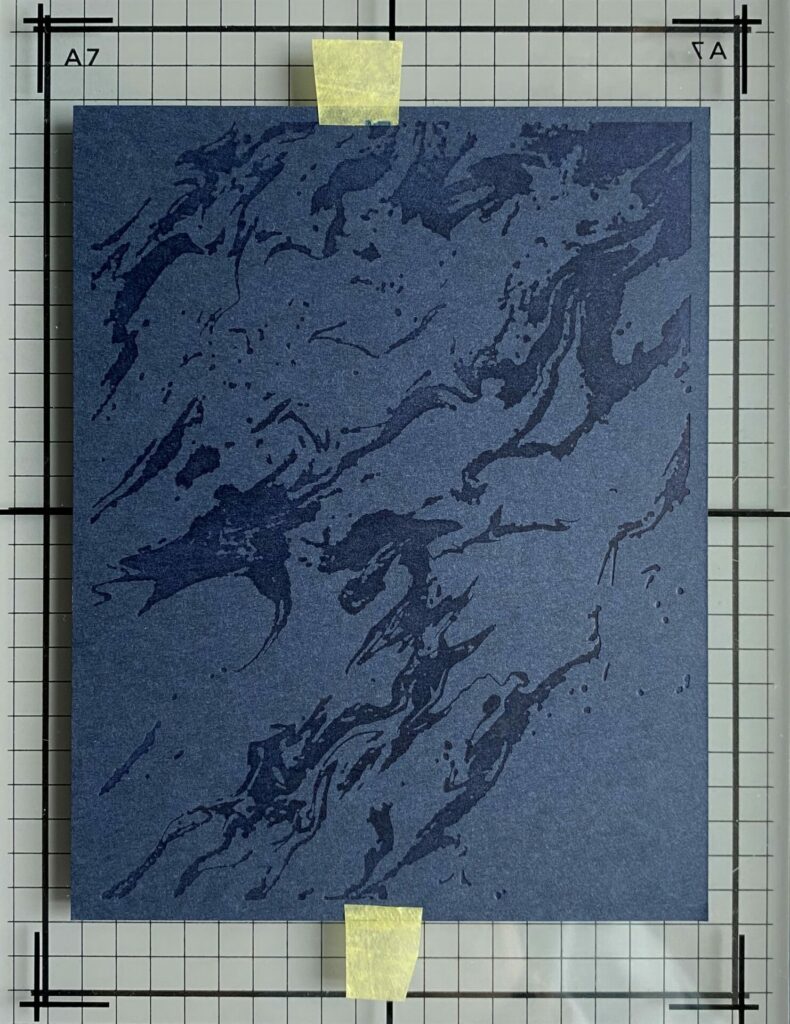
- Run it through your die-cutting machine once.
- Remove the platen and inspect the print. If any areas appear uneven, reapply ink and press again without moving the plate. (I repeated this process three times for a rich, even impression.)
- Once finished, clean any remaining ink from the BetterPress plate and chase using archival ink cleaner to prevent staining.

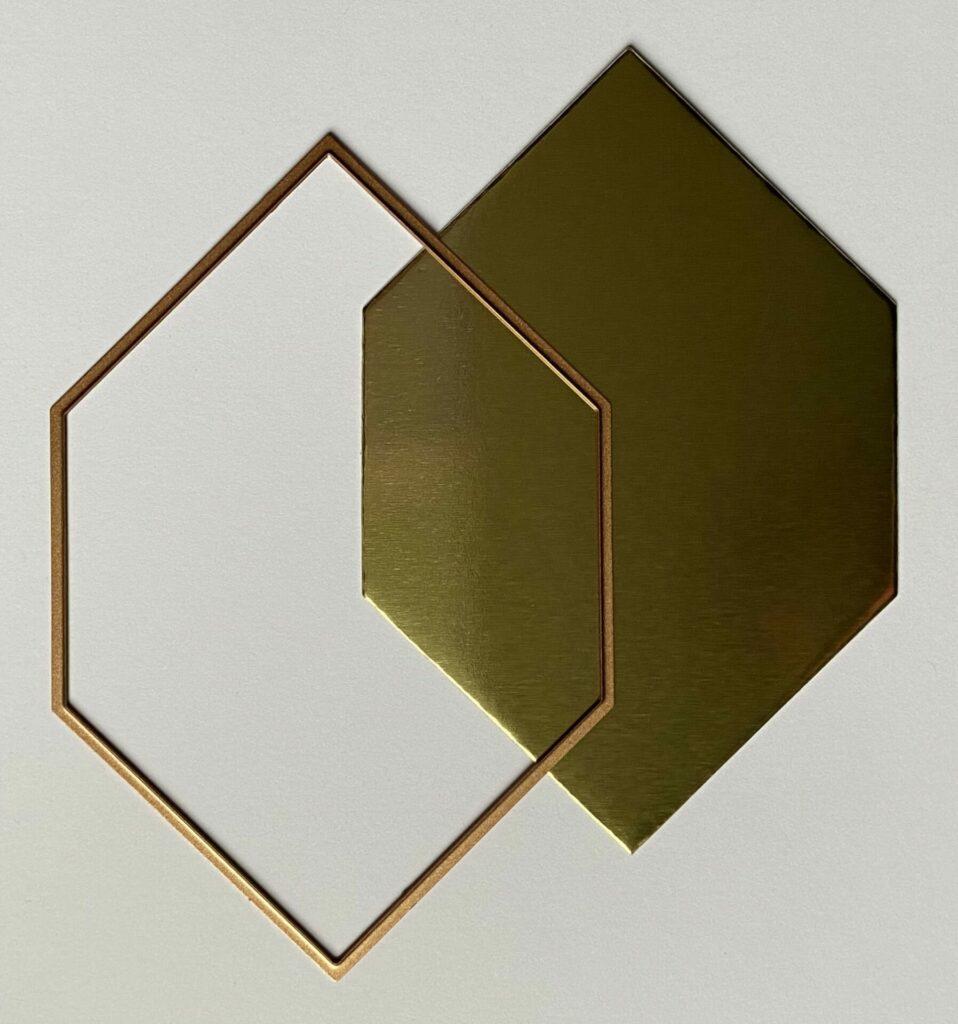
Assembling the Hexi-Gem Panel
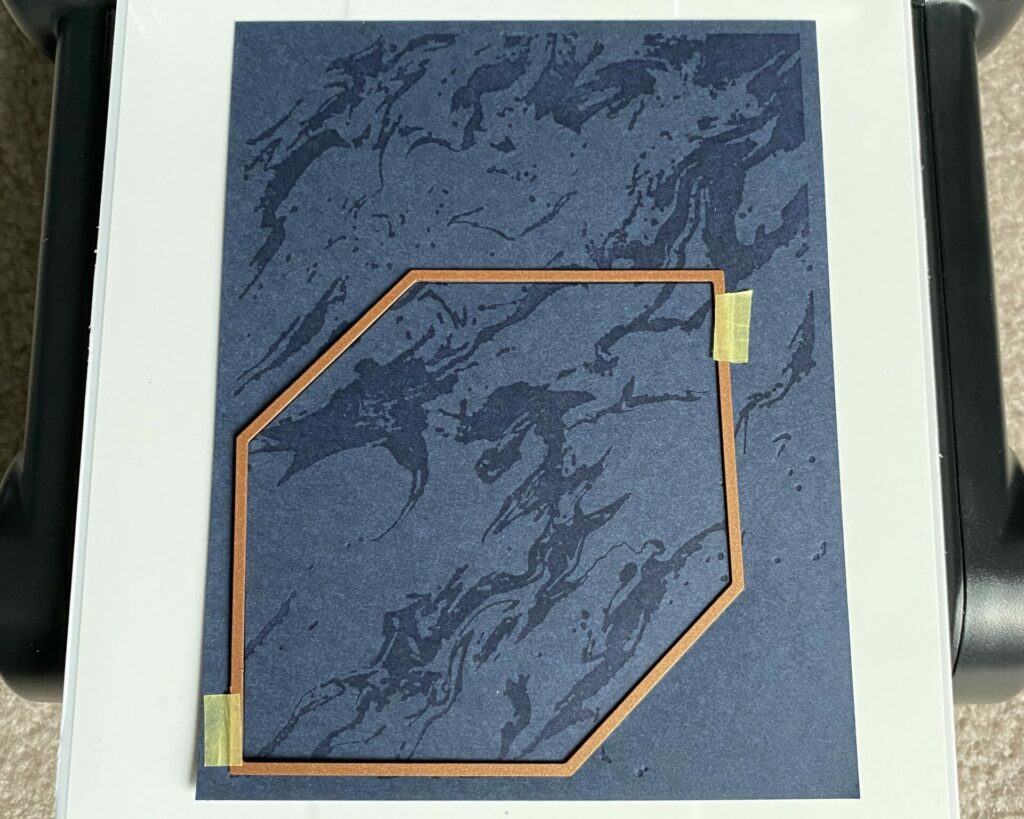
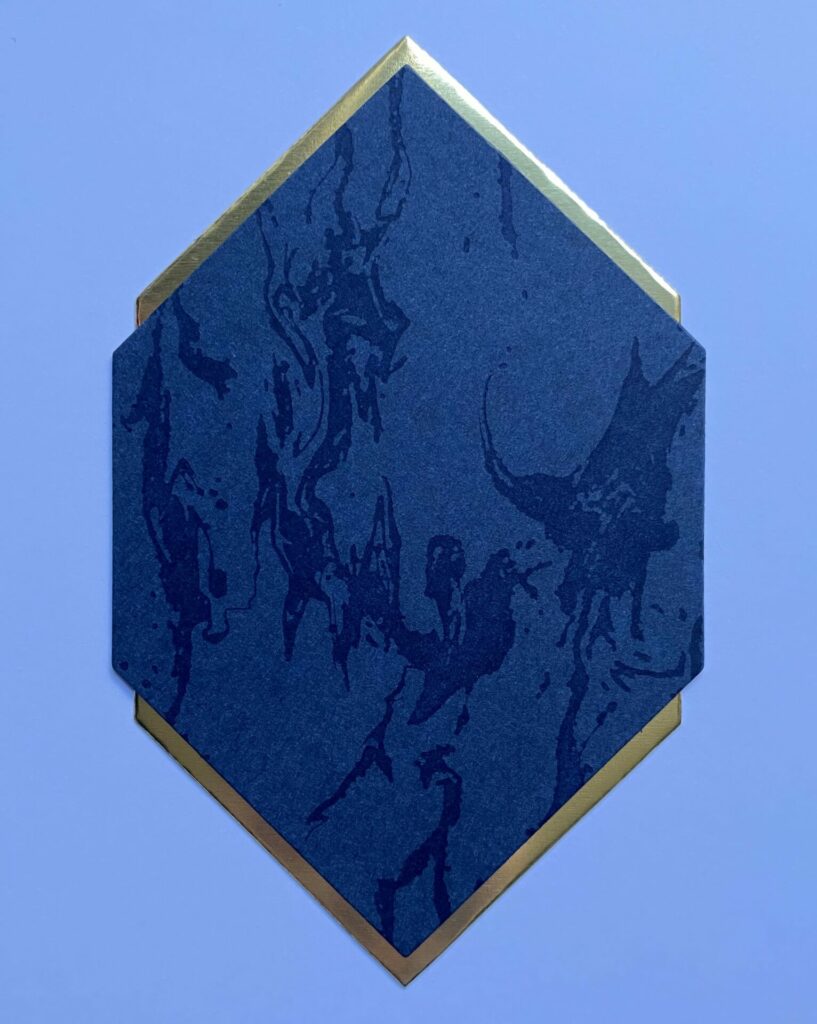
- Die cut using the third-largest hexi-gem die from the marbled BetterPress panel.
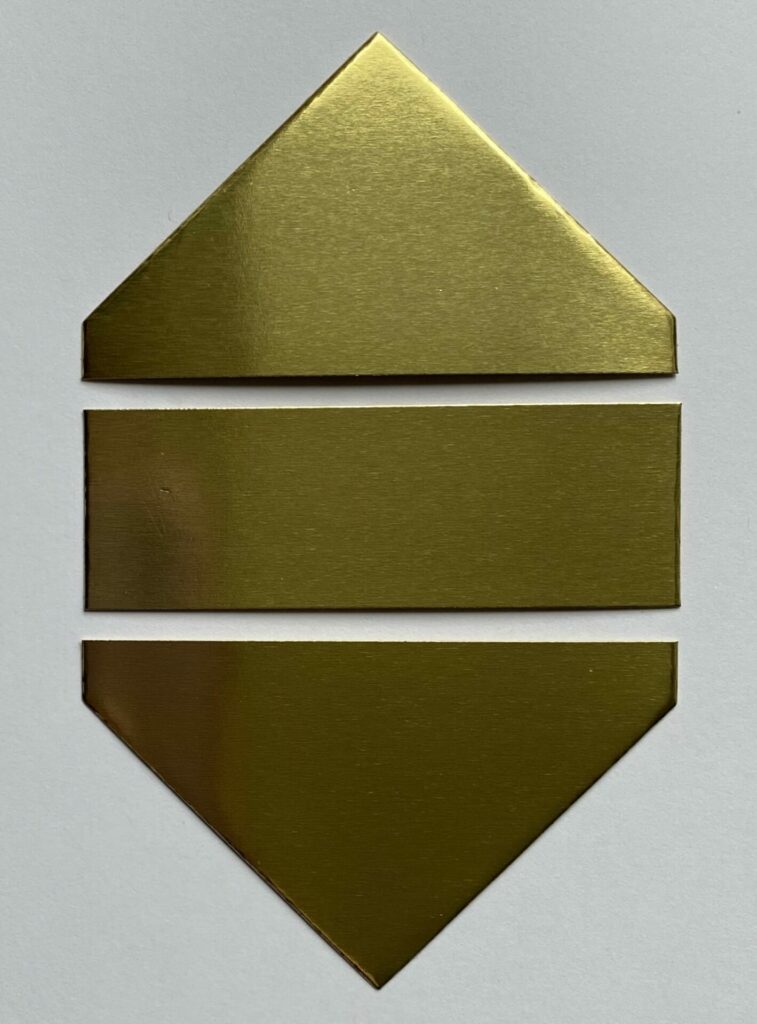
- Die cut using the fourth-largest hexi-gem die from gold mirror cardstock.
- Trim off the top and bottom portions of the gold hexi-gem die cut using a paper trimmer.
- Glue the gold layer behind the marbled layer, leaving an ⅛-inch border on the top and bottom for a subtle metallic accent.
- Add foam squares to the back of the assembled hexi-gem and adhere it to the center front of the card base.
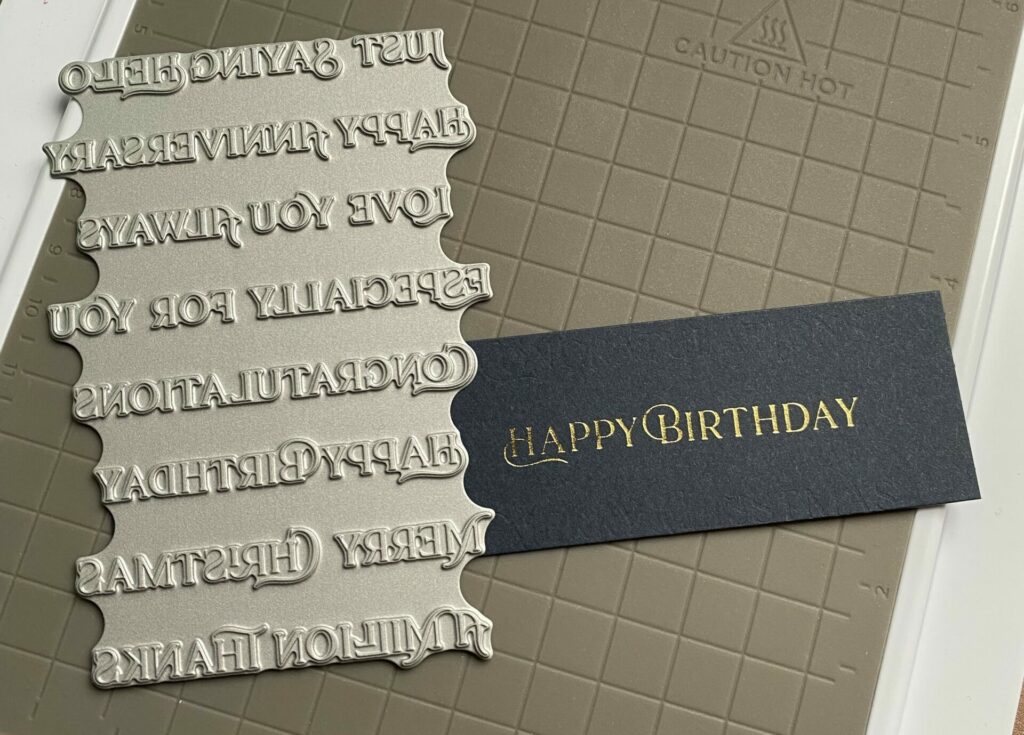
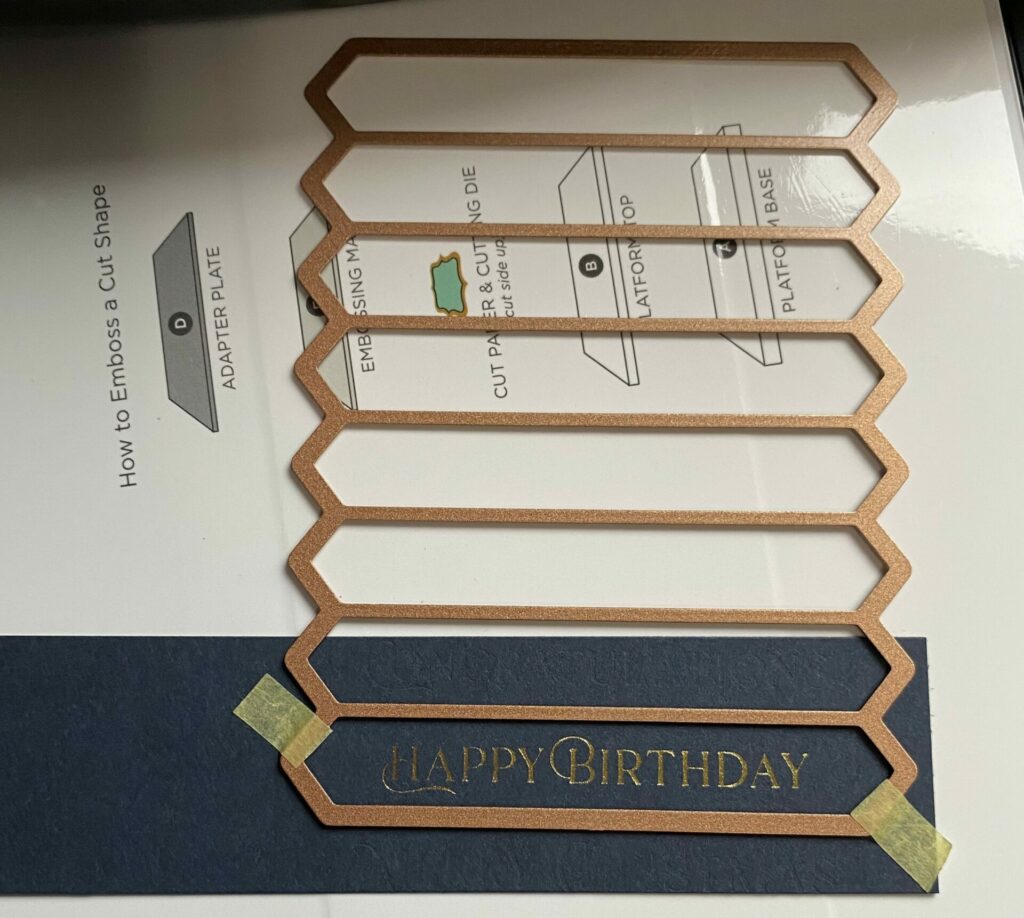
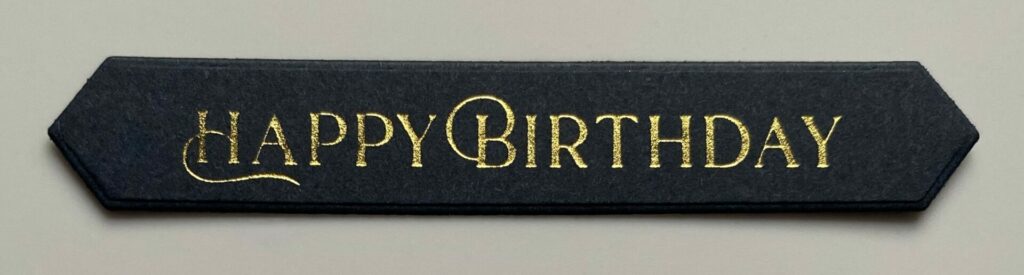
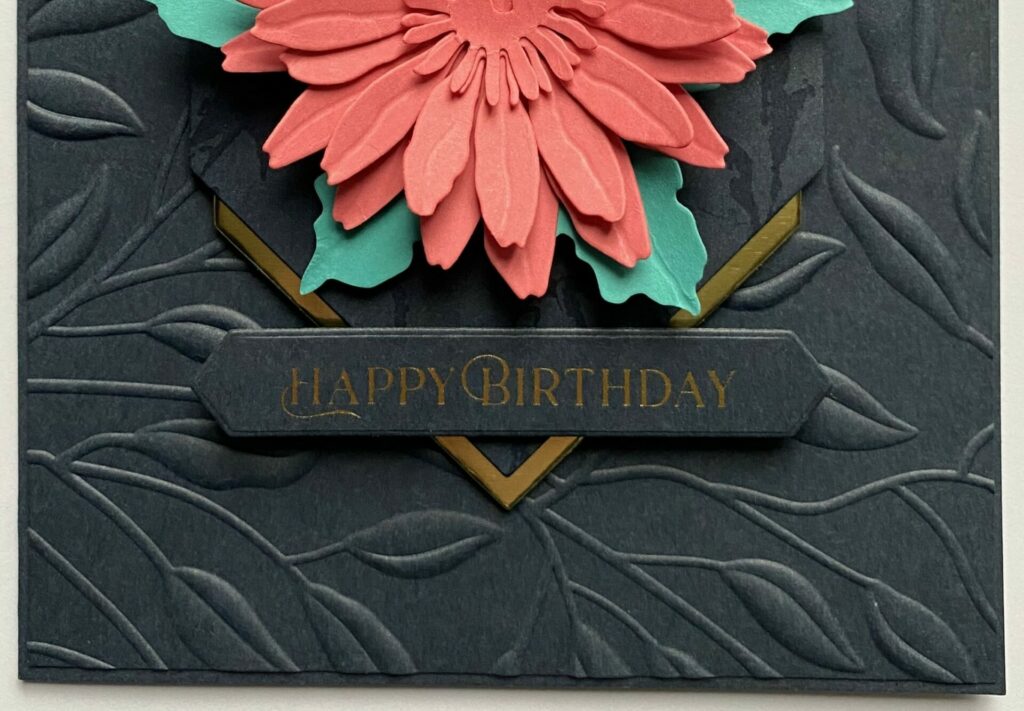
Hot Foiling the Sentiment
- Using your Glimmer machine, foil the “Happy Birthday” sentiment onto indigo cardstock using gold foil.
- Die cut the sentiment with the coordinating die.
- Set it aside for later use.
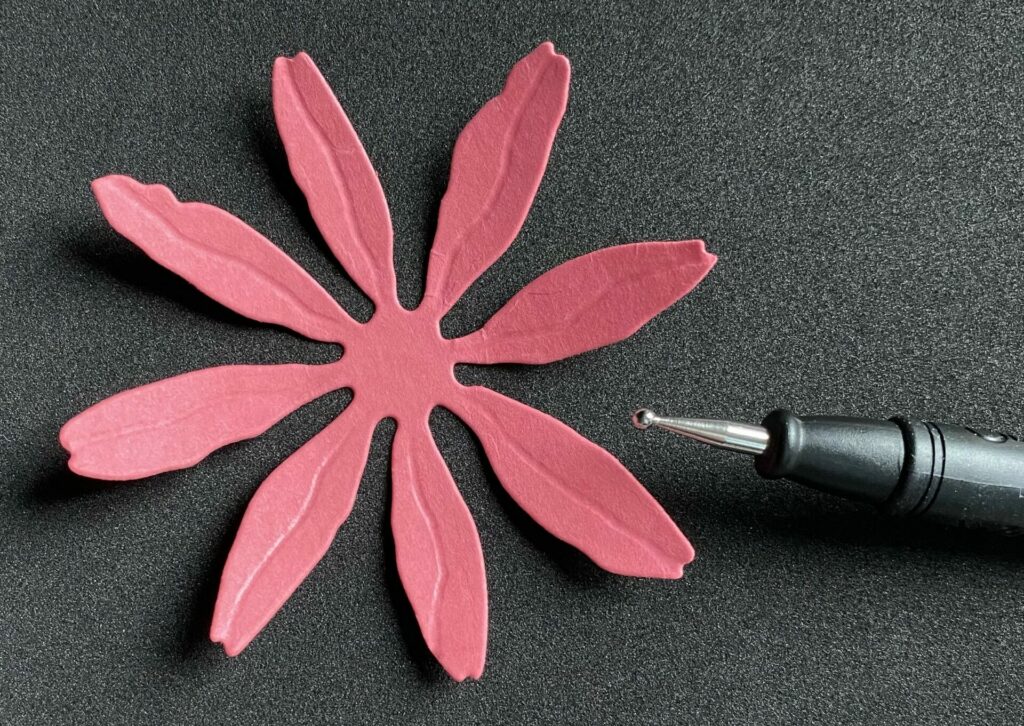
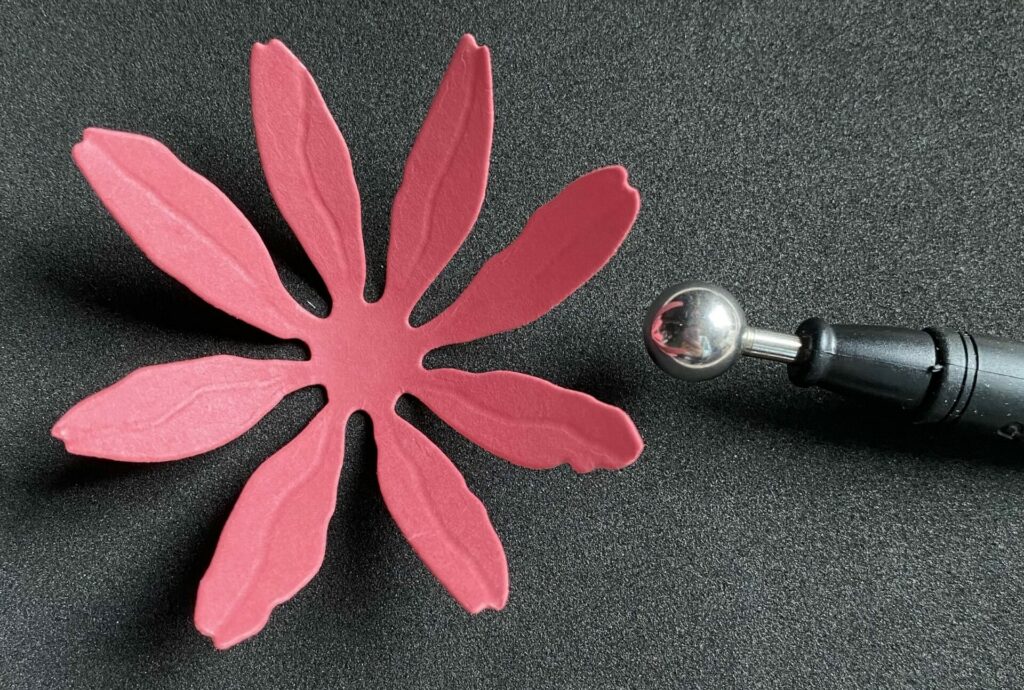
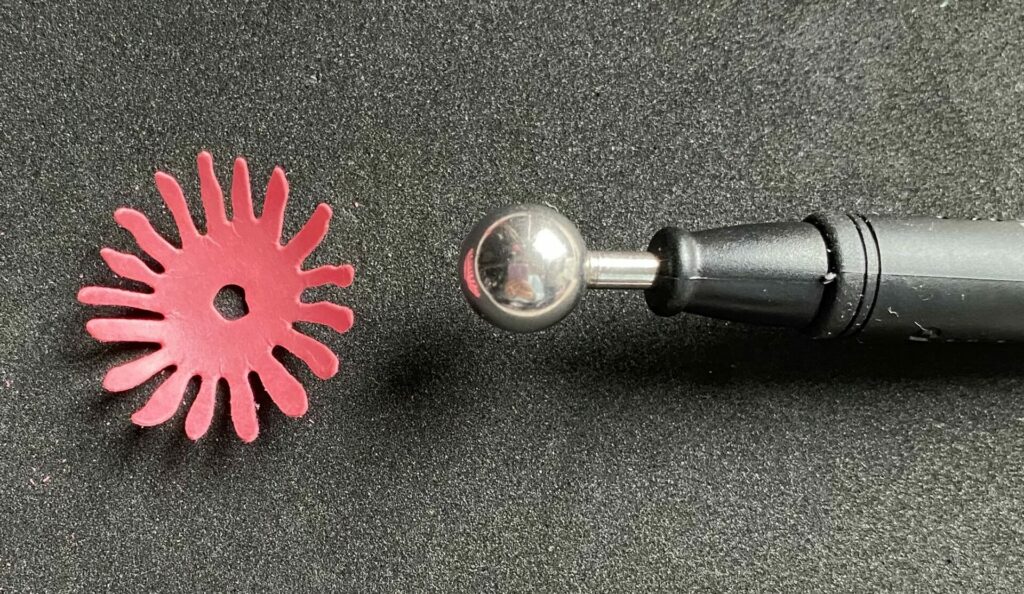
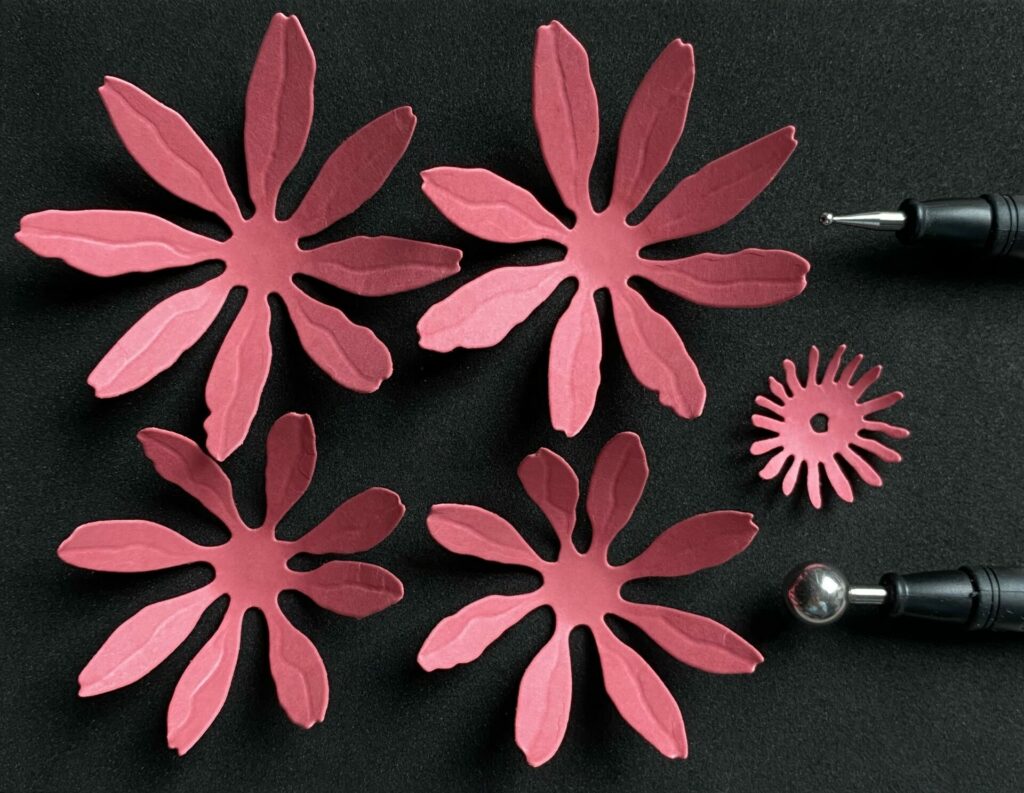
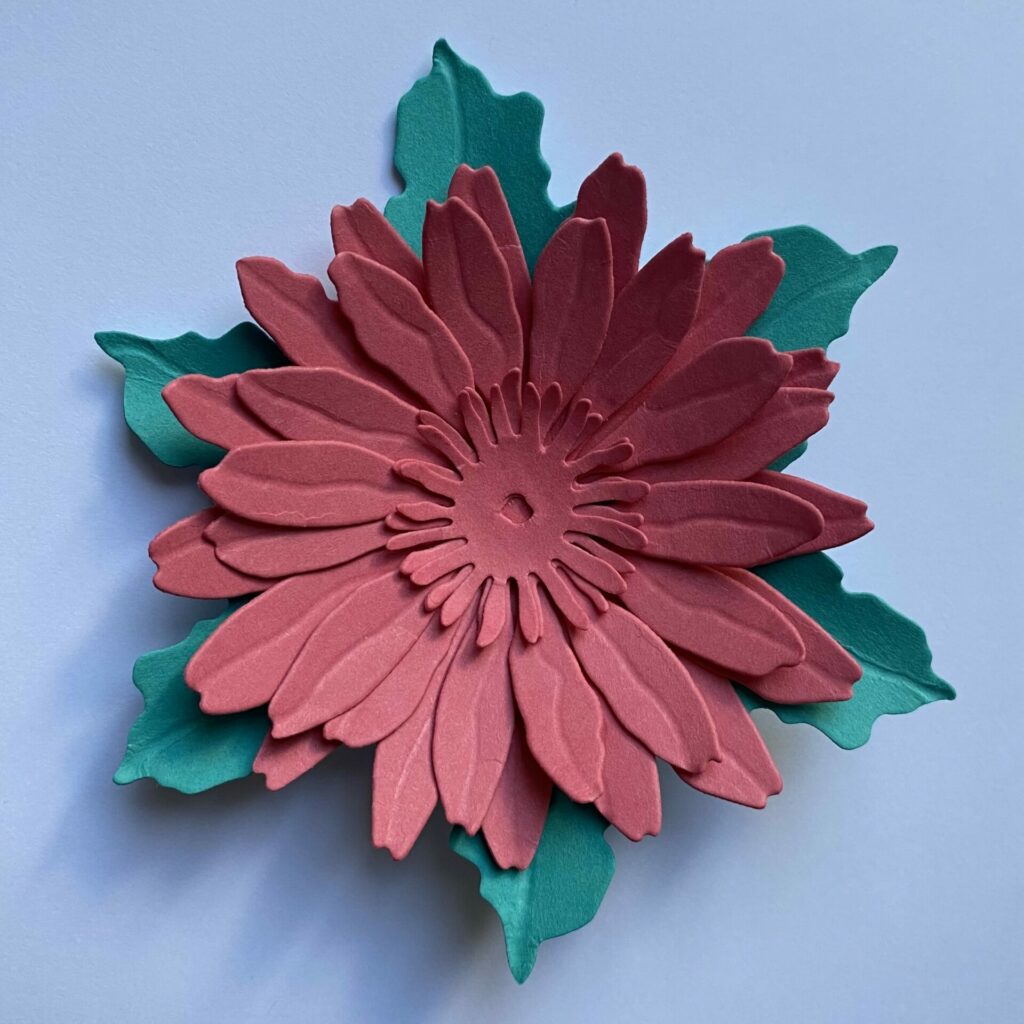
Cutting & Shaping the Daisy
Die Cutting:
-
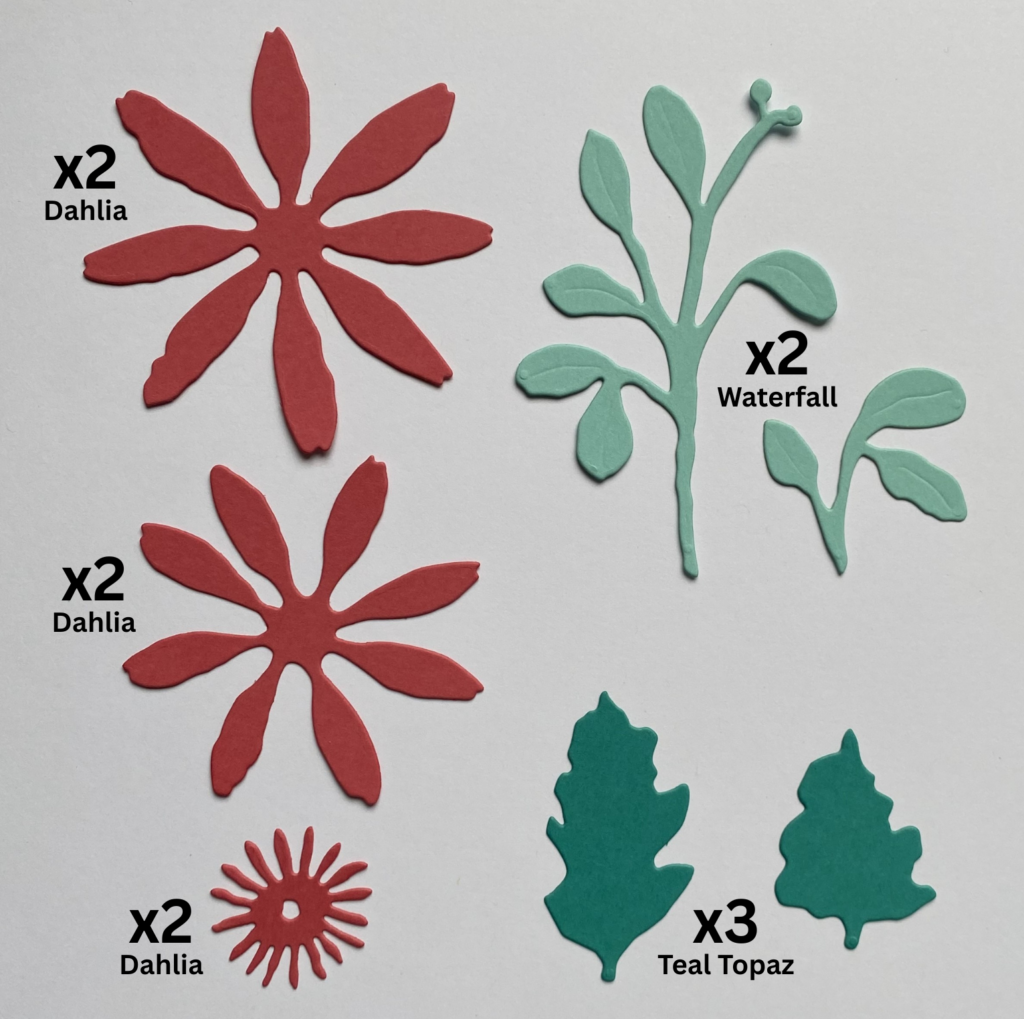
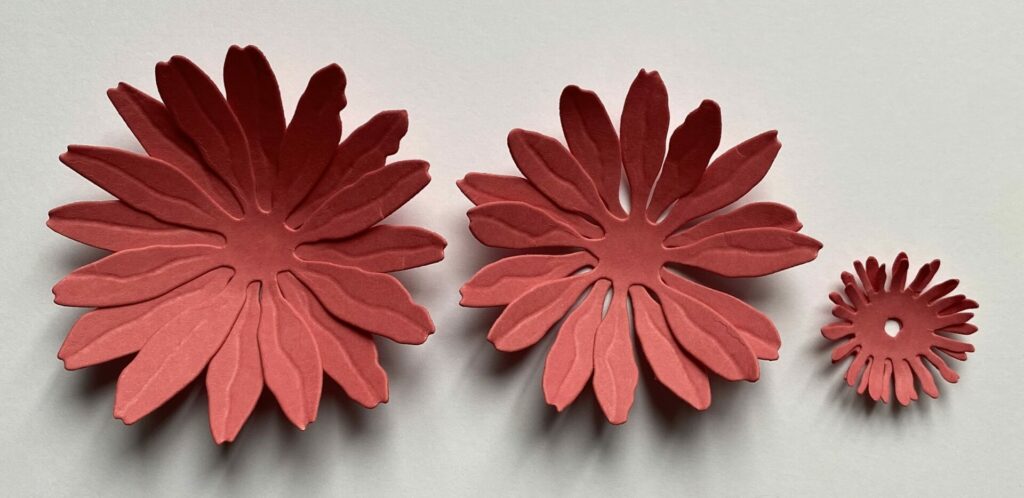
- Cut the large and medium layers of the daisy flower twice from dahlia cardstock.
- Cut the large flower center twice from dahlia cardstock.
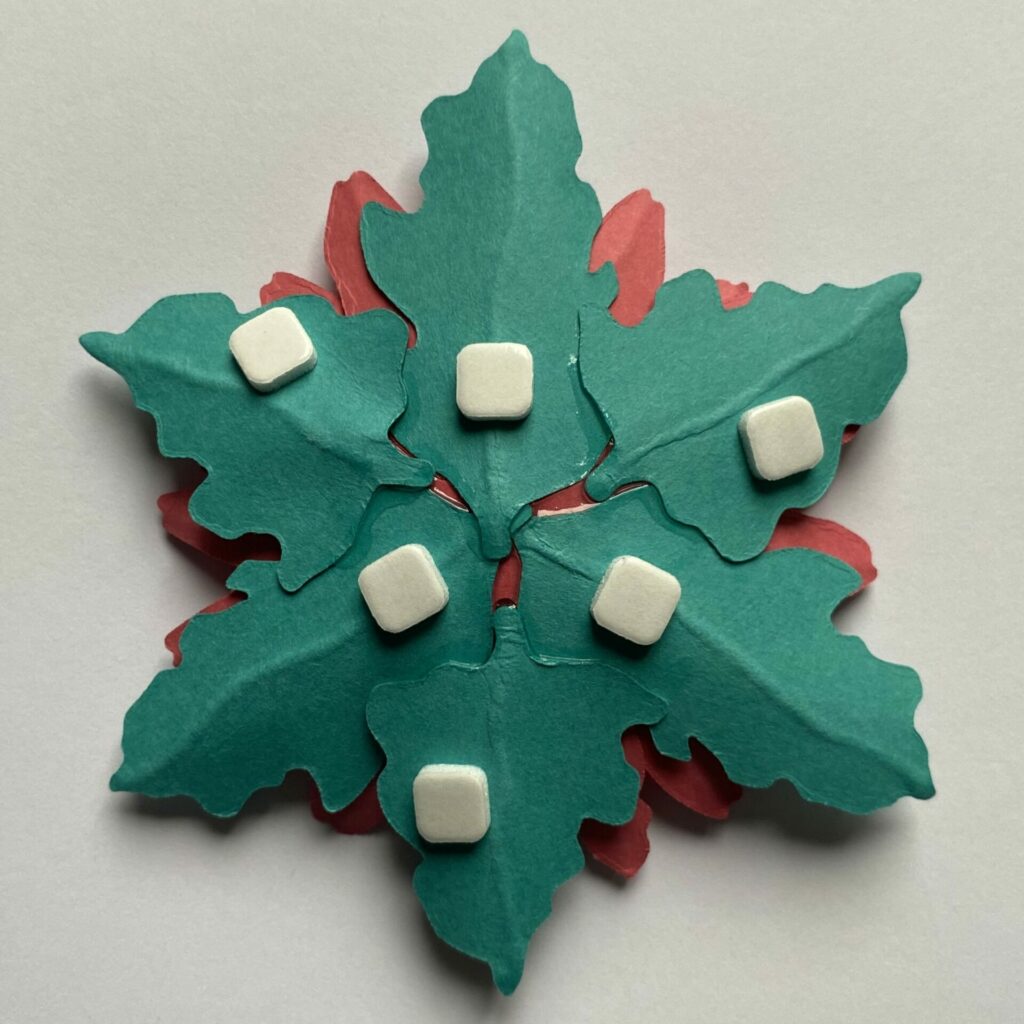
- Cut each daisy leaf three times from teal topaz cardstock.
- Cut the mistletoe greenery twice from waterfall cardstock.
Shaping the Daisy Flower:
-
- Lightly mist both sides of the flower die cuts with water to make them more pliable.
- Using the smallest shaping tool and a foam mat, emboss a line down the center of each petal.
- Switch to the medium shaping tool and press it into the center of the flower in a circular motion. This will lift the petals, adding dimension and a natural shape.
- Repeat step 3 on the flower center die cuts using the medium shaping tool for added depth.
- Allow all die cuts to air dry completely before assembling.
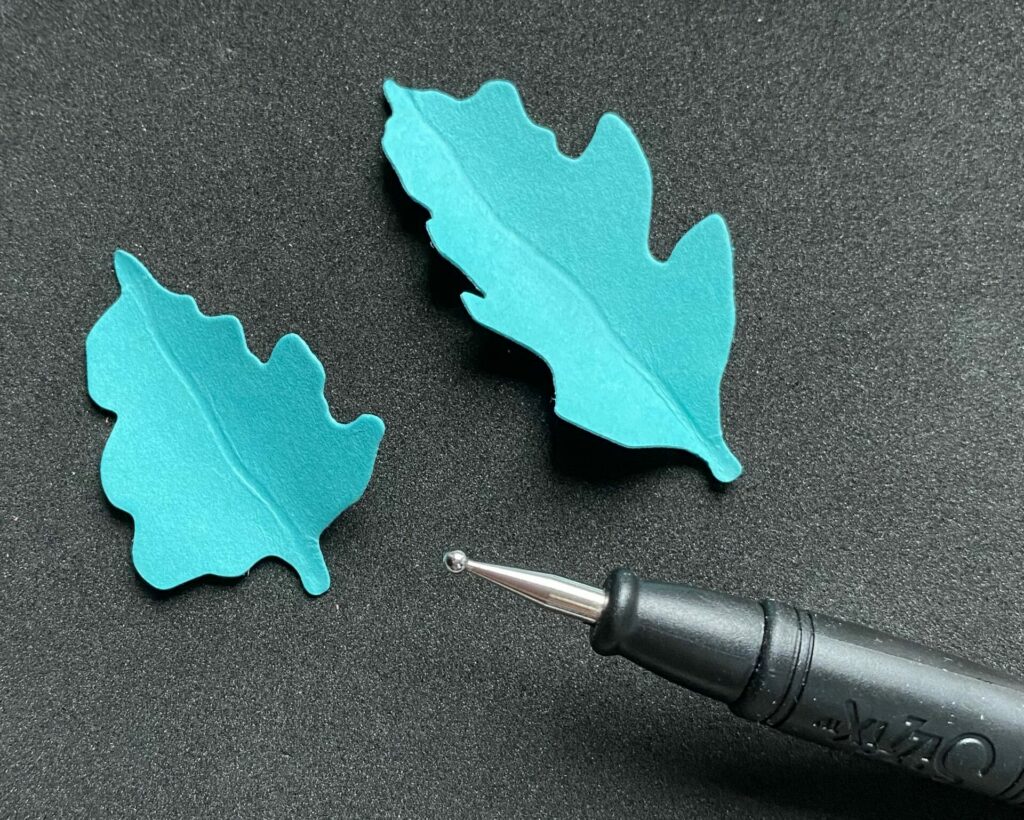
Shaping the Daisy Leaves:
- Lightly mist both sides of the daisy leaf die cuts with water to make them more pliable.
- Using the smallest shaping tool and a foam mat, emboss a line down the center of each leaf.
- Using your fingers, press the leaf stem together and gently bend the edges to add dimension.
Assembling the Daisy
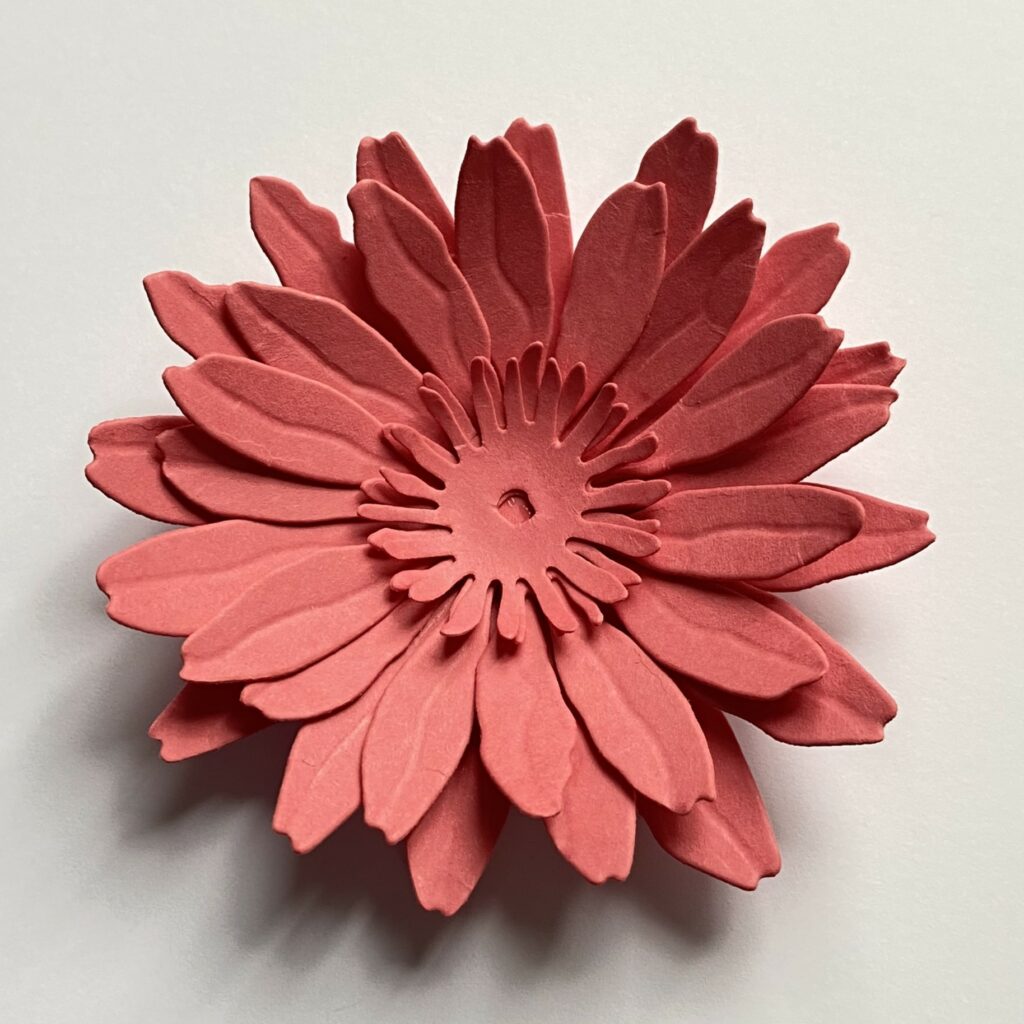
- Glue the two large daisy layers together, slightly offsetting them for added dimension.
- Repeat this step for the medium daisy layers and the large flower center.
- Attach the medium daisy layer on top of the large daisy, again slightly offsetting them.
- Glue the flower center to the middle of the assembled daisy.
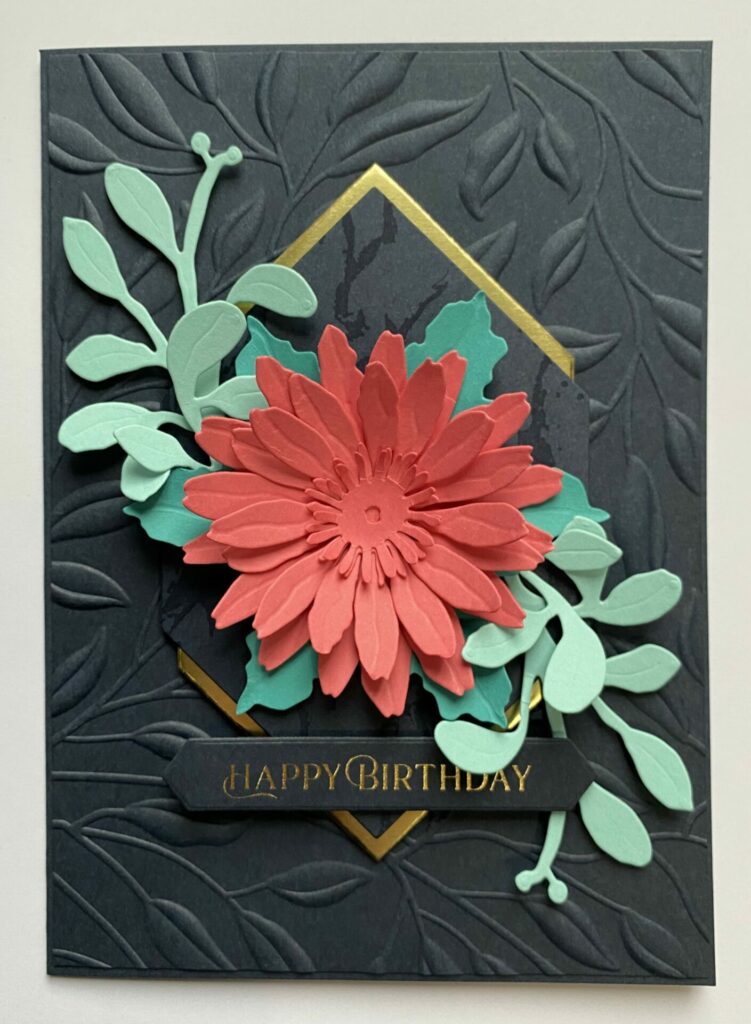
- Adhere the teal topaz die cut leaves behind the flower, using the reference photo as a guide.
- Allow the glue to dry completely before handling.
Attaching the Florals
- Attach small foam squares to the back of the daisy flower.
- Center the daisy on the front of the card, placing it within the hexi-gem panel.
- Place small foam squares on the back of the sentiment strip. Position it just below the daisy, and use a T-square to ensure it is aligned straight.
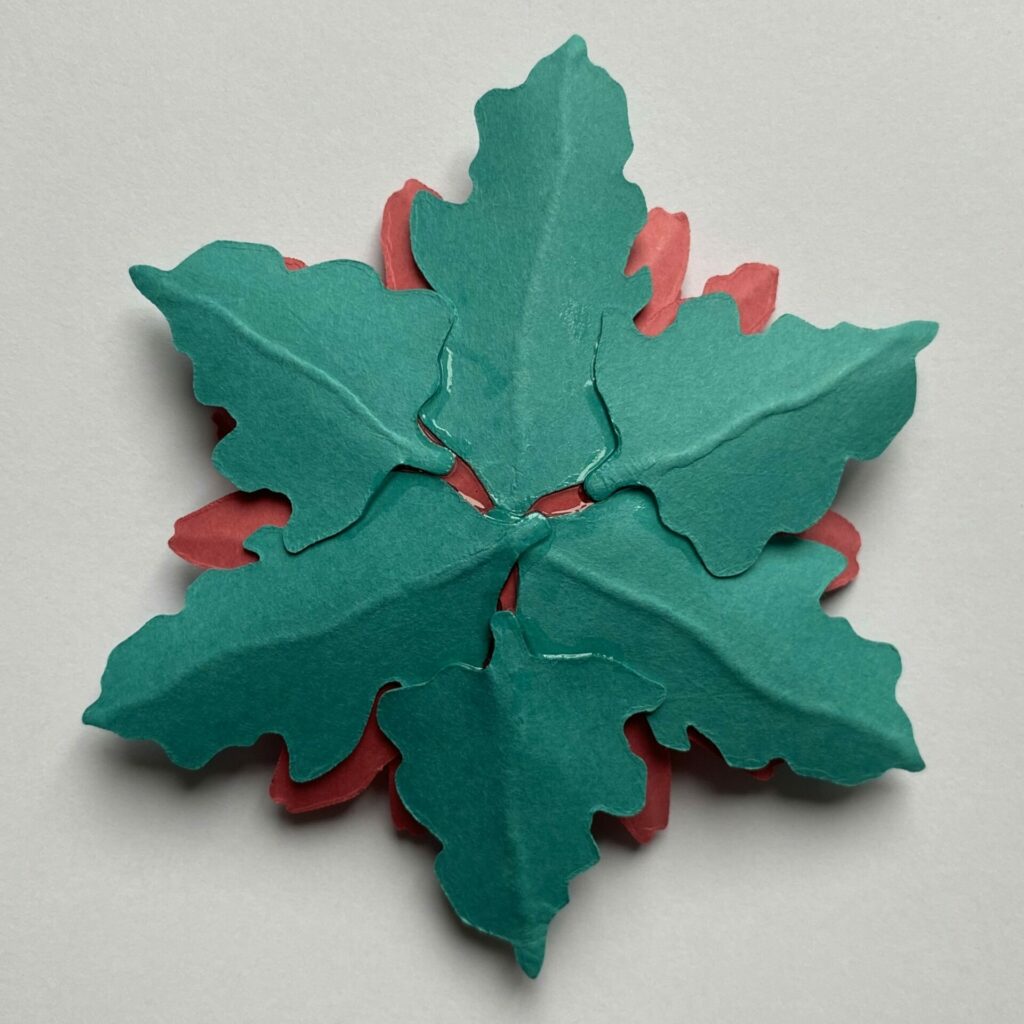
- Tuck the larger mistletoe greenery die cuts behind the daisy—one in the upper left and one in the lower right corner. Secure them in place using small foam squares cut in half and a bit of glue.
- Layer the smaller mistletoe greenery on top for added depth and dimension.
Creating the Wax Seal
- Place two gold wax beads in a warming spoon and melt them completely.
- Once melted, carefully pour the wax onto a silicone mat.
- Press the butterfly mini wax seal stamp into the wax while it’s still warm.
- Allow the wax to cool completely before gently removing the stamp.
- Use a gold DecoColor metallic marker to highlight the butterfly for an elegant touch.
- Use glue to securely attach the butterfly wax seal to the center of the daisy on the butterfly blooms birthday card.

Butterfly Blooms Birthday Card Complete!
And that’s a wrap on the Butterfly Blooms Birthday Card! I hope you had as much fun following along as I did putting it together. If you try this project (or put your own spin on it), I’d love to see what you create—be sure to tag me (@silversgrove or @grovecrafted) over on Instagram! Thanks so much for stopping by the blog today—I hope this tutorial sparked some inspiration for your next crafty session. Until next time, happy creating!
If you enjoyed making this Butterfly Blooms Birthday Card, you won’t want to miss the Beary Sweet Birthday Card tutorial—featuring a wax seal and a fun caring bear!