Crafting with Corners and Curves
Spellbinders – Lined Circles & Corners
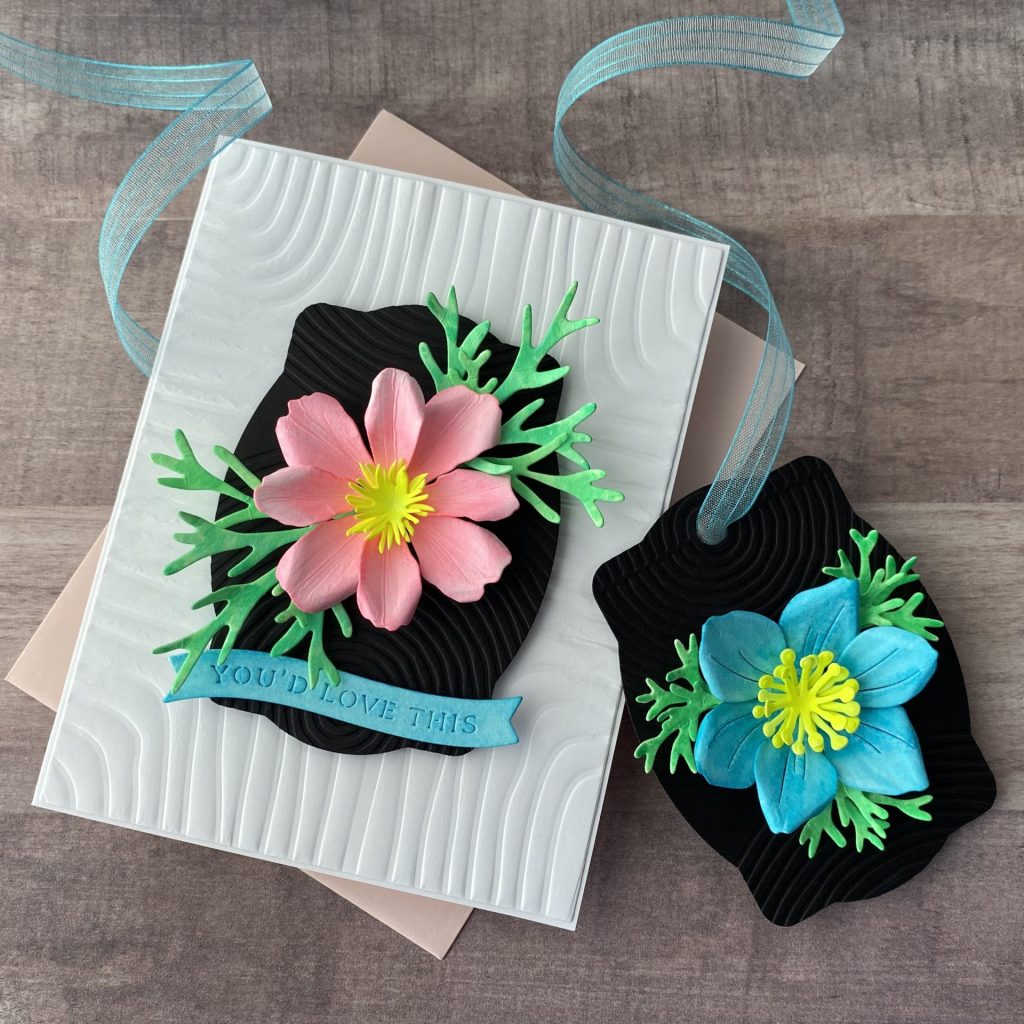
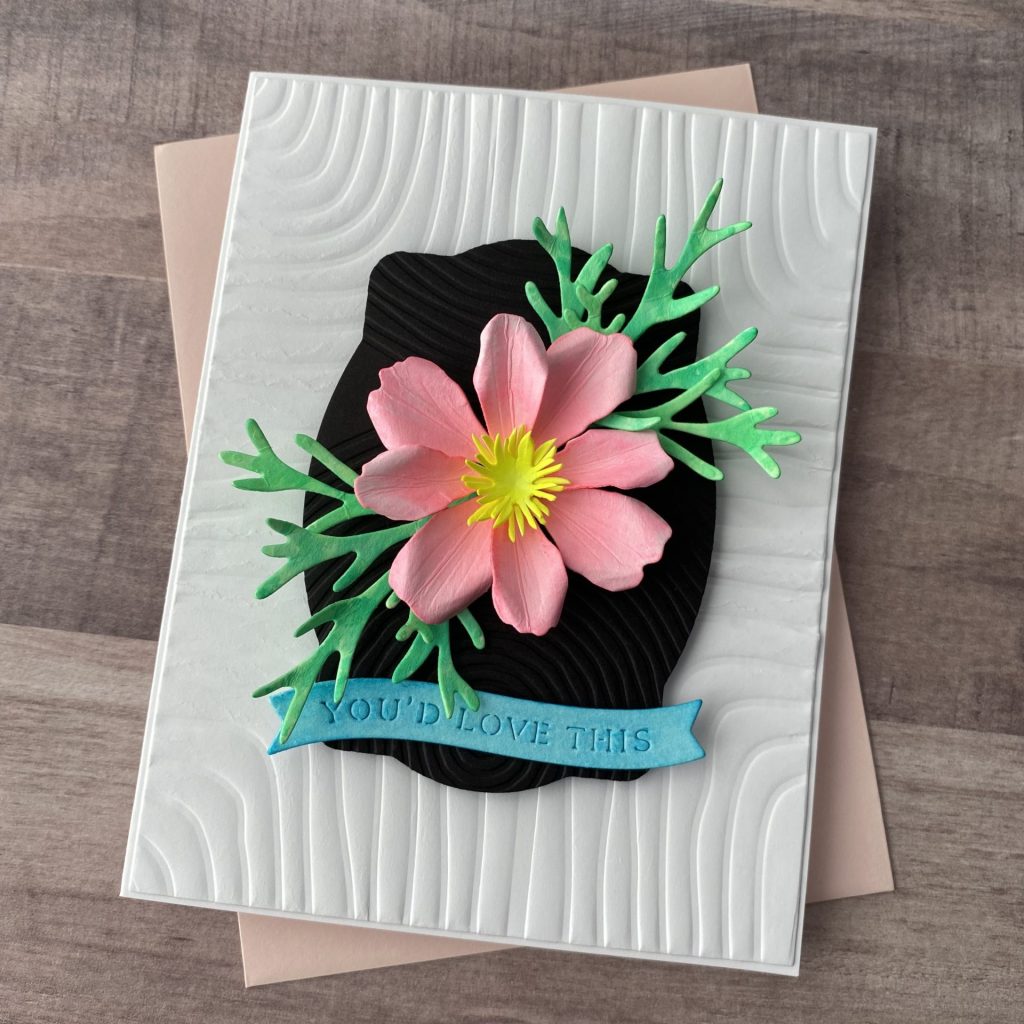
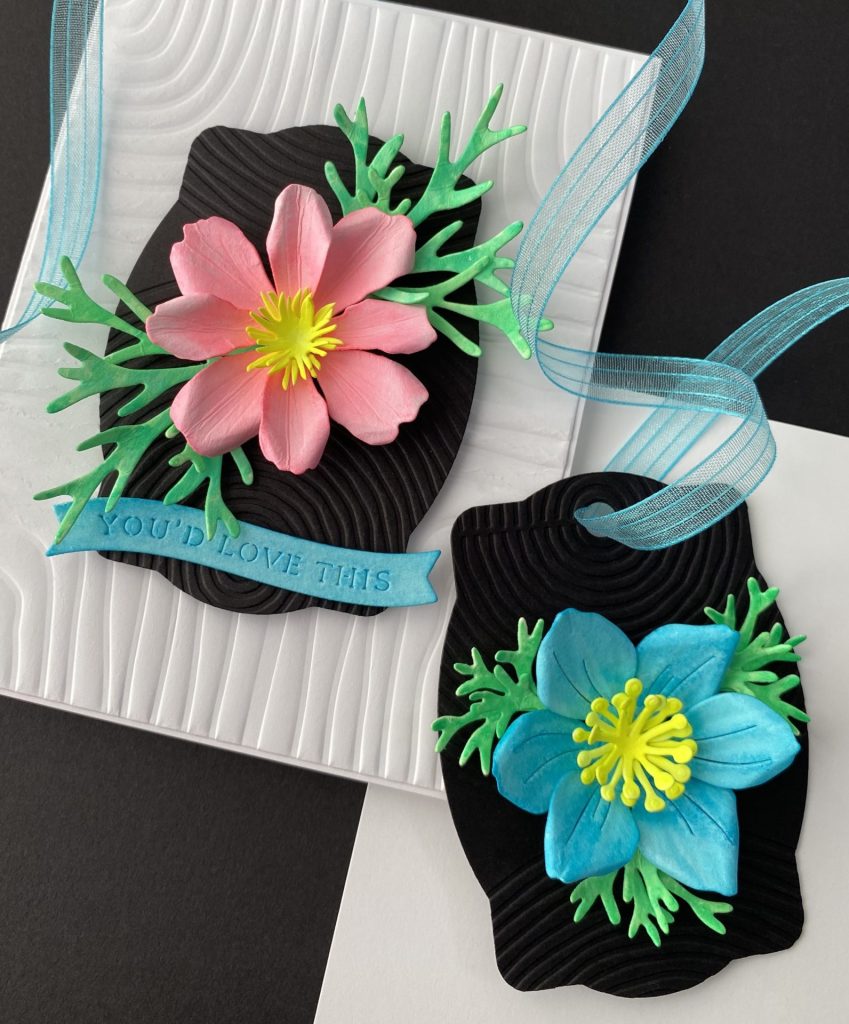
Hello, crafty friends! If you love texture and bold florals, you’re going to enjoy today’s duo—Modern Lines Card & Tag. This handmade card and coordinating tag features the Modern Botanicals Collection by Dina Wakley for Spellbinders. I used both the Lined Circles and Lined Corners embossing folders to add subtle, modern texture to my backgrounds, creating the perfect contrast for the bright dimensional flowers. These embossing folders are so versatile and add just the right amount of interest without overpowering the design. Whether you’re making a special card or dressing up a gift, this combo is a fresh and fun way to play with texture and color!
The Modern Botanicals Collection by Dina Wakley for Spellbinders brings an artful, abstract botanical vibe to papercrafting. Designed for the BetterPress letterpress system and 2D/3D embossing tools, it includes BetterPress‑plate sets like Flourishing and Growing—featuring graceful leaf fronds, sketched circles, dots, and arches. Plus embossing folders such as Lined Circles and Lined Corners. Every piece works beautifully together, allowing creators to layer shapes, inks, and textures in endless combinations.
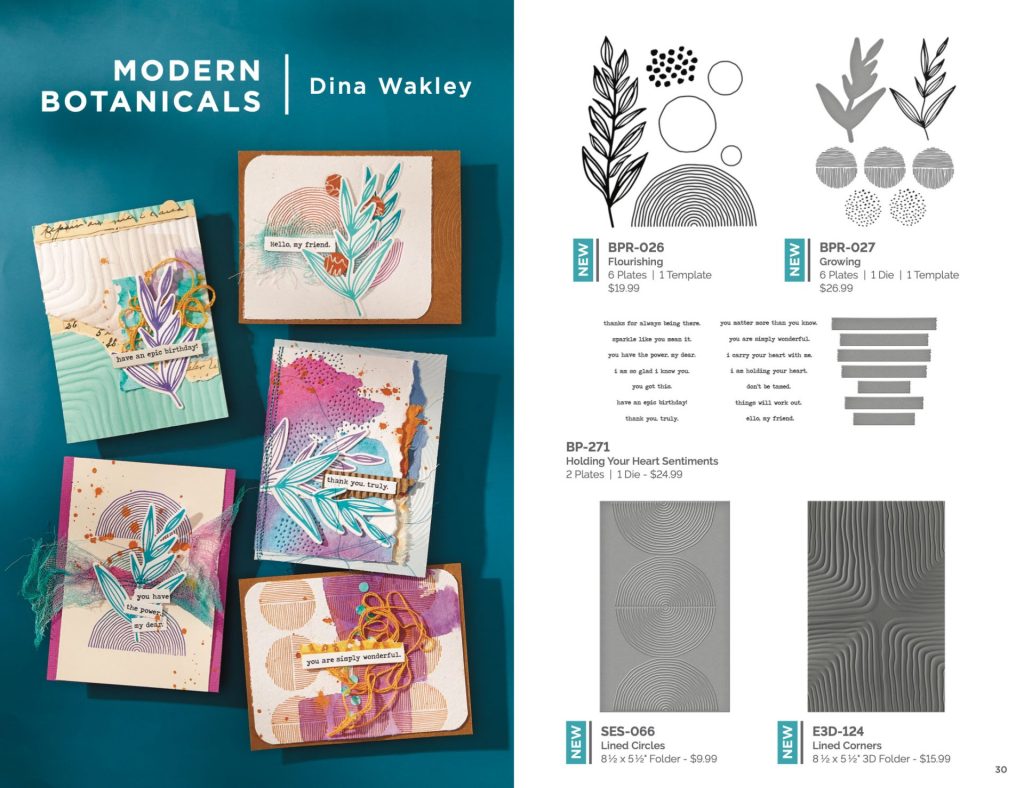
Be sure to explore the full Modern Botanicals Collection to discover more coordinating dies and press plates.
Link Abbreviations
- SB – Spellbinders*
- Sb.com – Scrapbook.com*
- SSS – Simon Says Stamp
- AMZ – Amazon*
- BA – Blick Art Materials*
Disclosure: I received this product to try out and share my honest thoughts with you. This post also includes affiliate links*—if you decide to shop through them, I may earn a small commission (at no extra cost to you). Money earned via affiliate links helps pay the fees to keep this blog up and running. Thanks so much for supporting GroveCrafted and helping me keep the crafty inspiration coming!
Supplies Used
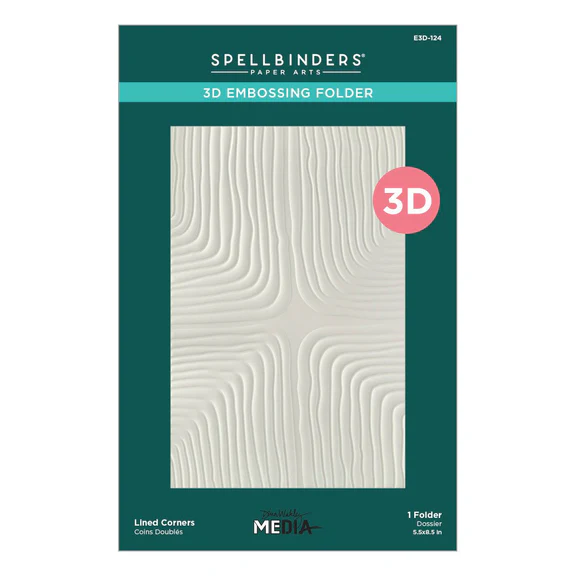
- Spellbinders 3D Embossing Folder – Lined Corners #E3D-124 | SB | Sb.com |
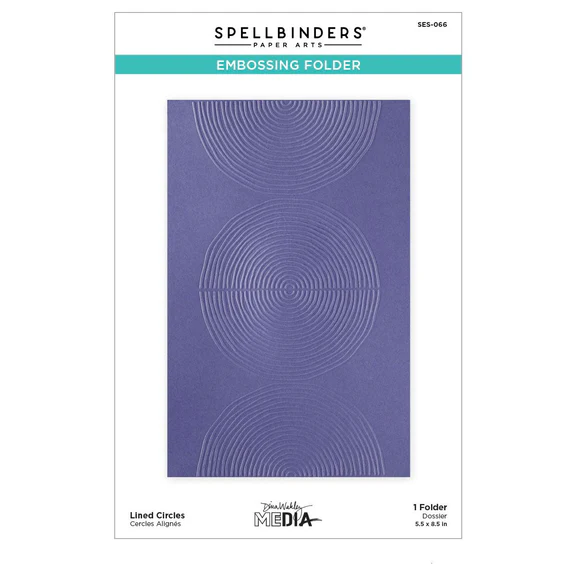
- Spellbinders Embossing Folder – Lined Circles #SES-066 | SB | Sb.com |
- Spellbinders Cutting Dies – Cosmos #S4-1436 | SB | Sb.com |
- Spellbinders Cutting Dies – Anemone #S2-440 | SB | Sb.com |
- Spellbinders BetterPress Plate & Die – Copperplate Gift Tag #BP-184 | SB | Sb.com |
- Spellbinders Cutting Dies – La Dolce Vita Banners #S1-173 | SB | Sb.com |
- Canson 140lb Cold Press Watercolor Paper | BA | AMZ |
- Spellbinders ColorWheel Cardstock
- Karin Brushmarker Pro Marker
- Spellbinders Platinum Six | SB | Sb.com |
- Tim Holtz Paper Trimmer | Sb.com | AMZ |
- EK Scoring Board | AMZ |
- Tim Holtz – Shaping Kit #665304 | Sb.com |
- Mighty Mister | SB | Sb.com |
- Bearly Art Glue | SB | Sb.com |
- Foam Squares – White | SSS |
Tips
Before you get started, here’s a quick heads-up. The Lined Corners 3D embossing folder can cause your cardstock to crack if you emboss it dry. But there’s an easy fix—just mist your cardstock with water first. This softens the fibers and helps you get a clean, crisp impression.
Now, let’s jump into the tutorial!
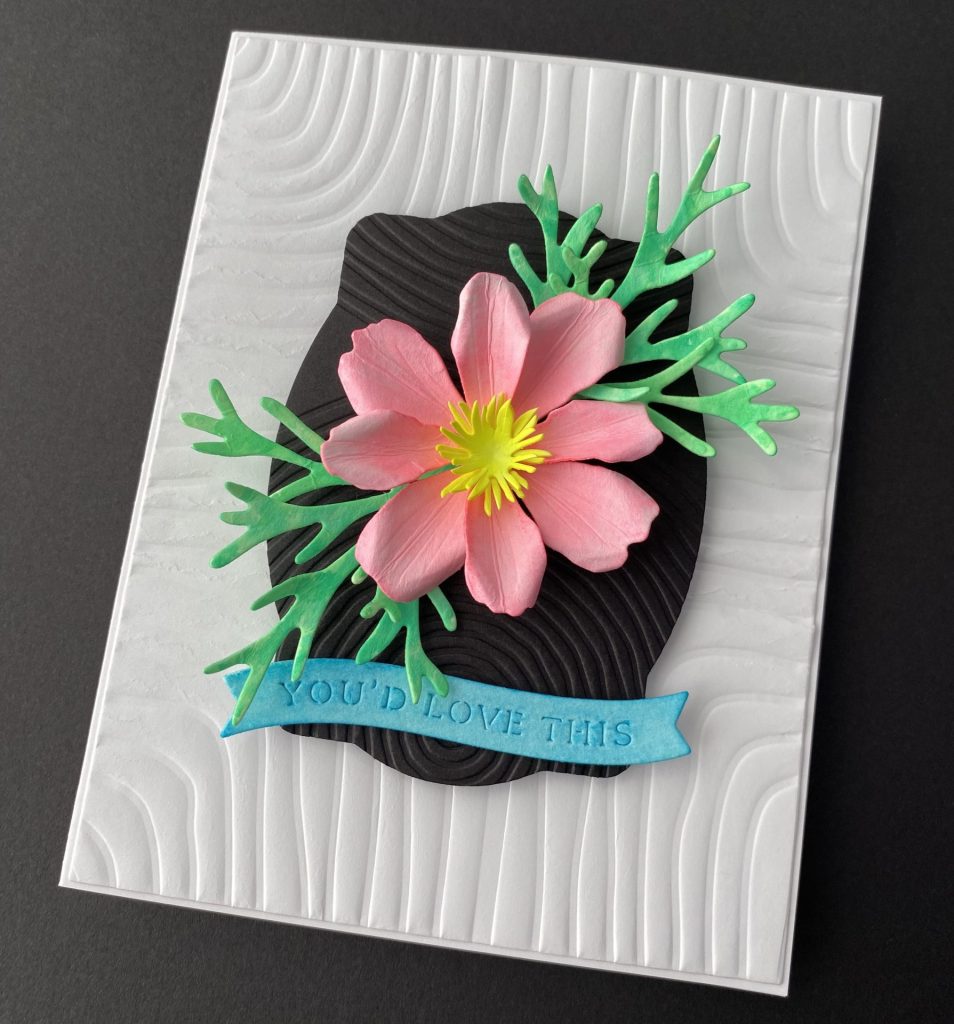
Cosmos Card Details
Card Base
- Create an A2 card base (4¼” x 5½”) using Classic White cardstock.
- Cut a panel of Classic White cardstock to 4¼” x 5½”.
- Mist the cardstock with water to prevent cracking, then emboss it with the Lined Corners 3D embossing folder.
- Adhere the embossed panel to the card front with glue.
Black Tag
- Die-cut Raven cardstock using the Copperplate Gift Tag die set.
- Lightly mist the tag with water.
- Emboss it with the Lined Circles 3D embossing folder, aligning the tag hole with the smallest circle.
- Attach the tag to the center of the card front using foam squares, making sure to position it with the hole at the bottom.
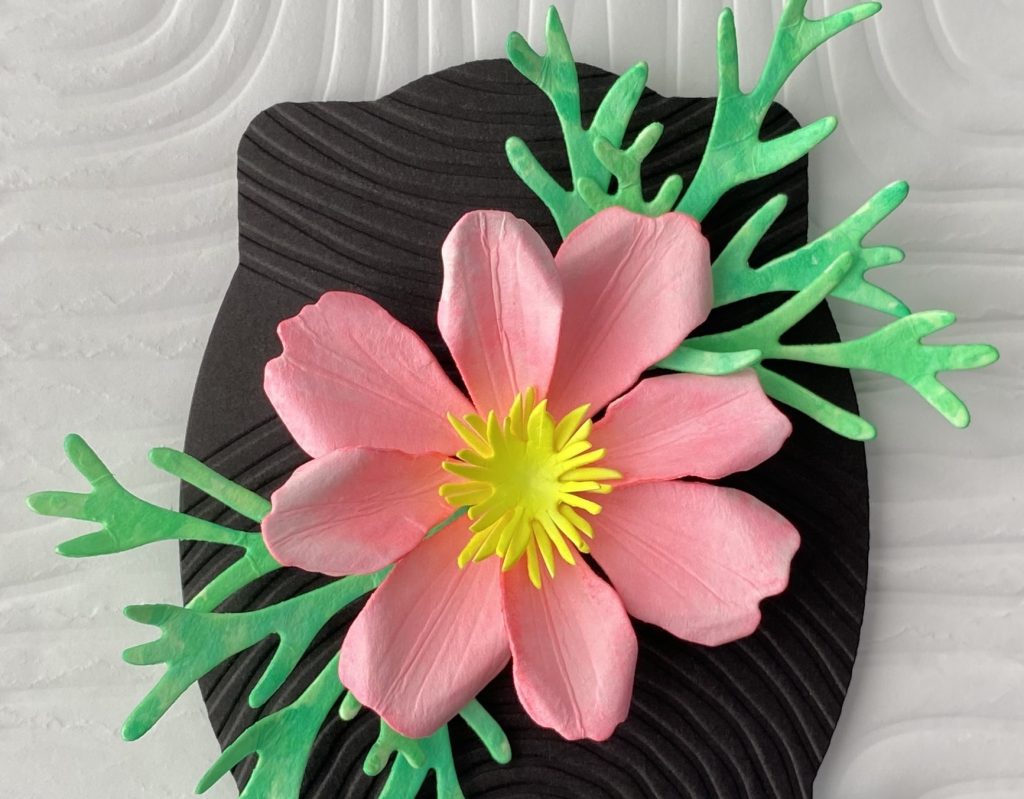
Cosmos Flower
- Die cut the flower and greenery from watercolor paper using the Cosmos die set.
- Watercolor each piece:
- Flower Petals – Neon Pink brushmarker
- Flower centers – Neon Yellow brushmarker
- Greenery – Neon Green brushmarker
- Let everything dry, then shape the flower using shaping tools.
- Assemble the flower with glue.
- Adhere the flower to the card using a mix of glue and foam squares for dimension.
 Need help shaping the flower? Watch this video tutorial for helpful tips and techniques.
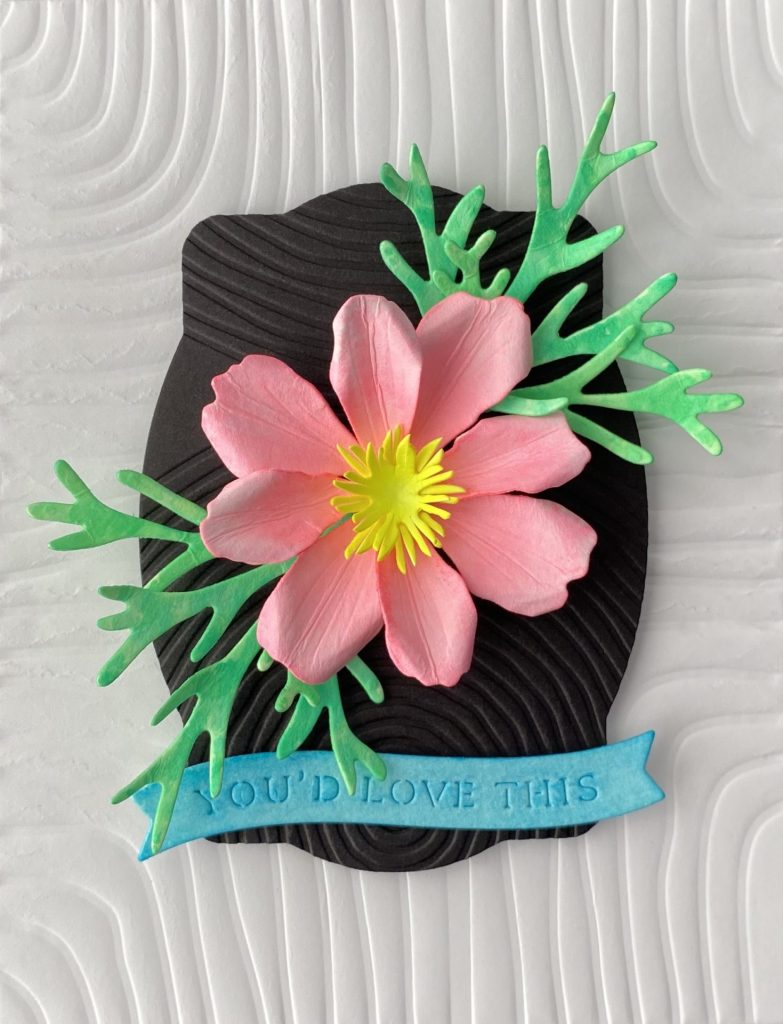
Sentiment
- Die cut the “You’d Love This” sentiment using the La Dolce Vita Banners die set from watercolor paper.
- Watercolor it with the Neon Blue brushmarker and let it dry.
- Use foam squares to attach the sentiment just below the flower, making sure it covers the tag hole.
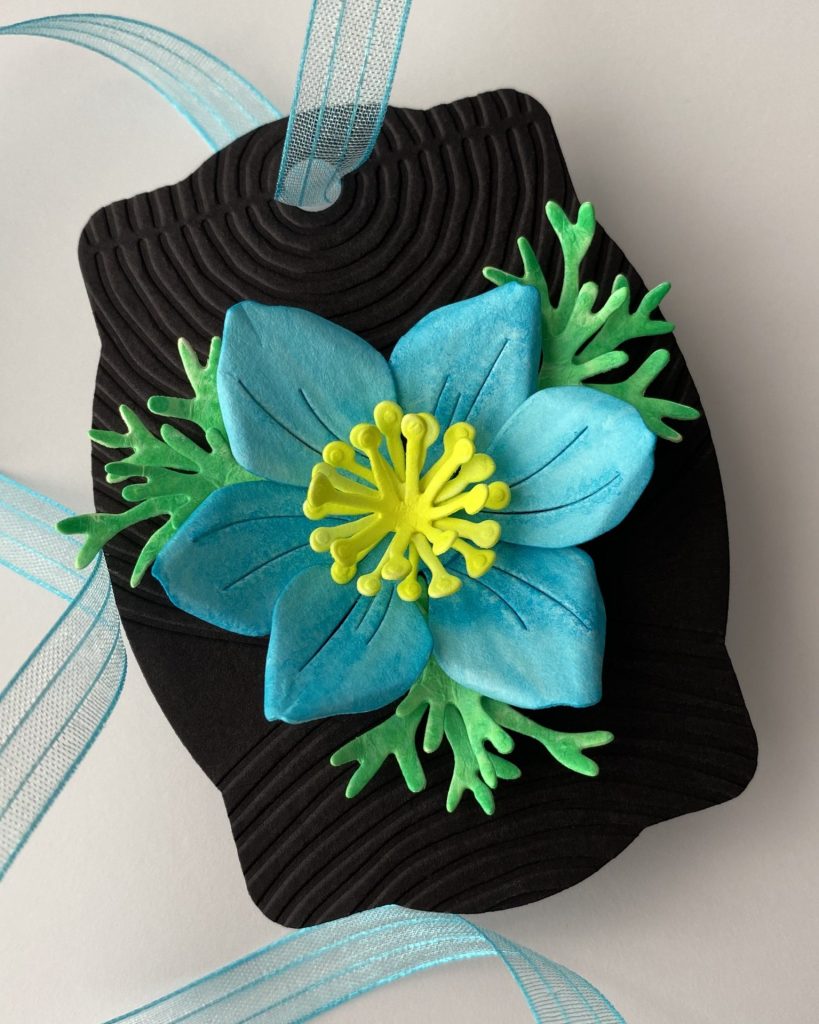
Anemone Tag Details
Black Tag
- Die cut two tags from Raven cardstock using the Copperplate Gift Tag die.
- Lightly mist one tag with water.
- Emboss the misted tag with the Lined Circles 3D embossing folder, aligning the tag hole with the smallest circle.
- Glue the two tags back-to-back to create a sturdy, finished base.
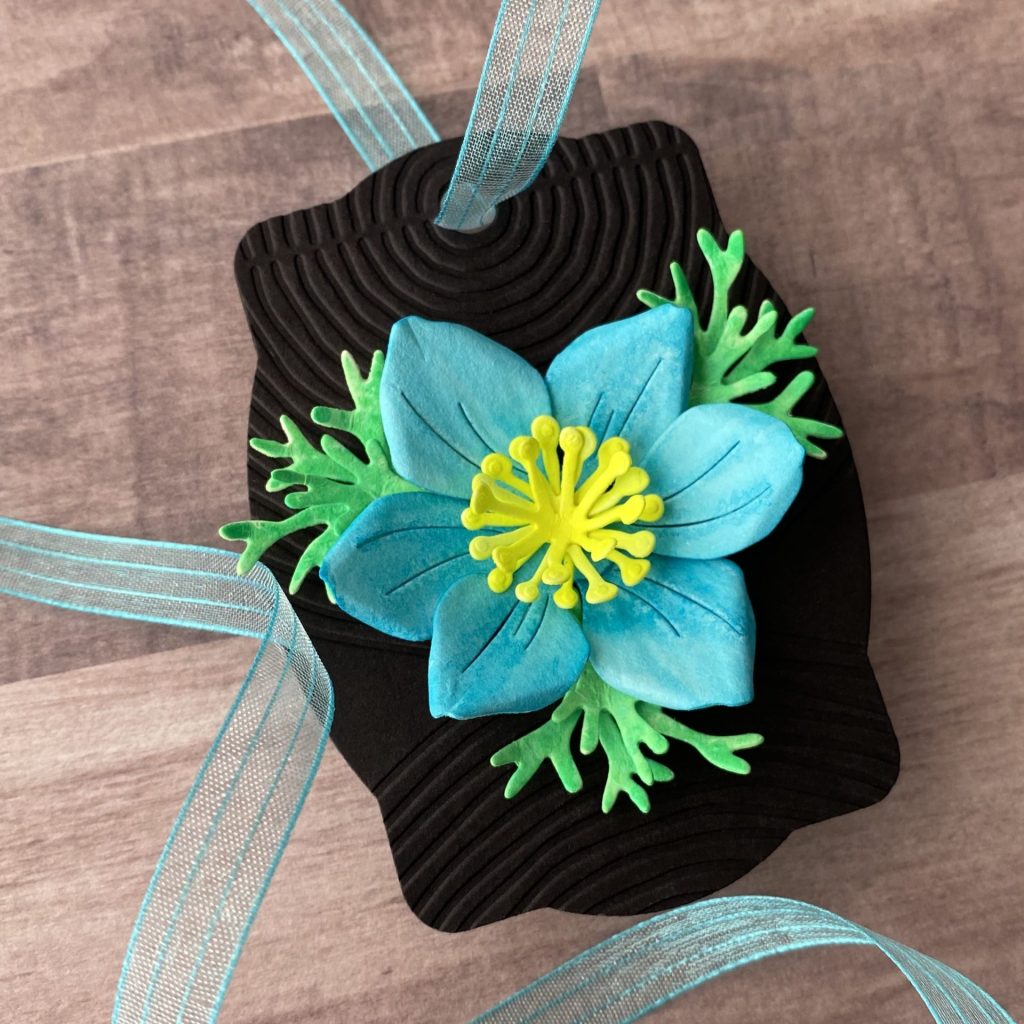
Anemone Flower
- Die cut the flower and greenery from watercolor paper using the Anemone die set.
- Watercolor each piece:
- Flower Petals – Neon Blue brushmarker
- Flower centers – Neon Yellow brushmarker
- Greenery – Neon Green brushmarker
- Let everything dry, then shape the flower using shaping tools.
- Assemble the flower with glue.
- Adhere the flower to the tag using glue.
Need help shaping the flower? Watch this video tutorial for helpful tips and techniques.
Tag, You’re Embossed!
I loved bringing this Modern Lines Card & Tag duo to life using the textured charm of the Lined Circles and Lined Corners embossing folders. The clean lines and subtle dimension really let the bold florals shine. Now it’s your turn! Whether you’re crafting a thoughtful gift or just playing with texture, I hope today’s project inspires you to emboss, layer, and create something beautiful of your own. If you do, I’d love to see what you create! Be sure to tag me (@silversgrove or @grovecrafted) on Instagram.
Until next time, happy crafting!
If you enjoyed creating this Modern Lines Card & Tag duo, be sure to check out my Summer Solstice Garden card tutorials—another floral-filled project you won’t want to miss!