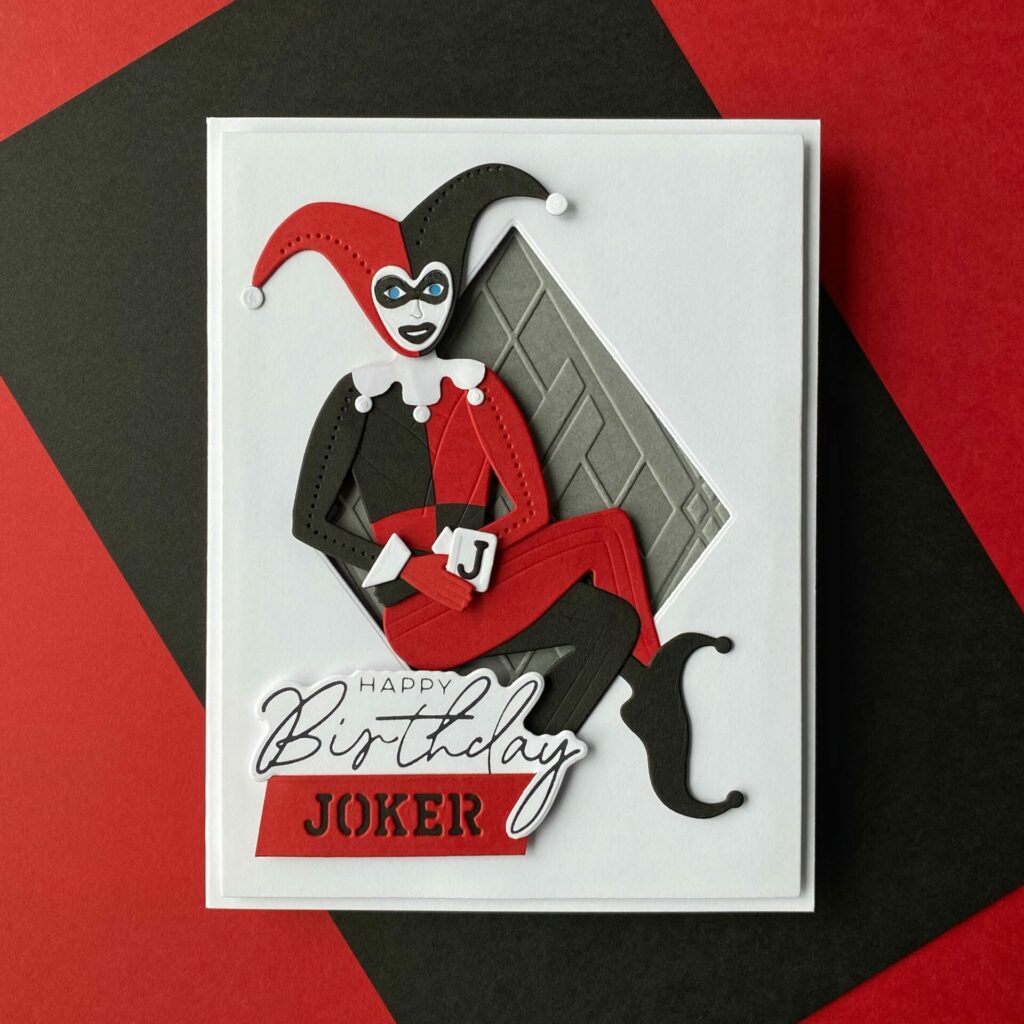
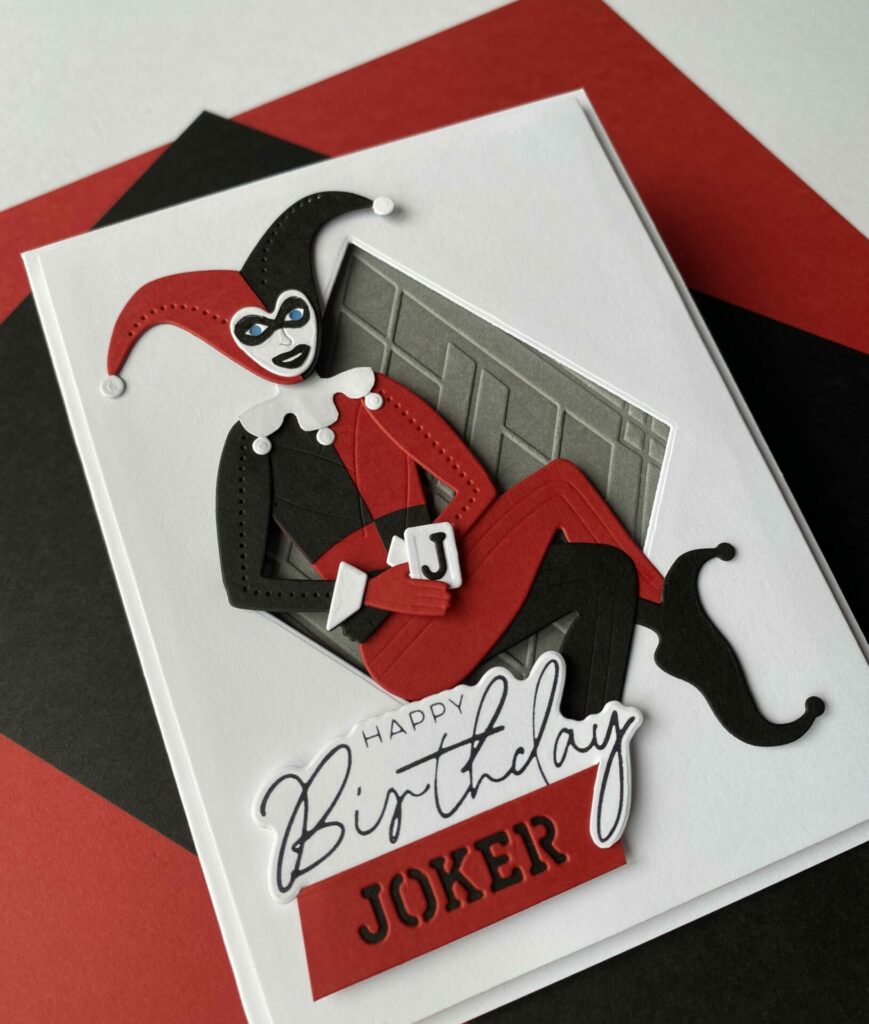
The Joker’s Birthday Card
Spellbinders – Wild Joker
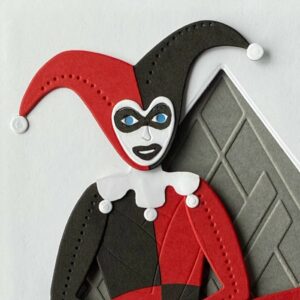
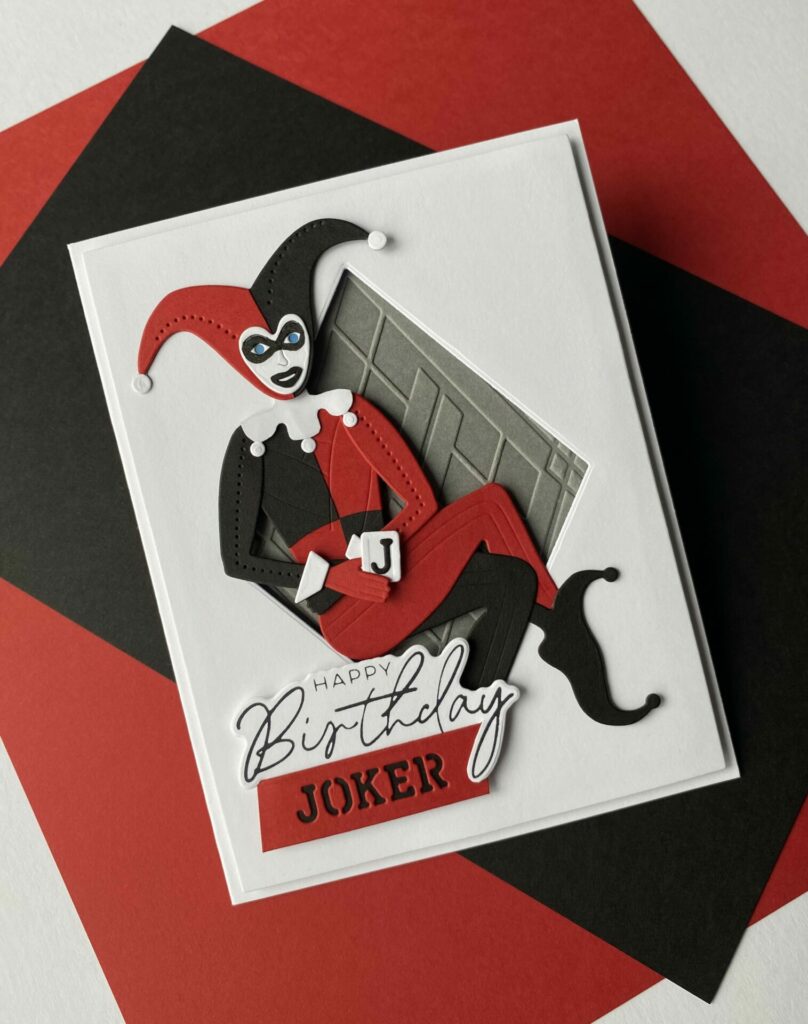
Hello, crafty friends! If you’re a fan of bold, playful designs and comic-inspired crafts, you’re going to love today’s project—The Joker’s Birthday Card! This handmade Harley Quinn–inspired birthday card features the Wild Joker die set from Spellbinders. With its whimsical character details and clever layering possibilities, this die set is perfect for creating striking, stylized cards full of personality.
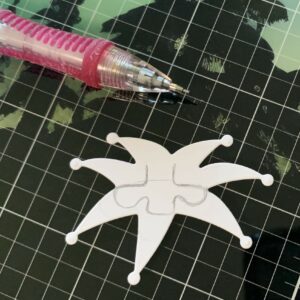
The Wild Joker die set from Jaycee Gaspar’s Jack of All Trades Collection by Spellbinders draws inspiration from French-suited playing cards. This set of 21 metal cutting dies assembles into a full-length Joker in a dynamic dance pose, perfectly fitting a standard A2-size card front. The Wild Joker die set includes etched lines for precise alignment, ensuring a polished finish.
Pair it with other elements from the collection, like the Reversible Royal Court dies and Pip & Rank dies, to craft a complete deck-themed project. Whether you’re creating a playful birthday card or a themed invitation, the Wild Joker adds a lively flair to your designs.
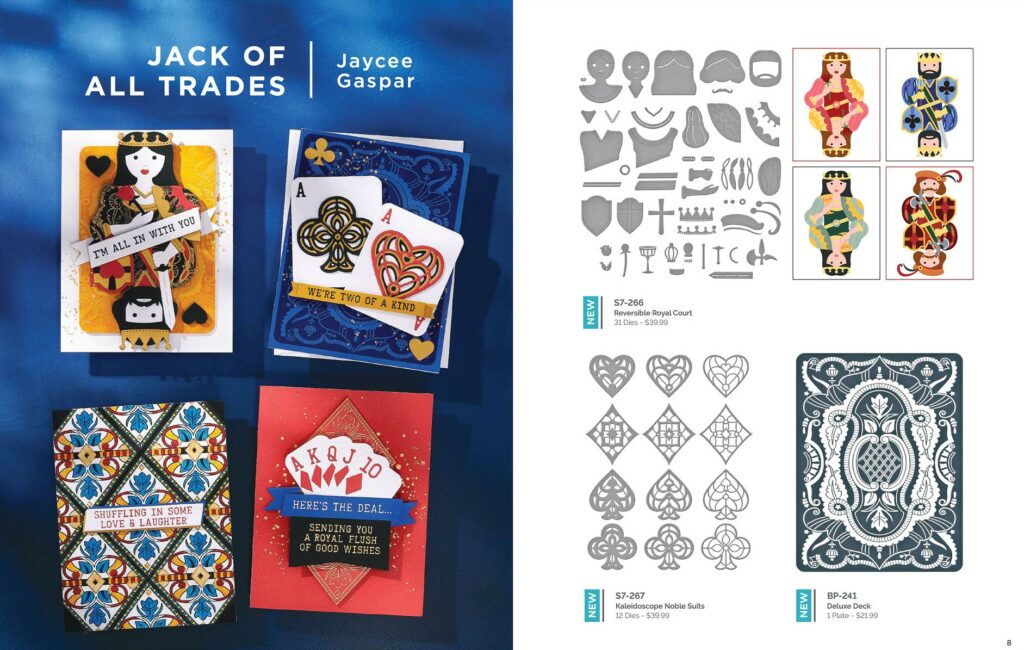
Explore the full Jack of All Trades Collection to discover more coordinating dies and press plates that bring the classic charm of playing cards to your paper crafts.
My Take
For my card, I took a fun twist on the classic jester by turning him into Harley Quinn, complete with costume modifications, a custom sentiment, and bold red and black details that really pop. This die set reminded me of her quirky, chaotic energy from the Batman comics, and that inspiration really drove the transformation—from a traditional jester to this iconic, mischievous antihero.
Now let me walk you through how I brought this mischievous birthday card to life!
Link Abbreviations
- SB – Spellbinders*
- Sb.com – Scrapbook.com*
- SSS – Simon Says Stamp
- AMZ – Amazon*
- BA – Blick Art Materials*
Disclosure: I received this product for free to try out and share my honest thoughts with you. This post also includes affiliate links*—if you decide to shop through them, I may earn a small commission (at no extra cost to you). Money earned via affiliate links helps pay the fees to keep this blog up and running. Thanks so much for supporting GroveCrafted and helping me keep the crafty inspiration coming!
Supplies Used
- Spellbinders Cutting Dies – Wild Joker #S5-686 | SB | Sb.com |
- Spellbinders Cutting Dies – Percision Layering A2 A #S5-487 | SB | Sb.com | AMZ |
- Spellbinders BetterPress Plate – Let’s Celebrate Sentiments #BP-123 | SB | Sb.com | AMZ |
- Spellbinders Embossing Folder – Argyle Socks #SES-043 | SB | Sb.com |
- Spellbinders Cutting Dies – Essential Diamonds #S5-525 | Sb.com | AMZ |
- Spellbinders ColorWheel Cardstock
- BetterPress Ink – Black #BPI-003 | SB | Sb.com |
- Sakura Micron Pen 005 – Black | BA |
- Alcohol Marker – Blue
Tools Used
- Spellbinders Platinum Six | SB | Sb.com |
- Spellbinders BetterPress Letterpress System | SB | Sb.com | AMZ |
- Tim Holtz Paper Trimmer | Sb.com | AMZ |
- EK Scoring Board | AMZ | SSS |
- Bearly Art Glue | SB | Sb.com | AMZ |
- Mighty Mister Spray Bottle | SB | Sb.com |
- EK Scissors | Sb.com | AMZ |
- Embelishment Wand | SSS |
- Archival Ink Cleaner | SB | Sb.com |
- Microfiber Cloth | SSS |
- Foam Squares – White | SSS |
- Best Ever Craft Tape – ¼ in | SB | Sb.com |
- Magic Black Eraser | BA | AMZ |
- X-Acto Knife | BA |
- Pencil
Creating the Card Front
To start, I created a standard A2 side-folding card base from white cardstock. Then, using the second largest die from the Precision Layering A2 A die set, I cut a white panel. To add interest and create a focal window, I die-cut a diamond shape from the center of that panel using the 4ish-inch tall diamond die.
For the background layer, I trimmed a slightly smaller panel from anchor cardstock and ran it through my machine with the Argyle Socks embossing folder to give it texture and pattern. I adhered the embossed piece directly to the center of the card base.
To finish the front, I popped up the white diamond panel over the embossed layer using craft foam for dimension. Foam squares would work just as well! This adds depth and makes the center design really stand out.
Die Cutting the Pieces
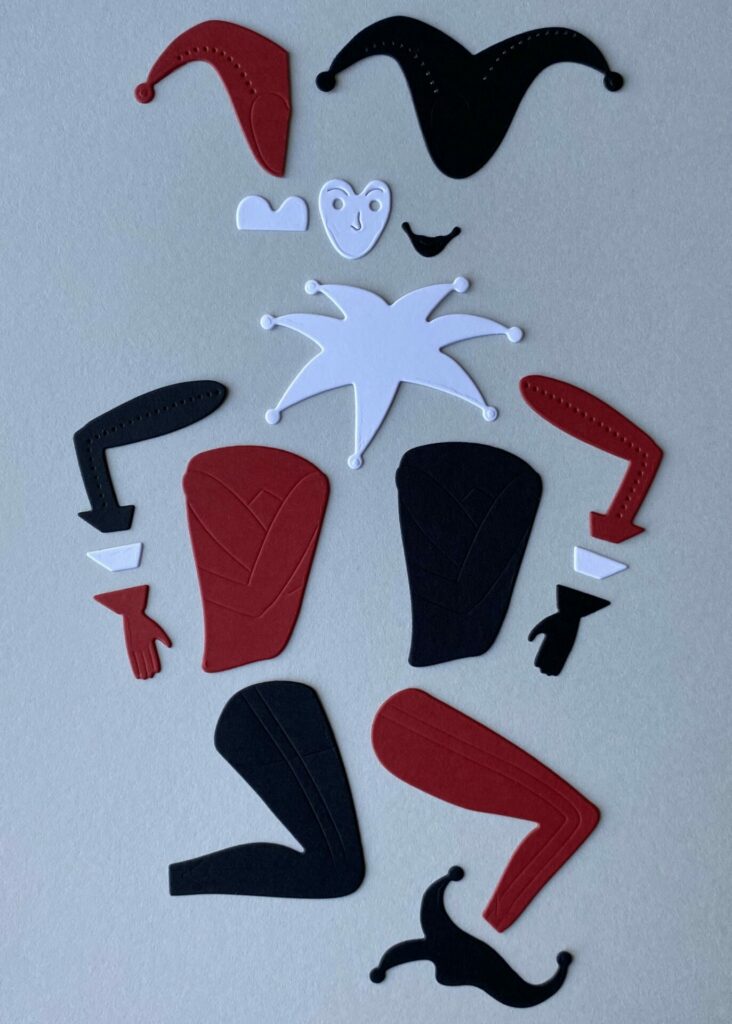
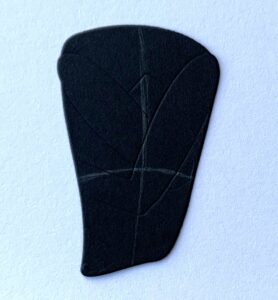
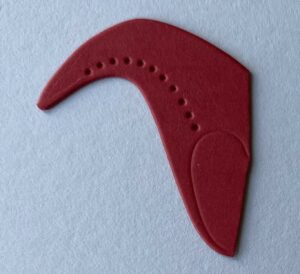
Next, I moved on to die cutting all the pieces needed to assemble Harley Quinn using the Wild Joker die set. I used ColorWheel cardstock in Pomegranate, Raven, and Classic White, selecting each color based on which part of the figure it would become. (See the photo below for a visual guide to which pieces were cut from which color.)
- Pomegranate (Red): Body, left side of the headpiece back layer, right arm, left hand, and front leg
- Raven (Black): Body, full headpiece back layer, lips, left arm, right hand, back leg, and front foot
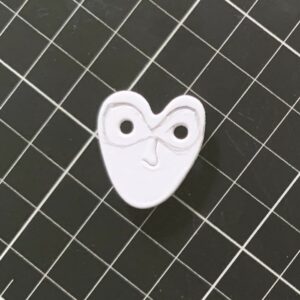
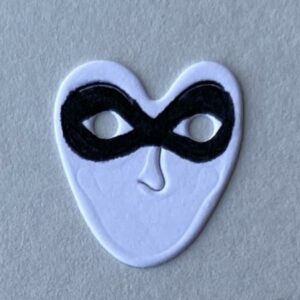
- Classic White: Full collar layer, face, wrist cuffs, and the backing piece for the eyes
Harley Quinn Modifications
To customize the look and create a more Harley Quinn-inspired design, I made a few modifications to the die-cut pieces:
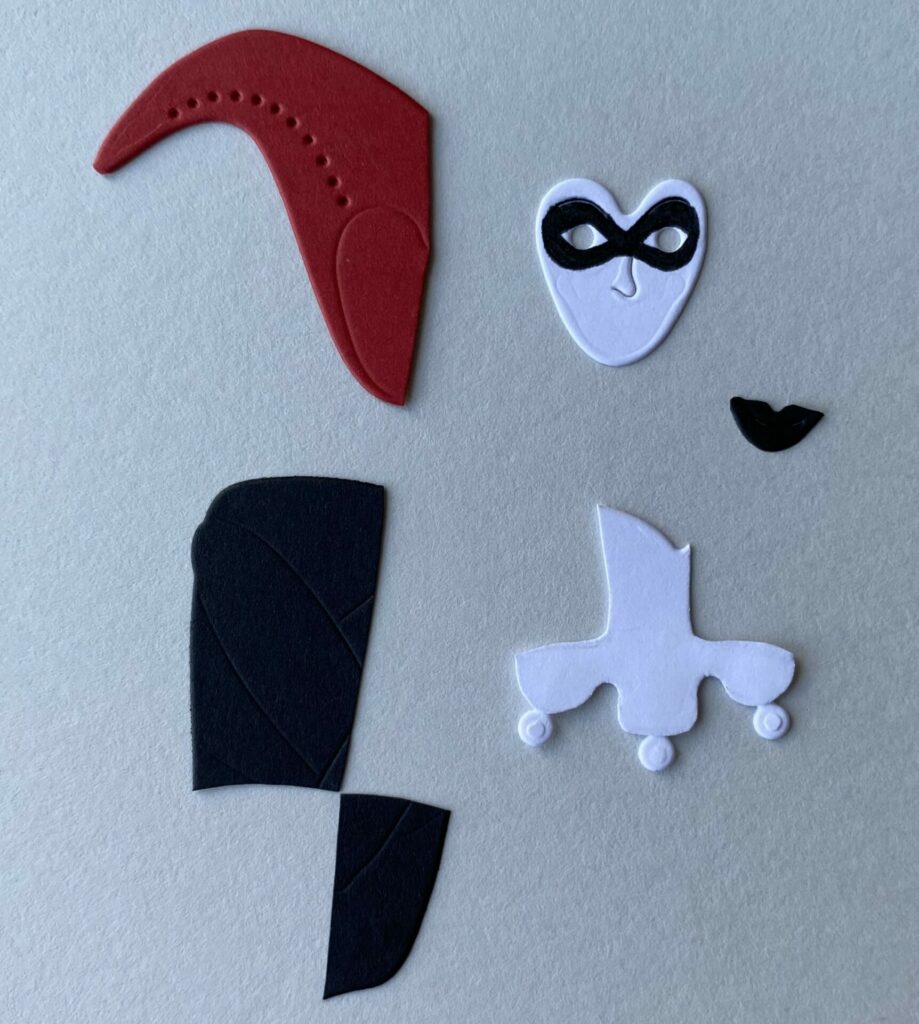
Black Body
Using a pencil, I lightly sketched curved lines to divide the torso into four sections, giving it a more realistic shape. I then cut along those lines with scissors and kept only the top left and bottom right quarter sections—discarding the others.
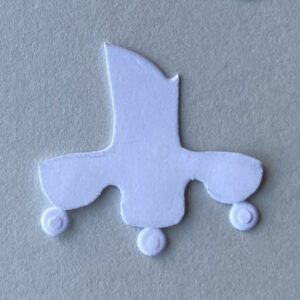
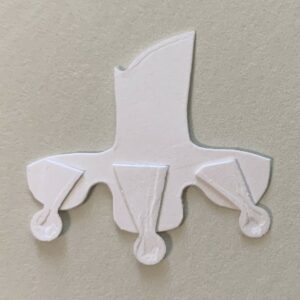
Red Headpiece
For the red headpiece, I trimmed it vertically down the center of the face and then cut inward to the middle point of the headpiece.
Face
To give her a classic Harley Quinn mask, I lightly sketched the shape with pencil directly onto the die-cut face, then carefully inked it using a 005 black Micron pen.
Lips
The lips needed some refinement! I used an X-Acto knife to carefully open up the mouth, then trimmed the lips with scissors to create a softer, more feminine look.
White Collar
To create her signature collar, I sketched a design in pencil on the white collar die-cut, then fussy cut it out with scissors. I finished it off by gluing the tiny pom-pom balls from the die-cut to the back of the collar.
Making the Sentiment
For the sentiment, I used the Happy Birthday Wishes BetterPress plate from the Let’s Celebrate Sentiments set by Spellbinders. I pressed it onto white cardstock using black BetterPress ink, then die-cut it with the coordinating die.
Next, I created a “Joker” sentiment strip by cutting it from pomegranate red cardstock, backing it with black cardstock for contrast, and trimming it down to a smaller size. To layer the two sentiments, I carefully cut a small slit along the edge of the “y” in the “Birthday” sentiment—just enough to tuck the Joker strip in and cover up the word “Wishes”. Then, I trimmed off any excess that still showed.
Finally, I adhered the finished sentiment to the bottom left corner of the card using foam squares to add a bit of dimension.

Assembling Harley Quinn
After all the die-cut modifications, it was time to bring Harley Quinn to life! I assembled the pieces using glue, crossing her legs slightly to give her a more feminine pose. I positioned her on the card so she appears to be sitting on the sentiment and leaning casually against the diamond window. This playful placement really brings her character to life. To add dimension, I used foam squares to pop her up off the card. As a final touch, I gave her a little playing card featuring the letter “J” to tie in the Joker’s birthday theme.

The Joker’s Birthday Card Completed!
And there you have it—a playful Harley Quinn birthday card full of personality and charm! I loved mixing die-cutting with creative tweaks to bring this fun character to life. The diamond window and layered sentiment add just the right touch of dimension. This design is perfect for comic book lovers, Batman and Joker fans, or anyone who enjoys bold and unique cards. I hope it inspires you to look at your dies differently and start creating your own custom characters!
If you give this card a try, I’d love to see your take—don’t forget to tag me on Instagram. (@silversgrove or @grovecrafted) I’m super excited to see what you’ve come up with!
Thanks so much for stopping by, and I hope this inspired some fresh ideas for your next crafty adventure. Happy creating!
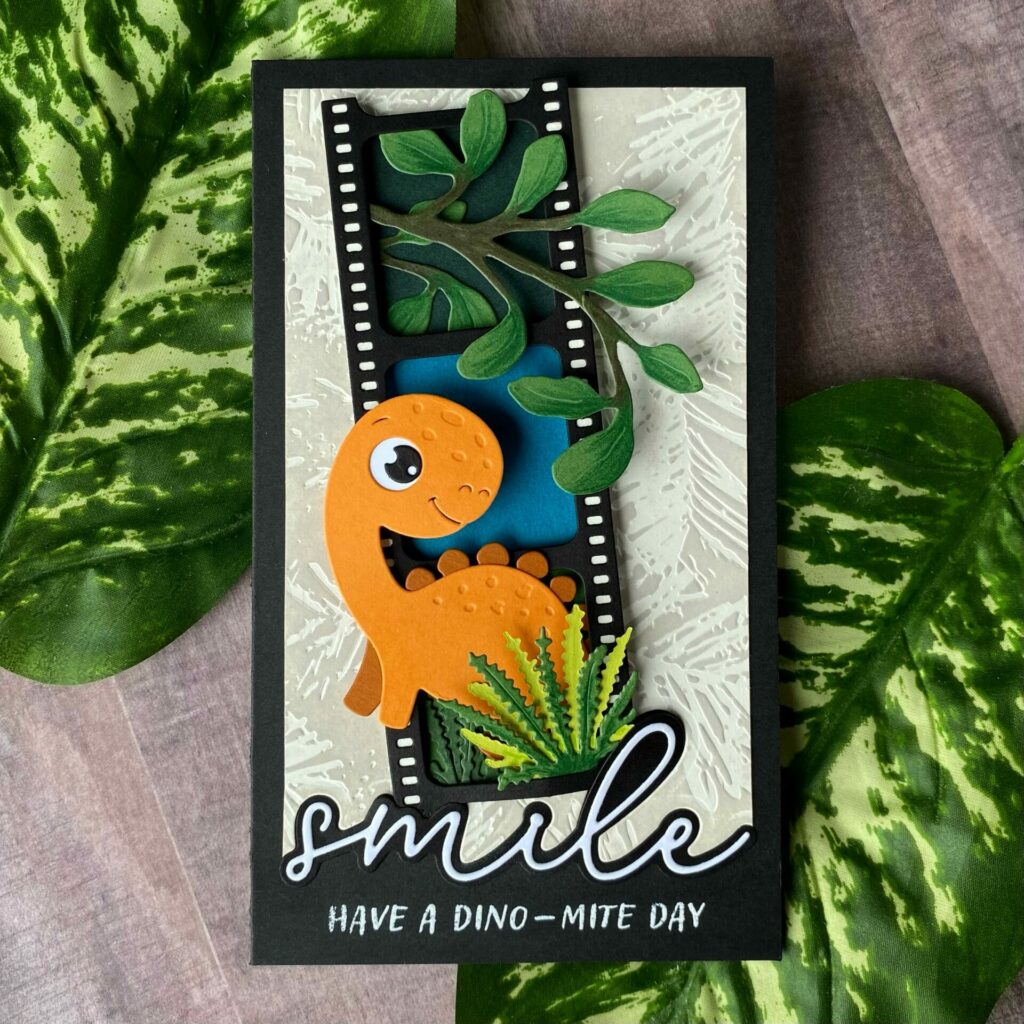
Did you had fun creating The Joker’s Birthday Card? If you did, you’ll definitely want to check out my Dino-Mite Smiles Card tutorial too!