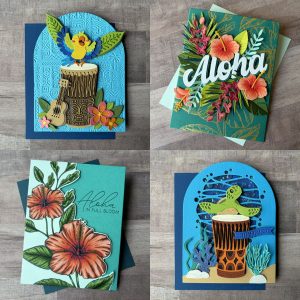
Elegant & Simple Card
Welcome fellow crafters! Today I am sharing how to make this simple, but still very elegant card. Listed below are all the supplies I used to make this card. But don’t worry if you don’t have the exact supplies I used. This look can be achieved using any embossing folder and sentiment die. You can also substitute ink or embossing powder for the luster wax if you don’t have it.
Full Disclosure: This post contains affiliate links which are indicated with an (*). If you click on an affiliate link and later make a purchase, I may receive a small commission. Clicking on an affiliate link which earns a commission does NOT result in additional charges to you or cost you anything extra. Money earned via affiliate links helps pay the fees to keep this blog up and running. Thank you so much for shopping through my links to show your support for the brands that we love and the products that I share!
Supplies Used / Substitutions:
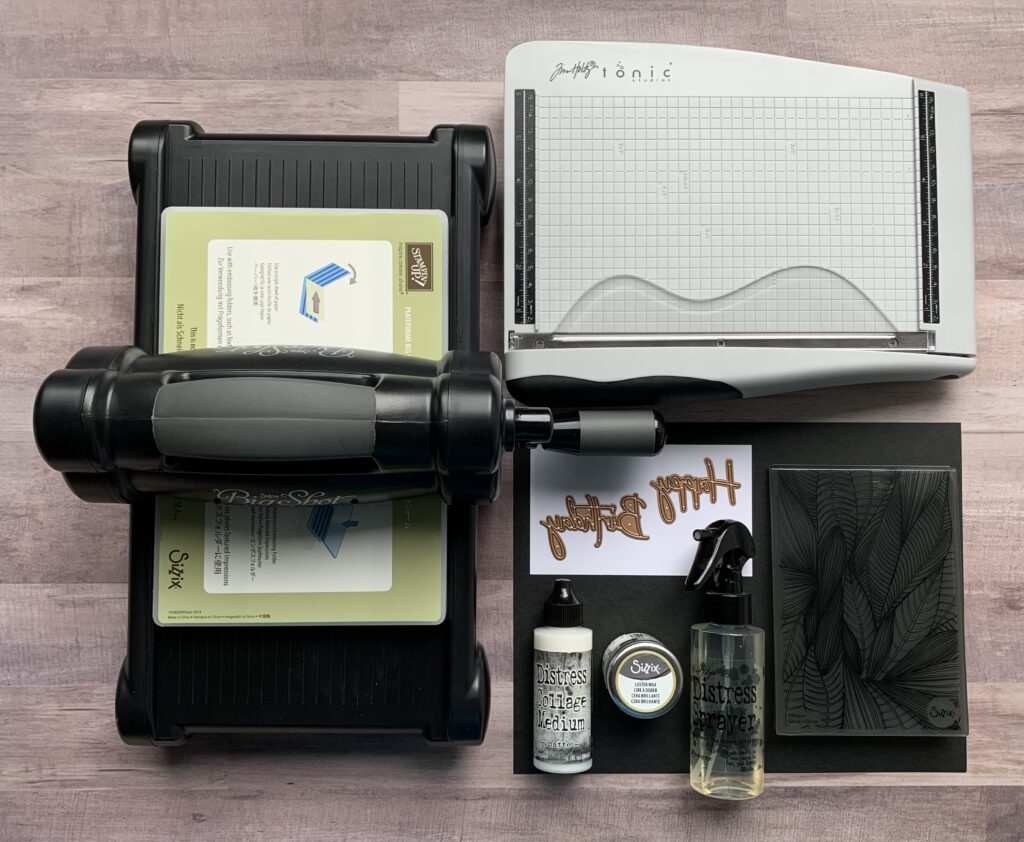
- *Sizzix Big Shot / *Spellbinders Platinum Six / Any die cutting machine
- *Tim Holtz Tonic Guillotine Comfort Paper Trimmer 160E / Any paper trimmer, scissors, or x-acto knife
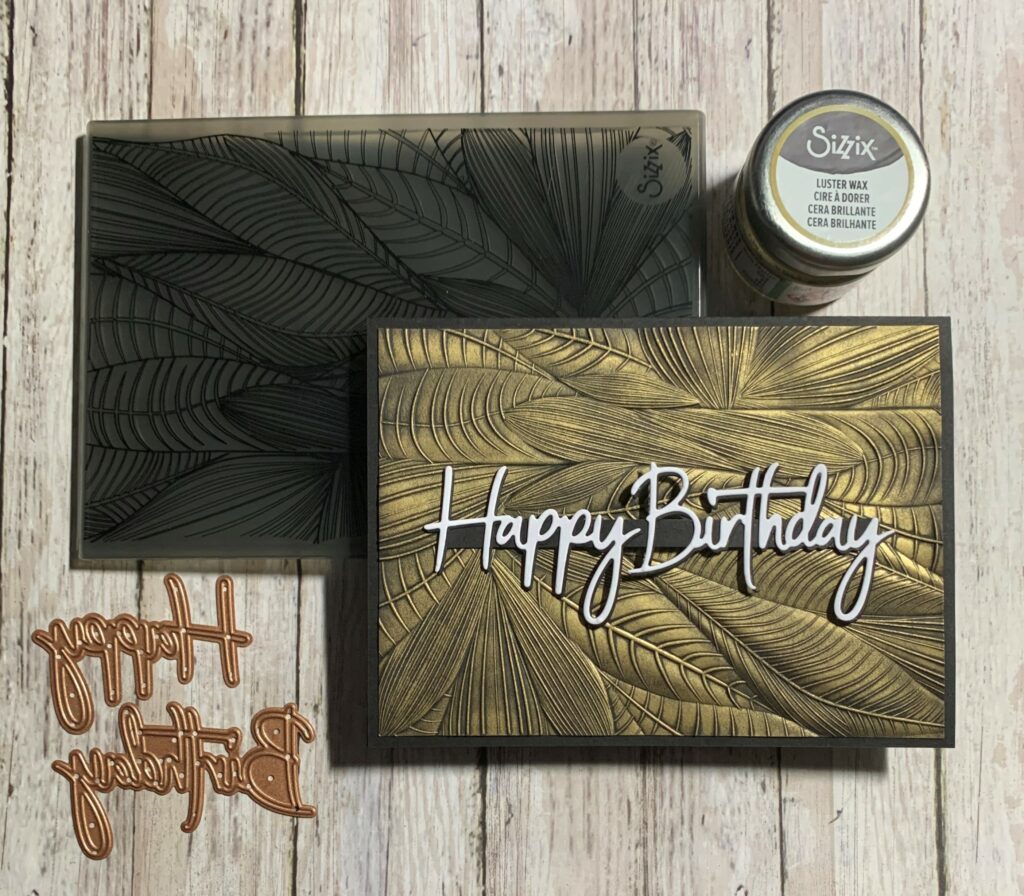
- *Sizzix 3D Embossing Folder – Fallen Leaves #664504 / Any embossing folder
- *Spellbinders Dies – Simply Perfect Mix & Match Sentiments SKU: S5-443 / Any sentiment die
- *Sizzix Luster Wax – Gold / Die or pigment inks or embossing powder
- Black & White Cardstock / Any color cardstock
- *Ranger Distress Collage Medium – Matte / Any liquid adhesive
- *Tim Holtz Distress Sprayer with water / Any spray bottle with water
- *Tim Holtz Tonic Studios Retractable Craft Pick / Toothpick
- Small Foam Adhesive Squares / Optional
- Post-it note / Scrap piece of paper
Making the Card base
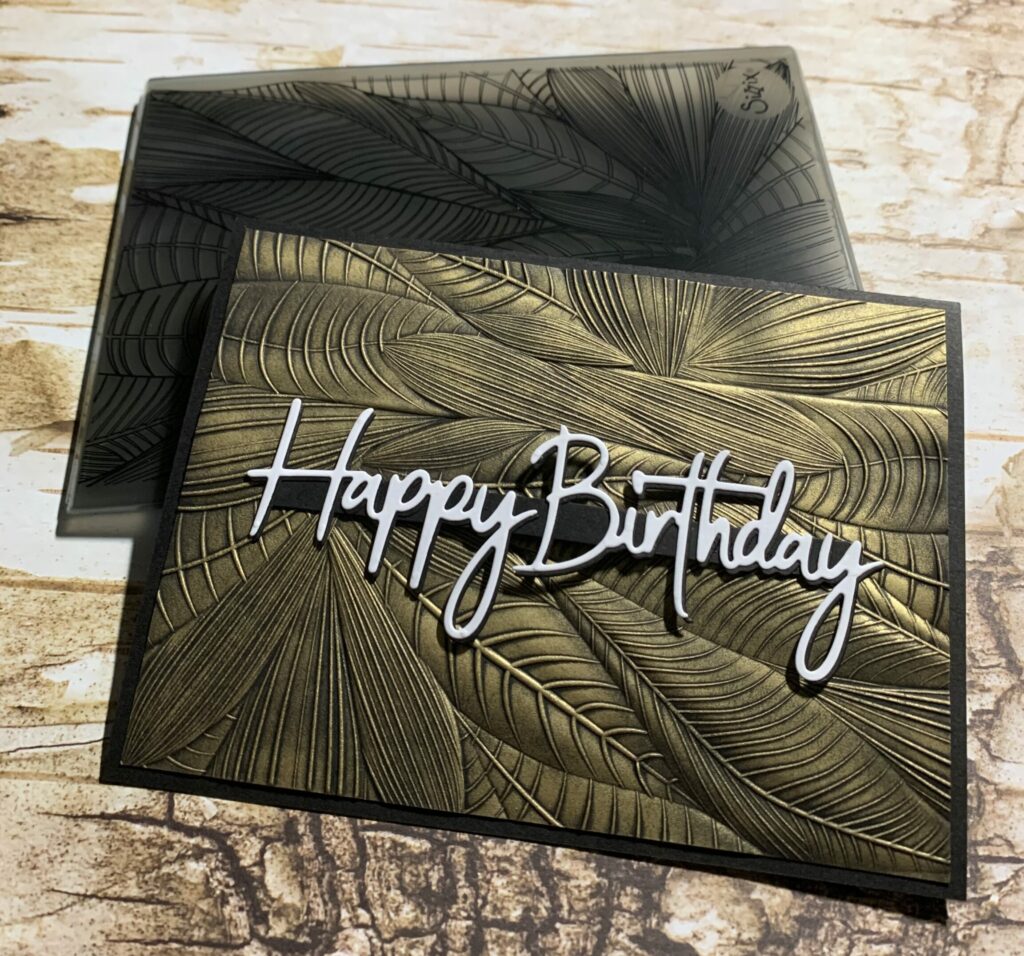
So lets get started making this elegant and simple card. First, I took my sheet of black cardstock and trimmed it to make my card base and the panel that will get embossed. I trimmed my card base to 5½” x 8½” and folded it in half. This gave me a standard A-2 card size of 4¼” x 5½”. I set it to the side for later. Then, I trimmed my panel to 4″ x 5¼”, giving me a 1/8″ border around the card. You can use whatever card size you prefer, but keep in mind the panel needs to fit in your embossing folder. And your panel needs to be 1/4″ smaller than your card. So if your card is the same size or smaller than your embossing folder, you’re all good.
Embossing the Panel
Next, I took my 4″ x 5¼” panel and lightly misted both sides with water. The water helps soften the fibers of the paper and prevents cracking. This is a necessary step when using a 3D embossing folder because it has much deeper grooves. I then placed the panel in the embossing folder and ran it through the Sizzix Big Shot three times. When using a 3D embossing folder you want to run it through 3 times because it gives you a more defined and crisp embossing (see examples below.) Just remember 3D = 3 times. I then let the panel dry. If you’re using a traditional embossing folder, feel free to skip these steps if you want. That being said, remember all machines are not created equal. Each one applies a different amount of pressure. So I would recommend making some test swatches to see what works best for your machine. For reference I used the Stampin Up version of the Sizzix Big Shot from 2017.
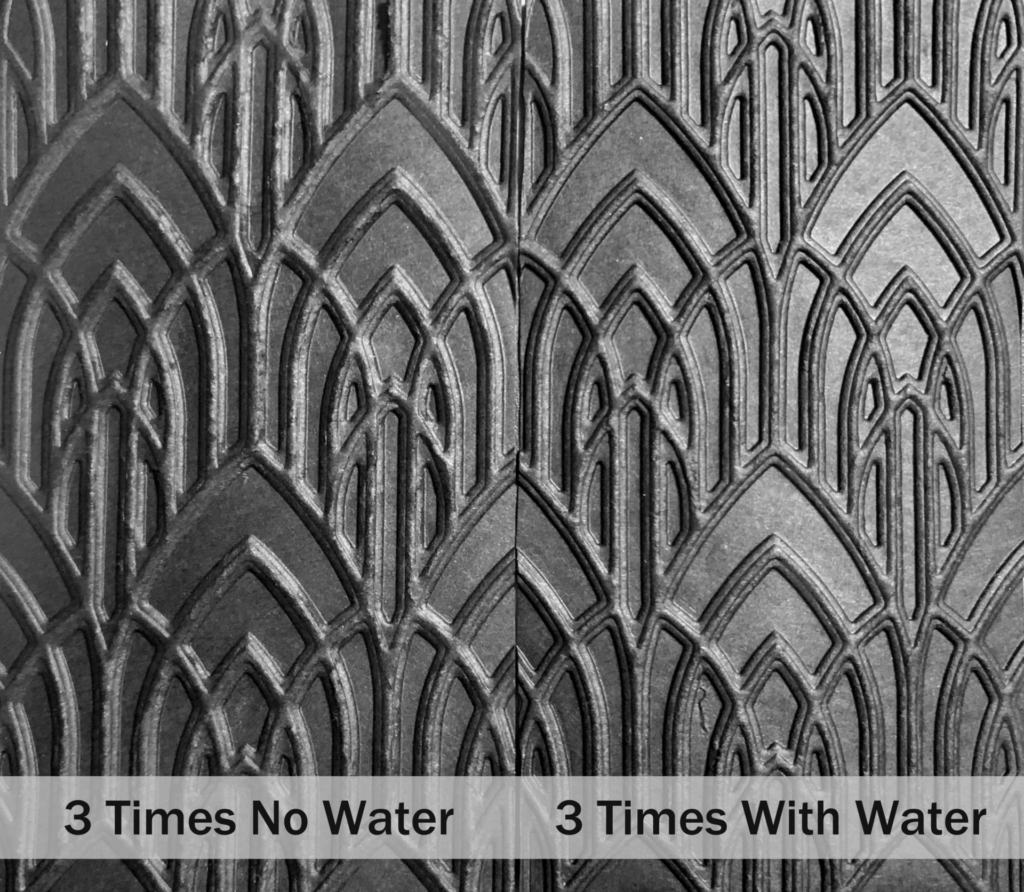
This is an example of the front side, embossed using regular 80lb black cardstock. The water really makes a difference!
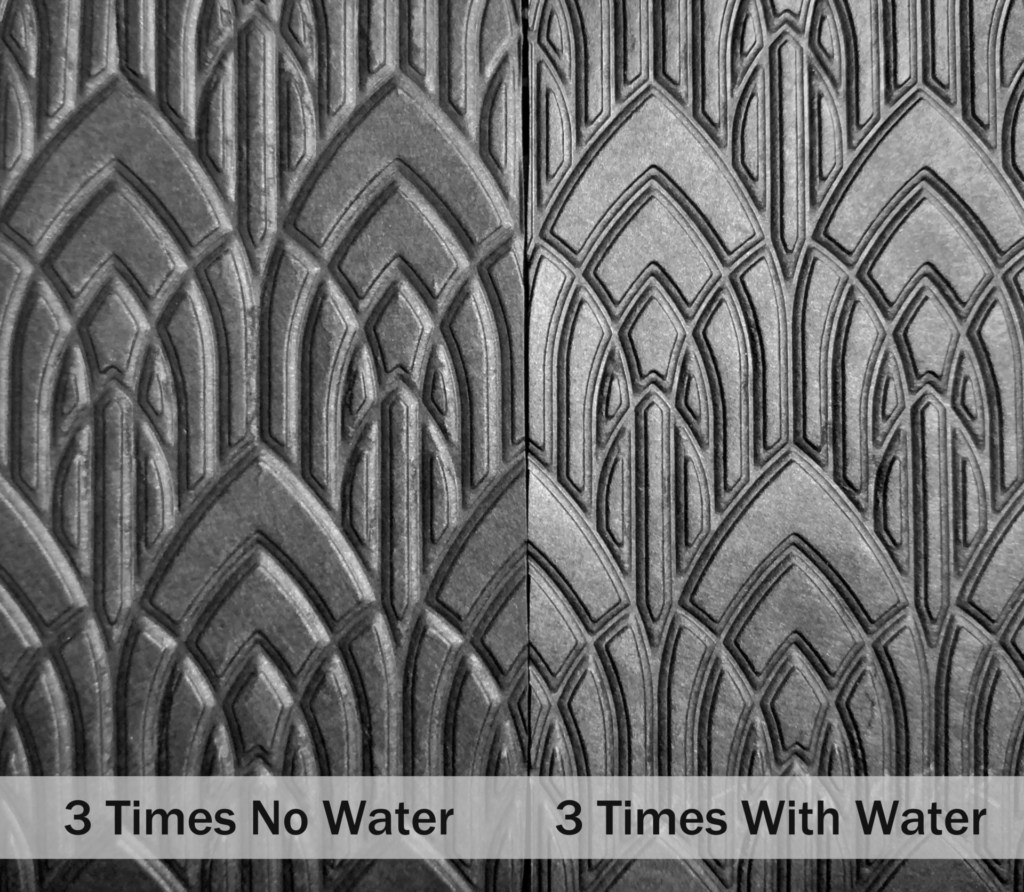
This is the back side, debossed using the Sizzix Tim Holtz Texture Fades – Arched #665459
Making the Sentiment
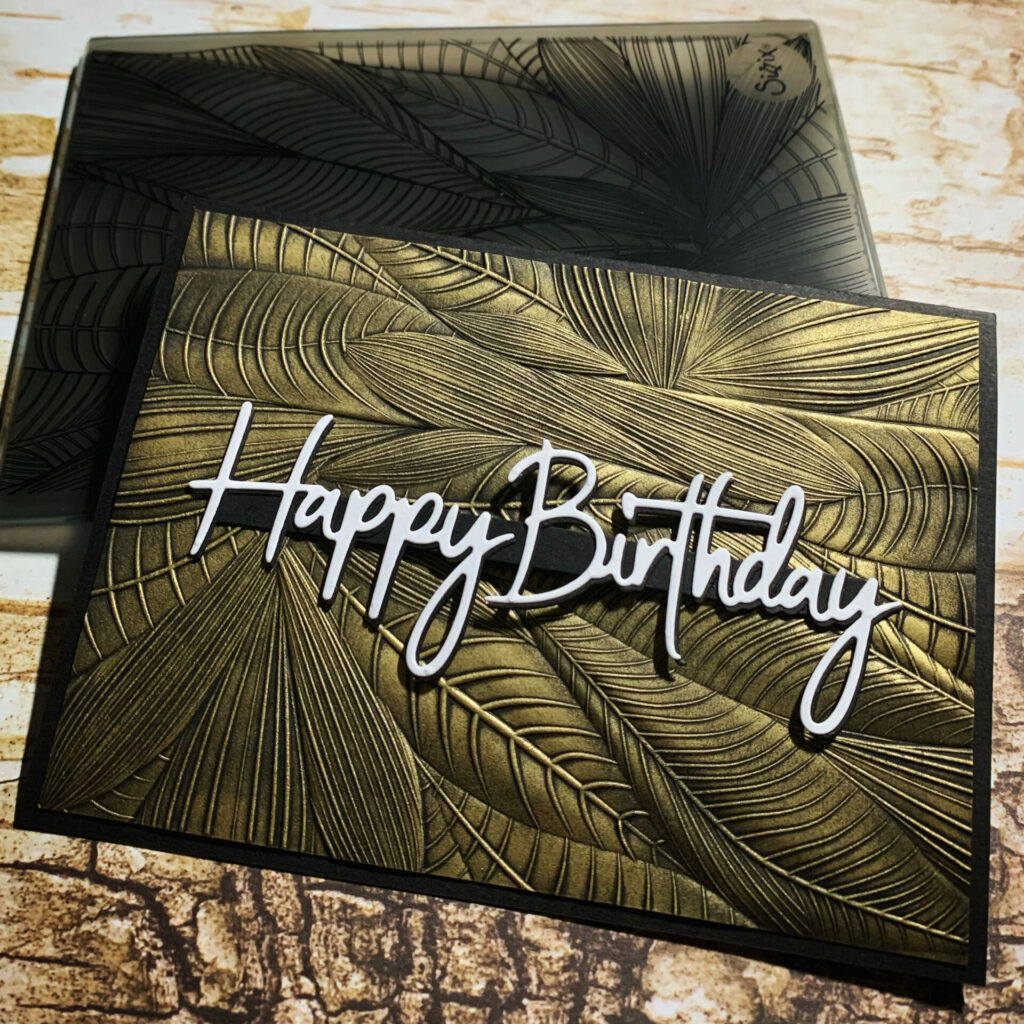
While the panel was drying, I used the Happy Birthday sentiment die and cut it twice from the black and white cardstock. Once from the white and once from the black. I then used distress collage medium and glued the black and white pieces together, the white being on top. While the glue is still slippery I slid the top white layer a little bit up and to the left. Giving the word a drop shadow effect. Then, I put something heavy (I use my Sizzix Big Shot platform) on top of them and let them dry. Next I cut a 4¼” x ¼” strip of black cardstock. This is the base to glue the Happy Birthday sentiment to. Then, I glued the sentiment to the black strip of cardstock. This is the main focal point of the elegant and simple card.

Applying the Luster Wax
Next, I took the black panel that I embossed earlier and rubbed the sizzix gold luster wax over it. Take a little bit out of the jar with your finger tip and rub it onto the Post-it note or scrap piece of paper. This removes some of the excess wax globs and will save you from ruining your project with hot spots of wax all in one area. It also makes for an even application of the luster wax. Use a light touch and take your time. Your finger might feel a bit numb afterward but it’s totally worth it for this metallic effect. I washed the luster wax off my hands with soap and water when I was done.
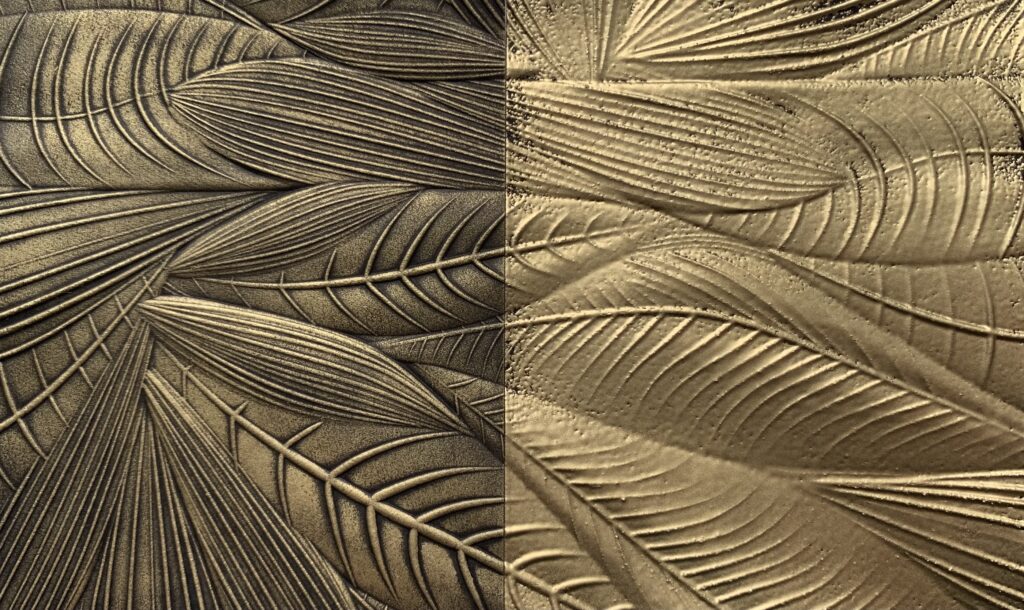
Example Swatches
Pictured below are swatches of the sizzix luster wax in gold (left side) and detail embossing powder in gold (right side) on black cardstock. For the embossing powder swatch, I just rubbed the clear embossing ink pad (or dabber) all over the cardstock, sprinkled on the powder, then heat set it with my embossing heat tool.
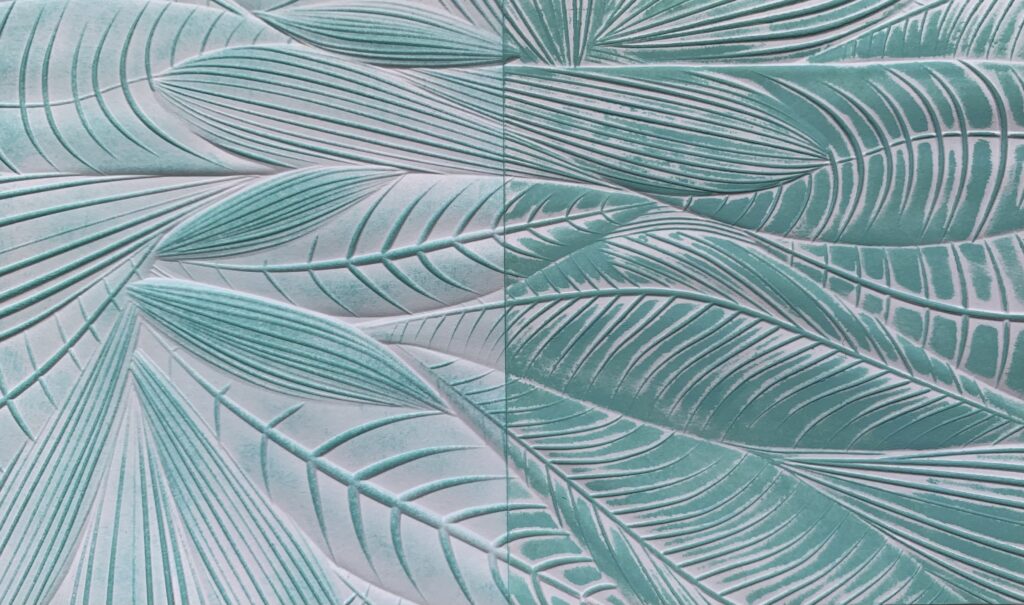
If you don’t have the luster wax and you are using die or pigment inks, see examples in the photo above. The swatch on the left side is Ranger Tim Holtz Distress Ink in Salvaged Patina rubbed on with a blending foam. The swatch on right is Ranger Tim Holtz Distress Oxide in Salvaged Patina rubbed on with my finger.
Putting it all Together
Now all that’s left to do is glue it all together. First, I glued the luster wax panel to my card base, set something heavy (my Big Shot platform) on it and let it dry. After that had dried, I took my sentiment strip and put a small foam square on the back of it in the middle. I did this to add some dimension to the card, but you can skip this step if you want. Then, I put some glue on the back side of both ends of the sentiment strip and placed it on the middle of the card front. I set something heavy on where I placed the glue and let it set to dry. I usually use my distress spray bottle full of water or the luster wax jar.
Elegant & Simple Card Complete!
Congratulations, you have now completed your simple and elegant card! I hope you enjoyed this tutorial and have as much fun making it as I did. If you do make this card please tag me and use the #grovecrafted on Instagram. I’d love to see it! Thanks for stopping by and I hope you found some new inspiration to create.
If you enjoyed making this card, you might want to check out my Layered Butterflies Card tutorial.