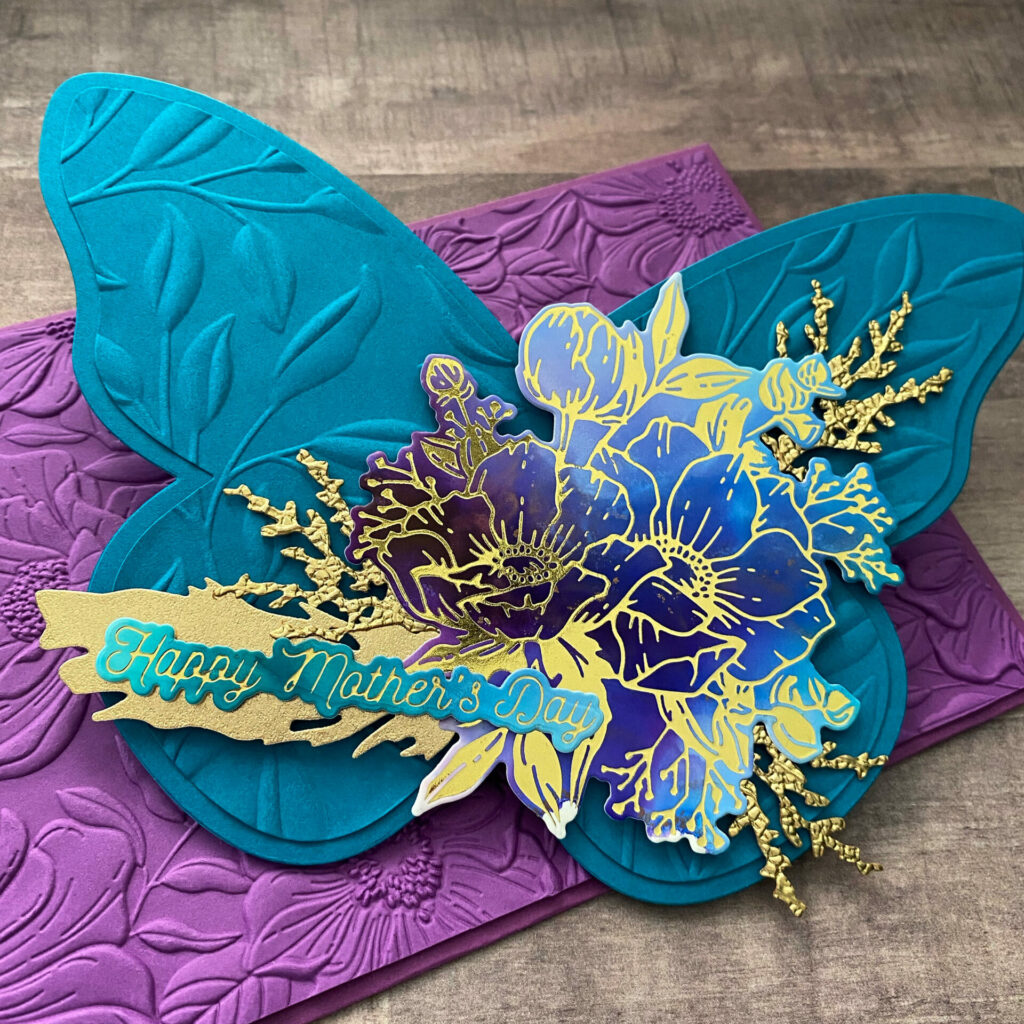
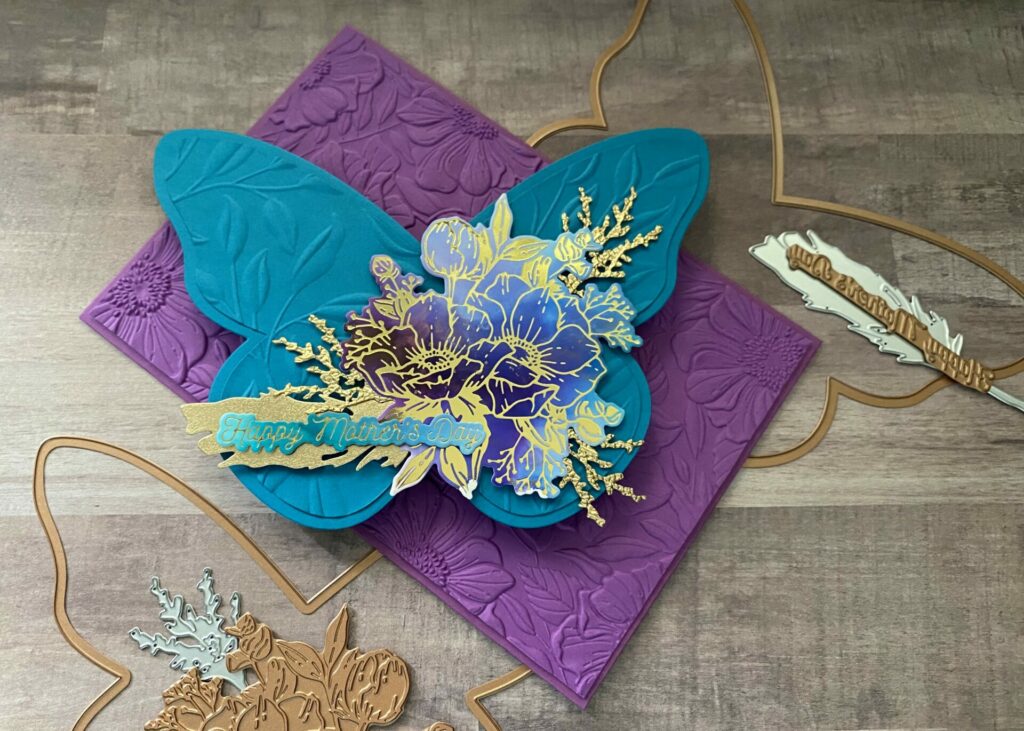
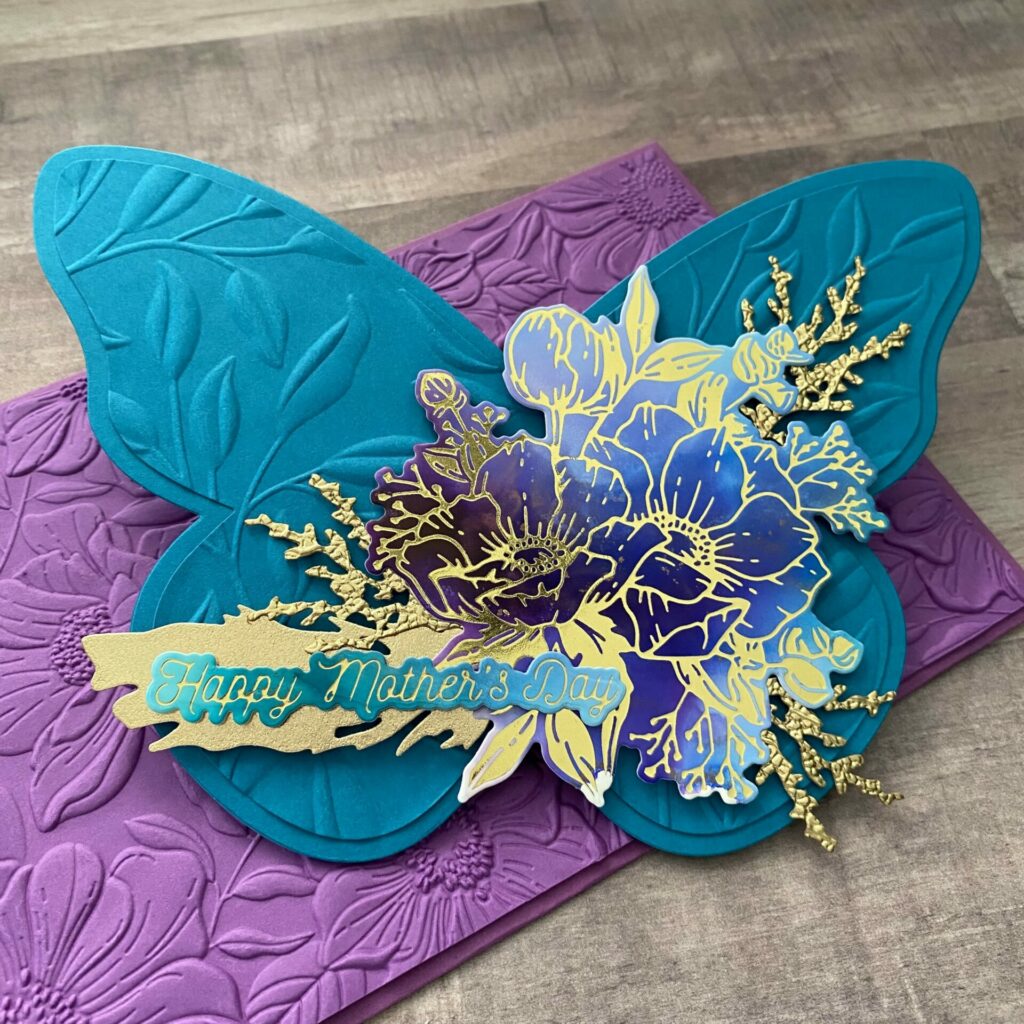
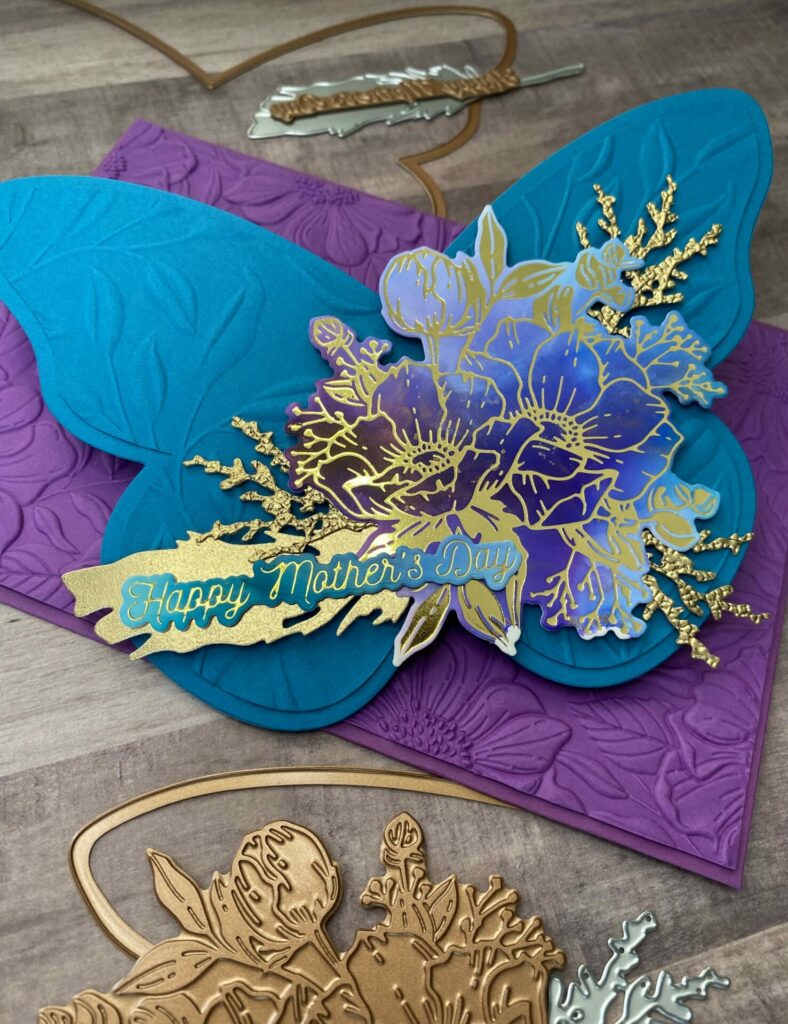
Floral Butterfly Shaped Card
Hey there, crafty card makers! Happy Mother’s Day! Today, I wanted to show you how I created this awesome butterfly shaped card with a floral design. I used alcohol ink and hot foiling for this one, but if you’re not into alcohol inking, you can totally use colored cardstock or watercolor instead. I personally made this card for Mother’s Day, but you can easily switch up the sentiment to suit any occasion. This versatile floral butterfly shaped card can also be used for birthdays, congratulations, thank you notes, hellos, thinking of you messages, or to welcome a new baby girl.
Link Abbreviations
- AMZ – Amazon*
- SSS – Simon Says Stamp
- Sb.com – Scrapbook.com*
- SB – Spellbinders*
- SIZ – Sizzix*
- RI – Ranger Ink*
Full Disclosure: This post contains affiliate links which are indicated with an (*). If you click on an affiliate link and later make a purchase, I may receive a small commission. Clicking on an affiliate link which earns a commission does NOT result in additional charges to you or cost you anything extra. Money earned via affiliate links helps pay the fees to keep this blog up and running. Thank you so much for shopping through my links to show your support for the brands that we love and the products that I share!
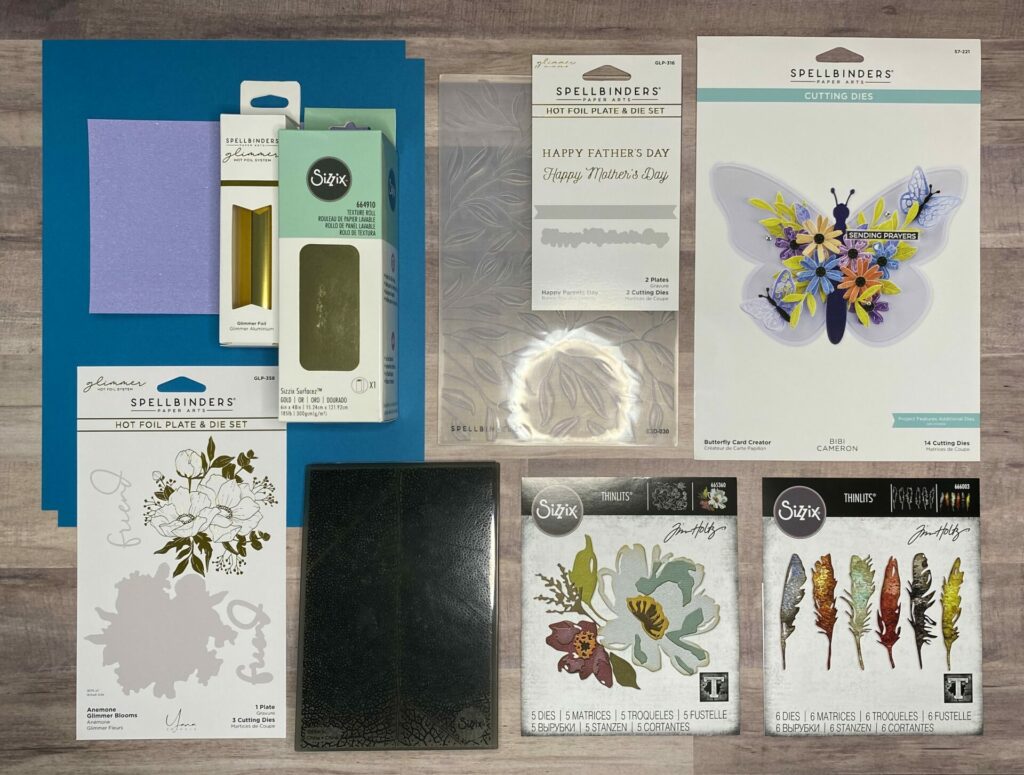
Supplies Used / Substitutions:
- Spellbinders Cutting Dies – Butterfly Card Creator #S7-221 | Sb.com | SB |
- Tim Holtz Sizzix Thinlits Dies – Feathery #666003 | Sb.com | SIZ | AMZ | SSS |
- Tim Holtz Sizzix Thinlits Dies – Brushstroke Flowers #3 #665360 | Sb.com | SIZ | AMZ | SSS / Any small foliage die
- Spellbinders Hot Foil Plate – Anemone Glimmer Blooms #GLP-358 | Sb.com | SB | AMZ / Any floral hot foil plate
- Spellbinders Hot Foil Plate – Happy Parents Day #GLP-316 | Sb.com / Any sentiment
- Sizzix 3D Embossing Folder – Leaf Veins #664488 | Sb.com | SIZ | AMZ / Any embossing folder
- Spellbinders 3D Embossing Folder – Leafy #E3D-030 | Sb.com | SB | AMZ | SSS / Any larger embossing folder
- Teal Cardstock / Any color cardstock
- Sizzix Surfacez Texture Roll – Gold #664910 | Sb.com | AMZ / Any metallic gold cardstock
- Spellbinders Glimmer Hot Foil – Gold #GLF-014 | Sb.com | SB / Any color glimmer hot foil
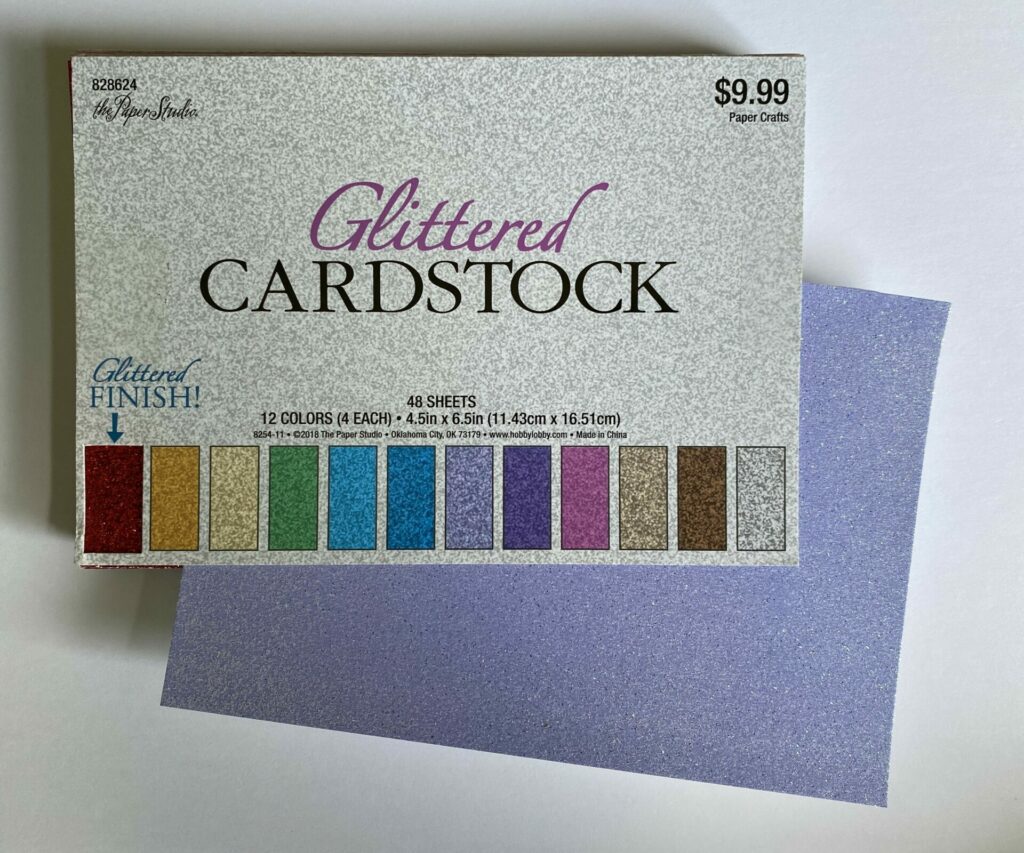
- Rough Glitter Cardstock | HL |
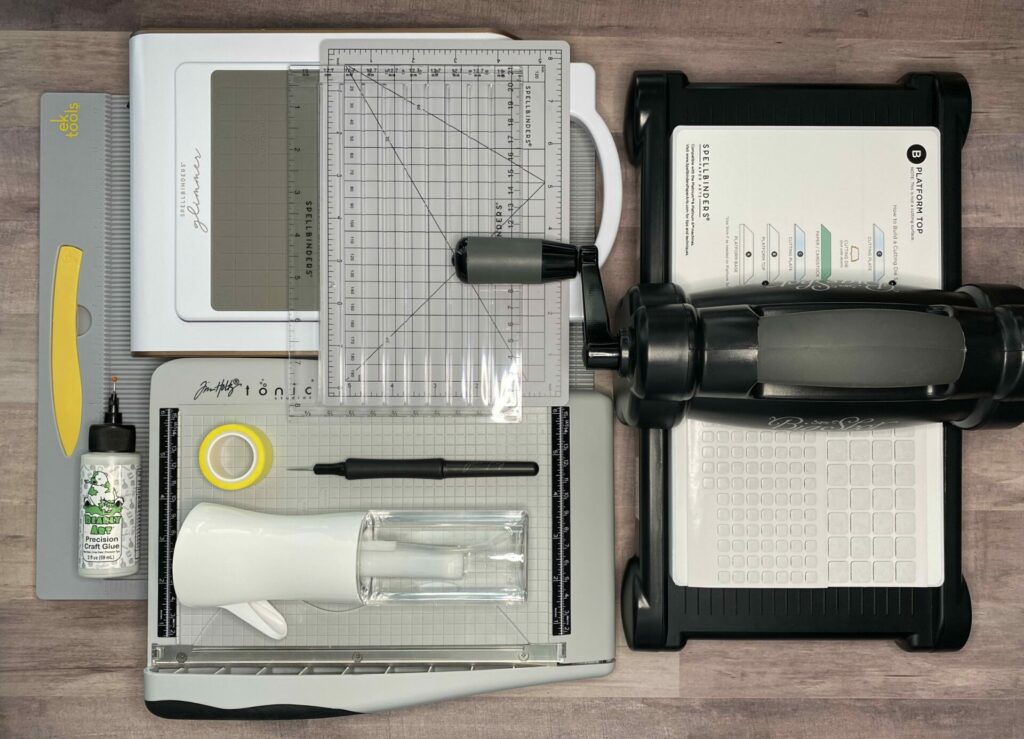
Tools Used / Substitutions:
- Sizzix Big Shot | SIZ / Spellbinders Platinum Six | Sb.com | SB / Any die cutting machine
- Spellbinders Glimmer Hot Foil System | Sb.com | SB |
- Tim Holtz Tonic Guillotine Comfort Paper Trimmer | Sb.com | AMZ | RI | SSS / Any paper trimmer
- EK Scoring Board | AMZ | SSS / Any scoring board
- Spellbinders Quick Trimmer | Sb.com | SB / Scissors
- Bearly Art Glue | Sb.com | SB | AMZ | SSS / Any liquid adhesive
- Spray Bottle with water | Sb.com | SB | AMZ / Any spray bottle
- Die Pick | Sb.com / Toothpick
- Foam Squares – Black | SSS / Optional
- Best Ever Craft Tape – 5/8 in | SB | Sb.com / Any low tack tape
Alcohol Ink Supplies Used / Substitutions:
- Yupo Paper 5 x 7in – White | *Sb.com | *RI | SSS
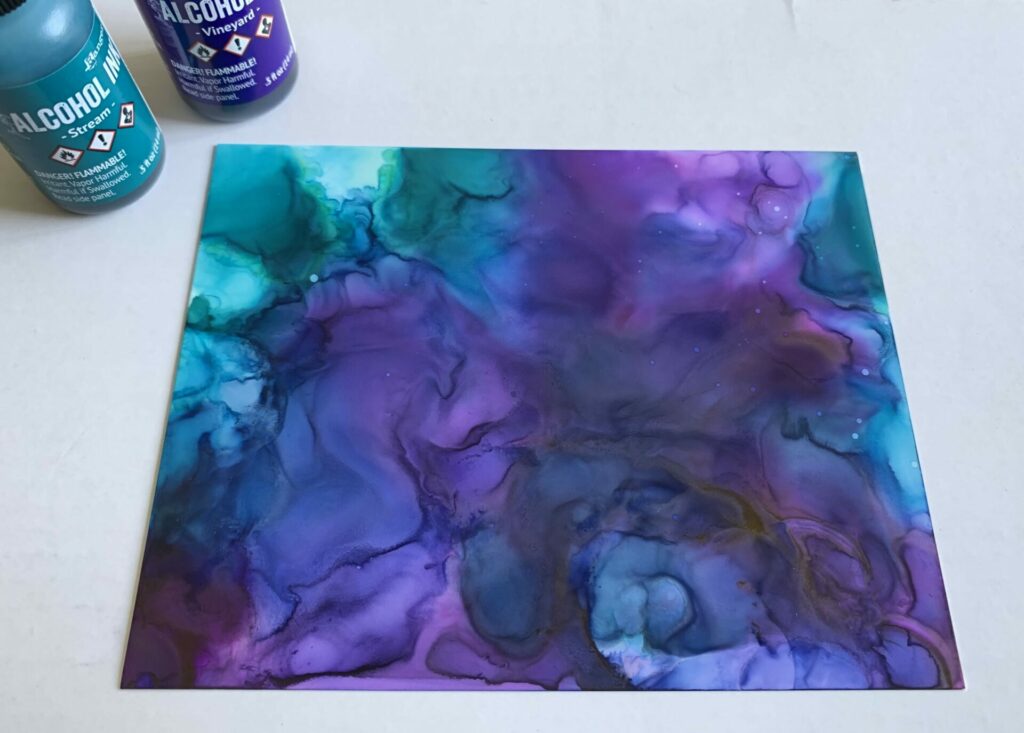
- Tim Holtz Alcohol Ink – Stream | *RI | *Sb.com | *AMZ | SSS / Any alcohol ink in any color
- Tim Holtz Alcohol Ink – Vineyard | *RI | *Sb.com | *AMZ | SSS / Any alcohol ink in any color
- 91% Isopropyl Alcohol | WalMart / Blending Solution
- Ranger Tim Holtz Alcohol Ink Air Blower | *RI | *Sb.com | *AMZ | SSS
- Tim Holtz Glass Media Mat | *Sb.com | *AMZ | SSS / Cardboard
- Plastic Trash Bag
- Paper Towels
About Alcohol Inks & Advice
If you’re new to alcohol inks, here’s a little info about them. For this project, I used the Tim Holtz alcohol inks from Ranger Ink. Ranger’s website describes the inks as follows:
“Alcohol Inks are fast drying, acid free, fade resistant dye inks specially formulated to create gorgeous backgrounds and vivid pops of color on non-porous surfaces.”
Important Safety Warnings
Alcohol inks do have a slight odor, so individuals sensitive to smells may want to avoid this medium. Additionally, please note that this project is intended for adults only and is not suitable for children.
- Work in a well ventilated area.
- Open up doors and windows and/or wear a respirator.
- Wear gloves to protect your hands from ink stains.
- Keep away from heat, sparks, and flame.
- Keep out of reach of children.
- Do not use a straw to blow ink. Use an air blower tool instead.
- Never ever spray alcohol inks or blending solution.
Below is a safety note from Ranger’s website:
Note: Ranger does not recommend using Tim Holtz® Alcohol Inks, Metallic Mixatives, Snow Cap Mixative or Alcohol Ink Blending Solution in spray bottles as these contents contain alcohol and should not be airborne.
Tips Before You Start Inking
- Watch some YouTube videos to familiarize yourself with alcohol inking techniques.
- Tim Holtz Alcohol Ink Exploration – This video covers all the basics of alcohol inking. (It’s a bit lengthy, so feel free to put it on in the background while you experiment with the inks.)
- Experiment and play to see which techniques work best for you.
- Avoid excessive ink usage as it may lead to pigment buildup, causing the hot foiling to adhere to it.
- Additionally, avoid excessive use of the isopropyl alcohol/blending solution too.
- Put your 91% isopropyl alcohol in a needle tip bottle or use a pipette dropper.
I recommend allowing this to dry for a few days, especially if a significant amount of ink and blending solution was used. (In humid climates, drying time may be extended.)
Trim down your yupo paper with a paper trimmer.
- 4 in x 4 in – Just the anemone bloom.
- 4 in x 5 in – Anemone bloom and a sentiment. (This is the size I used.)
- Or use the entire 5 in x 7 in sheet.
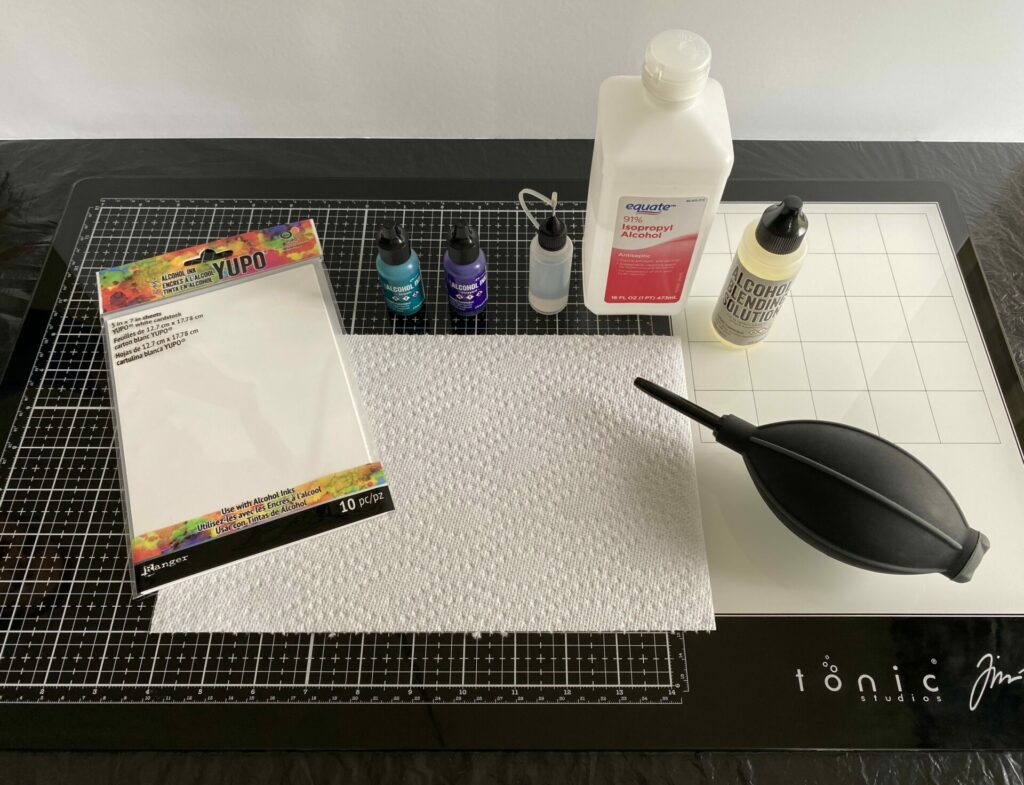
Setup Work Surface & Supplies
Firstly, I set up my work surface and collected my supplies. You might want to put a plastic trash bag under the glass media mat to protect the table. If you don’t have a glass media mat, you could work on a piece of cardboard. Also, you’ll want to work in a well-ventilated area, so crack a window while you’re working. Gather the supplies listed below and let’s get started.
- Glass Media Mat (remove kraft sheet from mat) / Cardboard
- Plastic Trash Bag
- Yupo Paper
- Alcohol Inks
- 91% Isopropyl Alcohol / Blending Solution
- Alcohol Ink Air Blower
- Paper Towels
Alcohol Inking The Background
- Drip some drops of 91% isopropyl alcohol / blending solution on to the yupo paper.
- Add a couple drops of stream alcohol ink here and there.
- Then, add a couple drops of vineyard alcohol ink into the mixture.
- Use the air blower tool to blow the ink around the paper. (Try to cover all the white space with ink.)
- Add more ink and isopropyl alcohol where needed.
- Allow it to dry and cure for a few days.
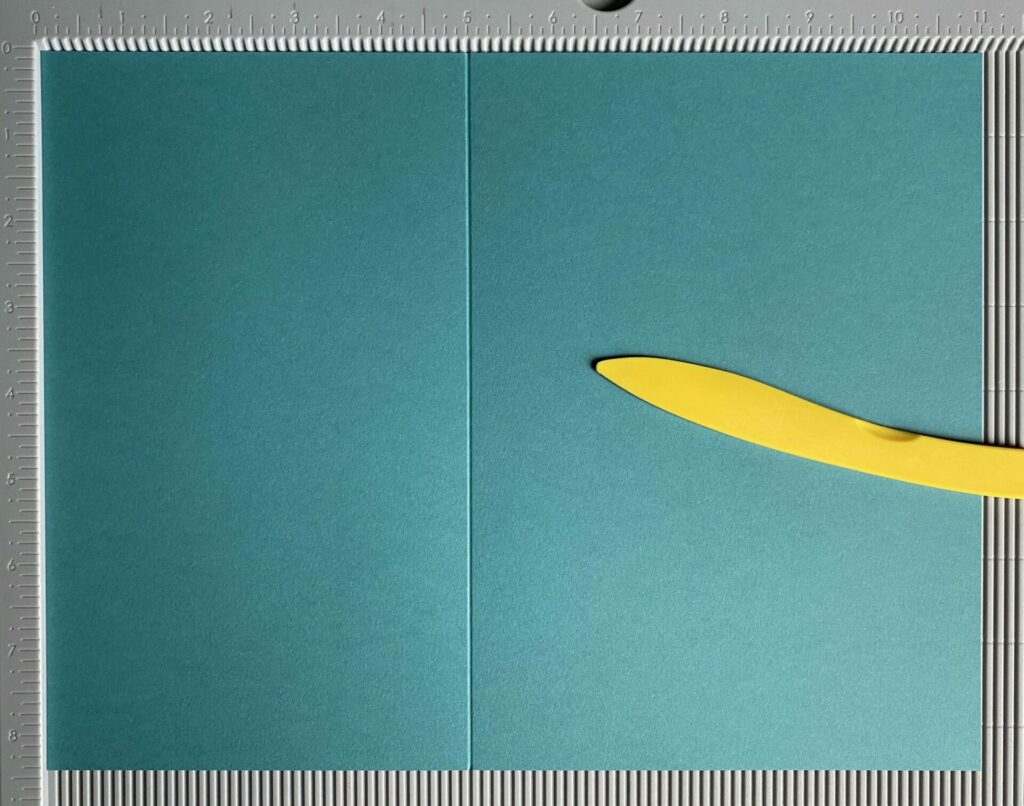
Making The Butterfly Shaped Card Base
- Score the teal cardstock at the 5-inch line and then fold it in half.

- Use your paper trimmer to cut off the extra 1-inch strip.
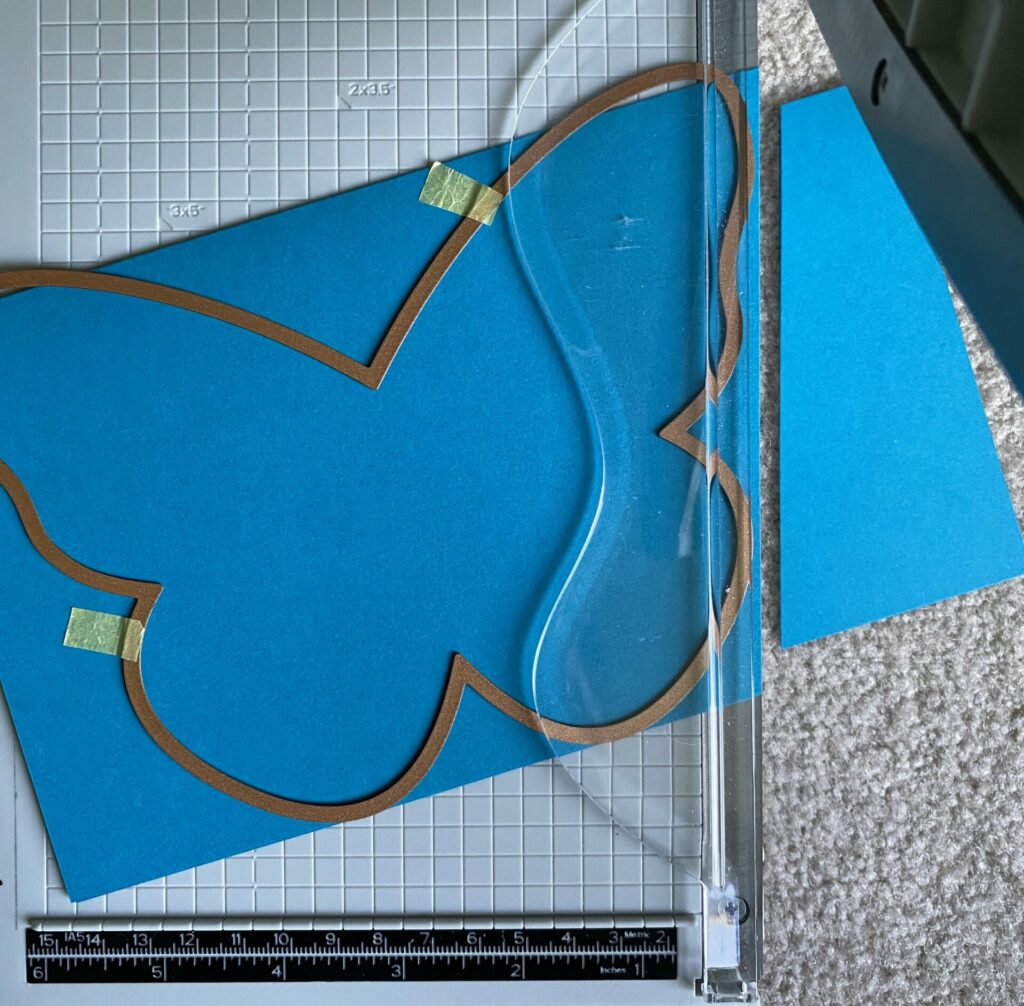
- Take the larger butterfly die and position it on the card base as shown below. (Use the edge of the scoring board to ensure that the butterfly die is level.)
- Make sure the fold is at the top, and that the top of the butterfly die hangs off the edge a bit. This creates the folded hinge of the card base.
- Use tape to secure the die in place.
- You can trim off any excess cardstock using a paper trimmer.
- Then, run it through your die cutting machine.

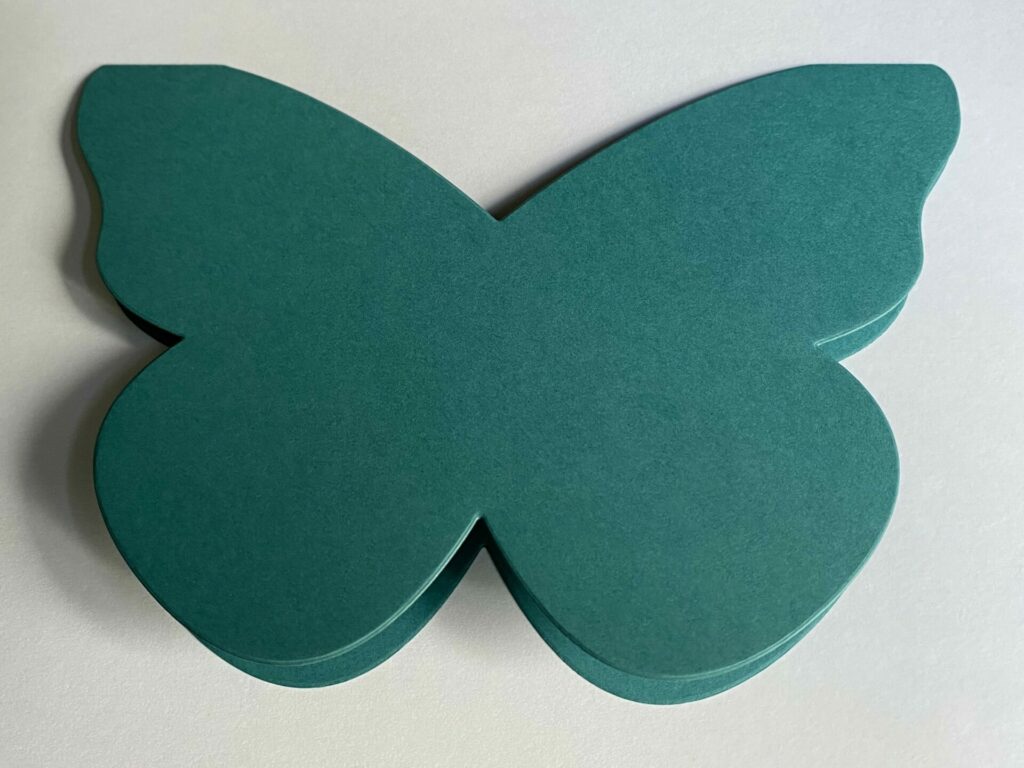
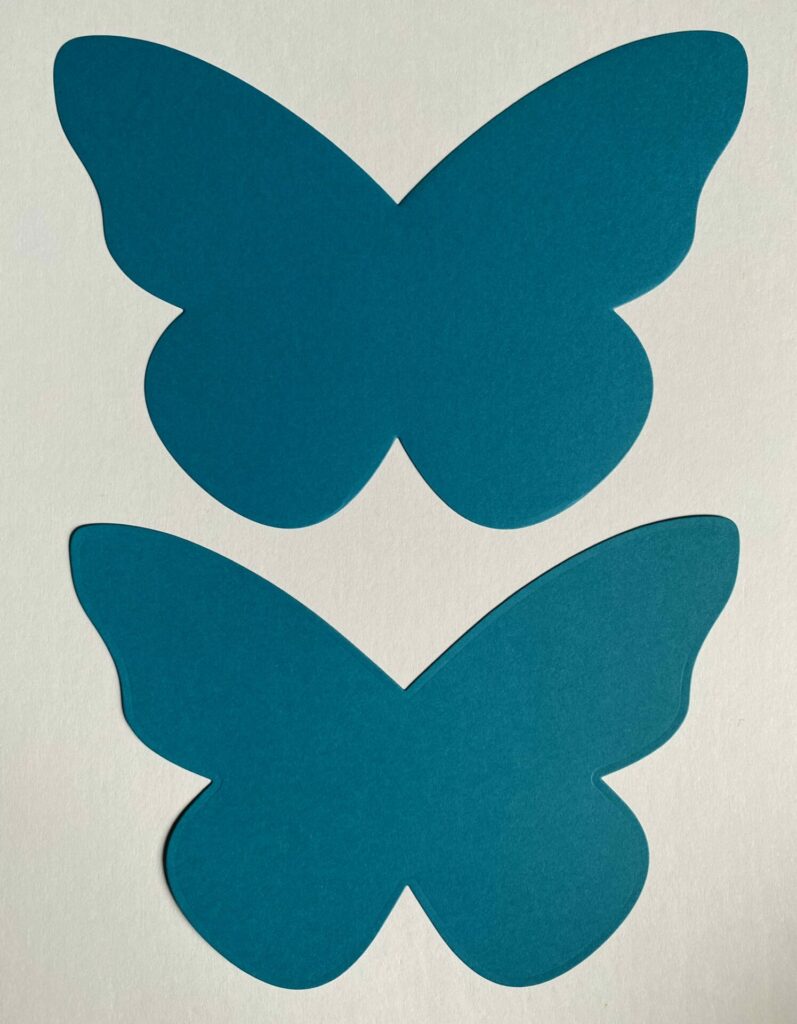
Cutting & Embossing The Butterfly
- Use the two larger butterfly dies to cut out each butterfly from teal cardstock.
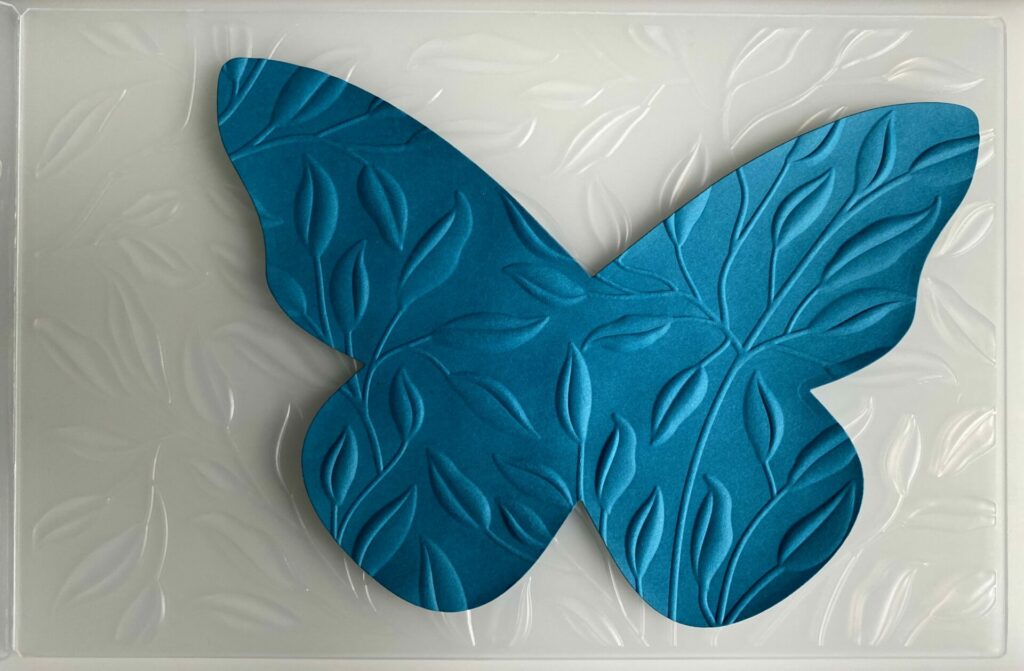
- Lightly mist the smaller butterfly die cut with water.
- Then, place it in the Spellbinders Leafy 3D embossing folder.
- If you’re using a Sizzix Big Shot machine like me, you’ll need the Universal Plate System to emboss with the Spellbinders 3D embossing folders.
- Next, run it through your die cutting machine to emboss.
- Take the paper out of the embossing folder and allow it to dry. Place a cutting pad on top to ensure it dries flat.
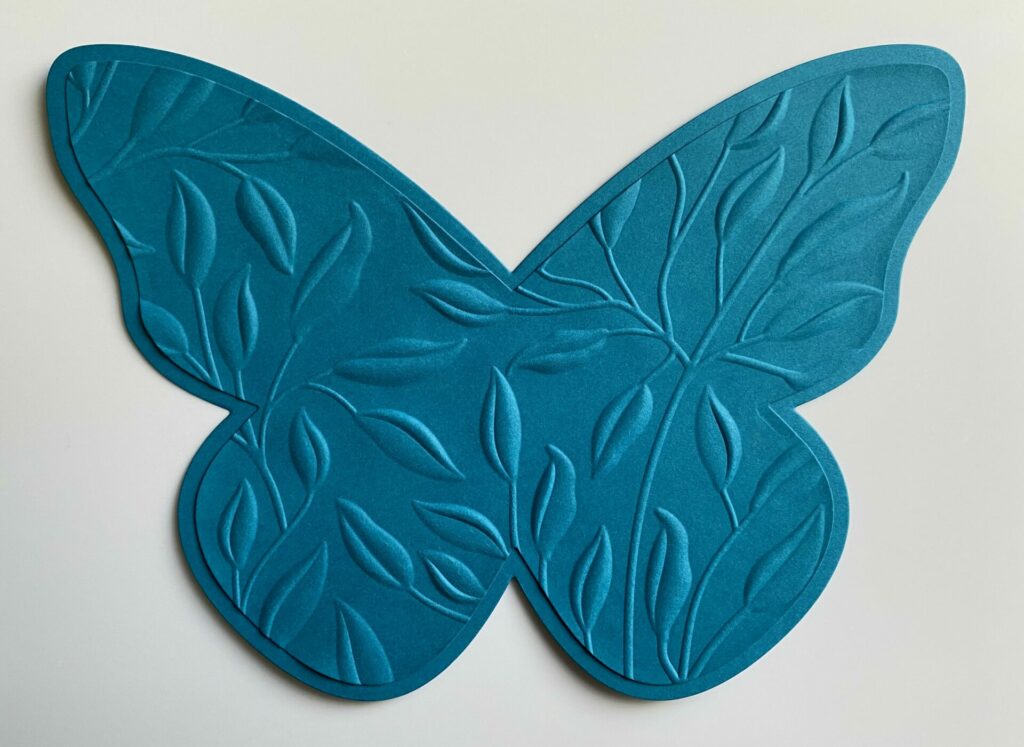
- Then, glue the embossed butterfly layer on top of the larger butterfly die cut from step 1. NOT THE CARD BASE.
- Set something heavy on top of it while it dries.
- Now, glue it to the front of the butterfly shaped card base.
Cutting & Embossing The Floral Sprigs
Please note that you don’t have to use this specific sprig die. Take a look at what you already have in your stash and choose a greenery die that goes well with the flower you’re using.
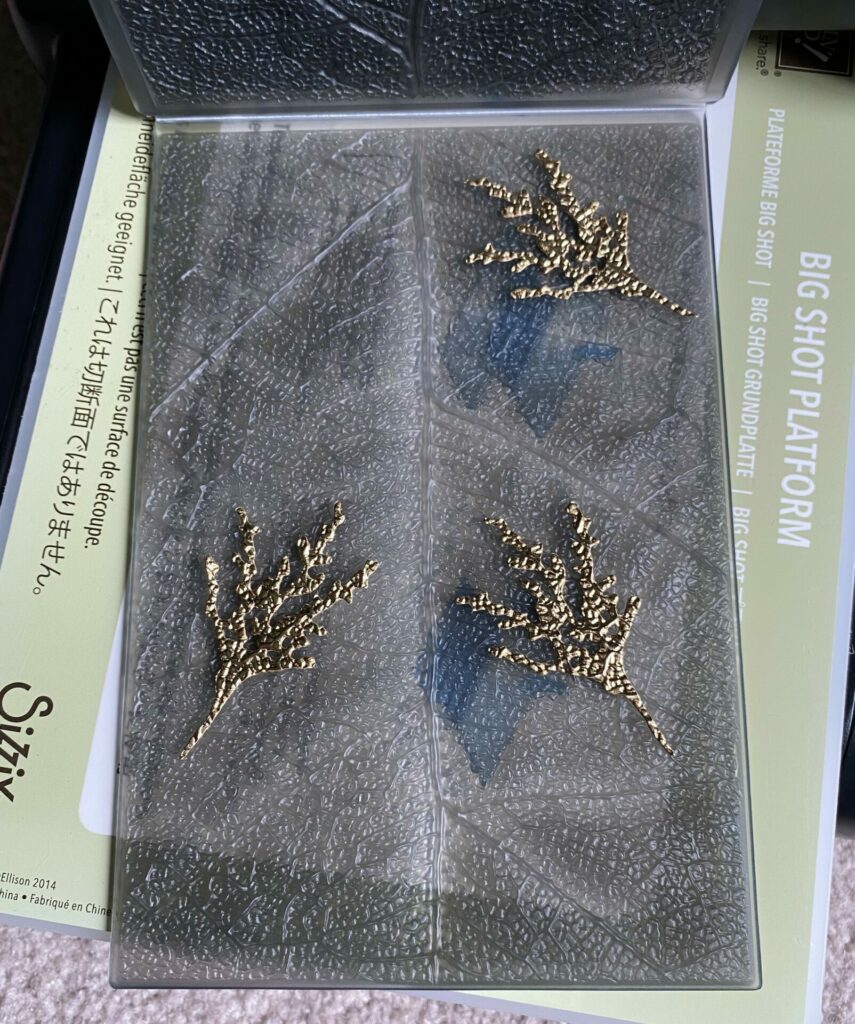
- Using the sprig die from the Brushstroke Flowers #3 die set, cut it from gold metallic cardstock three times.
- Place them in the Leafy Veins 3D embossing folder and run it through your die cutting machine once.
- Remove them from the folder and set aside for later.
Making The Feather
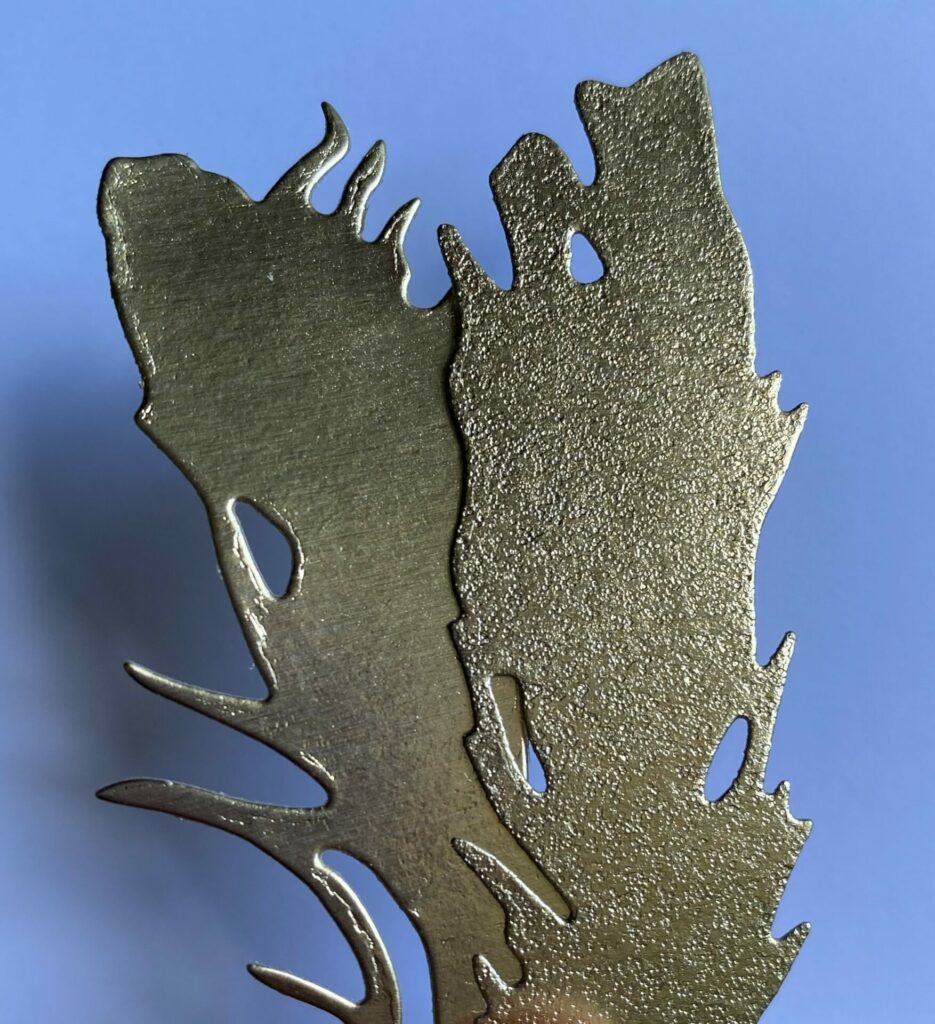
- Cut this feather from gold metallic cardstock.
- Add texture to the feather die cut with rough glitter cardstock. (I got mine from Hobby Lobby.)
- Assemble the embossing sandwich as depicted in the image below.
- Run it through your die cutting machine.
- Set the feather aside for later.


Here’s a comparison of plain metallic cardstock on the left and embossed with glitter paper on the right. I love the texture it creates.
Glimmer Basics
Whether you’re a beginner or simply in need of a quick review, visit Spellbinders page for detailed information on the Glimmer machine, including essential knowledge and helpful tips.
Spellbinders Page – Glimmer Basics: Everything you need to know to start hot foiling with the Glimmer machine.
Spellbinders YouTube – Glimmer Hands On Workshop Video – FREE Glimmer Virtual Workshop Video Class! This technique focused video is designed to transform a Glimmer newbie into a Glimmer Pro. We’ll start with the basics, talk troubleshooting, and then move to advanced techniques that are sure to WOW.
Yanas YouTube Video – I highly suggest checking out Yana Smakula’s video, “Hot Foil Stamping 101 – Tips, Do’s & Dont’s & More”, for a thorough overview of hot foiling with the Glimmer machine. This video includes helpful advice, best practices, and a detailed walk through of the hinge method to avoid plate shifting while hot foiling.
Hinge Method – Timestamp 9:10
Foiling The Anemones
- Turn on your Glimmer machine and dock in the platform to the base.
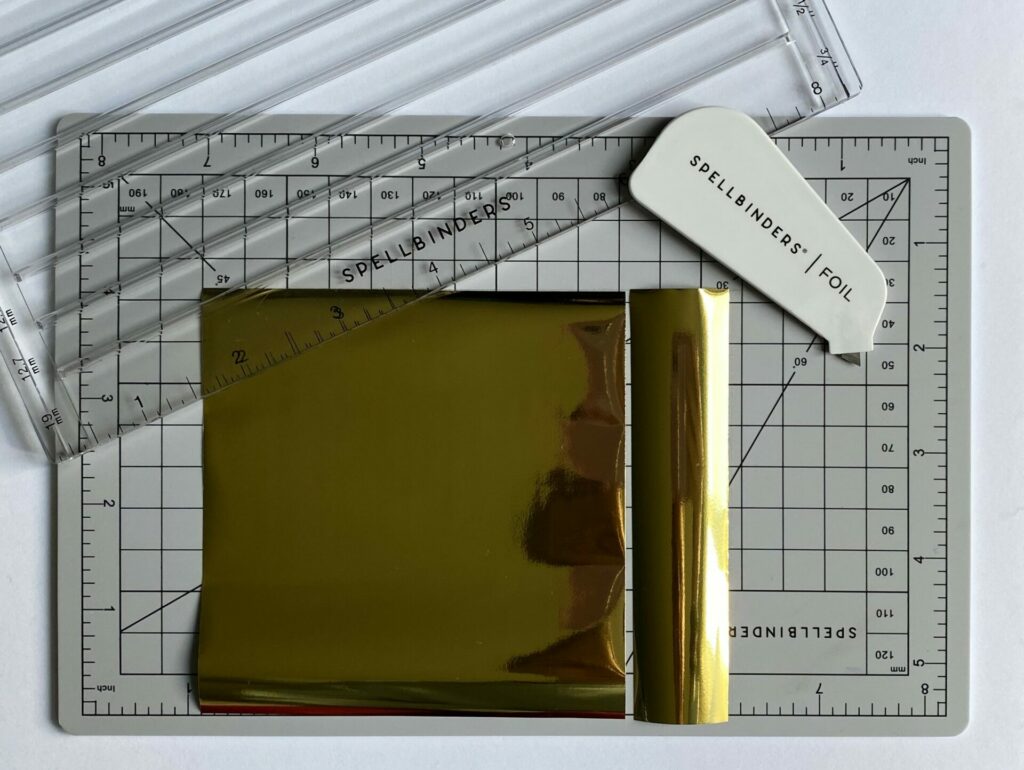
- Use the quick trimmer to cut a piece of gold hot foil to 4 x 4 inches. Keep the one inch strip for your sentiment.
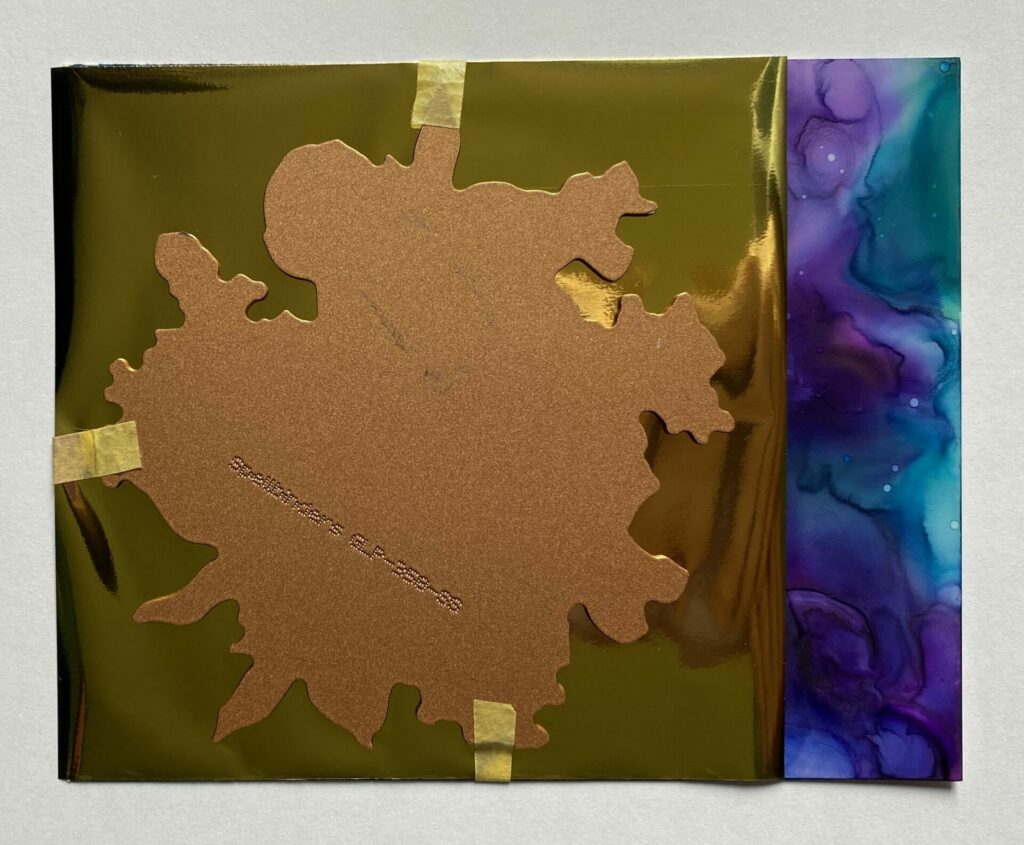
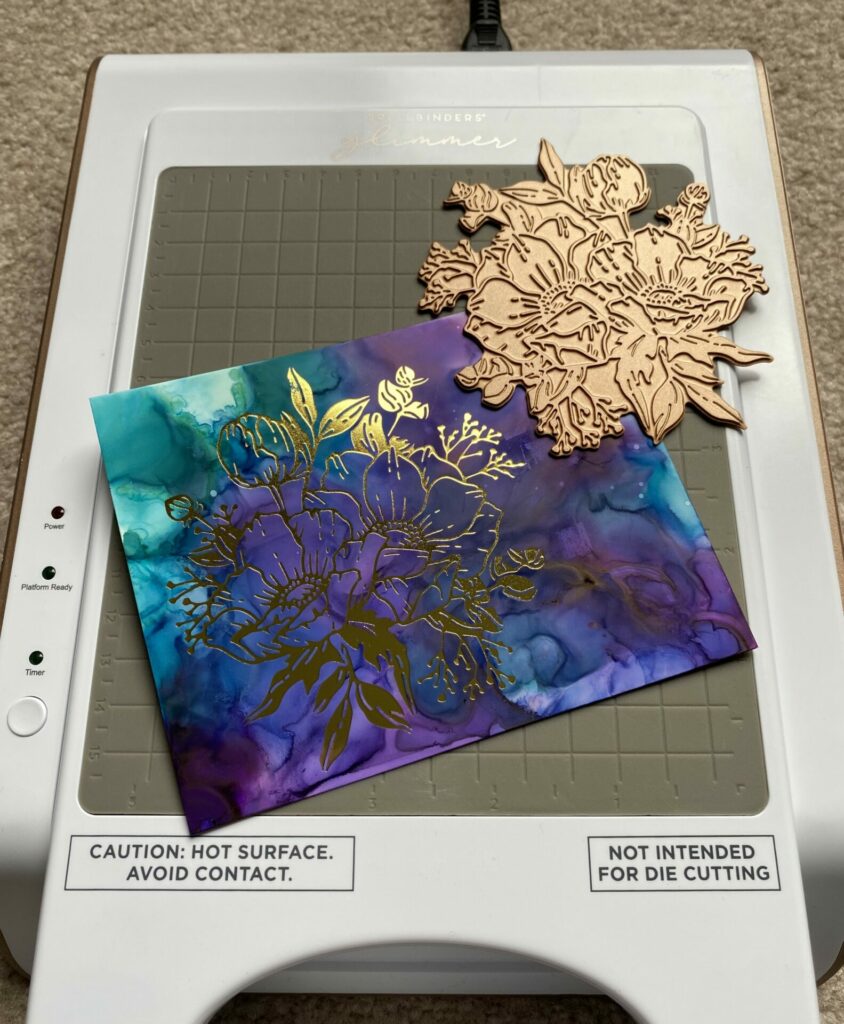
- Place the gold foil (shiny side facing up) on top of the alcohol inked yupo paper (facing up).
- Then, place the anemone glimmer plate (face down) on top of the gold foil.
- Position the plate in the center of the gold foil square and use best ever craft tape to secure it in place.
- Flip it over and place it on the heated Glimmer platform. Make sure the plate is against the platform and the yupo paper is on top.
- Press the timer button.
- When the timer light stops blinking and turns solid green, undock the platform.
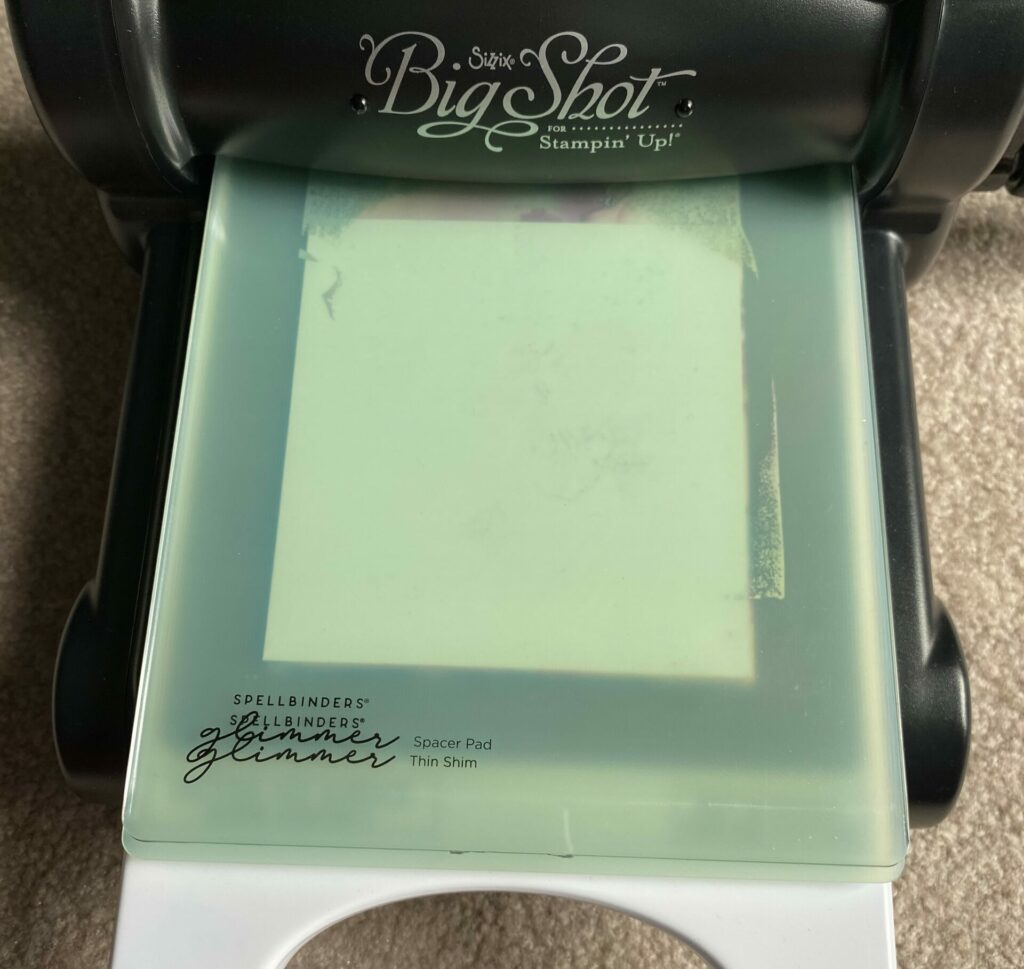
- Put the green thin shim on the platform and then place the clear spacer pad on top of it.
- Then, slowly roll it through your die cutting machine.
- Remove the shims and dock the platform back in the base.
- Use the magnetic pick-up tool to move the hot foil plate to the silicone cooling pad.
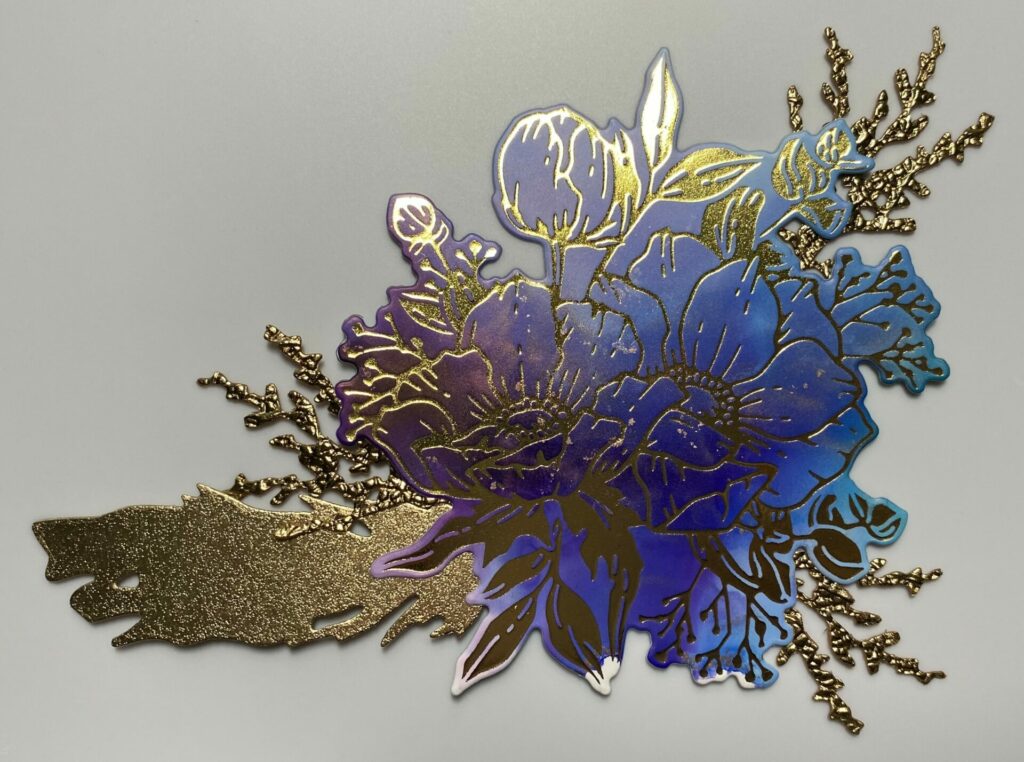
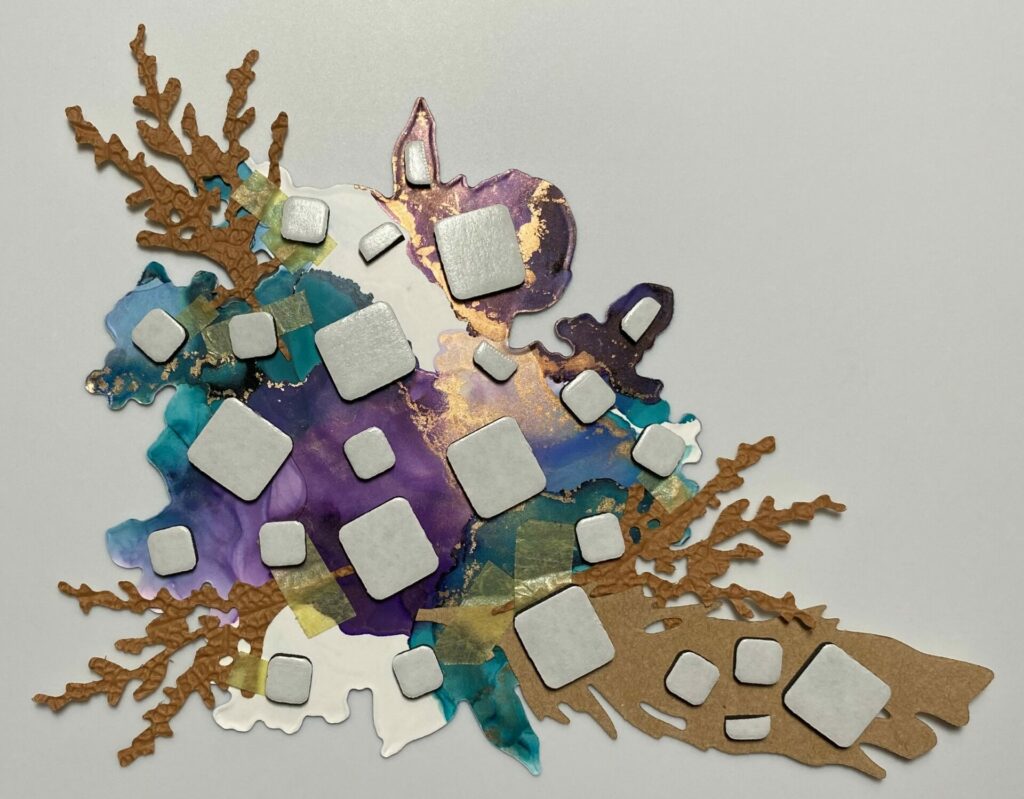
- When cooled, remove the tape and peel away the foil to reveal the beautifully foiled anemones.
Your foiling should look something like this.
Cutting The Anemones
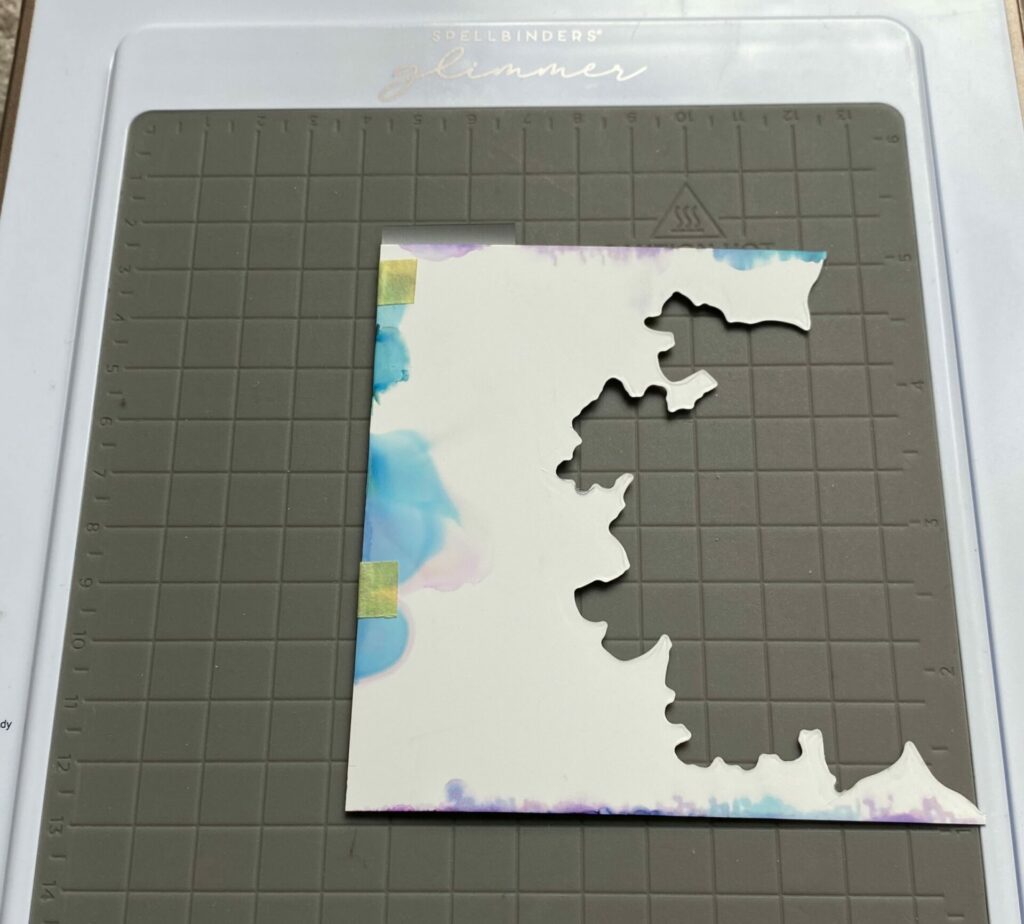
- Align the cutting die with the foiled image.
- Use best ever craft tape to secure the die in place. (Avoid placing the tape directly over any foiled areas, as this may cause the foil to come off. Additionally, refrain from applying tape over the desired location for the foiled sentiment, as it may also lift some of the alcohol ink.)
- Then, run it through your die cutting machine.
- Pop out the foiled die cut and set it aside for later.

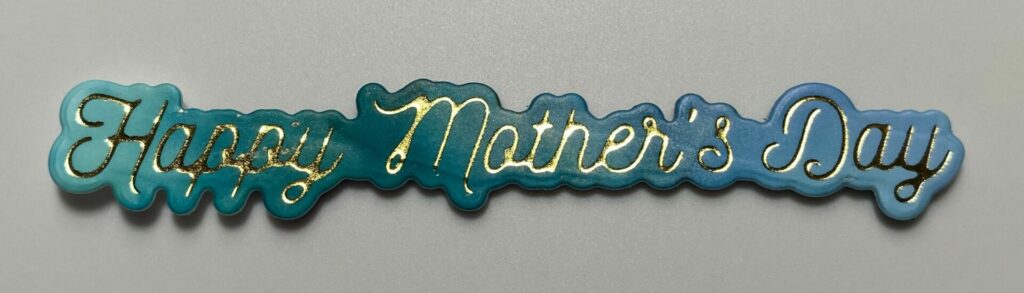
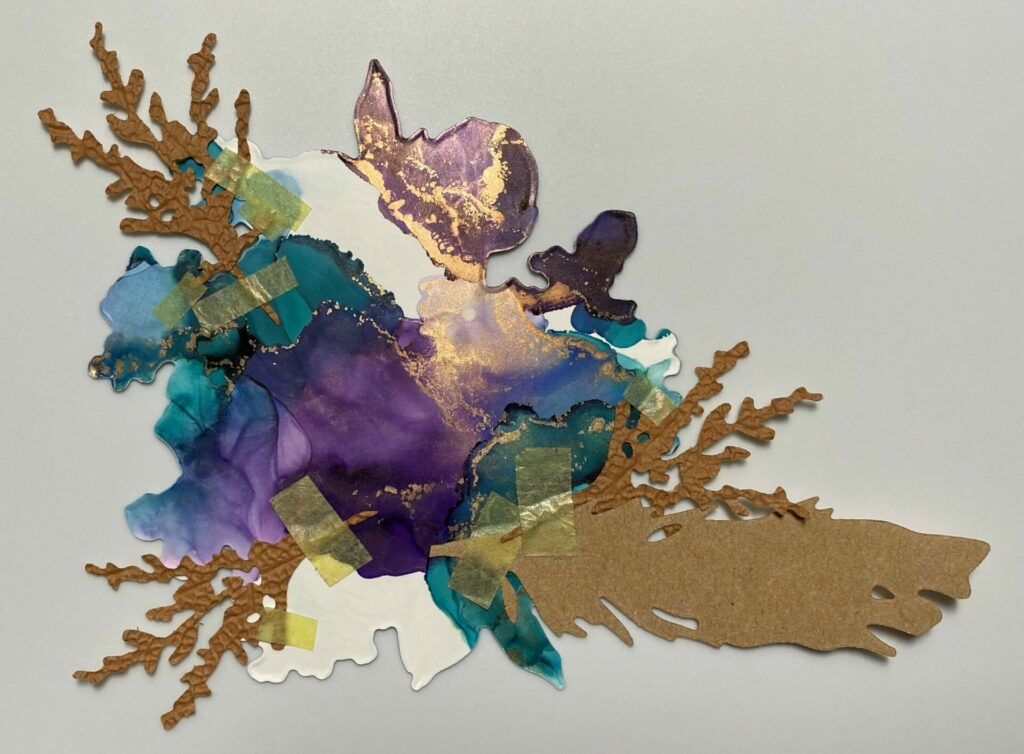
Foiling The Sentiment
- To foil the sentiment I used the hinge method.
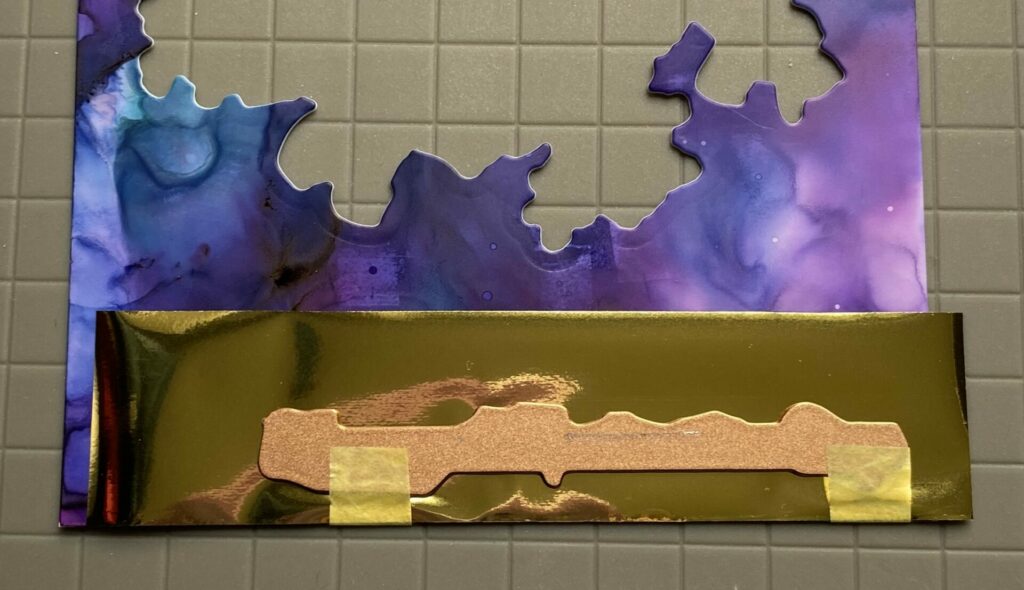
- Position the sentiment plate (face down) on the alcohol inked paper. Ensure there is sufficient space around the sentiment for die cutting.
- Place two pieces of tape on the plate to create a hinge.
- Lift up the plate and carefully insert the one-inch strip of gold foil (shiny side facing up) underneath.
- Flip it over and place it vertically on the heated Glimmer platform. Make sure the plate is against the platform and the yupo paper is on top.
- Press the timer button. When the timer light stops blinking and turns solid green, undock the platform.
- Put the green thin shim on the platform and then place the clear spacer pad on top of it.
- Then, slowly roll it through your die cutting machine.
- Remove the shims and use the magnetic pick-up tool to move the hot foil plate to the silicone cooling pad.
- When cooled remove the tape and peel away the foil to reveal the foiled sentiment.
- Next, align the cutting die with the foiled sentiment.
- Use best ever craft tape to secure the die in place and run it through your die cutting machine.
- Pop out the foiled die cut sentiment.
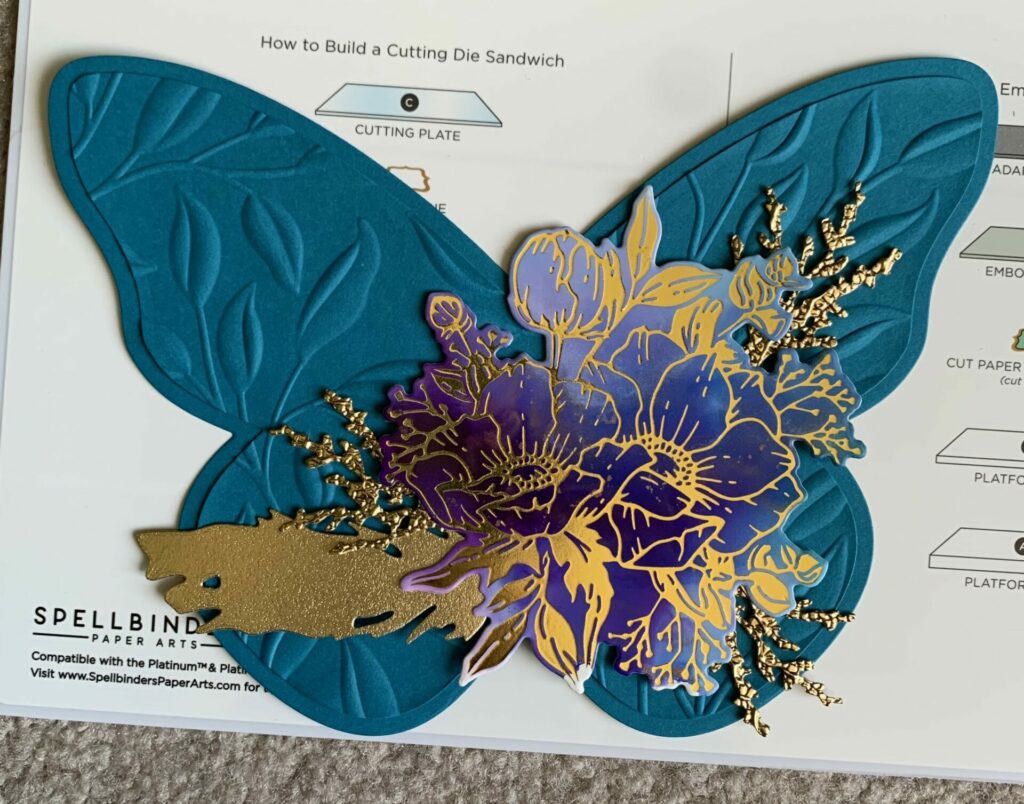
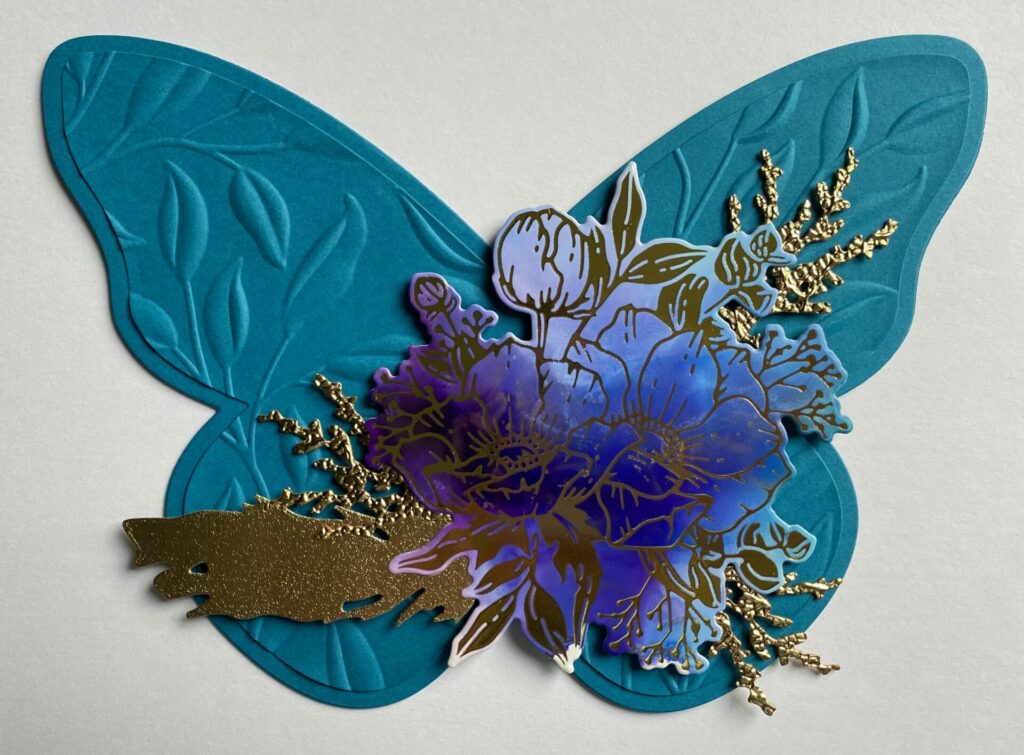
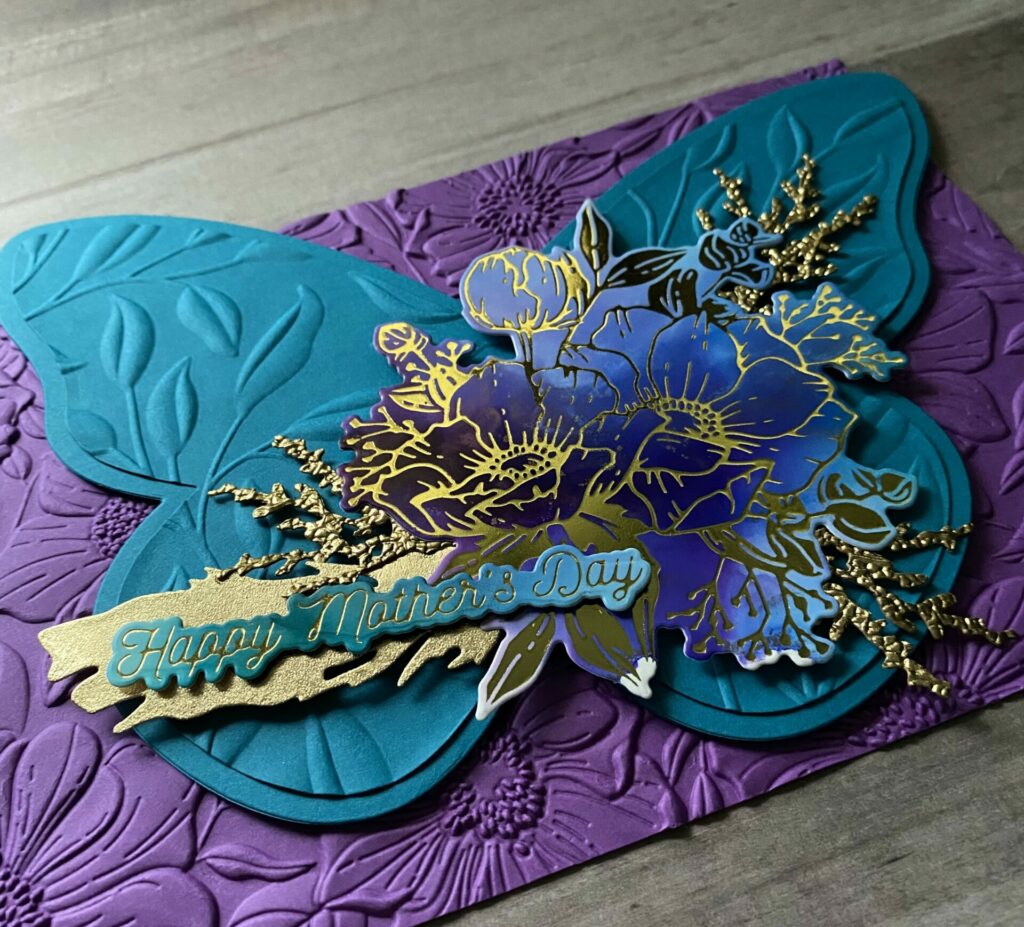
Assembling The Floral Elements
- Arrange the floral elements on the butterfly shaped card front according to your desired layout.
- Next, attach them by using tape on the back side.
- Apply some glue to make sure they stay put forever.
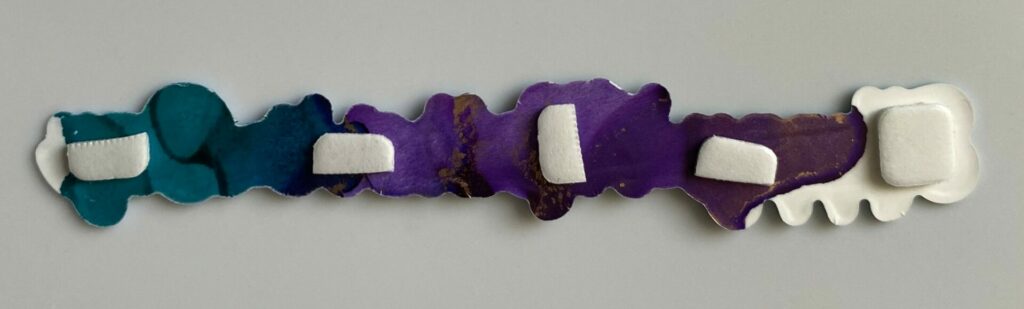
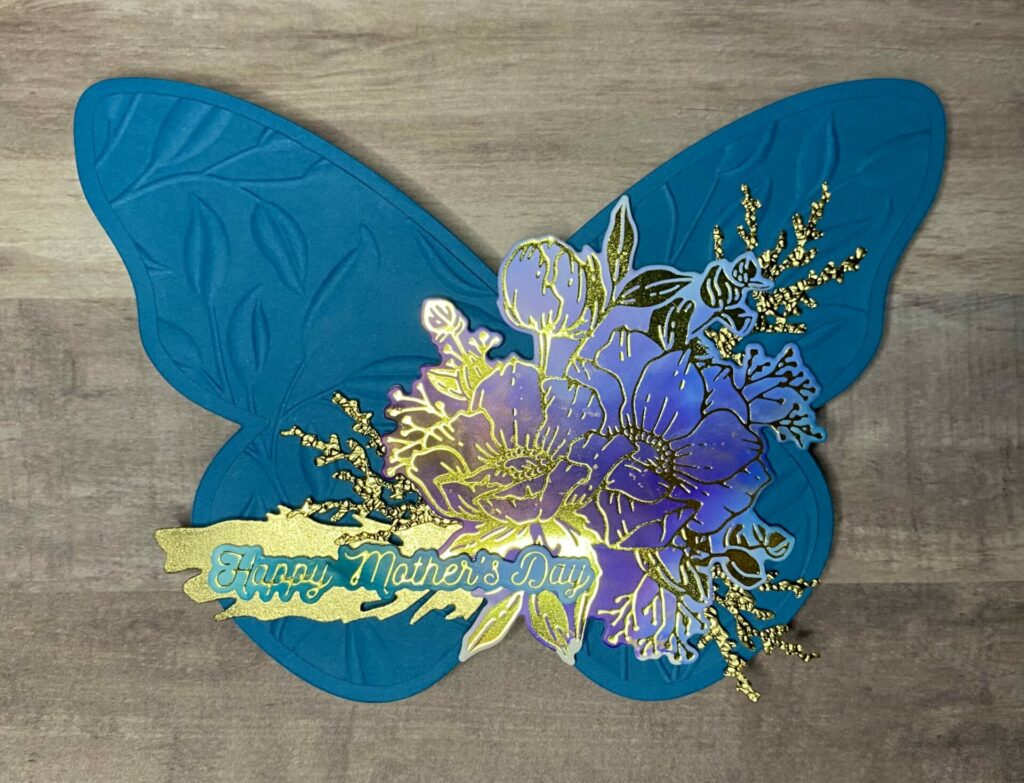
Putting It All Together
- Apply a generous amount of the thicker foam squares to the back of the anemones and feather die cuts.
- Peel off the release paper from the foam squares. (I recommend applying some glue to the foam squares. This allows for flexibility in adjusting its placement on the card.)
- Adhere it to the front of the butterfly shaped card base. (If you used glue, set something heavy on it while it dries.)
- Then, place the thinner foam squares on the back of the sentiment.
- Remove the release paper, apply some glue to the foam squares, and adhere it on top of the feather.
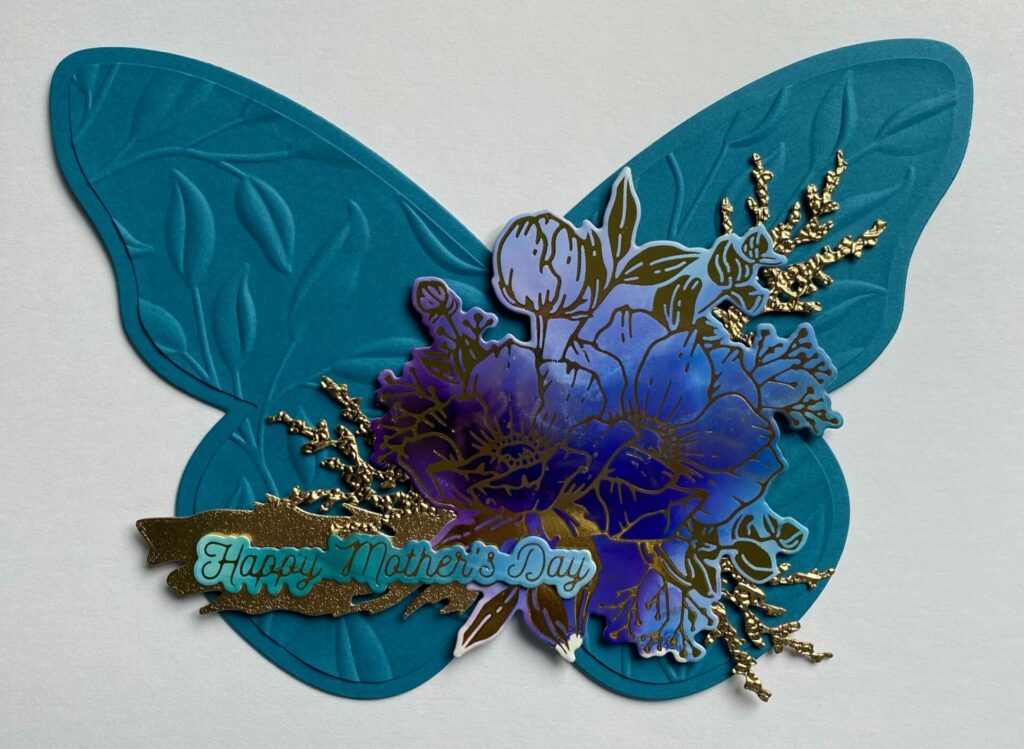
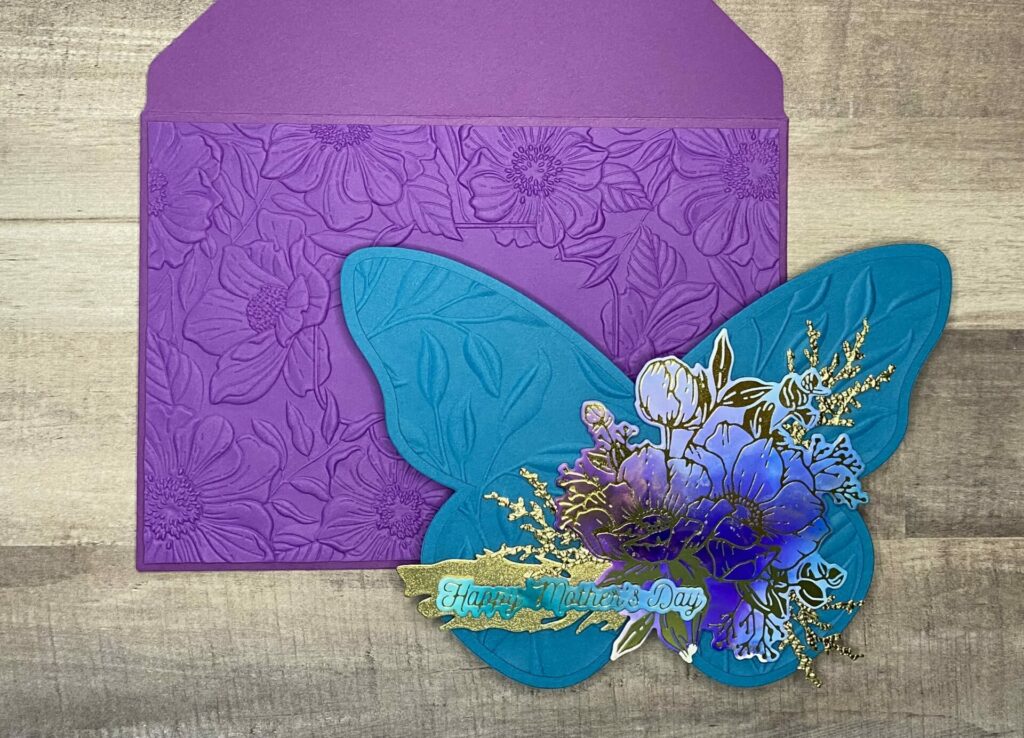
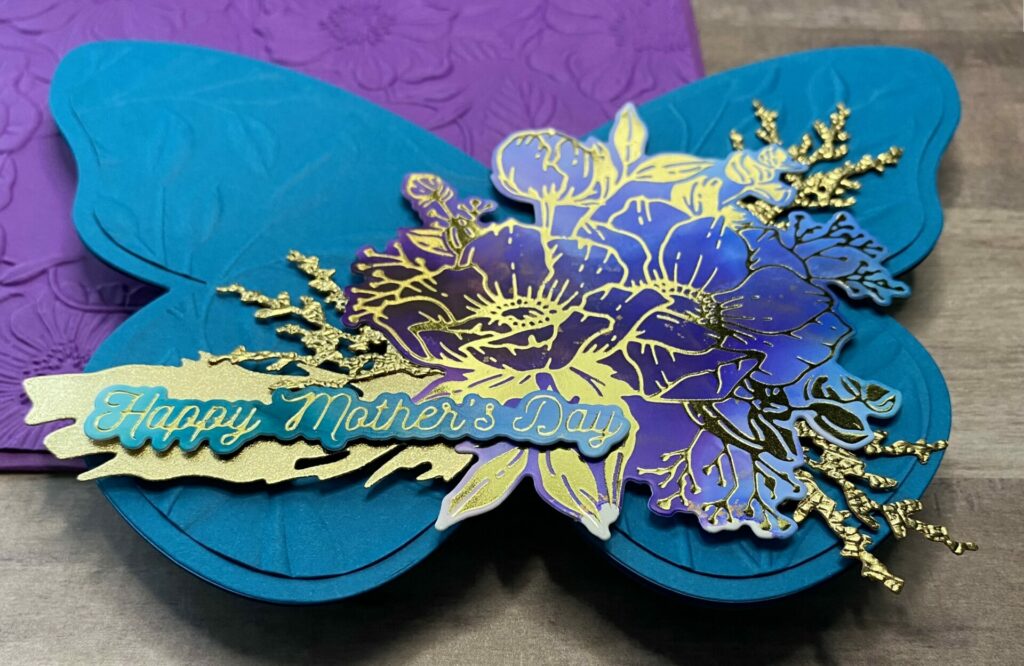
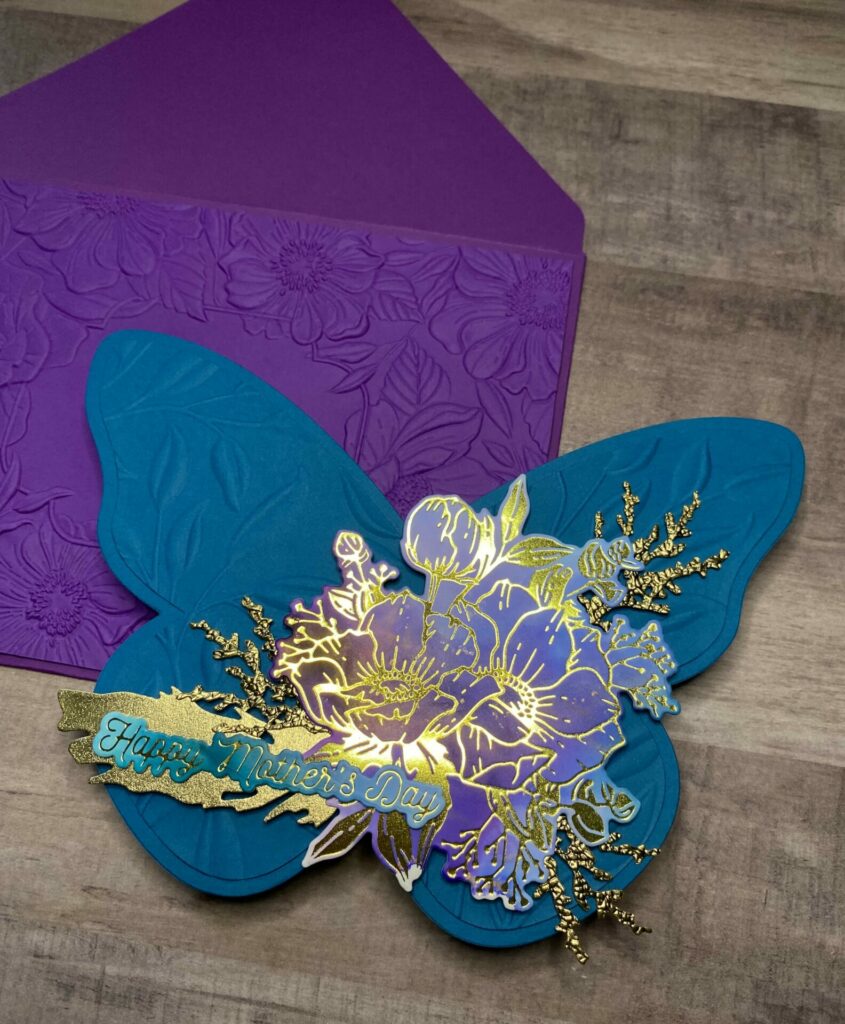
Floral Butterfly Shaped Card Complete!
Hey, congrats! You’ve finished making your floral butterfly shaped card! I really hope you had a blast following this tutorial, just like I did. If you decide to give it a go, don’t forget to tag me (@silversgrove or @grovecrafted) on Instagram. I’m super excited to see what you’ve come up with! Thanks for checking this out, and I hope it sparked some fresh ideas for your own creations. Have a great time crafting!
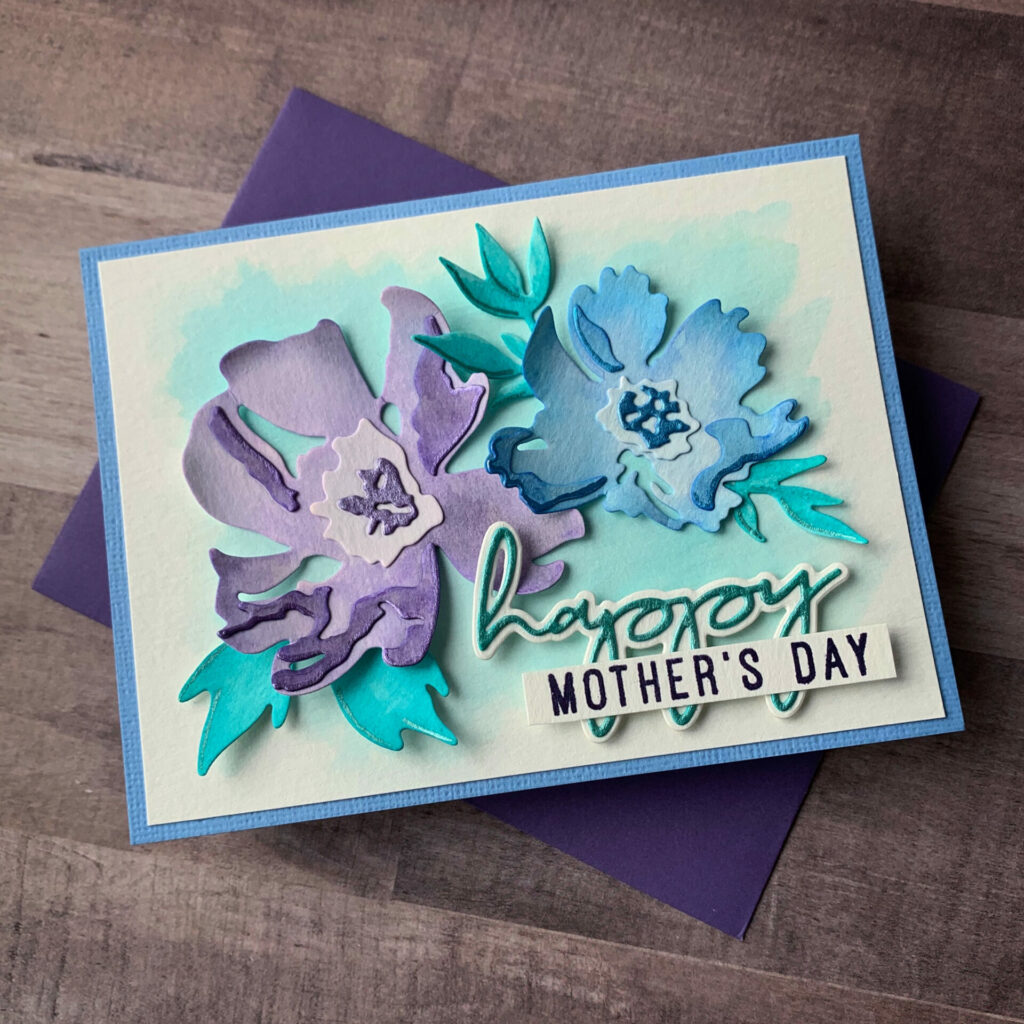
Check out my other Mother’s Day Card Tutorial for additional inspiration and ideas.