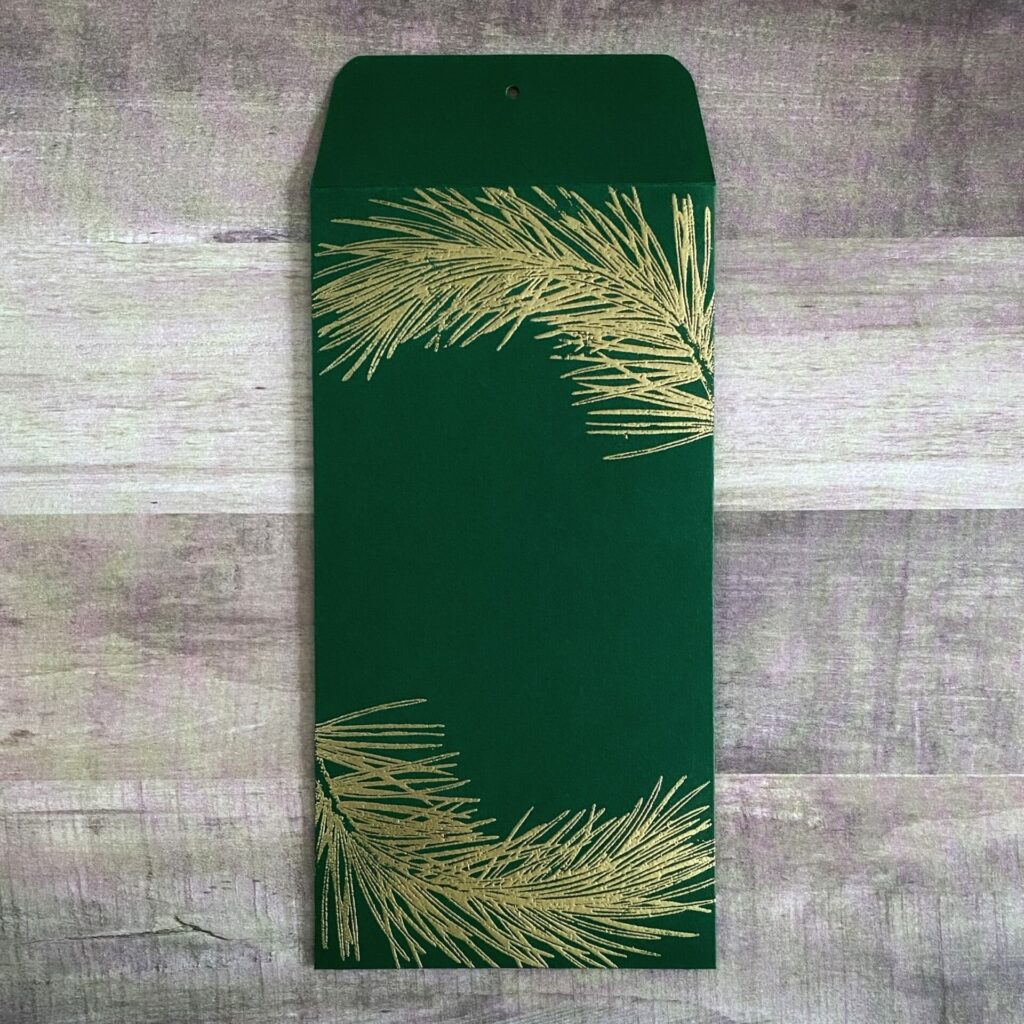
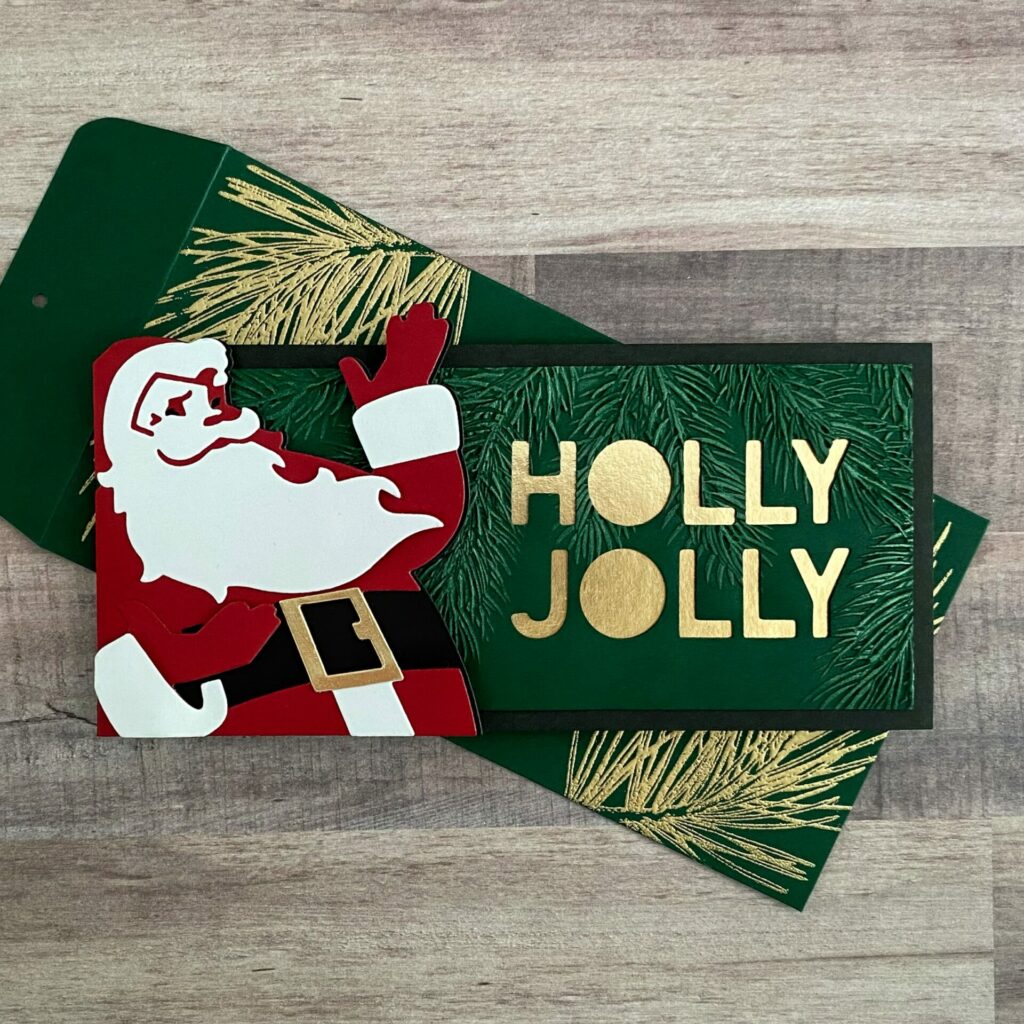
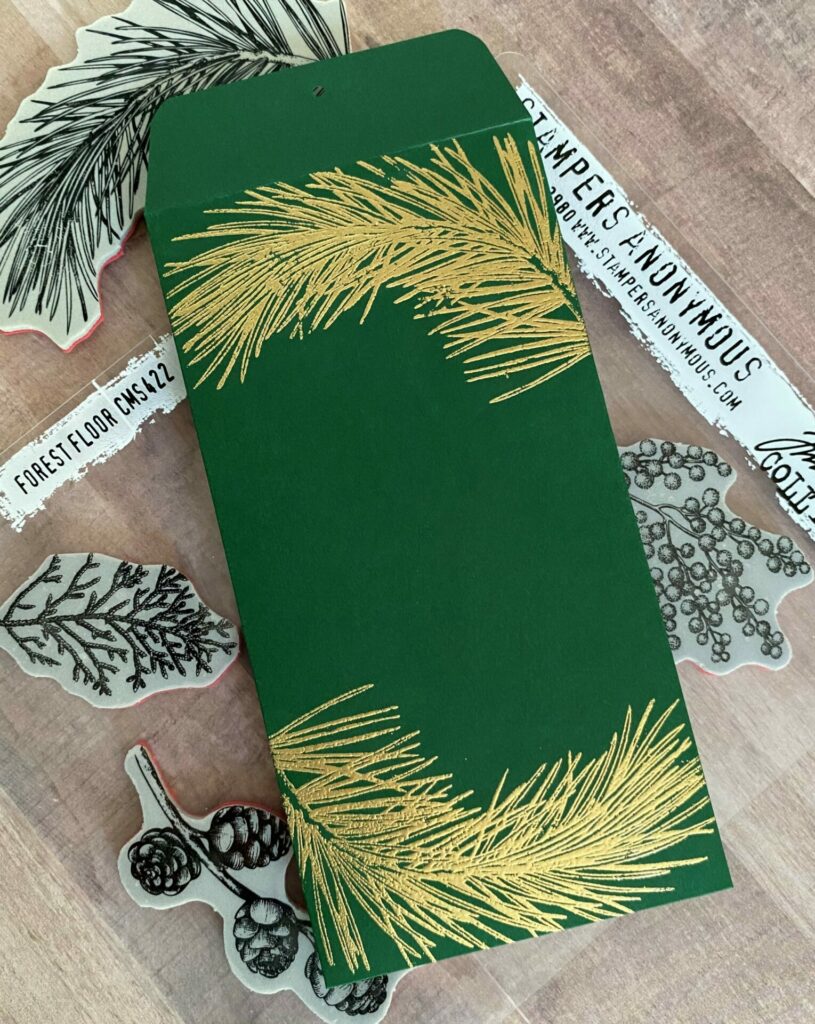
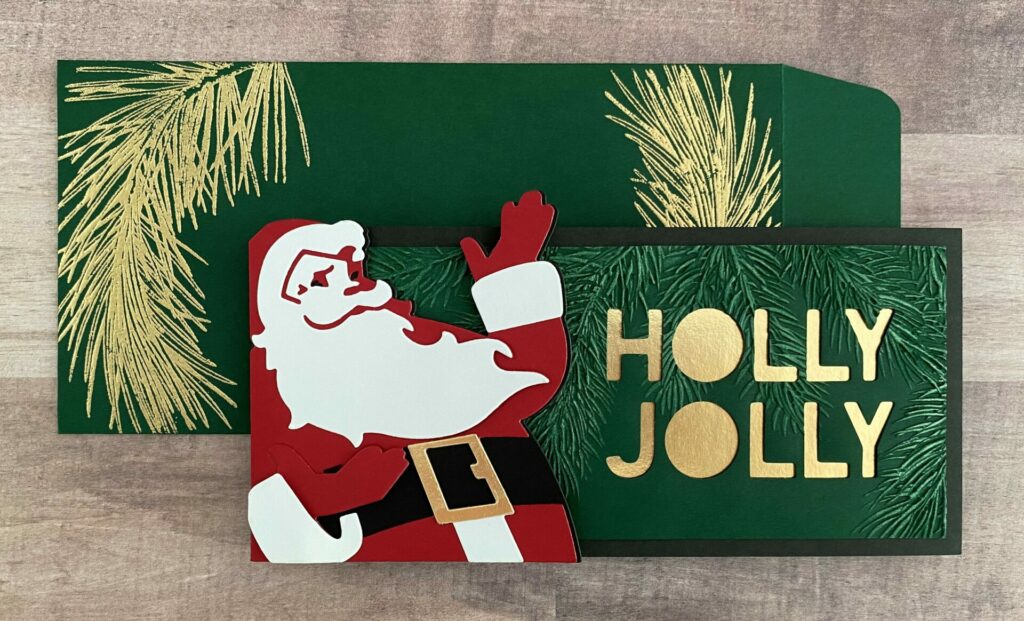
Holly Jolly Envelope
Hello crafty card makers! Today I’m sharing how to make this heat embossed mini slimline envelope. It’s perfect for adding style and shine to an otherwise plain and boring envelope. It will also take your handmade cards to the next level! This envelope coordinates perfectly with the Holly Jolly Santa Card. If you’re interested in the matching card, you can find the tutorial here.
This envelope is not a true mini slimline size. It’s a ¼” wider and ¾” longer. So it’s a little bit bigger than your traditional mini slimline. When assembled, the dimensions of the envelope are 7¼” x 3¾”. If you’re planning on sending it through the mail, you may need some extra postage.
Link Abbreviations
- AMZ – Amazon*
- Sb.com – Scrapbook.com*
- SIZ – Sizzix*
- SSS – Simon Says Stamp
Full Disclosure: This post contains affiliate links which are indicated with an (*). If you click on an affiliate link and later make a purchase, I may receive a small commission. Clicking on an affiliate link which earns a commission does NOT result in additional charges to you or cost you anything extra. Money earned via affiliate links helps pay the fees to keep this blog up and running. Thank you so much for shopping through my links to show your support for the brands that we love and the products that I share!
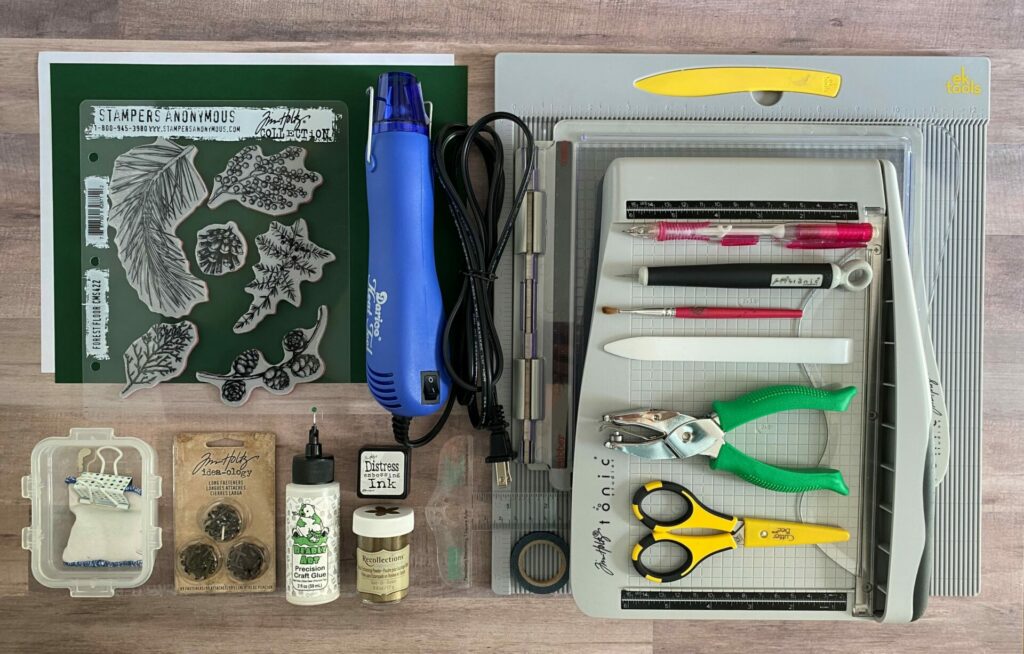
Supplies Used / Substitutions:
- Stampers Anonymous Tim Holtz Stamp Set – Forest Floor #CMS422 | Sb.com | AMZ | SSS |
- Green Cardstock / Any color cardstock
- Ranger Super Fine Embossing Powder – Gold | Sb.com / Any embossing powder
- Tim Holtz Tonic Guillotine Comfort Paper Trimmer | Sb.com | AMZ | SSS / Any paper trimmer
- Tonic Tim Holtz Stamp Platform / Any stamping tool
- EK Scoring Board | AMZ | SSS / Any scoring board
- Embossing Gun
- Circle Hole Punch – 1/8″ | Sb.com / Any small hole punch
- Tim Holtz Retractable Craft Pick | Sb.com | SSS | AMZ / Any piercing tool
- Idea-ology Long Fasteners Brads – TH92703 | Sb.com / Any small flat head brads
- Bearly Art Glue | Sb.com | AMZ | SSS / Any liquid adhesive
- Distress Embossing Ink – Mini | Sb.com / Any embossing ink
- Anti Static Pouch | Sb.com / Any anti static tool
- EK Scissors | Sb.com | AMZ / Any scissors
- Pencil & Ruler
- Bone Folder | SSS |
- Small Brush
- Sheet of Copy Paper
- Washi Tape / Any low tack tape
Trimming & Scoring
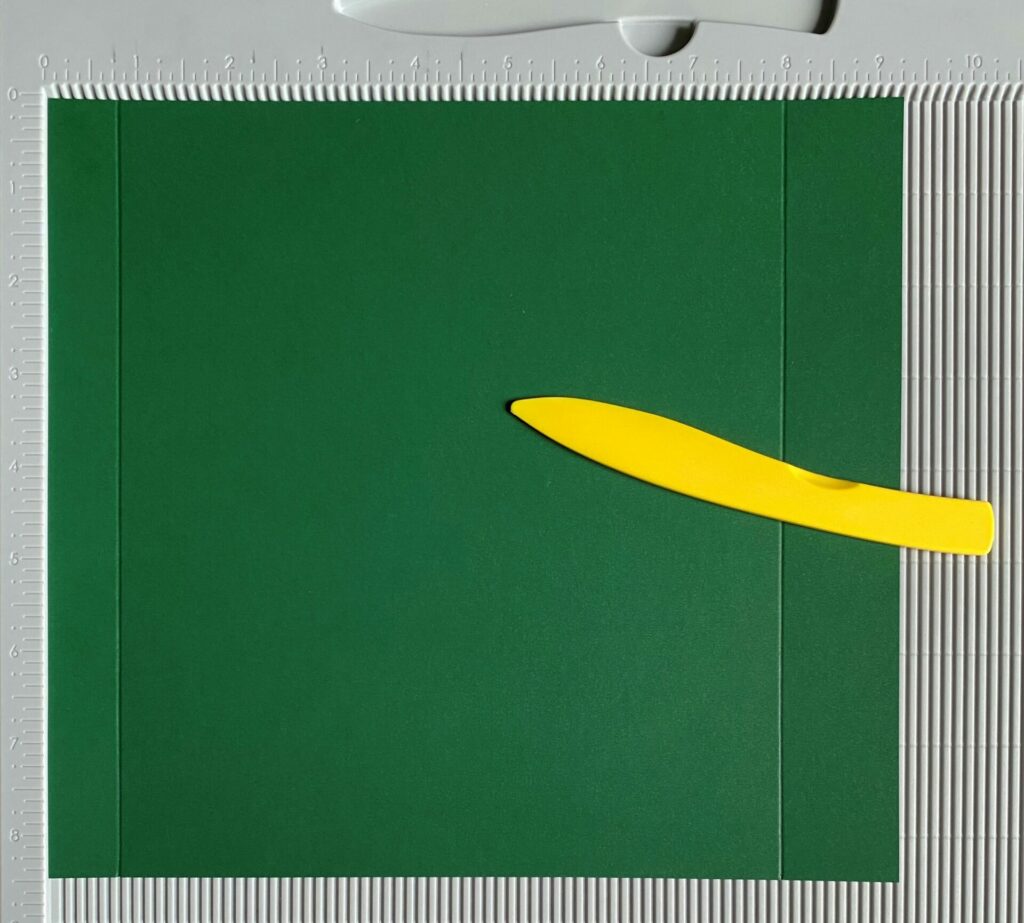
- Trim the cardstock down to a size of 9¼” x 8½” with a paper trimmer.
- Place the cardstock on the scoreboard horizontally and score on the ¾” line and the 8″ line.

- Rotate the cardstock 90 degrees and score on the 1-7/8″ line and 5-5/8″ line.
- Trim off 5/8″ on the right side flap. It should now be 2-1/4″ wide.
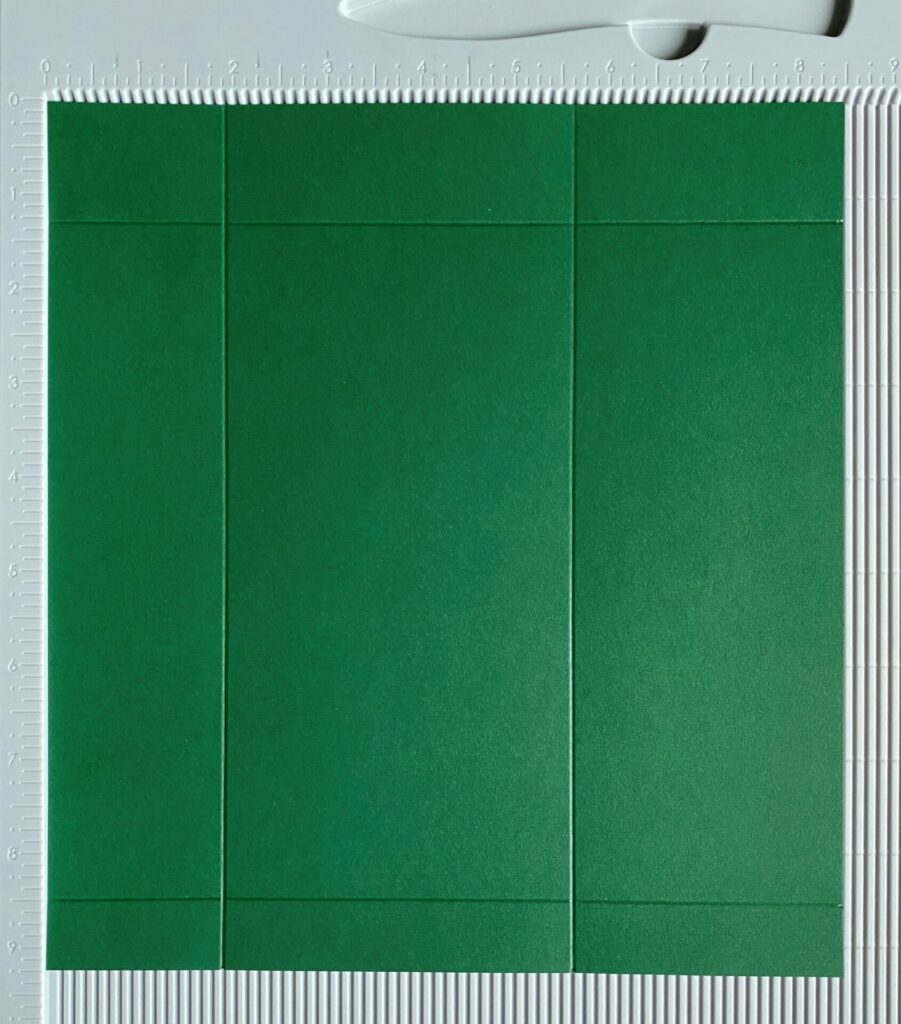
Drawing The Envelope Outline
- Using a ruler, measure and draw lines for the cut lines in the corners.
- See below for corner cut line measurements. (Red dotted lines)
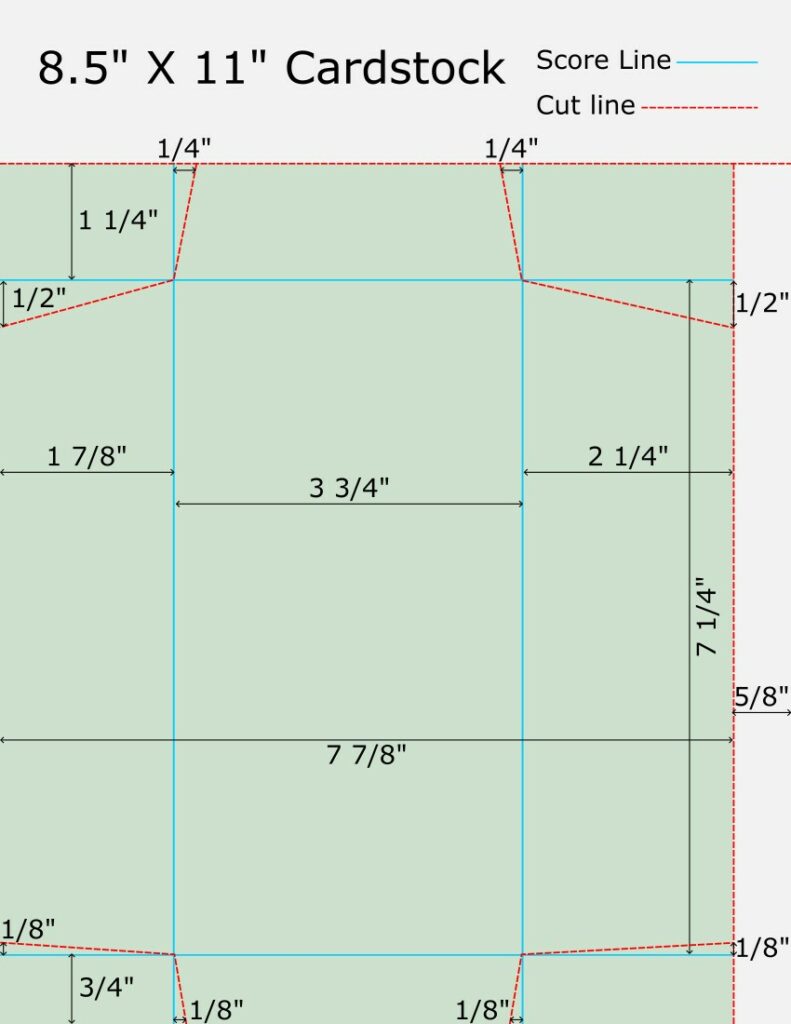
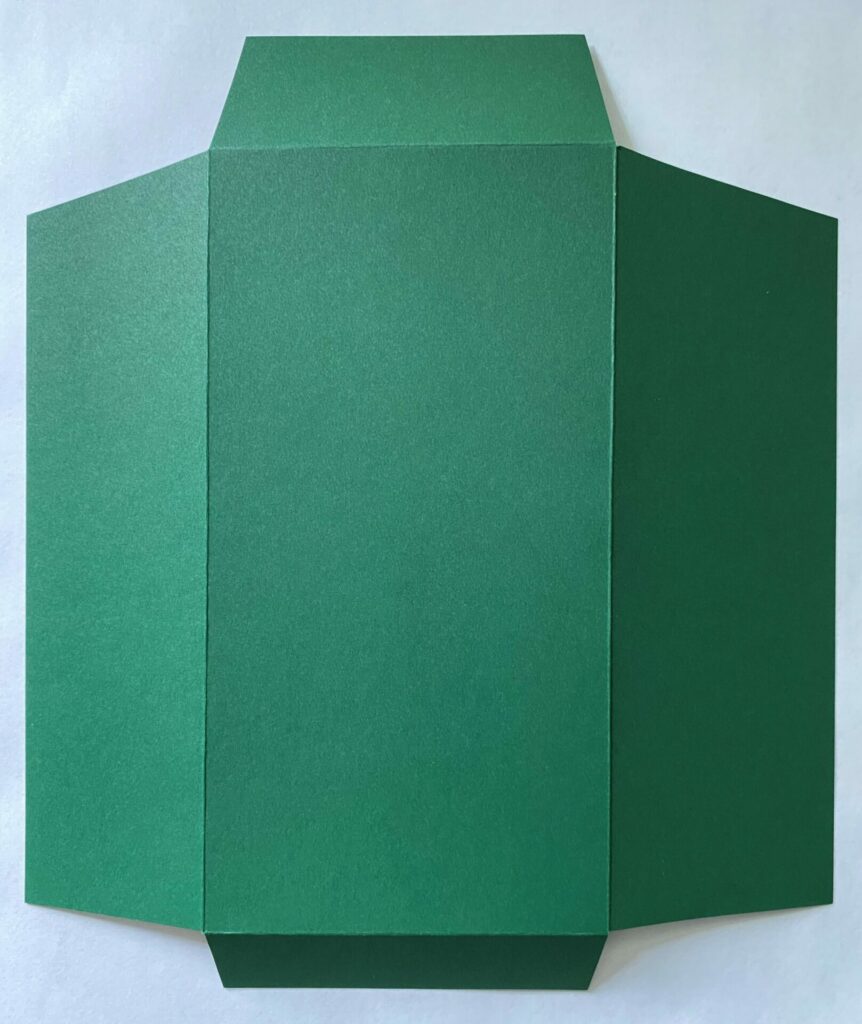
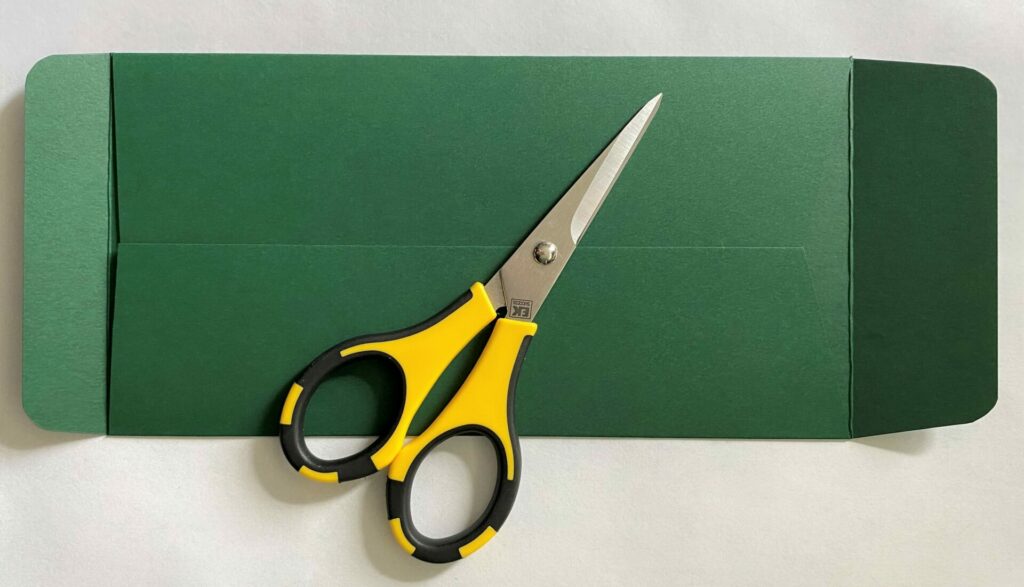
Cutting Out The Envelope
- Cut out the corners of the envelope with scissors.
- Fold all flaps in and reinforce the folds with a bone folder.
- Round off the corners of the top and bottom flaps.
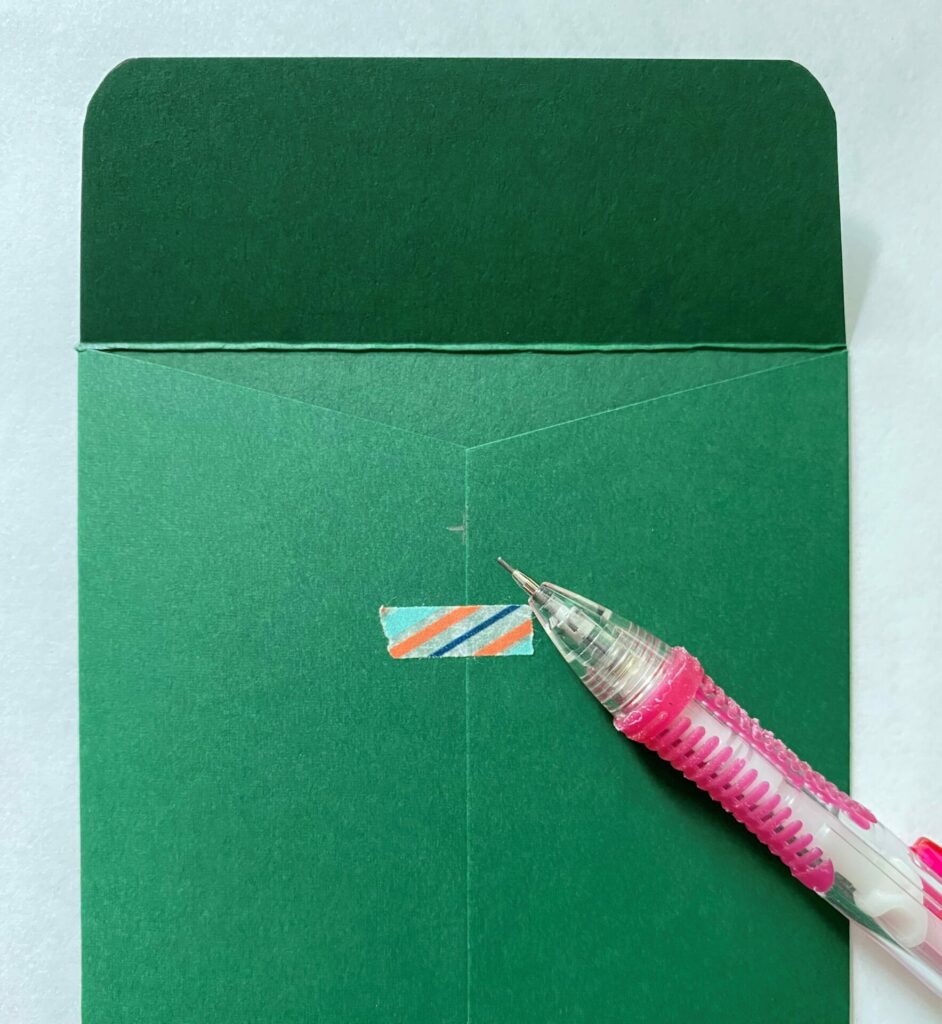
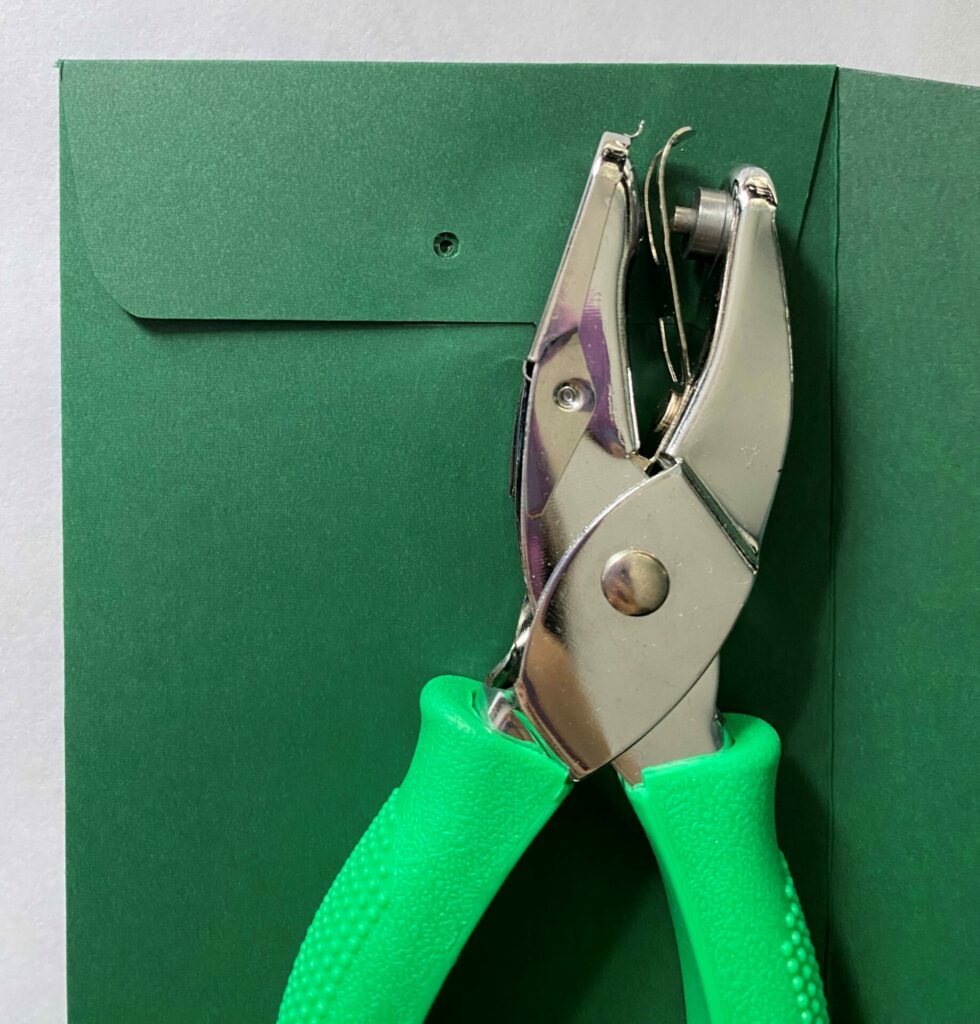
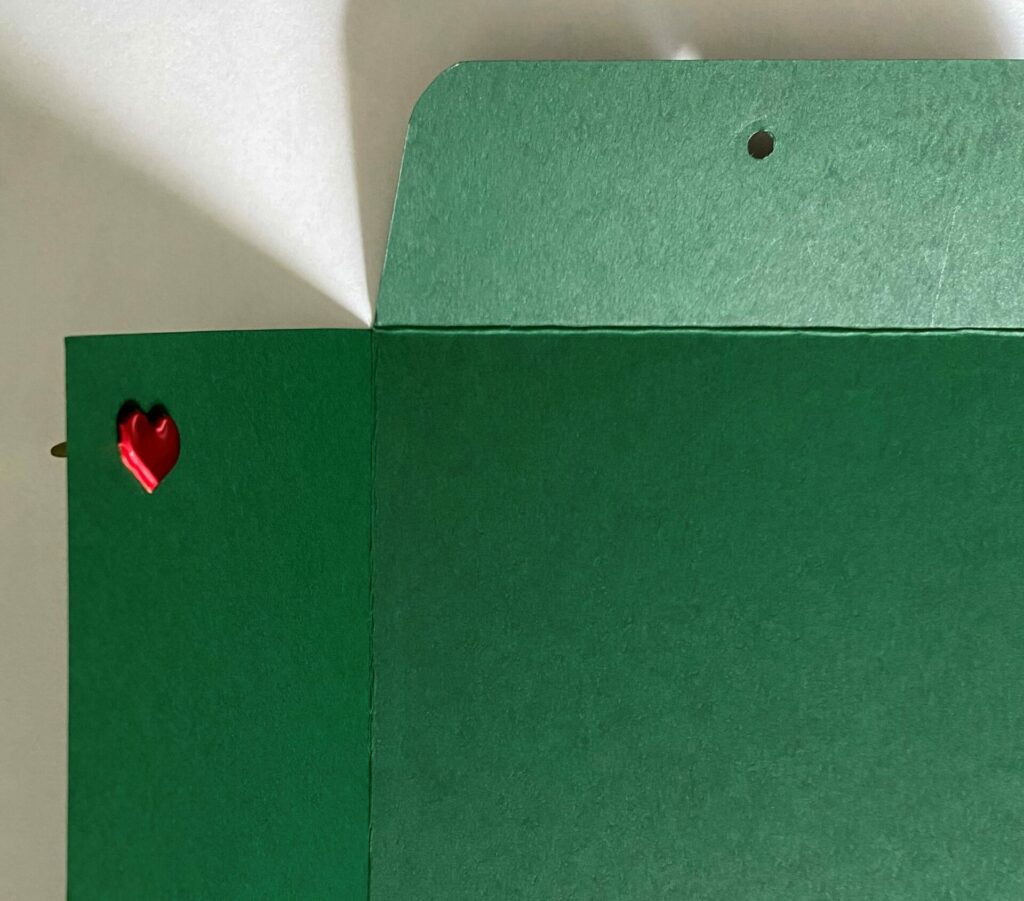
Making The Brad Hole
- Fold the envelope flaps in with the right flap on top.
- Fold down the top flap and place a piece of washi tape where it meets the envelope.
- Using a pencil, make a mark halfway between the washi tape and the envelope opening.
- Take the retractable craft pick and puncture a hole through the paper where the pencil mark is on the left flap.
- You can do this over a piece of foam or over the carpet (that’s what I did).
- Next, fold the top flap down, and then the left flap down over it.
- Trace the small hole onto the top flap with a pencil.
- Punch a hole in the top flap where the circle was drawn in pencil.
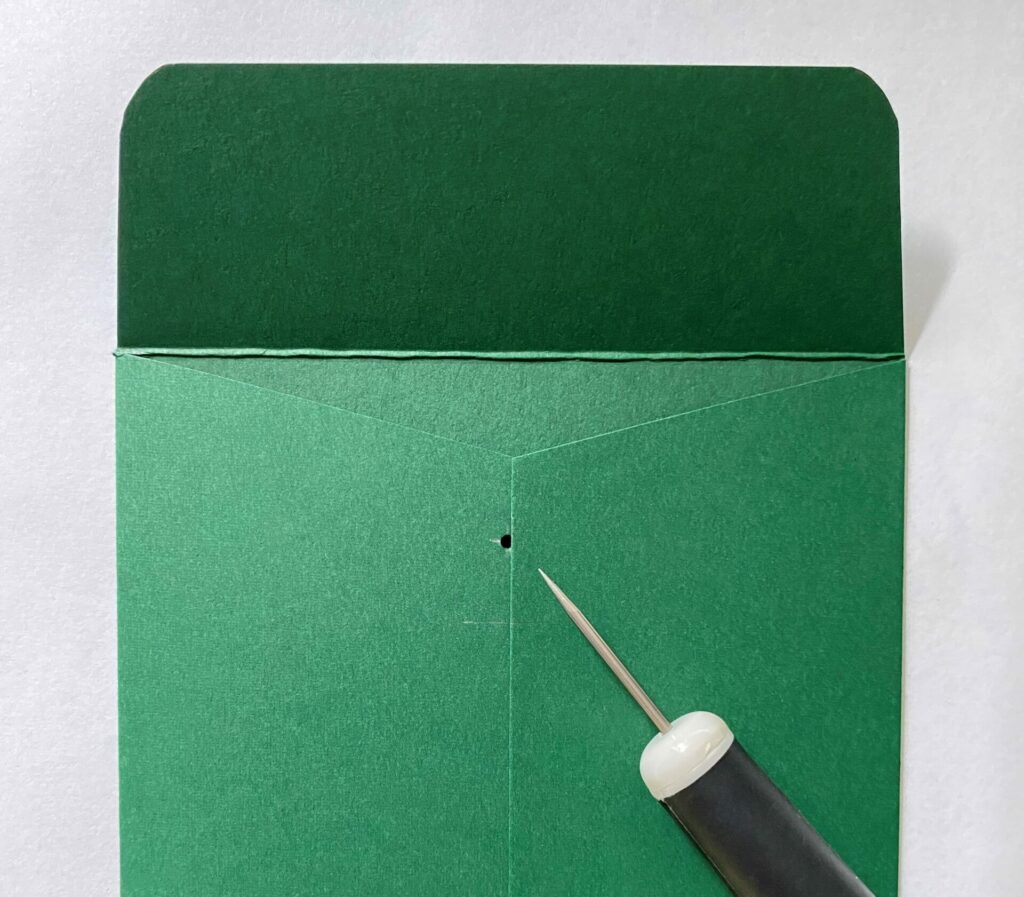 Next, fold the top flap down, and then the left flap down over it.
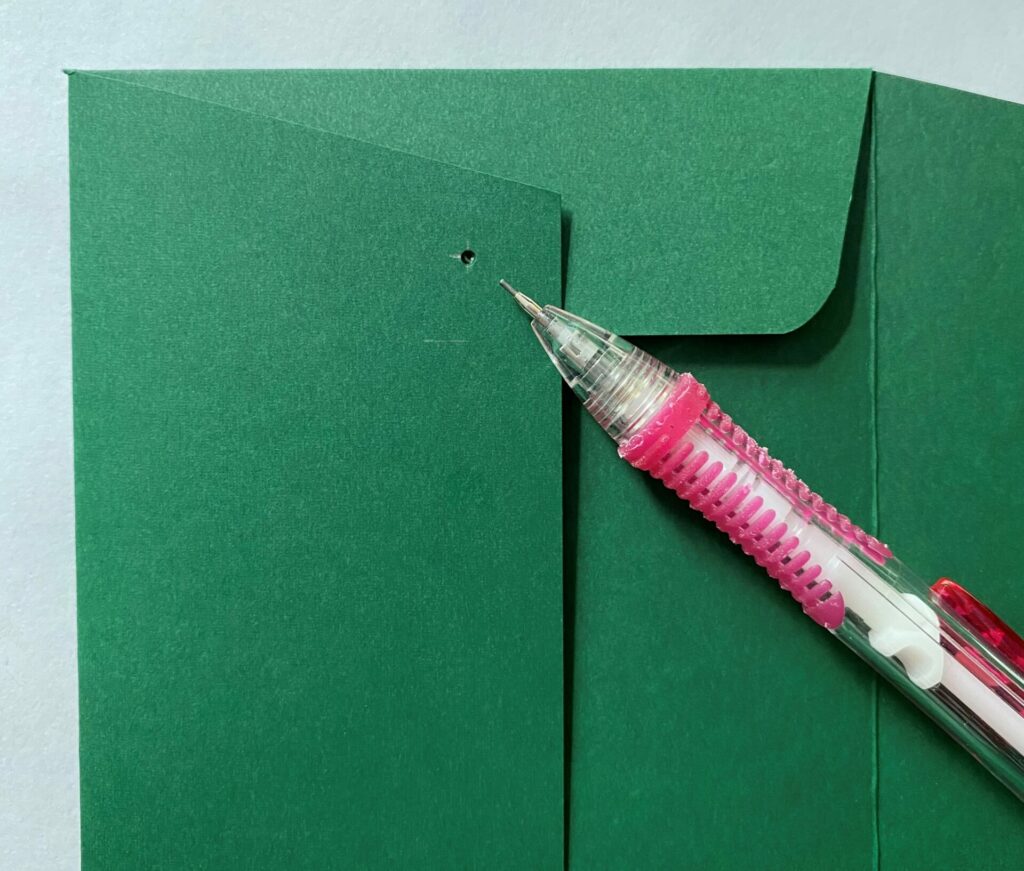
Attaching The Brad
- Put glue on the inside of the head of the brad and put it through the hole of the left flap.
- Turn the brad so it is positioned vertically.
- Put something heavy up against it to make sure the glue fully adheres to the paper.
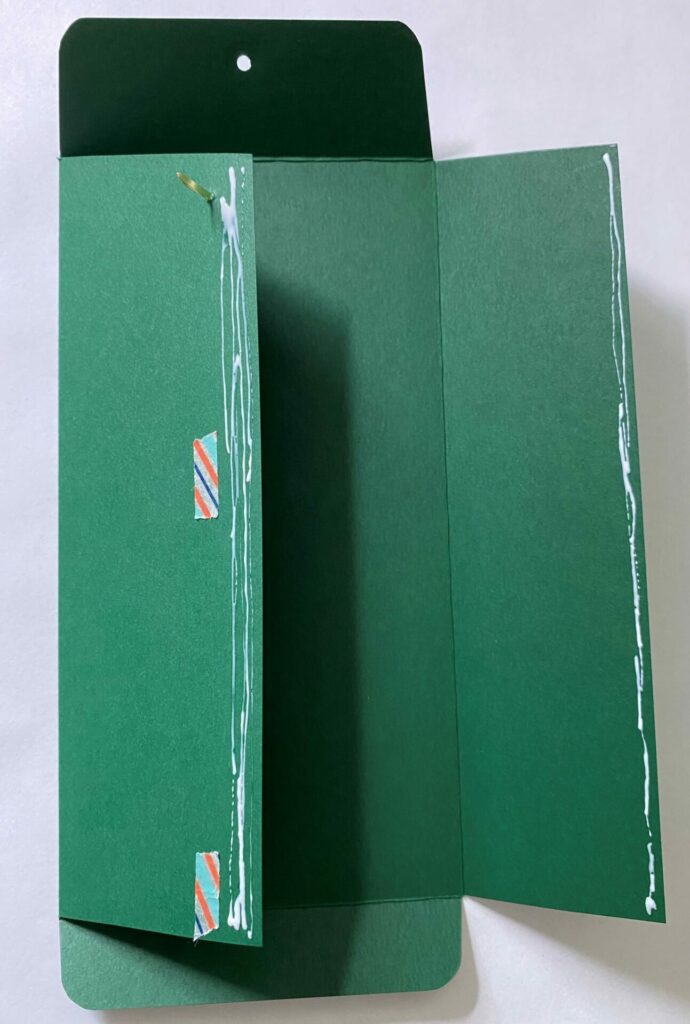
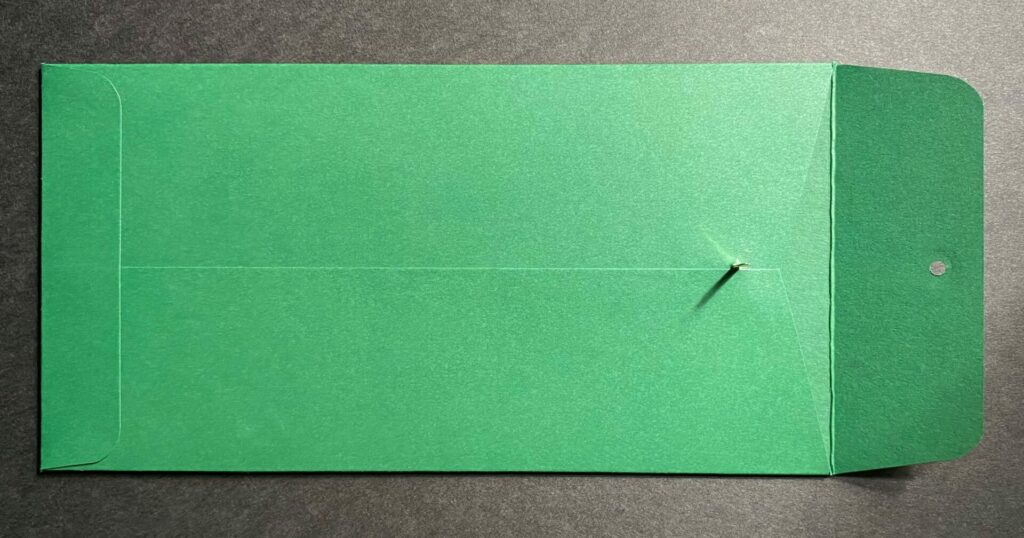
Gluing The Envelope Together
- Glue the side flaps together.
- Glue the bottom flap down and put something heavy on it while it dries.
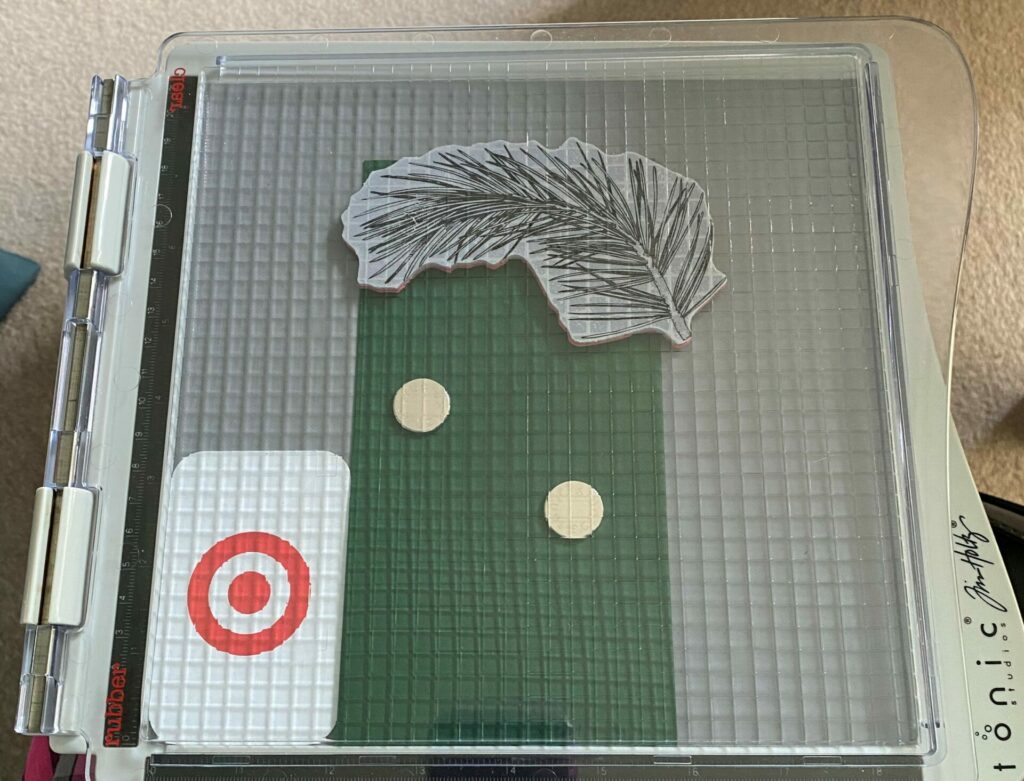
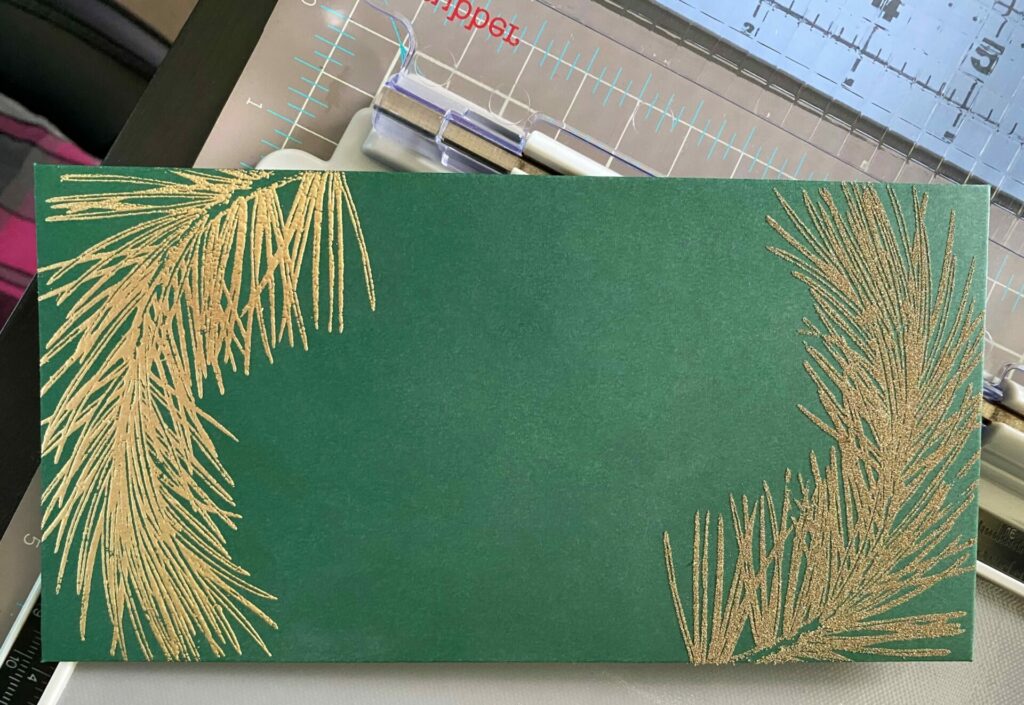
Heat Embossing The Pine Branch
- Place the envelope in your stamping tool with the front side facing up.
- Position the pine branch stamp on the envelope and close your stamping tool.
- Rub the anti-static pouch all over the top half of the envelope.
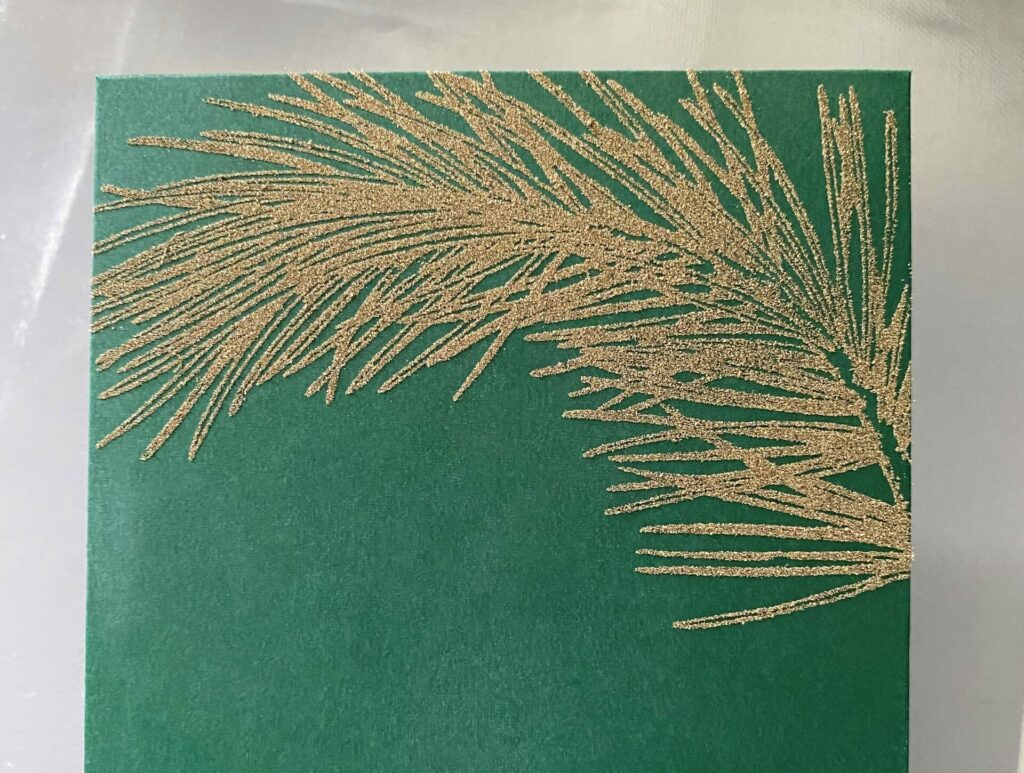
- Ink the stamp with embossing ink and close the stamping tool to stamp the pine branch.
- Remove the envelope from the stamping tool and pour gold fine detail embossing powder over the stamped image. Tap off the powder over a sheet of copy paper and pour the extra powder back into the jar.
- Brush away any stray embossing powder with a small brush.
- Lastly, emboss the powder with a embossing gun.
- Rotate the envelope 180 degrees and repeat steps 1-7.
Pro Tip: Turn on the embossing gun, while holding it, let it run for a bit to warm up before aiming it at the paper. Keep the embossing gun moving to prevents over embossing and scorching off the shiny metallic finish.
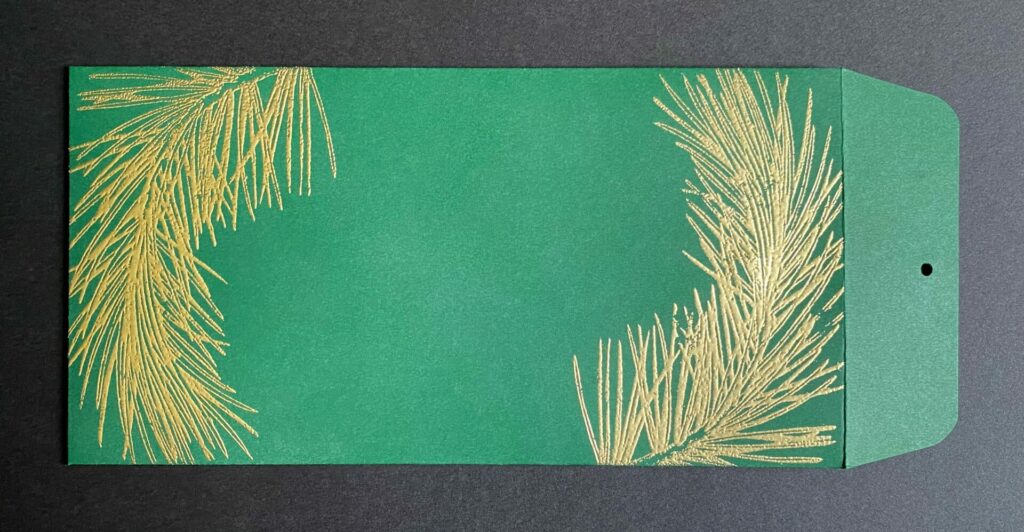
Envelope Complete!
Congratulations! You have now completed your mini slimline envelope! I hope you enjoyed this tutorial and have as much fun making it as I did. If you do make this envelope, please use the #grovecrafted and tag me (@silversgrove or @grovecrafted) on Instagram. I’d love to see what you’ve created! Thanks for stopping by and I hope you found some new inspiration to create.
If you enjoyed making this embossed envelope, you might want to check out my Holly Jolly Santa Card tutorial. It coordinates perfectly with the holly jolly envelope you just made.

Thank you, Sylvia, for this clear and concise tutorial. I also enjoyed your Holly Jolly Santa Card tutorial. You have inspired me to give these a try and I am going to check out the other two tutorials you’ve offered. You are a very talented teacher and have addressed some of the frustrations that accompany inexperience. Thank you for that. Your projects are beautiful!
You’re welcome Kathleen! Thank you for your kind comments. I’m so glad you’re enjoying the tutorials.