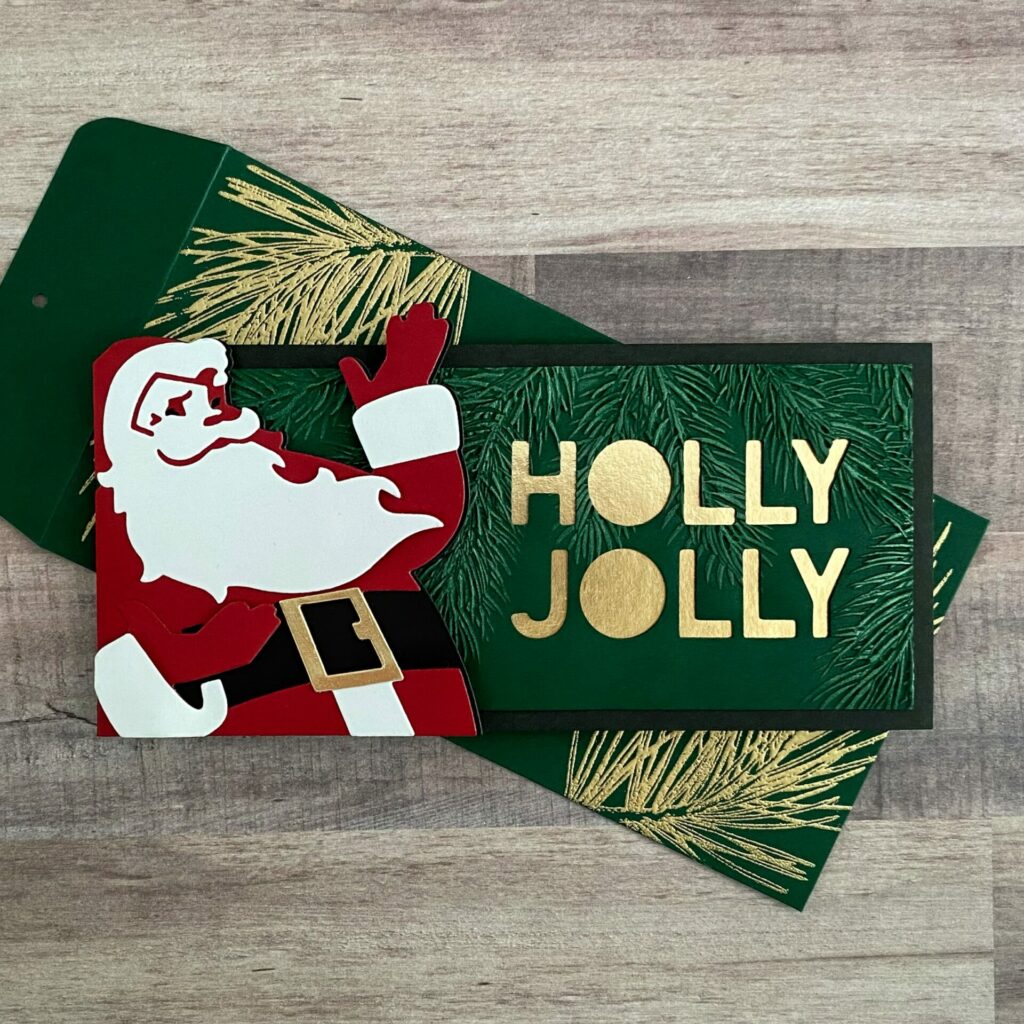
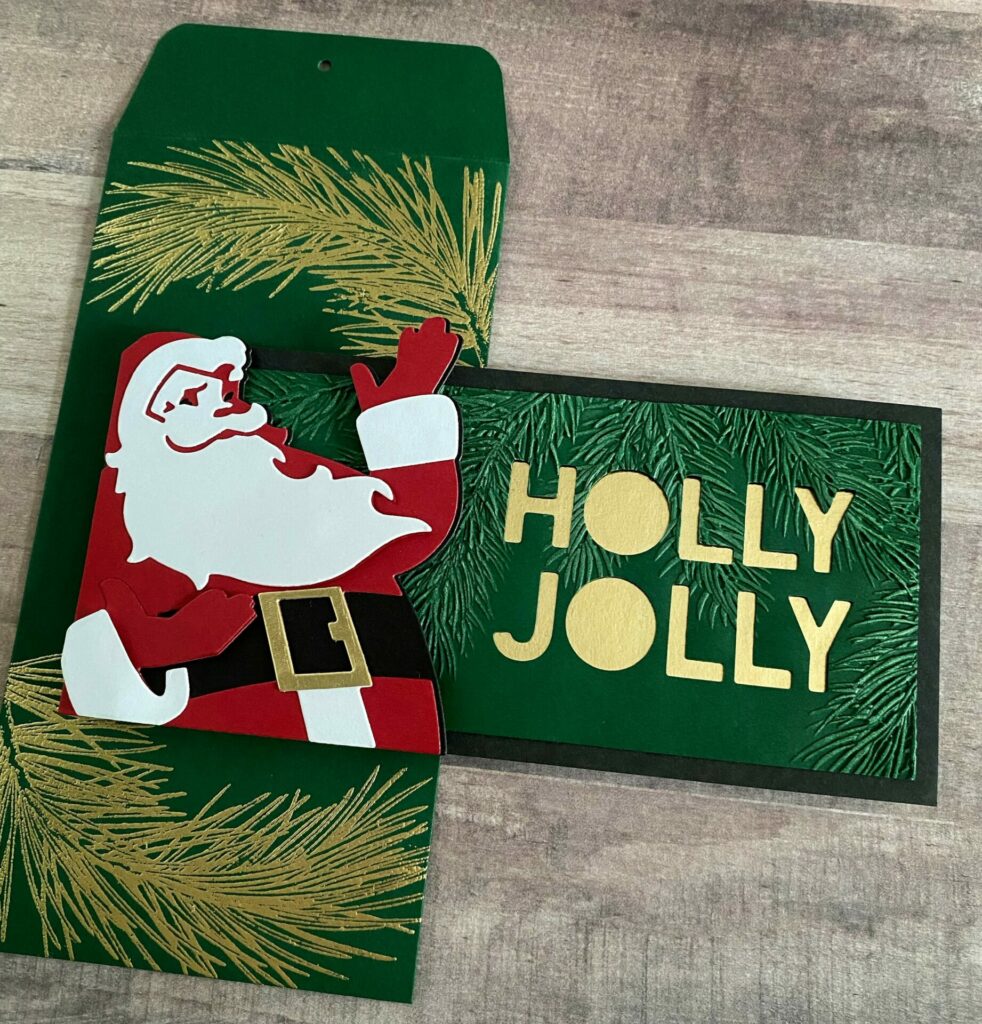
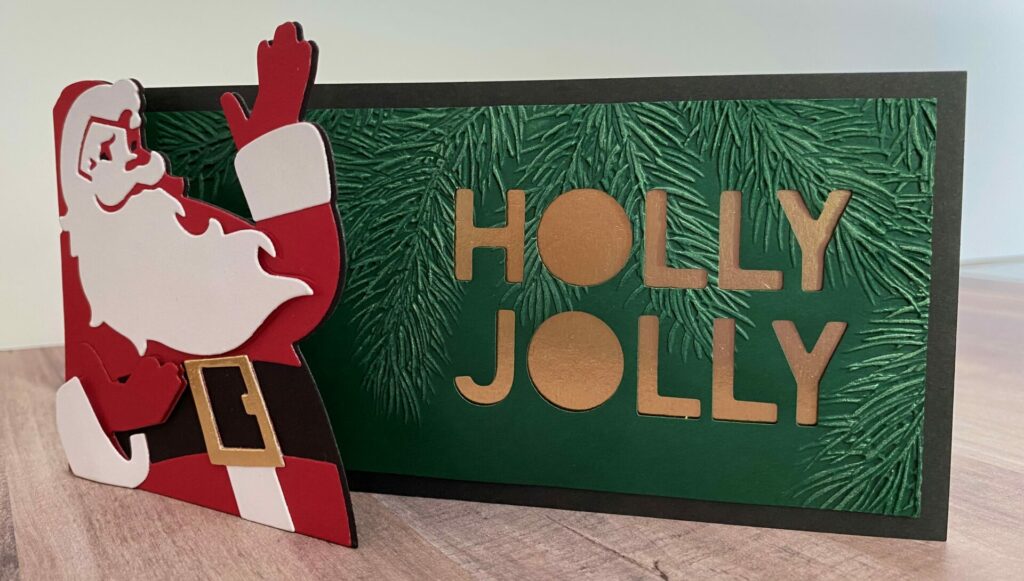
Holly Jolly Santa Card
Hello crafty card makers! I’m continuing with more Christmas in July goodness. This is my third and final (for July) holiday card tutorial for you! Today I’m sharing how to make this Holly Jolly Santa Card. It features layers of die cuts, along with some embossed texture. This classic retro Santa card is perfect for the holidays. It could also be used for anyone with a December birthday, just by switching up the sentiment. This Holly Jolly Santa Card would also work great for a Christmas party invitation as well.
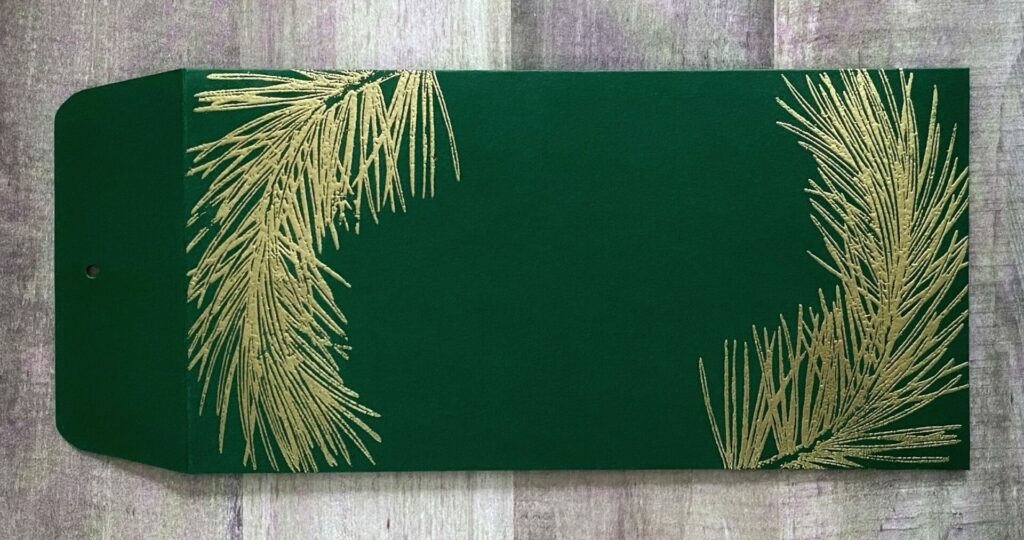
I also made a coordinating envelope. Its heat embossed design compliments the Holly Jolly Santa Card nicely. If you want to learn how I made that, you can skip straight to the envelope tutorial here.
Link Abbreviations
- AMZ – Amazon*
- Sb.com – Scrapbook.com*
- SIZ – Sizzix*
- SSS – Simon Says Stamp
- SB – Spellbinders
Full Disclosure: This post contains affiliate links which are indicated with an (*). If you click on an affiliate link and later make a purchase, I may receive a small commission. Clicking on an affiliate link which earns a commission does NOT result in additional charges to you or cost you anything extra. Money earned via affiliate links helps pay the fees to keep this blog up and running. Thank you so much for shopping through my links to show your support for the brands that we love and the products that I share!
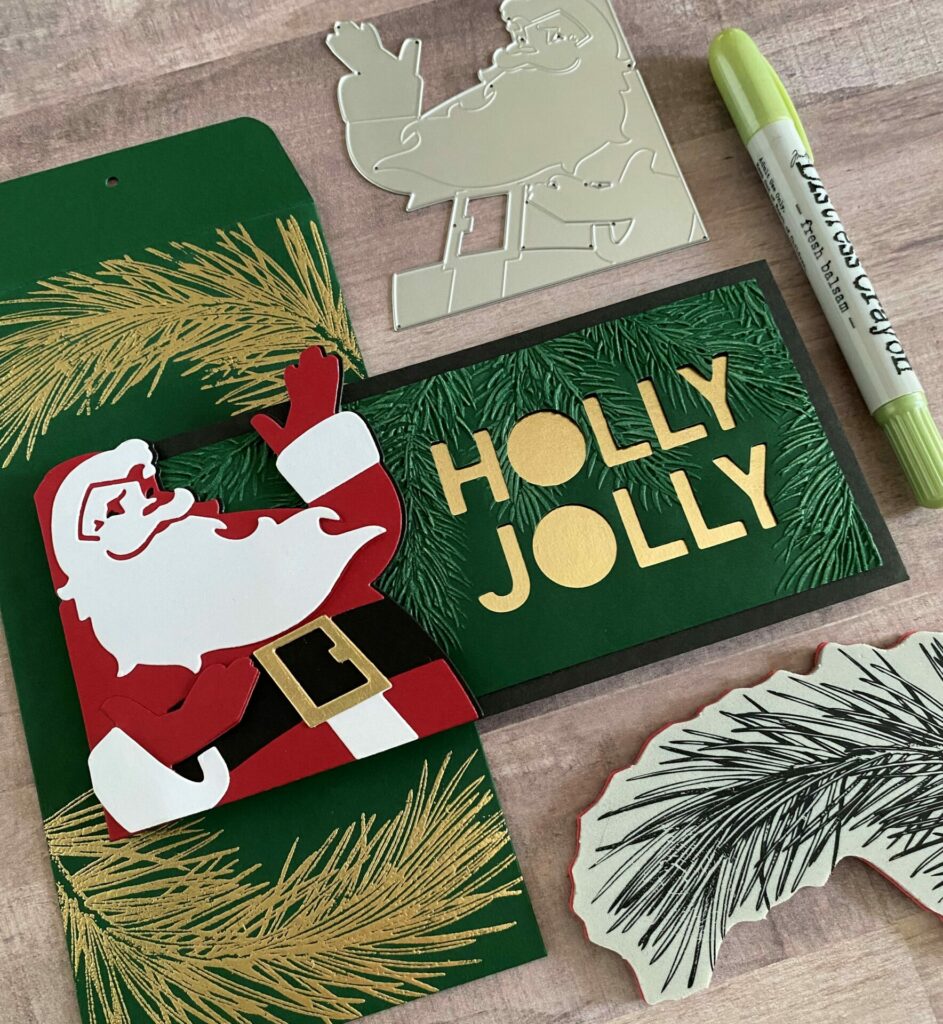
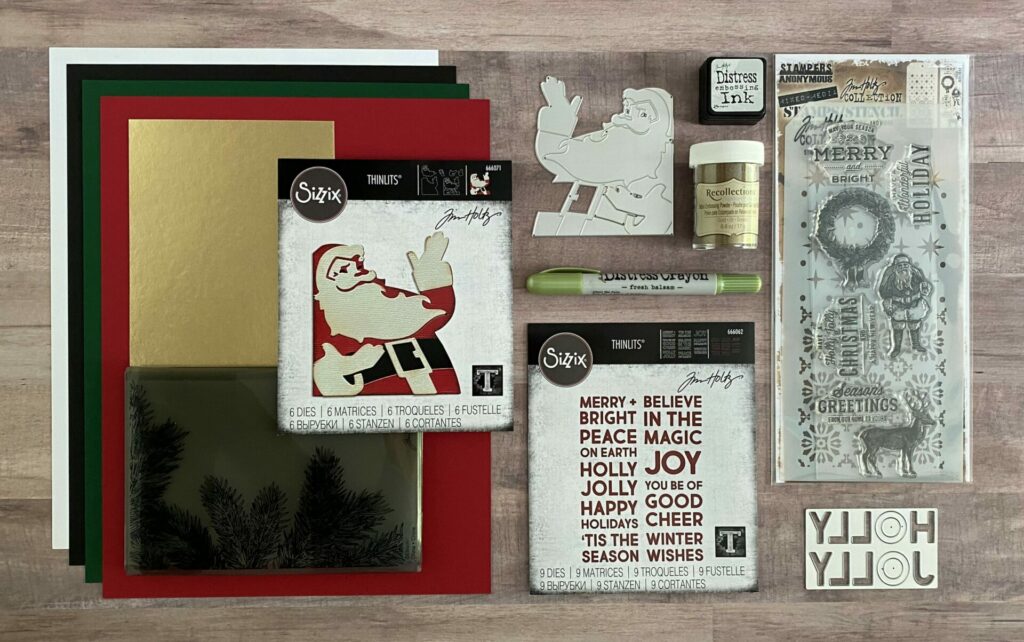
Supplies Used / Substitutions:
- Tim Holtz Sizzix Thinlits Dies – Retro Santa #666071 | Sb.com | SIZ | AMZ | SSS |
- Tim Holtz Sizzix Thinlits Dies – Bold Text, Christmas #666062 | Sb.com | SIZ | AMZ | SSS |
- Sizzix Tim Holtz Thinlits Dies – Pine Branches #666048 | Sb.com |
- Stampers Anonymous Tim Holtz Stamp/Stencil Set #THMM135 | SSS / Any small holiday sentiment stamp
- Distress Heavystock – White | Sb.com | AMZ / Any white heavyweight cardstock
- Black Cardstock
- Green Cardstock
- Spellbinders Cardstock – Crimson | SB | AMZ | Any red cardstock
- Tim Holtz idea-ology Metallic Kraft Stock – Gold | Sb.com | AMZ | SSS / Any metallic cardstock
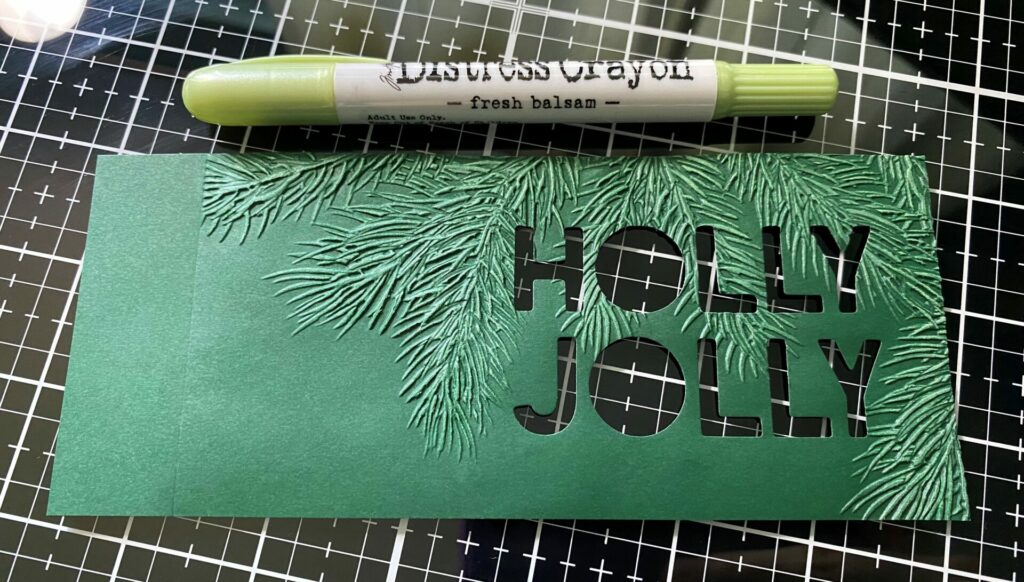
- Ranger Tim Holtz Distress Crayon – Fresh Balsam | Sb.com | SSS |
- Ranger Super Fine Embossing Powder – Gold | Sb.com / Any embossing powder
- Distress Embossing Ink – Mini | Sb.com / Any embossing ink
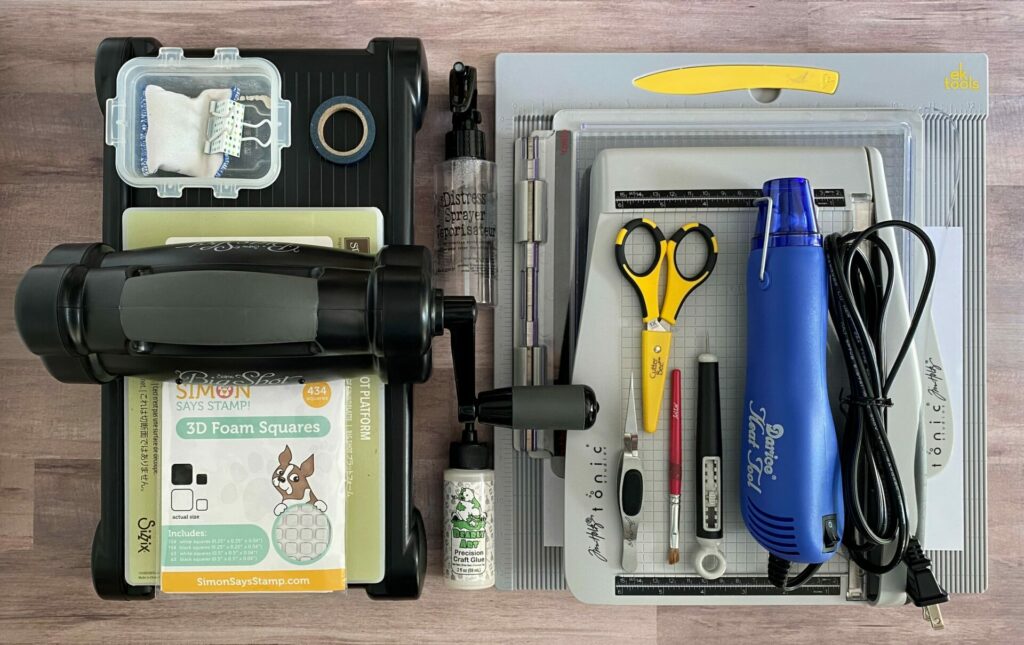
Tools Used / Substitutions:
- Sizzix Big Shot | Sb.com | SIZ / Any die cutting machine
- Tim Holtz Tonic Guillotine Comfort Paper Trimmer | Sb.com | AMZ | SSS / Any paper trimmer
- Tonic Tim Holtz Stamp Platform / Any stamping tool
- EK Scoring Board | AMZ | SSS / Any scoring board
- Embossing Gun
- EK Scissors | Sb.com | AMZ / Any scissors
- Bearly Art Glue | Sb.com | AMZ | SSS / Any liquid adhesive
- Spray Bottle with water | Sb.com | AMZ / Any spray bottle with water
- Tim Holtz Retractable Craft Pick | Sb.com | SSS | AMZ / Any die pick or toothpick
- Tim Holtz Reverse Action Tweezers #665304 | Sb.com | SIZ | SSS / Any reverse action tweezers
- Anti Static Pouch | Sb.com / Any anti static tool
- Small Brush
- Sheet of Copy Paper
- Foam Squares | SSS / Optional
- Washi Tape / Any low tack tape
Making The Card Base
- Take a sheet of black cardstock and cut a strip off that is 3¼ inches wide with your paper trimmer.
- Score the cardstock strip at the 7 inch line.

- Fold on the score line and reinforce the fold with a bone folder.
- Trim the front flap down to be 7/8 inch wide with your paper trimmer.
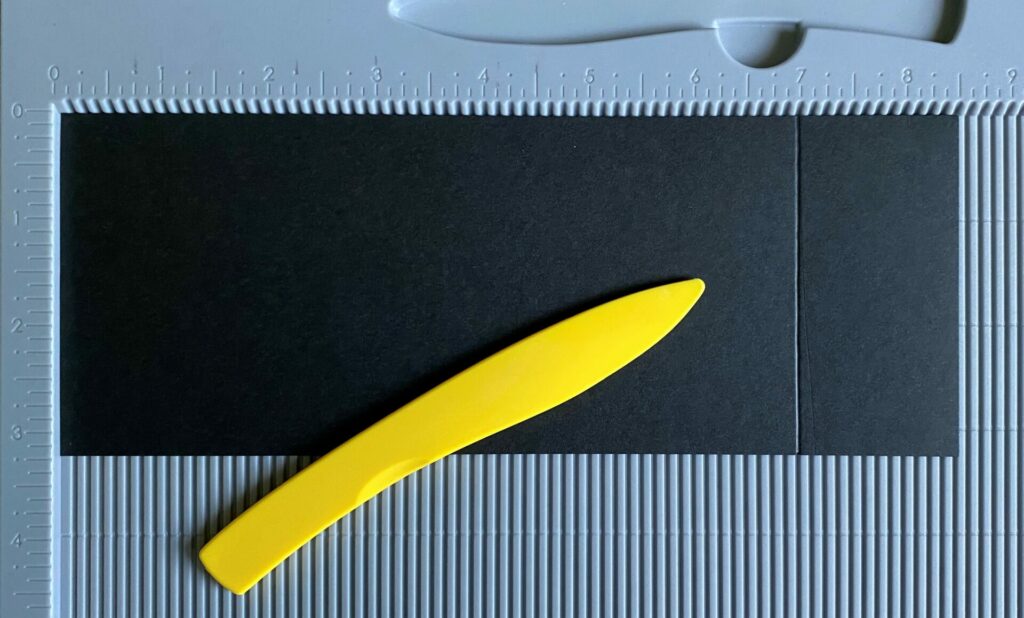
Your card base should be 3¼ inches x 7 inches with a 7/8 inch flap for the front.

Die Cutting The Holly Jolly
- Cut the green cardstock down to a size of 3 x 6¾ inches with your paper trimmer.
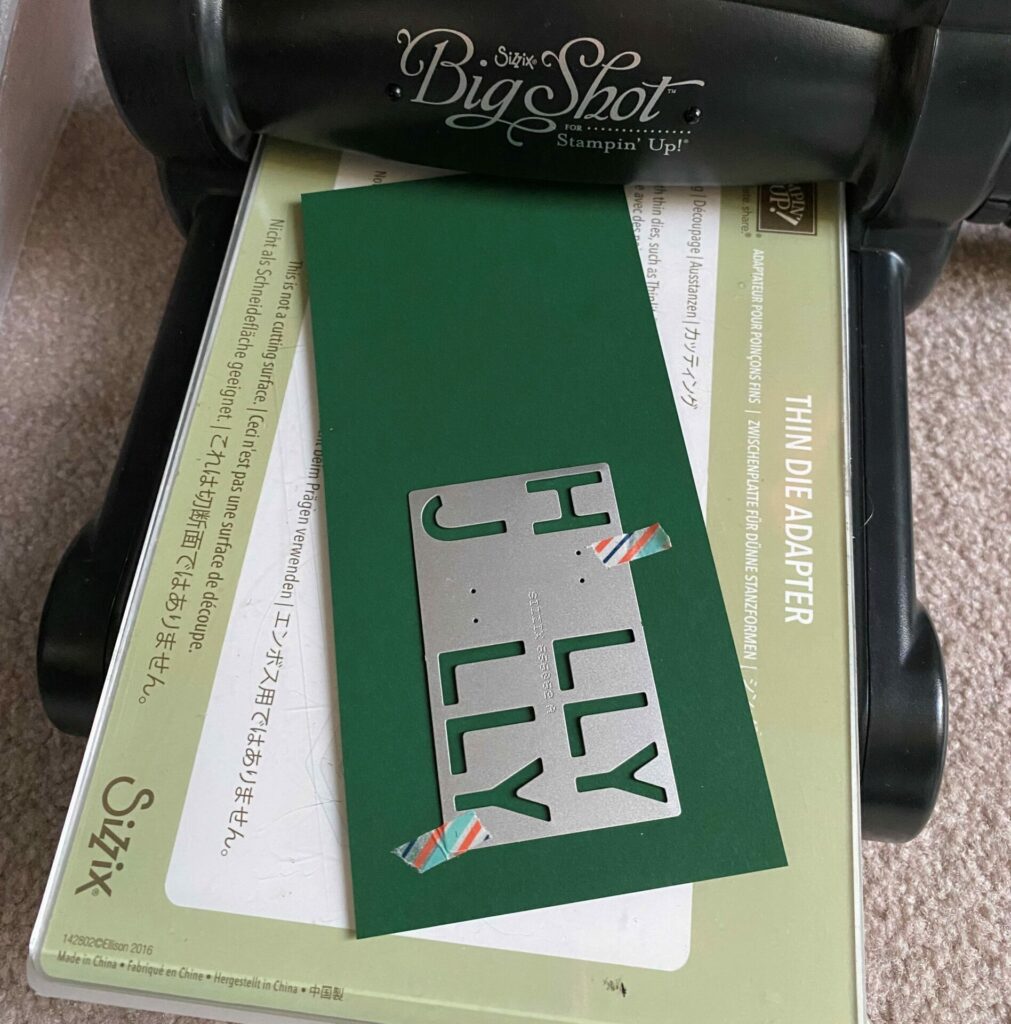
- Position the “Holly Jolly” die down on the right side of the green panel.
- Align it with equal spacing on the top, right, and bottom sides. Then, tape it down with some washi tape.
- Run it through your die cutting machine.
- Remove the die and pop out the die cuts from the paper.
3D Embossing Tips
Before we emboss, here are some tips for getting the best 3D embossing.
- Spritz the front and back of the paper with water before putting it into the 3D embossing folder. The water helps to soften the fibers of the paper so it doesn’t crack.
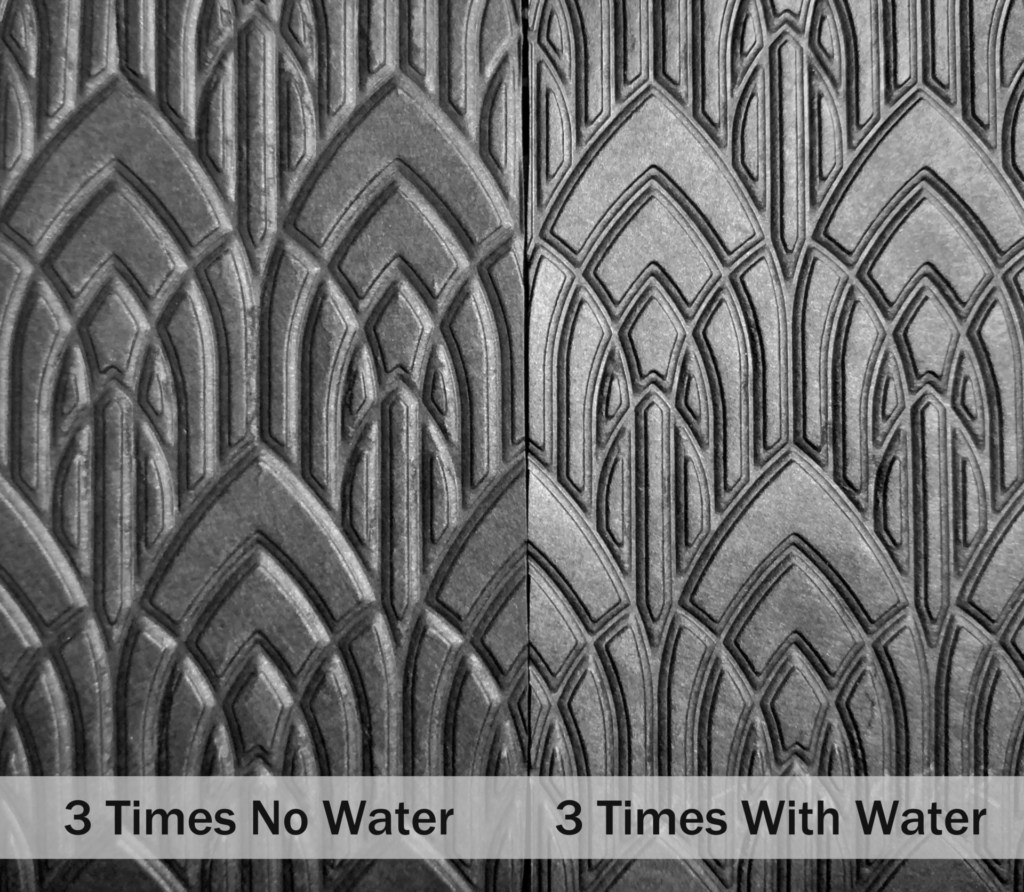
- Then, you’ll put the misted paper into the 3D embossing folder and run it through the Sizzix Big Shot/any die cutting machine 3 times. Remember, 3D = 3 times (it makes for a deeper and crisper impression.) See photo below for a side-by-side comparison.
However, each machine applies a different amount of pressure. Older machines tend to be well loved and will probably need the three passes. Newer machines don’t need as many passes. For instance, the Sizzix big shot foldaway machine applies a lot of pressure, and would only need one pass for a 3D embossing folder. The weight of your paper is also a contributing factor. The thinner the paper the less number of passes you’ll need to run it through. The heavier weight paper may need an extra pass through the machine. I recommend doing some small test swatches to see how many passes is ideal for your machine with the different weights of paper that you will be using. For more examples of why I recommend using the water spritz, check out my side-by-side photo comparisons in my Elegant & Simple Card tutorial.
Embossing The Pine Branch
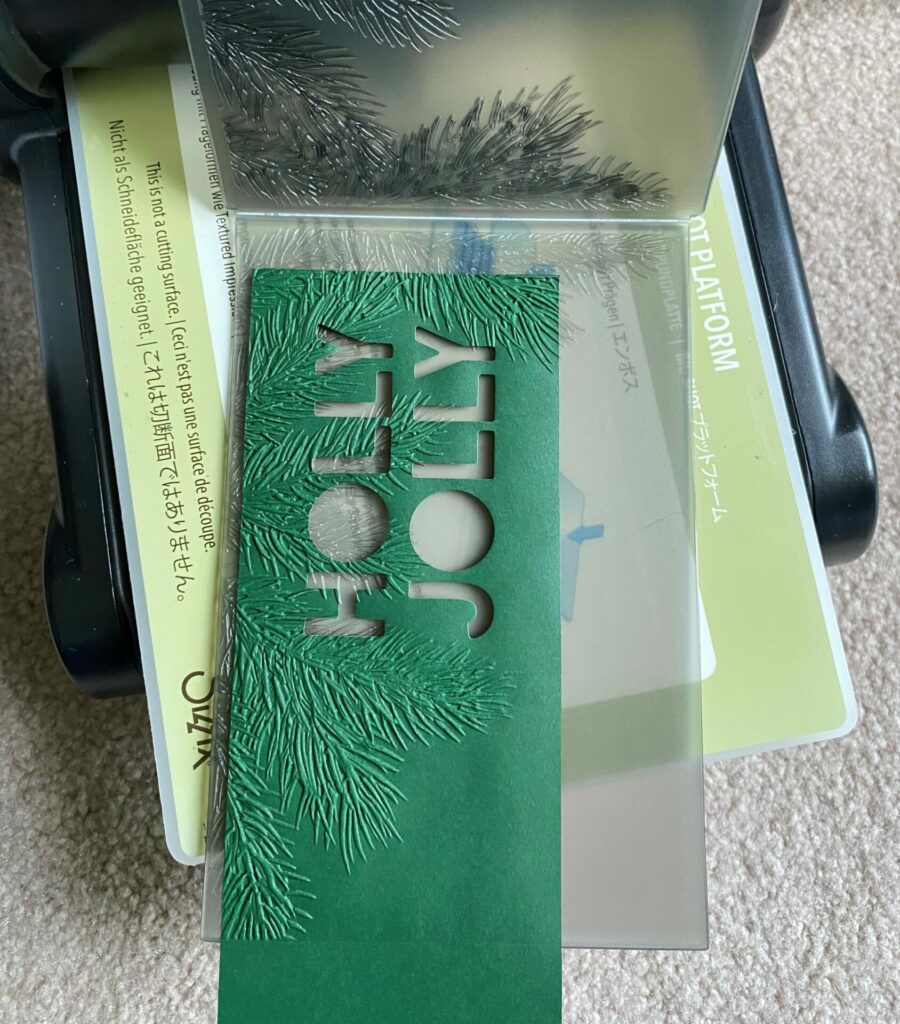
- Lightly spritz the front and back of the holly jolly panel with water.
- Place it in the Sizzix Tim Holtz Pine Branches 3D embossing folder. (See below for paper placement.)
- I tried to center the word JOLLY between the pine branches.
- I tried to center the word JOLLY between the pine branches.
- Next run it through your die cutting machine.
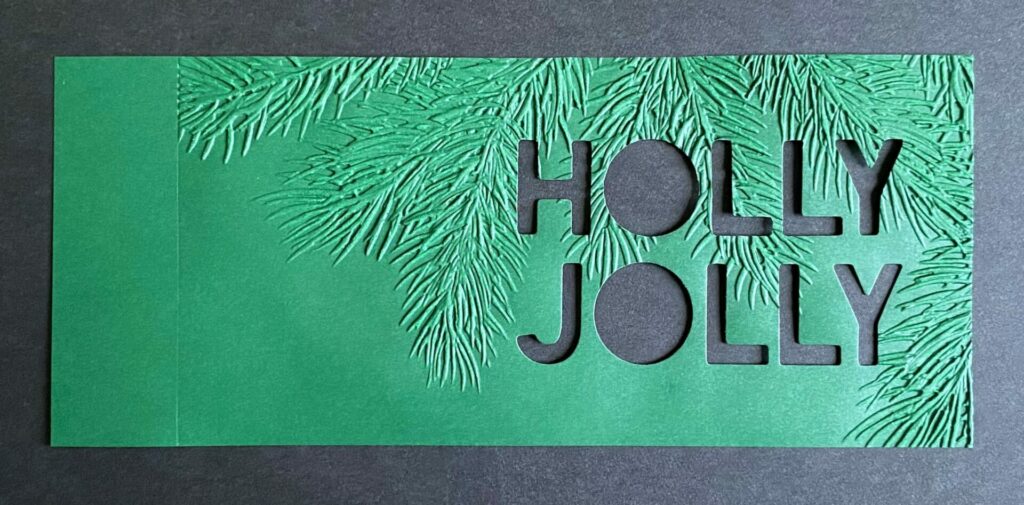
- Remove the paper from the embossing folder and let it dry. Put a cutting pad on top of it so that it dries flat.
- After embossing, the cardstock got a little skewed. So I trimmed it to 2-7/8 in x 6-3/4 in.
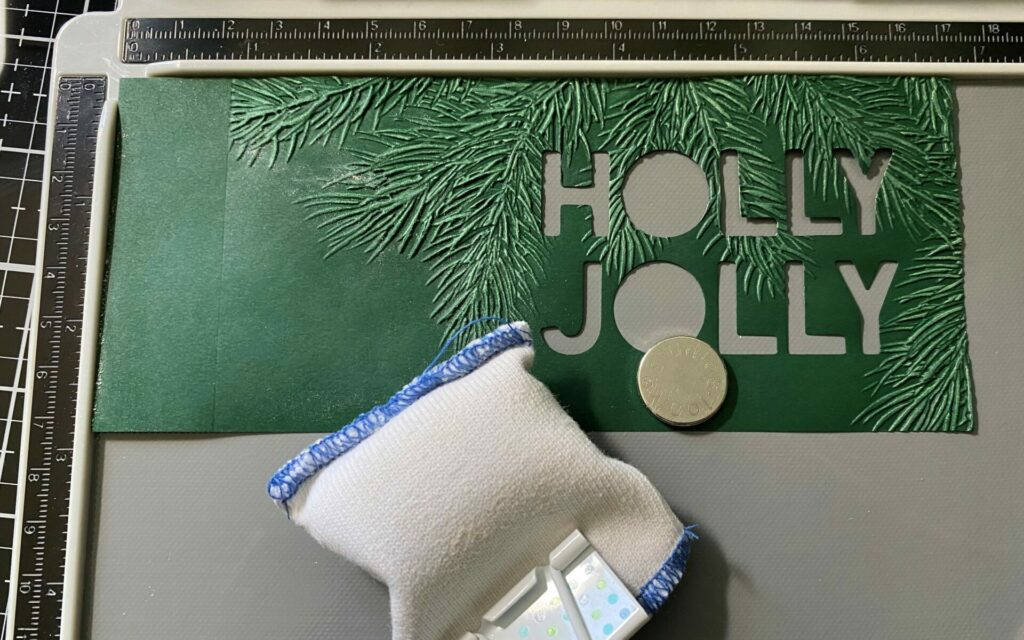
Adding The Crayon
- Scribble some mica crayon on your craft sheet.
- If your crayon is dry you can add some water to the craft sheet and mix it in. But not too much water.
- Using your finger, rub the crayon on the high points of all the pine branches.
- Use a light touch for this.
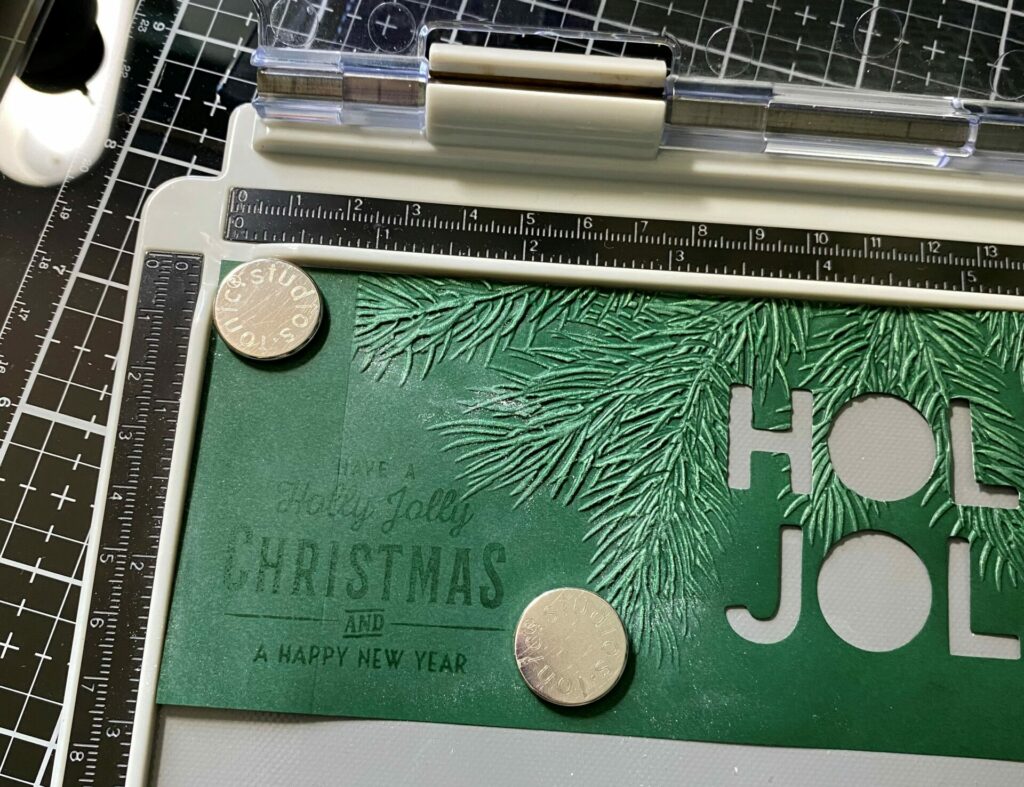
Heat Embossing The Sentiment
- Place the holly jolly panel in your stamping tool with the branches at the top.
- Position the Have a Holly Jolly Christmas and a Happy New Year stamp in the bottom left corner and close your stamping tool. (See below for stamp placement.)
- Rub the anti-static pouch all over the panel below the branches.
- Ink the stamp with embossing ink and close the stamping tool to stamp the sentiment.
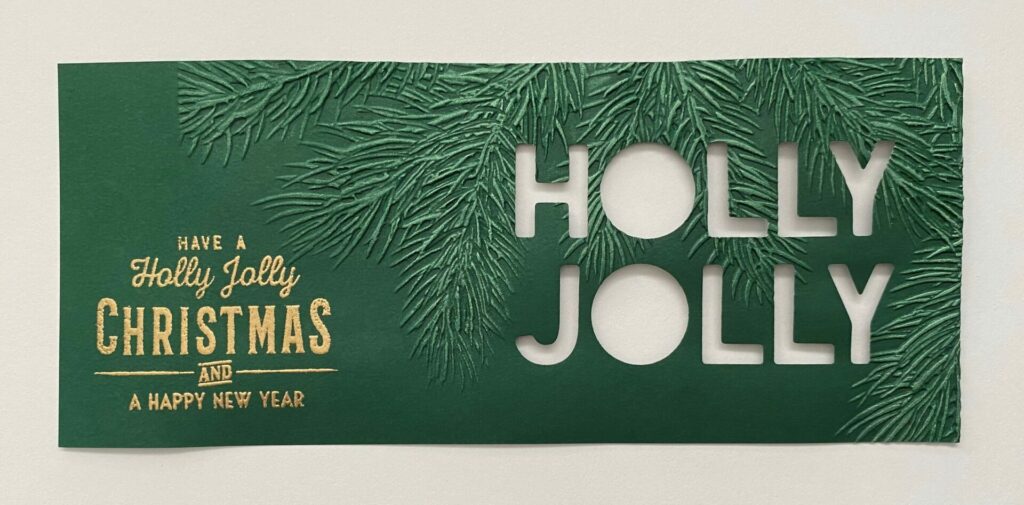
- Remove the panel from the stamping tool and pour gold fine detail embossing powder over the stamped sentiment. Tap off the excess powder over a sheet of copy paper and pour the extra powder back into the jar.
- Brush away any stray embossing powder with a small brush.
- Lastly, emboss the powder with an embossing gun.
Pro Tip: Turn on the embossing gun, while holding it, let it run for a bit to warm up before aiming it at the paper. Keep the embossing gun moving to prevents over embossing and scorching off the shiny metallic finish.
Assembling The Card Base
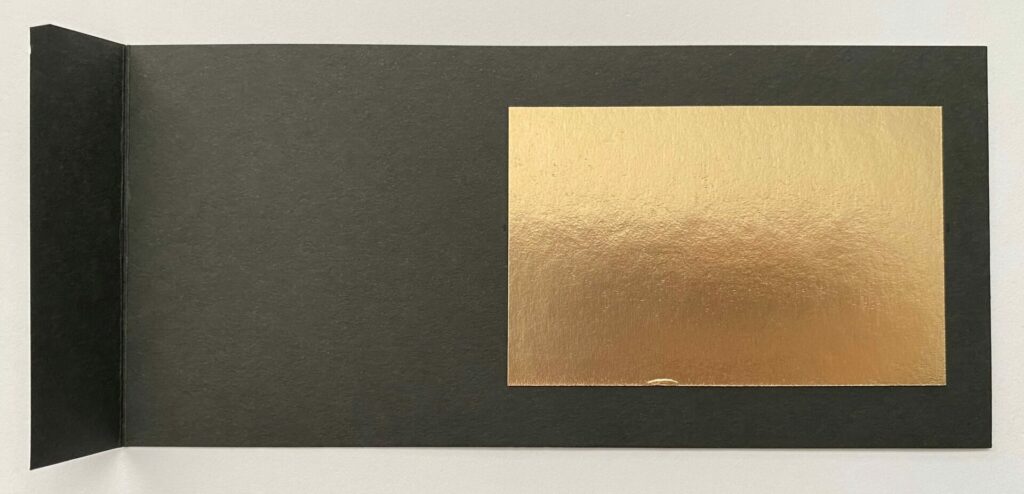
- Cut some gold metallic cardstock to a size of 2¼” x 3½”.
- Glue it to the right side of the black card base. (See below for placement.)
- Make sure the front flap is on the left side.
- Put something heavy on it while the glue dries.
- Then, take the green holly jolly panel and put foam squares on the back of it.
- Place them only around the “Holly Jolly” cut out.
- I put a dot of glue on each one for an extra secure hold.
- Put glue on the back right side of the holly jolly panel and adhere it to the card base.
- Align it flush up against the fold on the left of the card, and with equal spacing on the top, right, and bottom of the card base.
 Put something heavy on it while the glue dries.
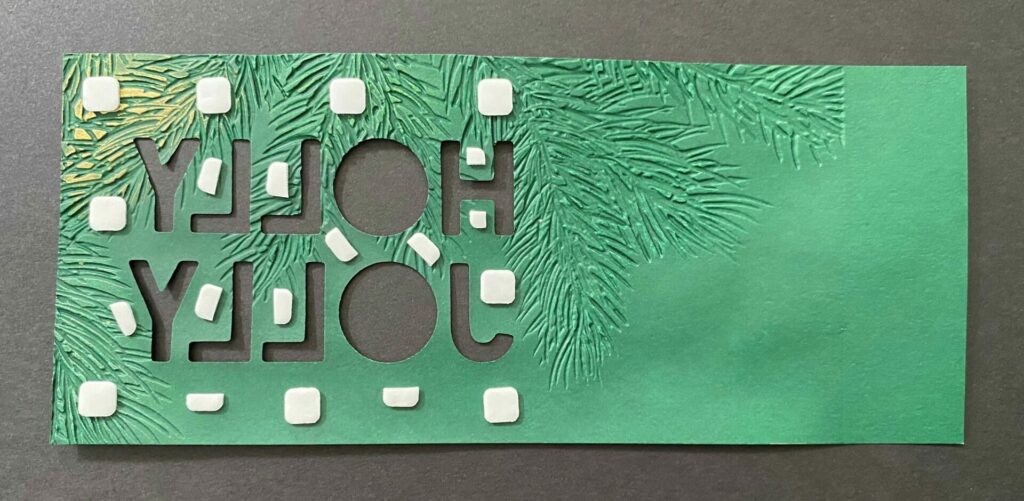 Put glue on the back right side of the holly jolly panel and adhere it to the card base.
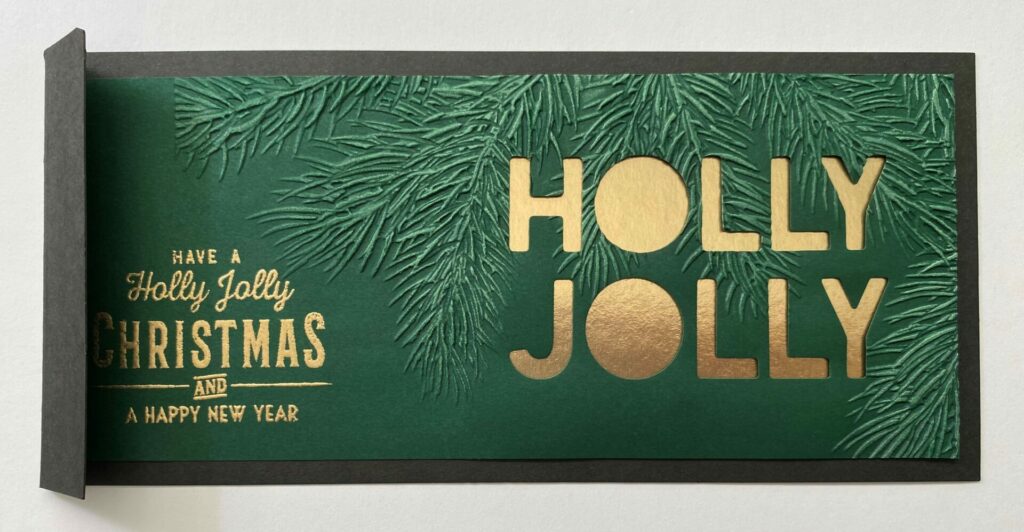
Die Cutting Retro Santa
- Cut two background layers from black cardstock.
- Cut the Santa layer and bottom hand from red cardstock.
- Cut the beard, both hands, and the buckle from white cardstock.
- Cut just the buckle from metallic gold cardstock.
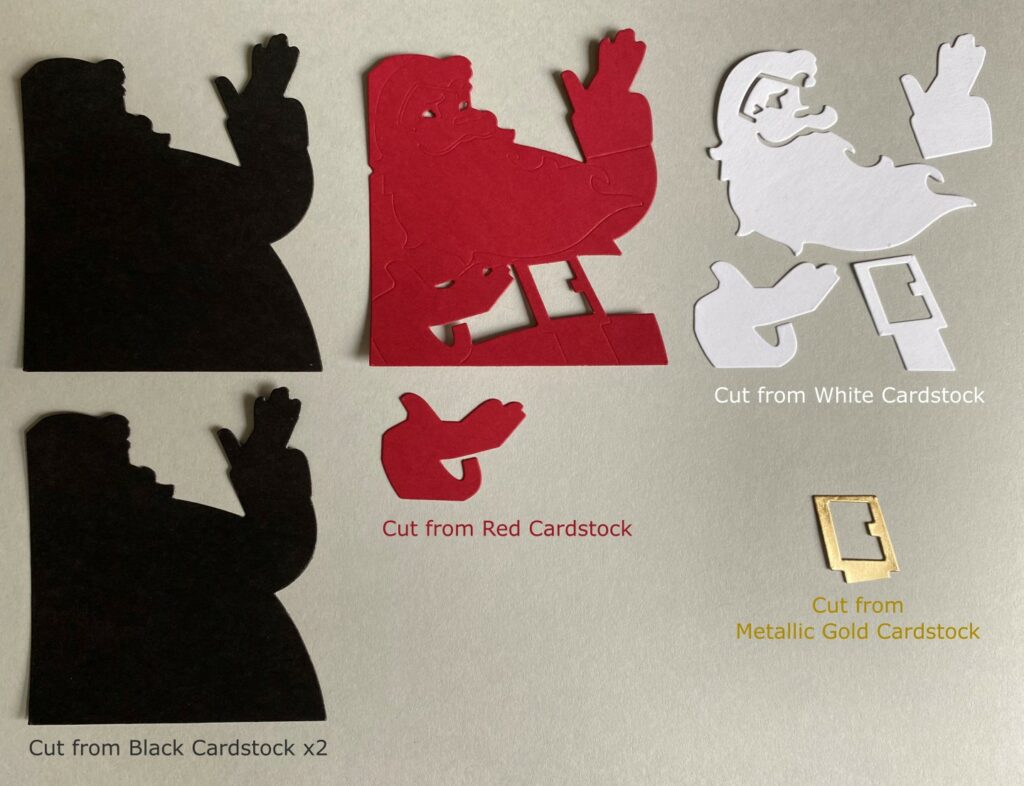
Trim the hands and buckle along the indicated dotted lines.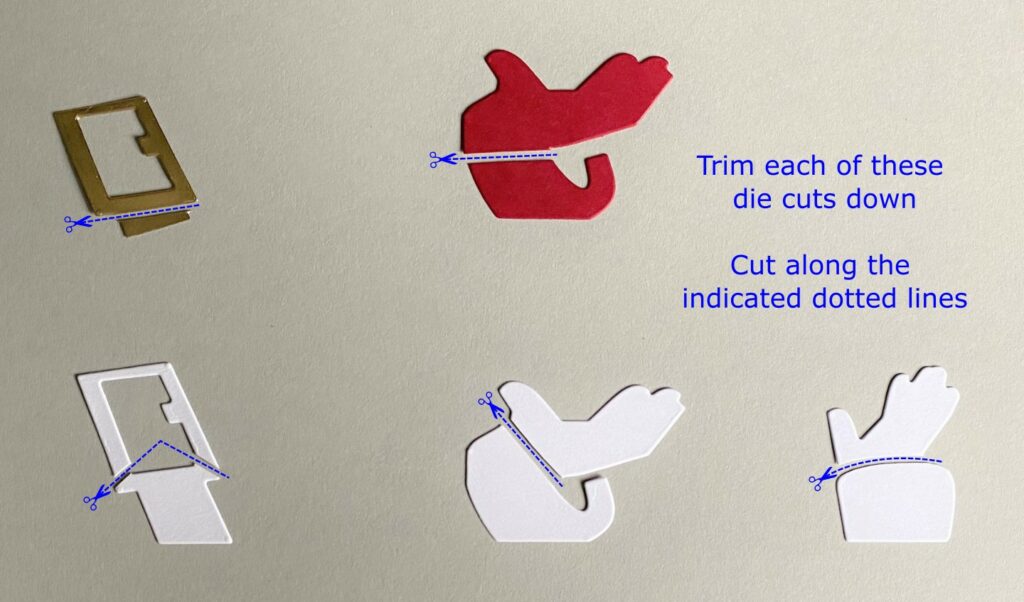
Your trimmed die cuts should now look like this.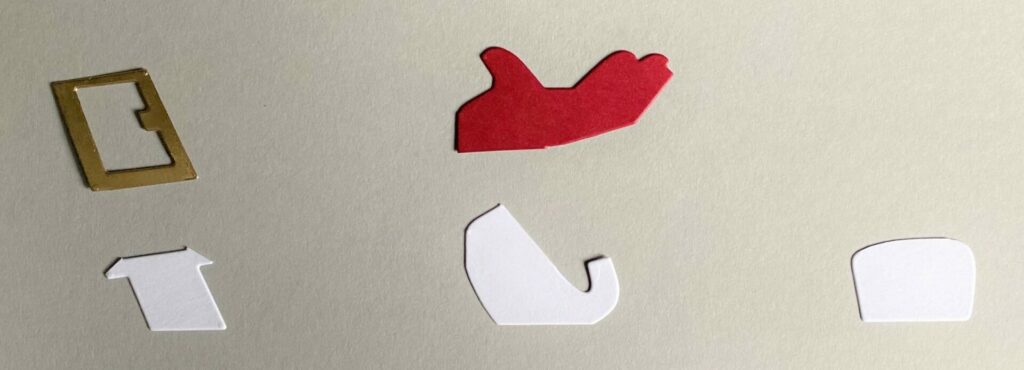
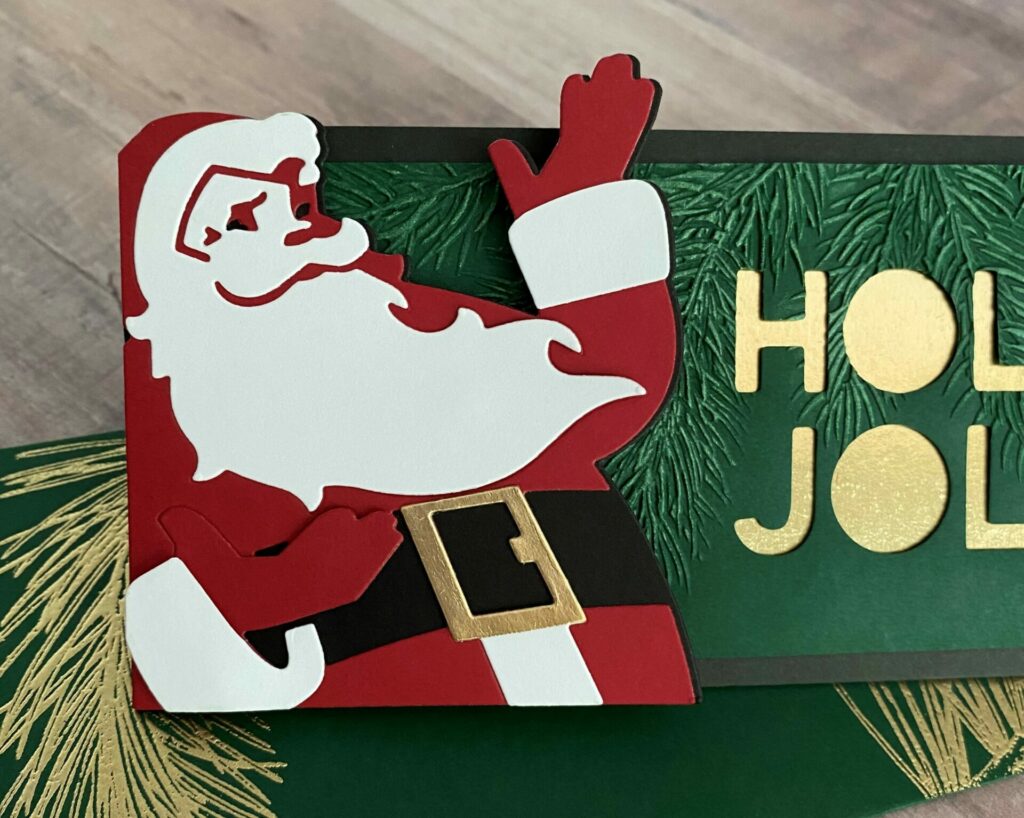
Assembling Retro Santa
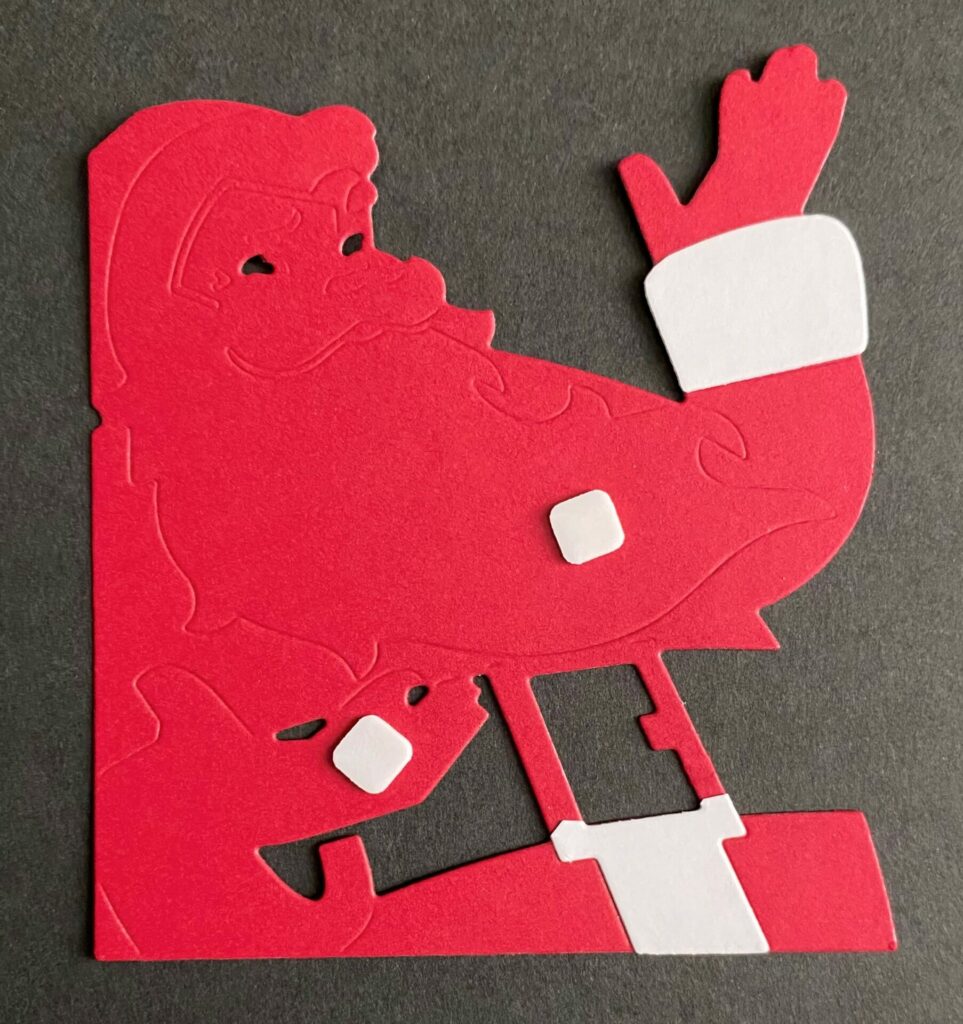
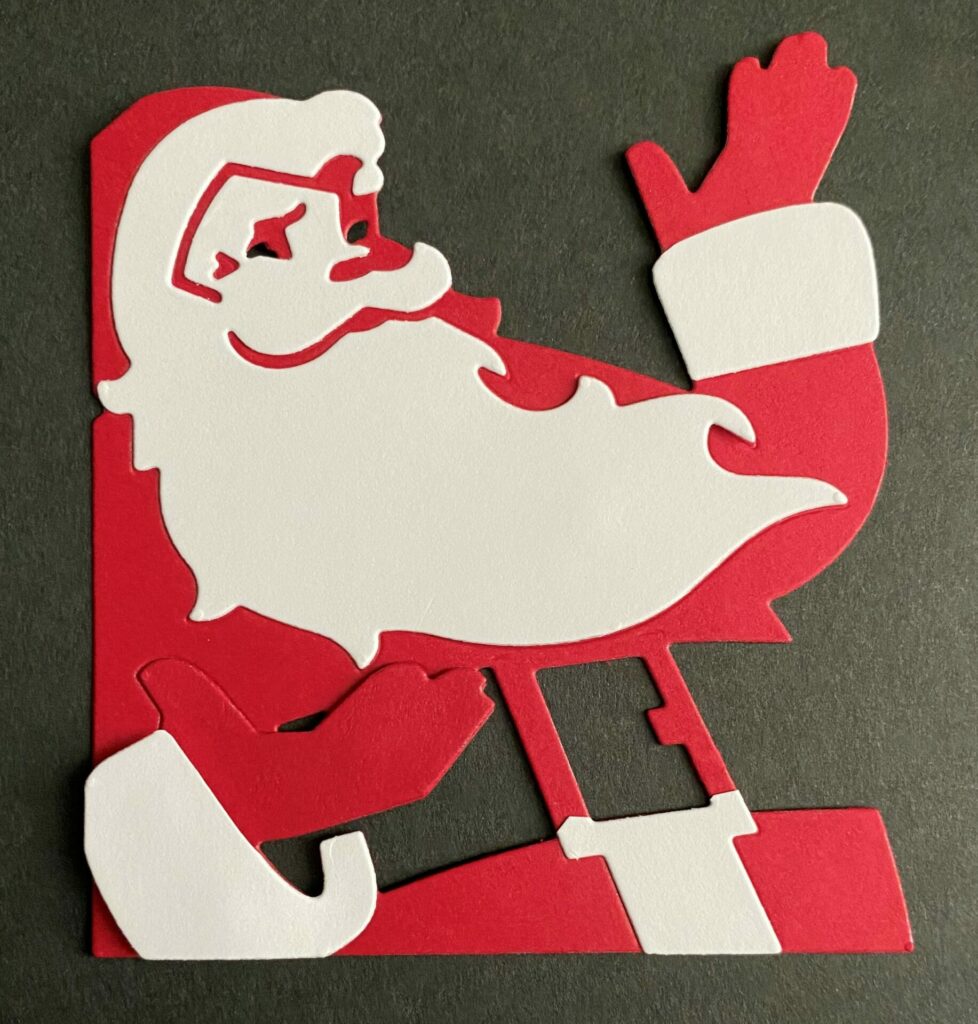
- Glue the white top arm cuff and coat trim to the red Santa layer.
- Place a foam squares on his beard and the fingers of the bottom hand.
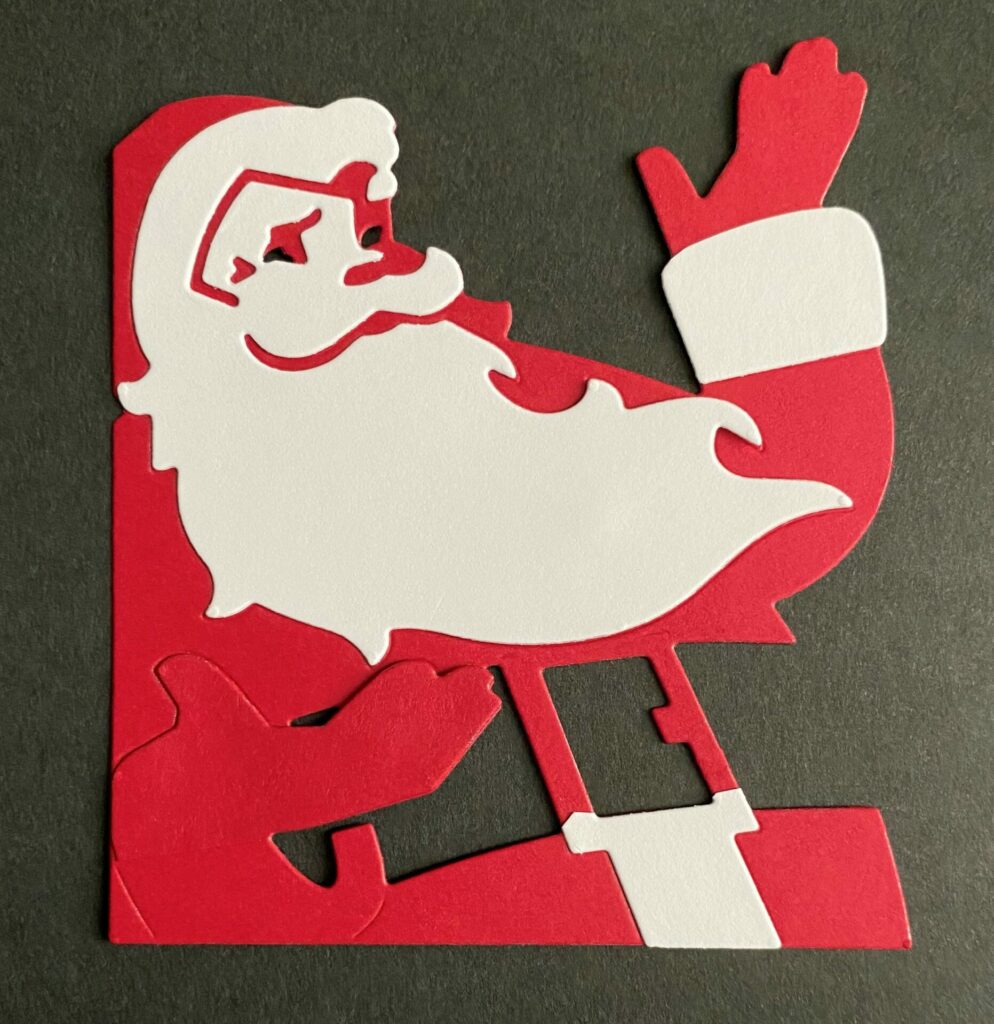
- Put a dot of glue on the beard foam square. Then, glue the white face layer to the red layer.
- Put a dot of glue on the bottom hand foam square. Then, glue the red bottom hand layer in place.
- You can’t see it too well in the photo but it does add some extra dimension and depth.
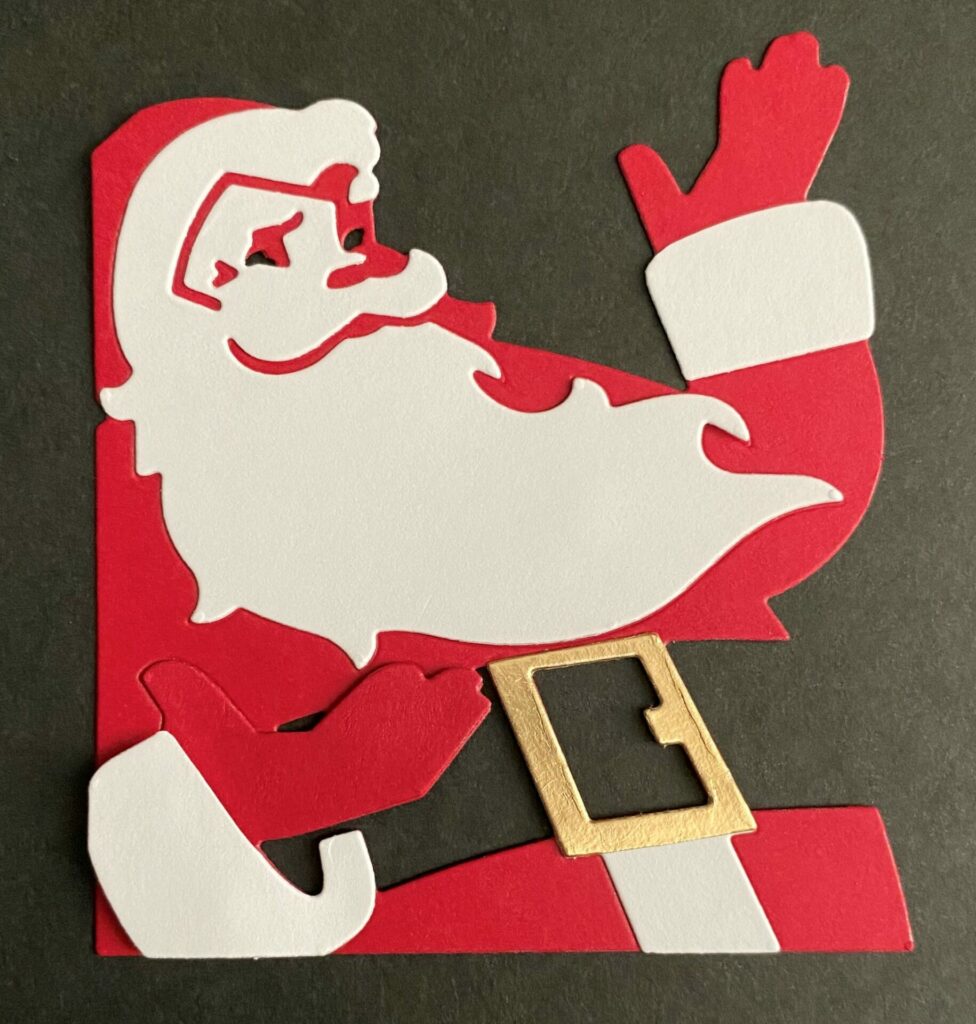
- Place two foam squares on the cuff of the bottom hand.
- Put a dot of glue on each of the foam squares. Then, glue the white cuff layer in place.
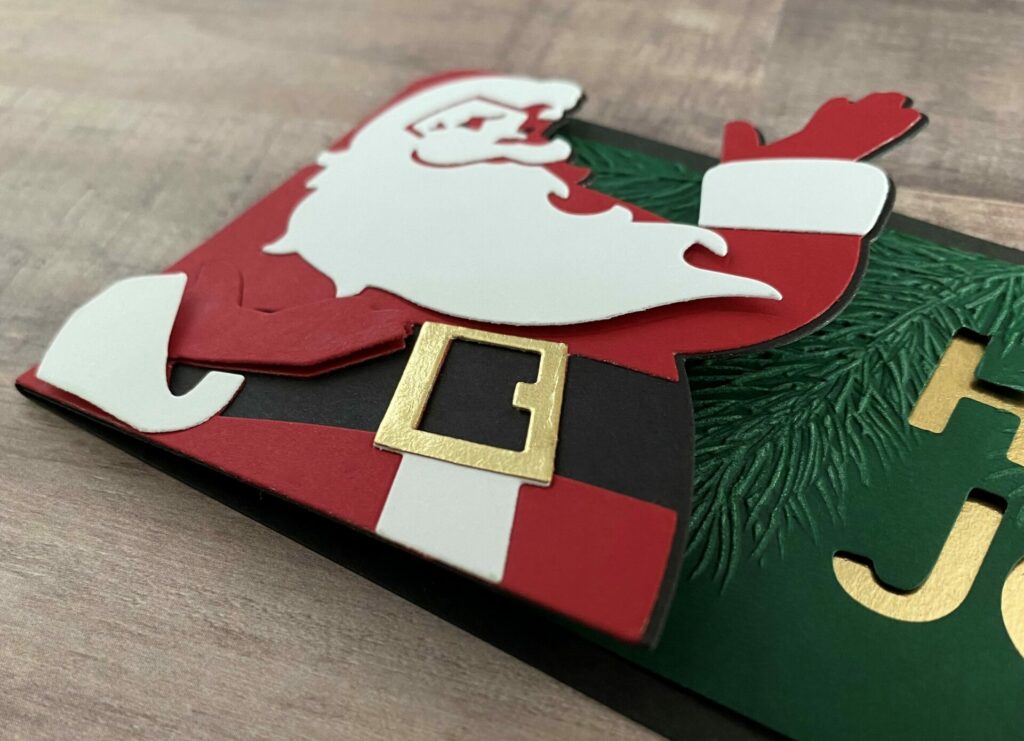
- Next, glue down the metallic gold buckle layer.
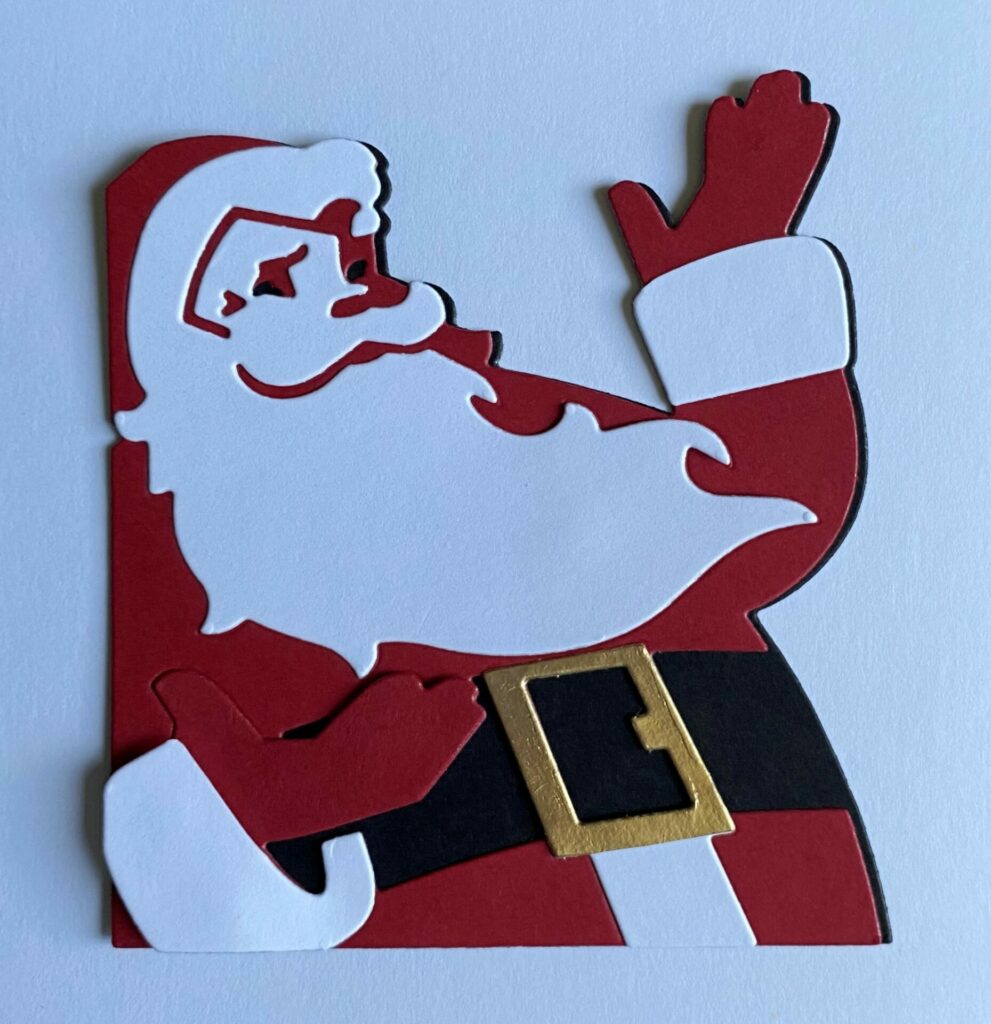
- Lastly, glue the black base layer behind the red layer.
- I shifted mine to the right a little bit for a drop shadow effect.
 Place two foam squares on the cuff of the bottom hand.
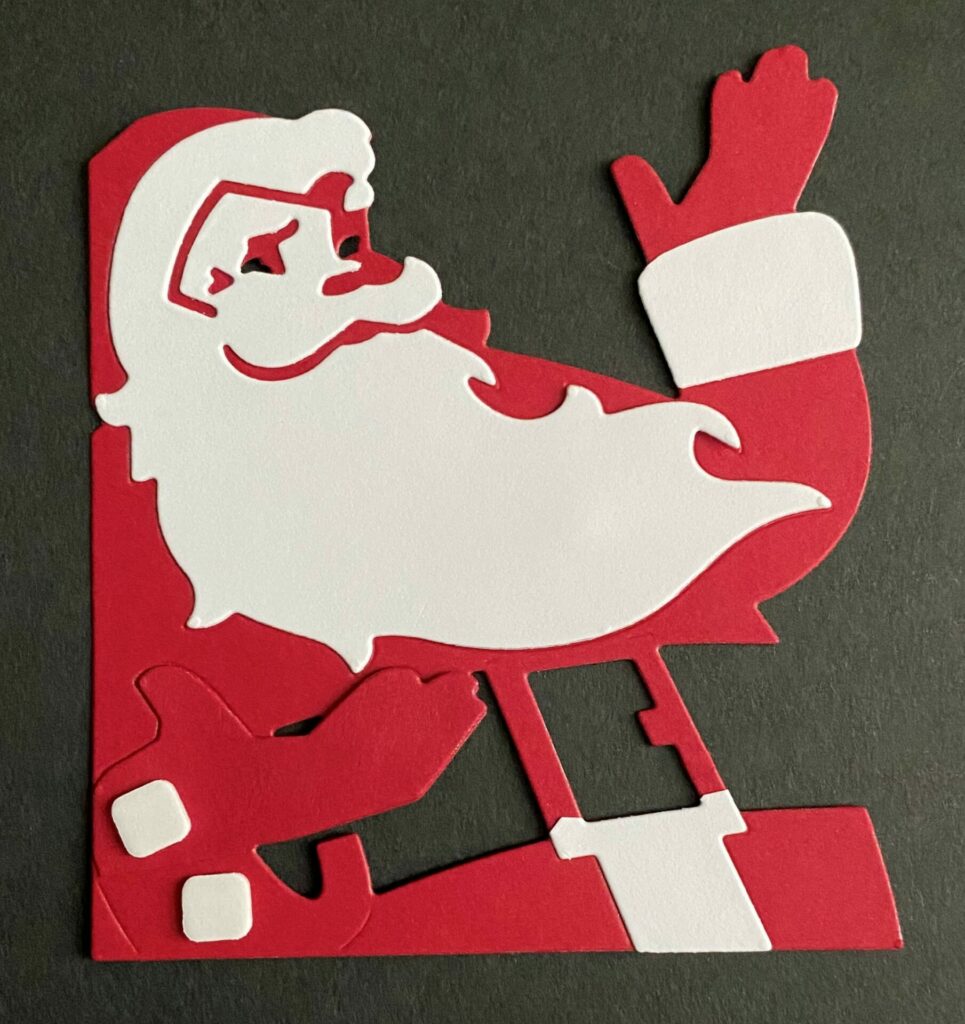
You should still have a left over black base layer for Santa. Don’t toss it, we’ll be using that in the next step.
Gluing It All Together
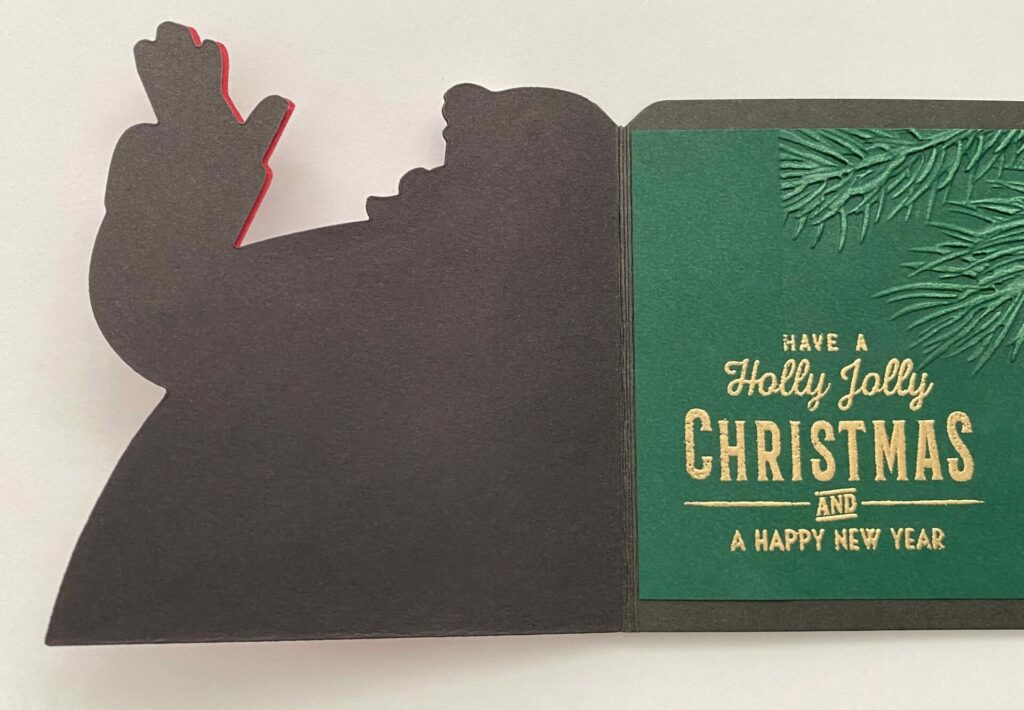
- Glue Santa to the front flap of the card. Align him flush with the left side and bottom of the card.
- Set something heavy on it while it dries.
- Then, open the card and glue the black base layer behind Santa to cover up the flap seam.
- Set something heavy on it while it dries.
- Trim off the top left corner of the card base by Santa head.
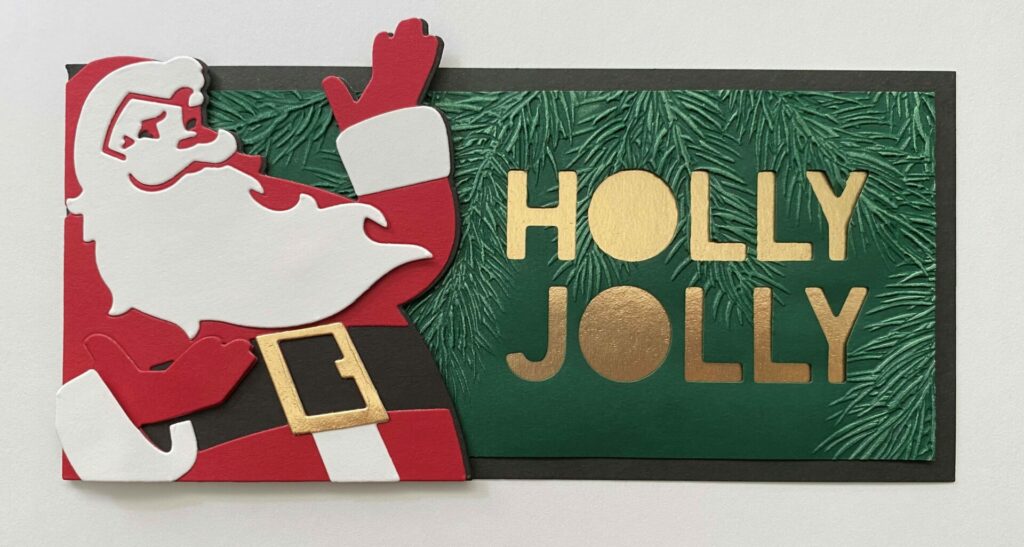
Holly Jolly Santa Card Complete!
Congratulations! You have now completed your Holly Jolly Santa Card! I hope you enjoyed this tutorial and have as much fun making it as I did. If you do make this card, please use the #grovecrafted and tag me (@silversgrove or @grovecrafted) on Instagram. I’d love to see what you’ve created! Thanks for stopping by and I hope you found some new inspiration to create.
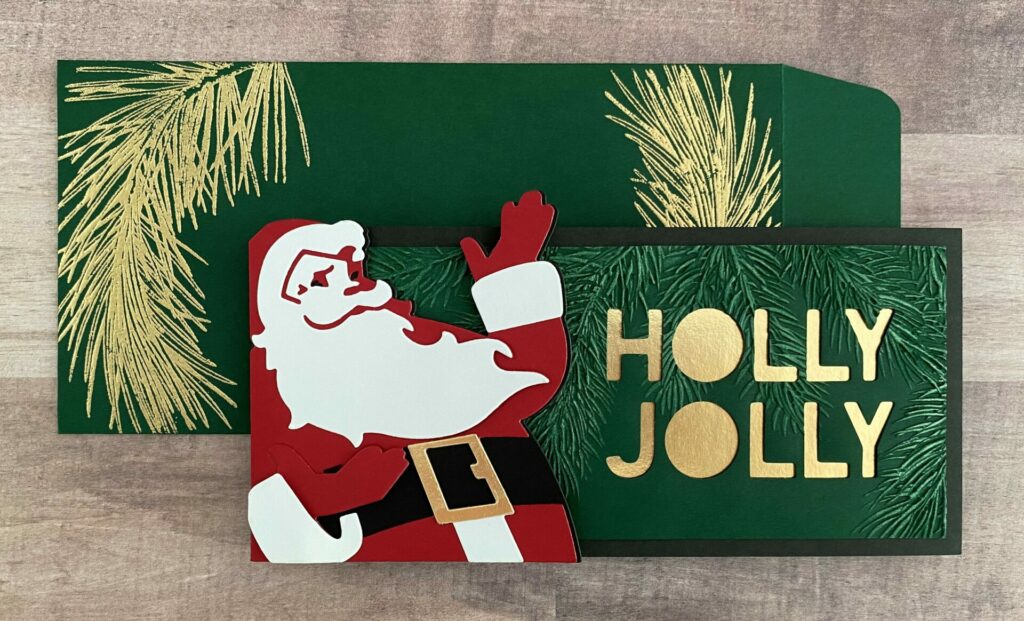
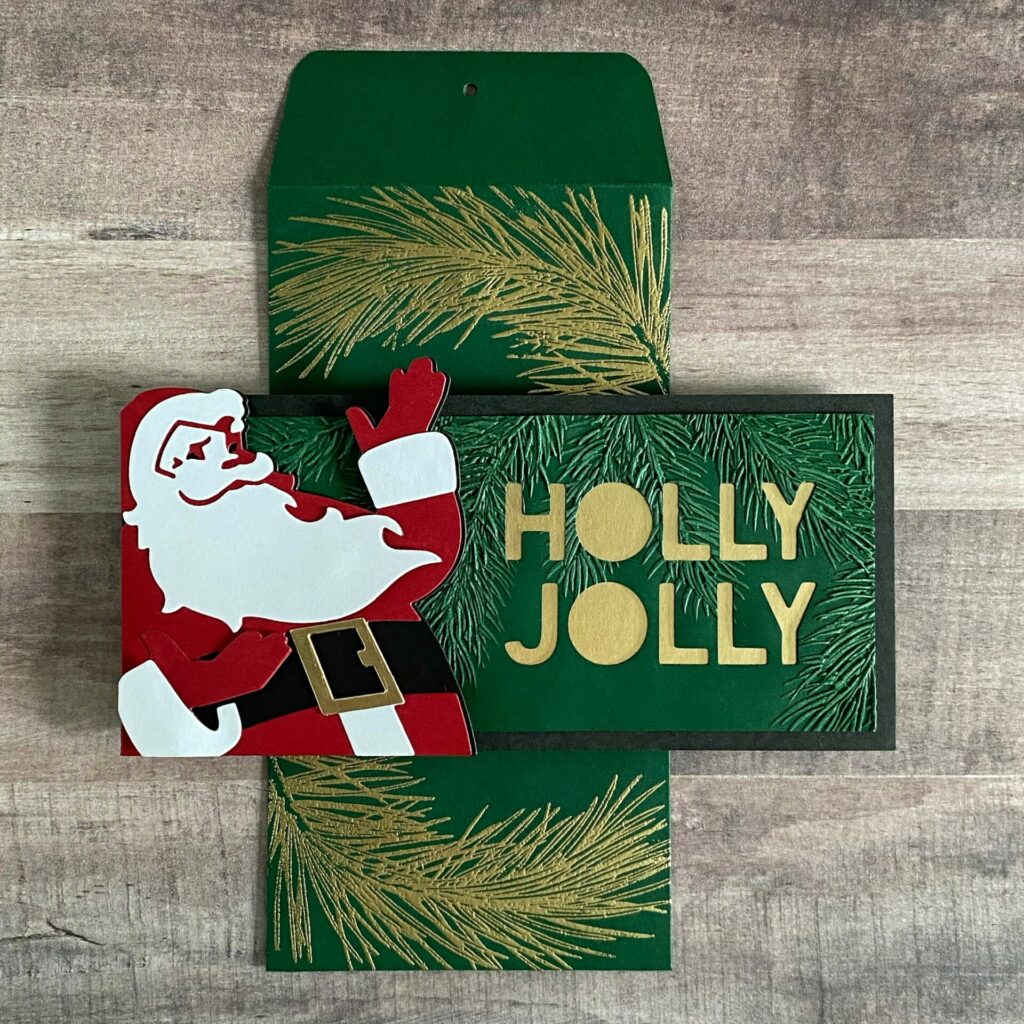
If your interested in making the coordinating envelope you might want to check out my Holly Jolly Envelope tutorial. It fits perfectly with the Holly Jolly Santa Card that you just made.
If you enjoyed making this Holly Jolly Santa Card, you might want to check out my Pine Christmas Slimline Card tutorial.