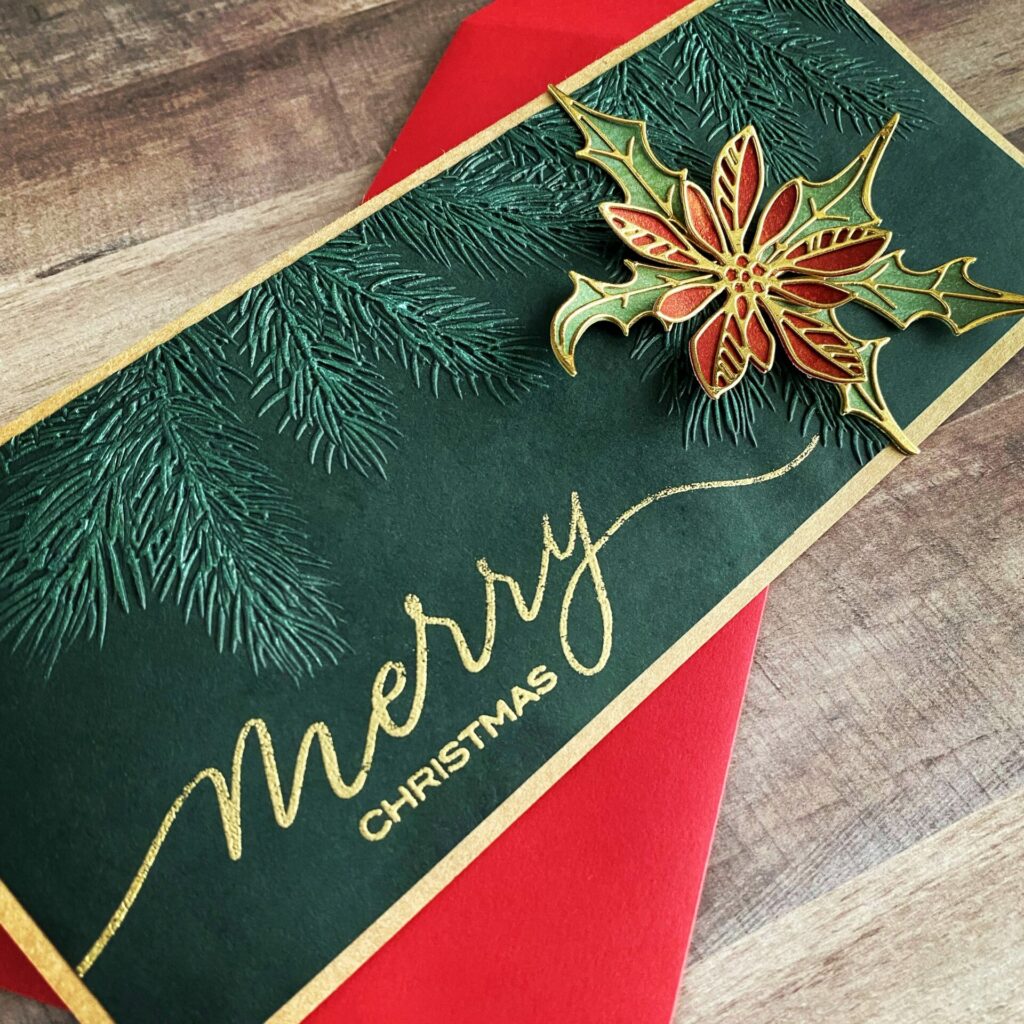
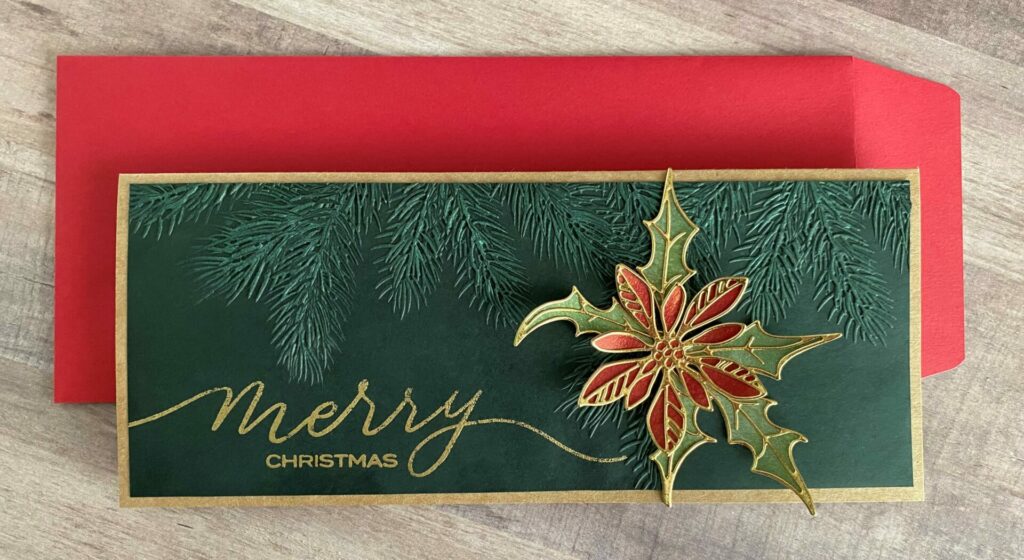
Pine Christmas Slimline Card
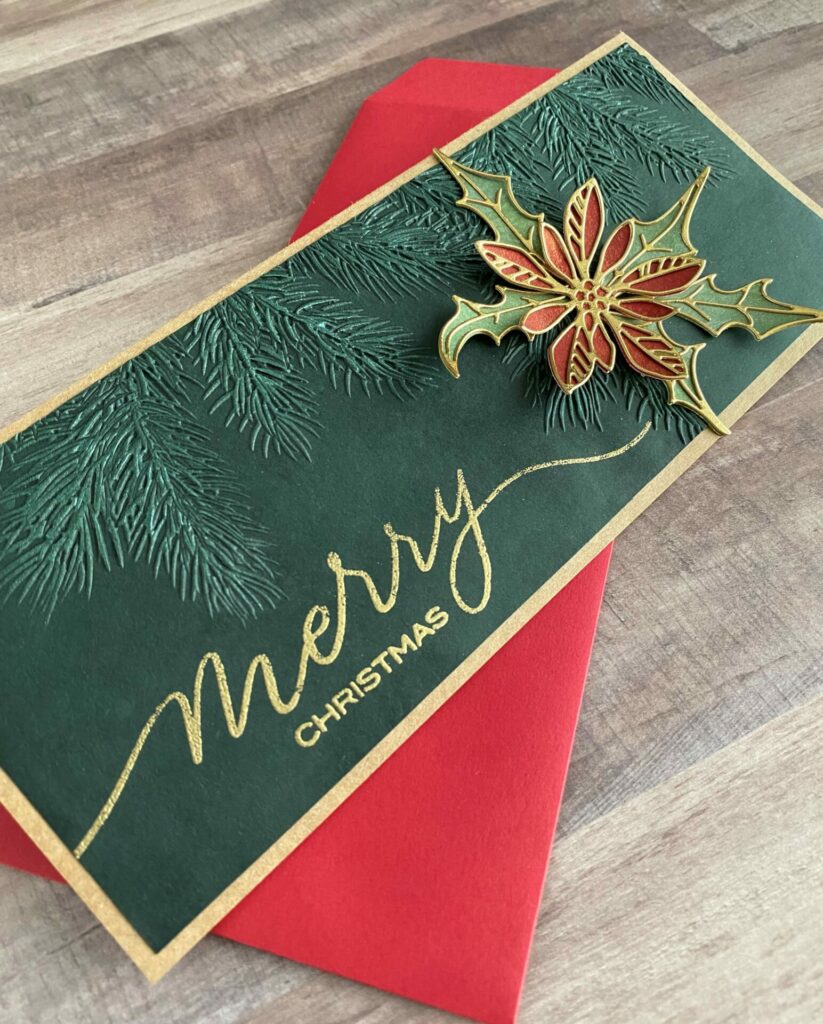
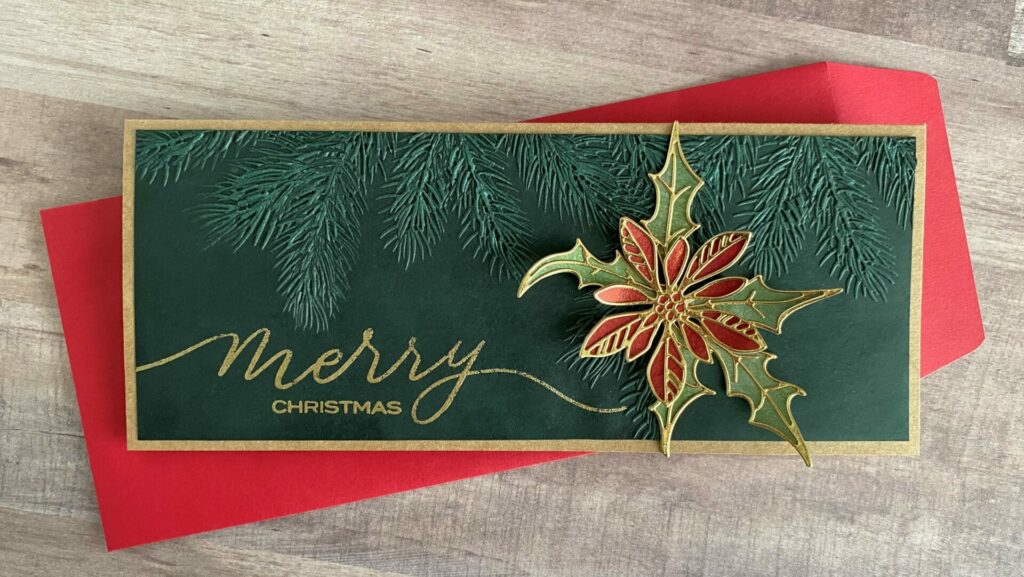
Hello crafty card makers and welcome to the start of Christmas in July! Today I’m sharing how I made this pine Christmas slimline card. It features mica stain inking, along with some heat embossing. You can make this card in traditional Christmas colors, or even go for a cool wintry pallet. This elegant card is perfect for the holidays. I made this card for Christmas, but the sentiment could easily be changed to fit your specific need. This pine Christmas slimline card could also work for anyone with a December birthday, just by switching out the sentiment. So here we are. It’s Christmas in July, and as promised (on Instagram) here’s the tutorial for this handmade Christmas card. If you don’t know what I’m talking about, well here’s the story. Last year I didn’t quite finish this card in time for Christmas. But I decided to post it on Instagram (@silvergrove) anyway, even thought Christmas had come and gone. Many people liked it and I got such nice comments. So I decided to do a tutorial for it and said I would post it for Christmas in July.
Some Alternatives
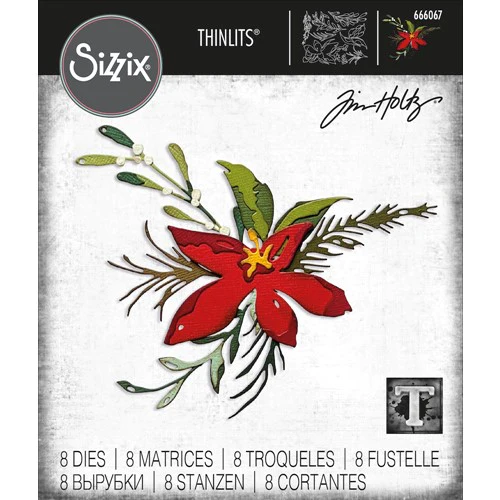
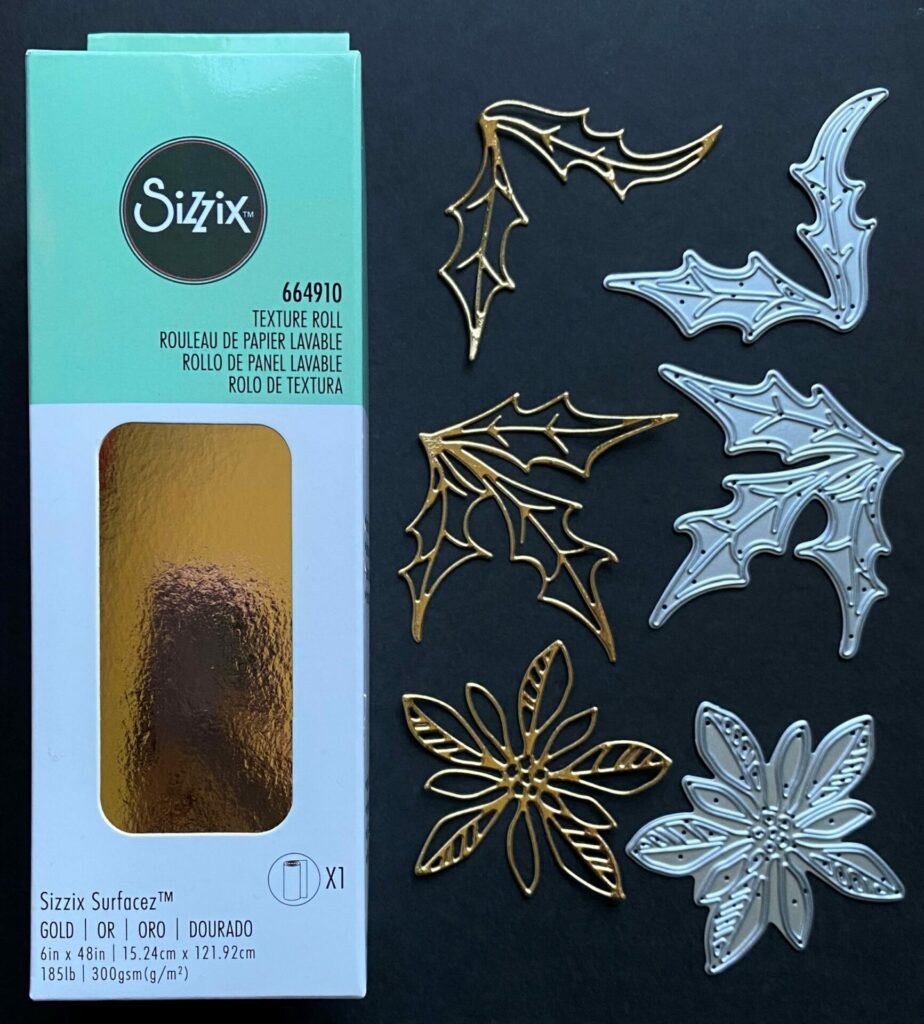
However, when I sat down to write this blog post, I discovered that Sizzix has discontinued the Season Sketch die set. Insert sad face here. But no worries, I have come up with some substitute options for you. Also there are so many poinsettia dies on the market, any of them would work well for this card layout.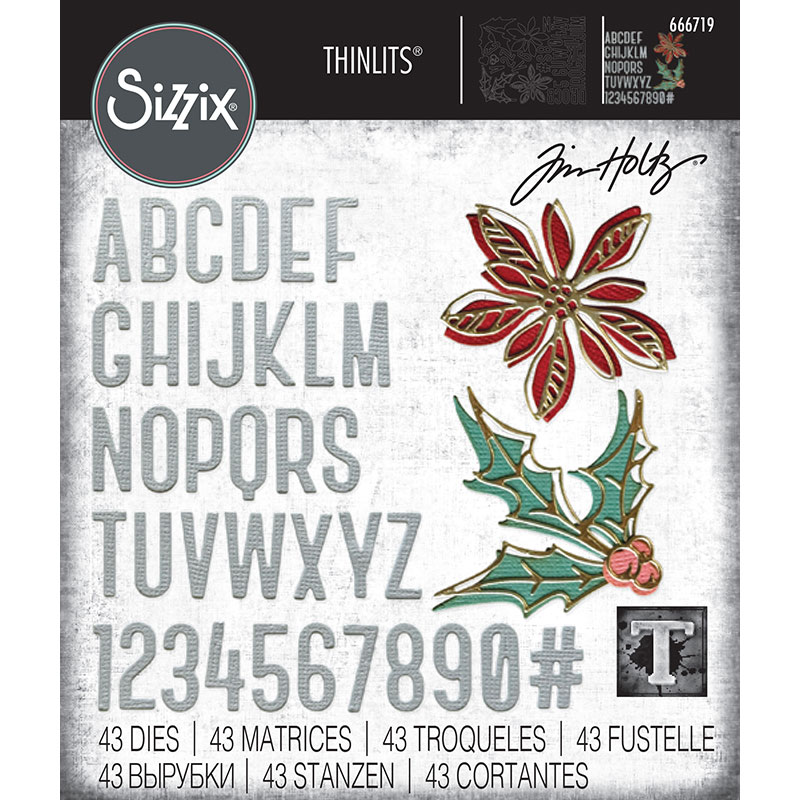

Link Abbreviations
- AMZ – Amazon*
- BA – Blick Art Materials*
- RI – Ranger Ink*
- SB – Spellbinders*
- Sb.com – Scrapbook.com*
- SIZ – Sizzix*
- SSS – Simon Says Stamp
Supplies Used / Substitutions:
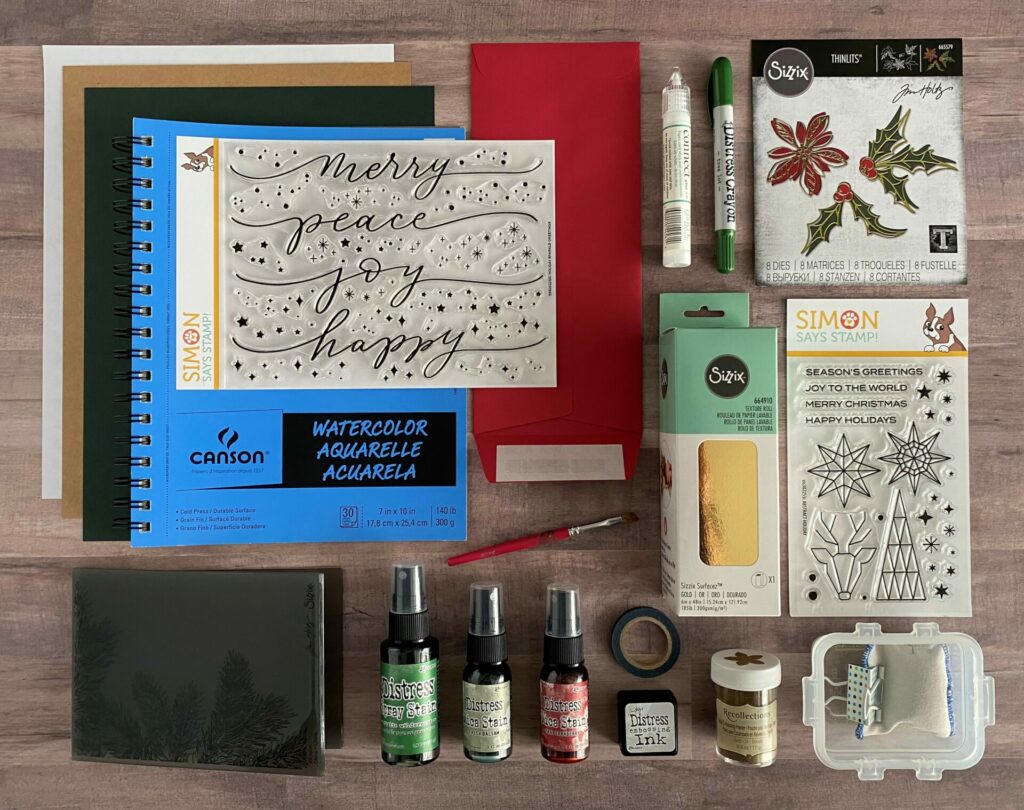
- Simon Says Stamp Clear Stamps – Holiday Sparkle Greetings SSS202230 | SSS |
- Simon Says Stamp Clear Stamps – Abstract Holiday SSS302253C / Any small basic Christmas stamp
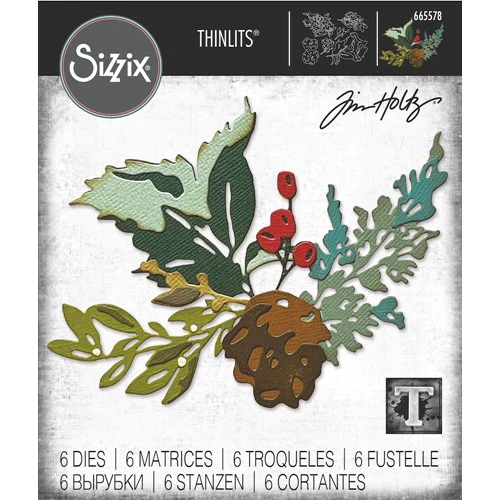
- Sizzix Tim Holtz Thinlits Dies – Pine Branches #666048 | Sb.com |
- Sizzix Tim Holtz Thinlits Dies – Seasonal Sketch #665579 | AMZ / Vault Seasonal Sketch #666719 | Sb.com | SIZ / Any poinsettia/flower die
- Simon Says Stamp Cardstock – Midnight Green | SSS / Any color cardstock
- Distress Kraft Heavystock | Sb.com | RI | AMZ / Any cardstock in any color
- Canson 140lb Watercolor Paper – Cold Press | BA | AMZ / Any watercolor paper
- Sizzix Surfacez Texture Roll – Gold #664910 | Sb.com | AMZ / Any metallic cardstock
- Simon Says Stamp Slimline Envelope – Schoolhouse Red / Any slimline envelope
- Tim Holtz Distress Mica Stain – Tart Cranberry & Fresh Balsam | Sb.com (Set) / Glitter paper
- Tim Holtz Distress Spray Stain – Rustic Wilderness | Sb.com | RI | SSS / Any green ink or optional
- Tim Holtz Distress Mica Crayon – Tree Lot | SSS / Fresh Balsam mica crayon or optional
- Ranger Super Fine Embossing Powder – Gold | Sb.com / Any embossing powder
- Distress Embossing Ink – Mini | Sb.com / Any embossing ink
- Anti Static Pouch | Sb.com / Any anti static tool
- Gina K Connect Glue | Sb.com | SSS / Any liquid adhesive
- Washi Tape / Any low tack tape
- Scrap Piece of Paper
- Small Brush
Tools Used / Substitutions:
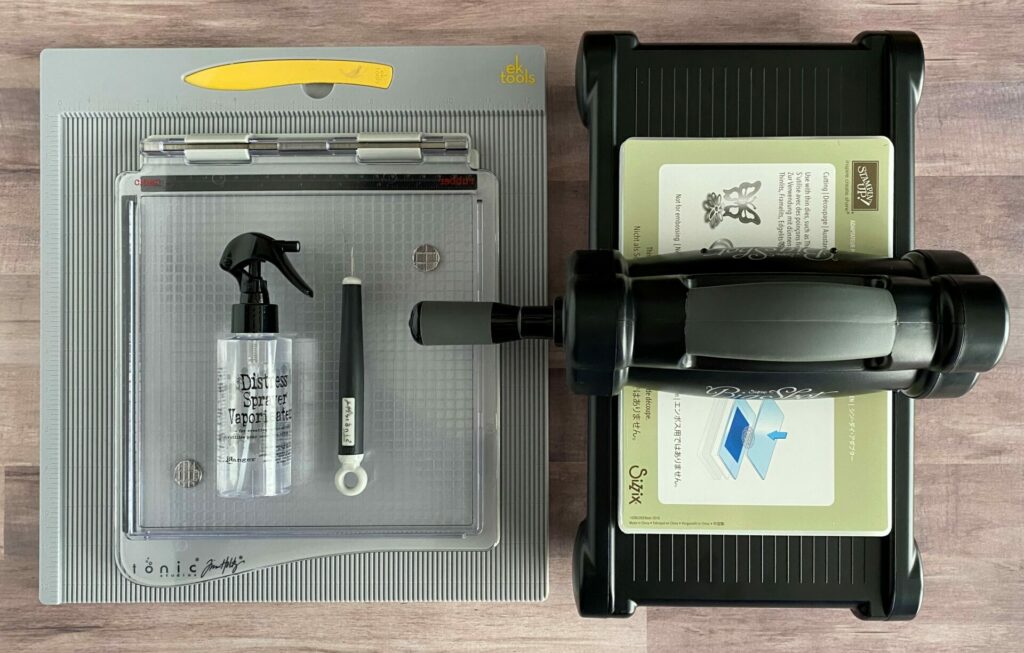
- Sizzix Big Shot | SIZ / Spellbinders Platinum Six | SB | Sb.com / Any die cutting machine
- Tim Holtz Glass Media Mat | Sb.com | AMZ | SSS / Optional or non-stick craft sheet
- Tim Holtz Comfort Paper Trimmer | Sb.com | AMZ | RI / Any paper trimmer
- Tonic Tim Holtz Stamp Platform / Any stamping tool
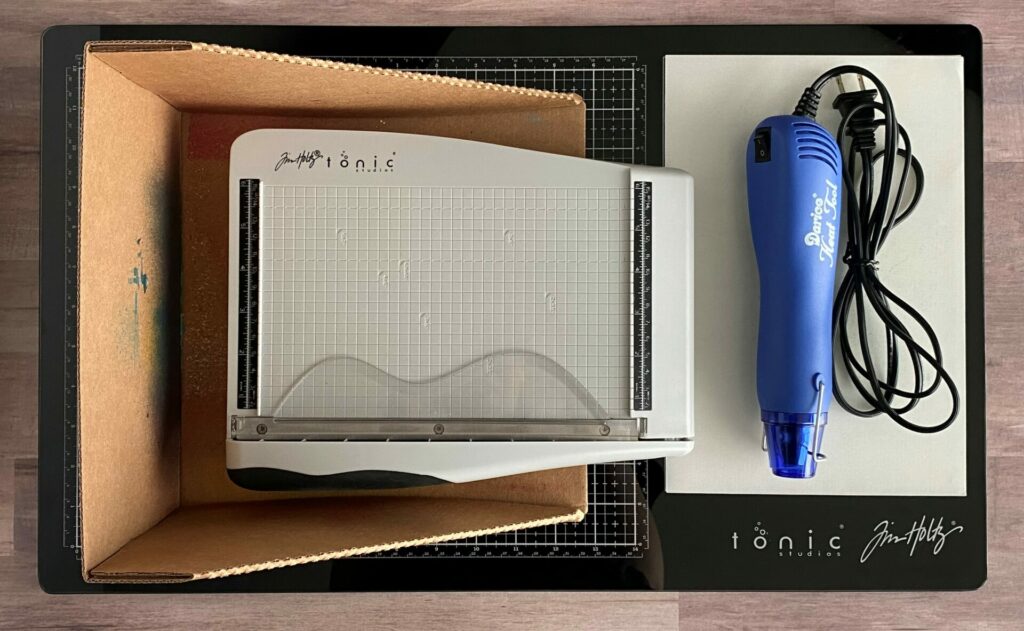
- EK Scoring Board | AMZ / Any scoring board
- Embossing Gun
- Tim Holtz Retractable Craft Pick | Sb.com | AMZ / Any die pick or toothpick
- Spray Bottle with water | Sb.com | SB | AMZ / Any spray bottle with water
- Splat Box | Sb.com / Any cardboard or plastic box
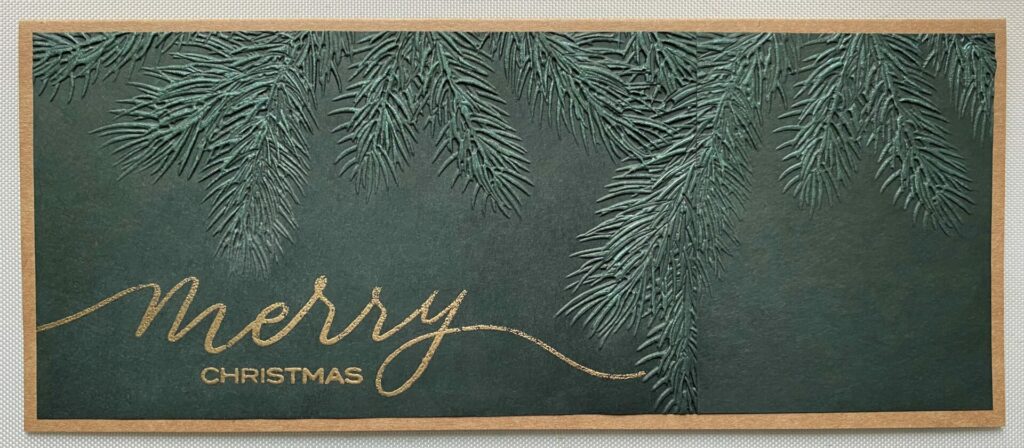
Making The Card Base
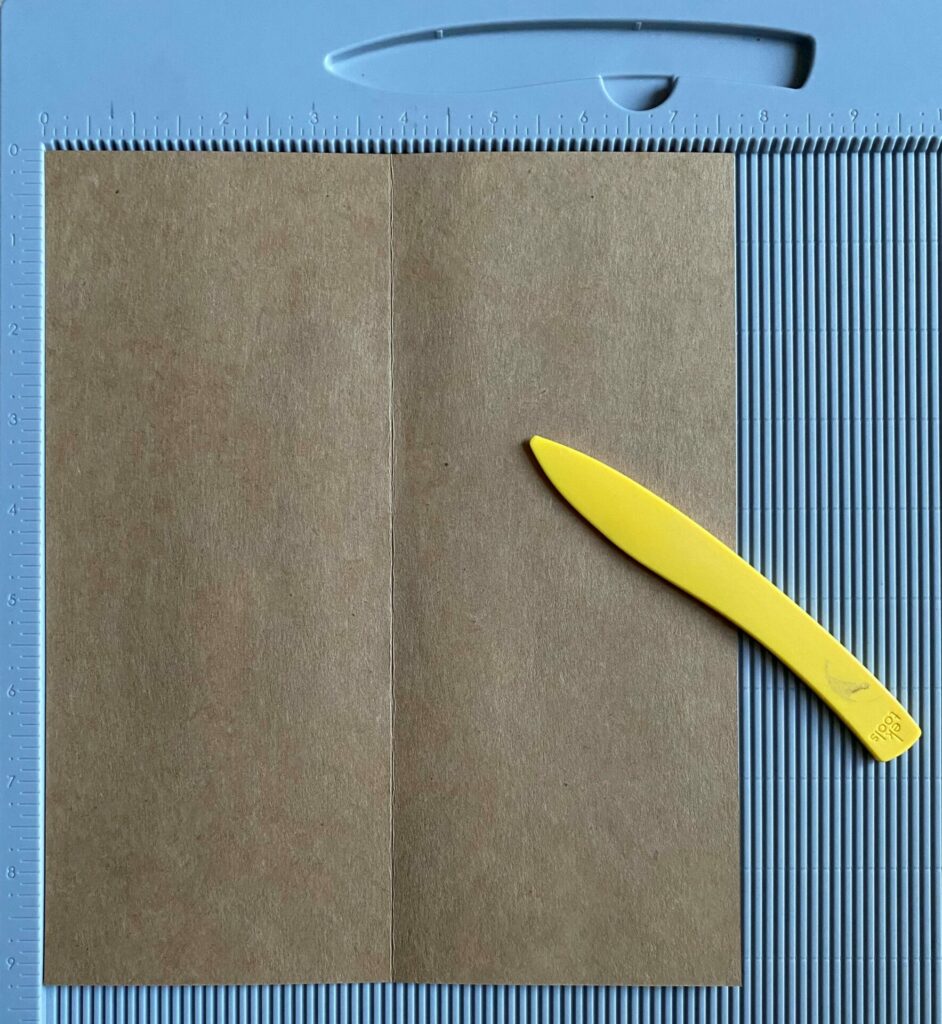
- Take a sheet of kraft cardstock and cut it down to a length of 9¼ inches with your paper trimmer.
- Score the kraft cardstock at the 3-7/8 inch line.
- Fold on the score line and reinforce the fold with a bone folder.
- Trim off the excess strip of cardstock with your paper trimmer or with an x-acto knife and ruler.
Inking The Watercolor Paper
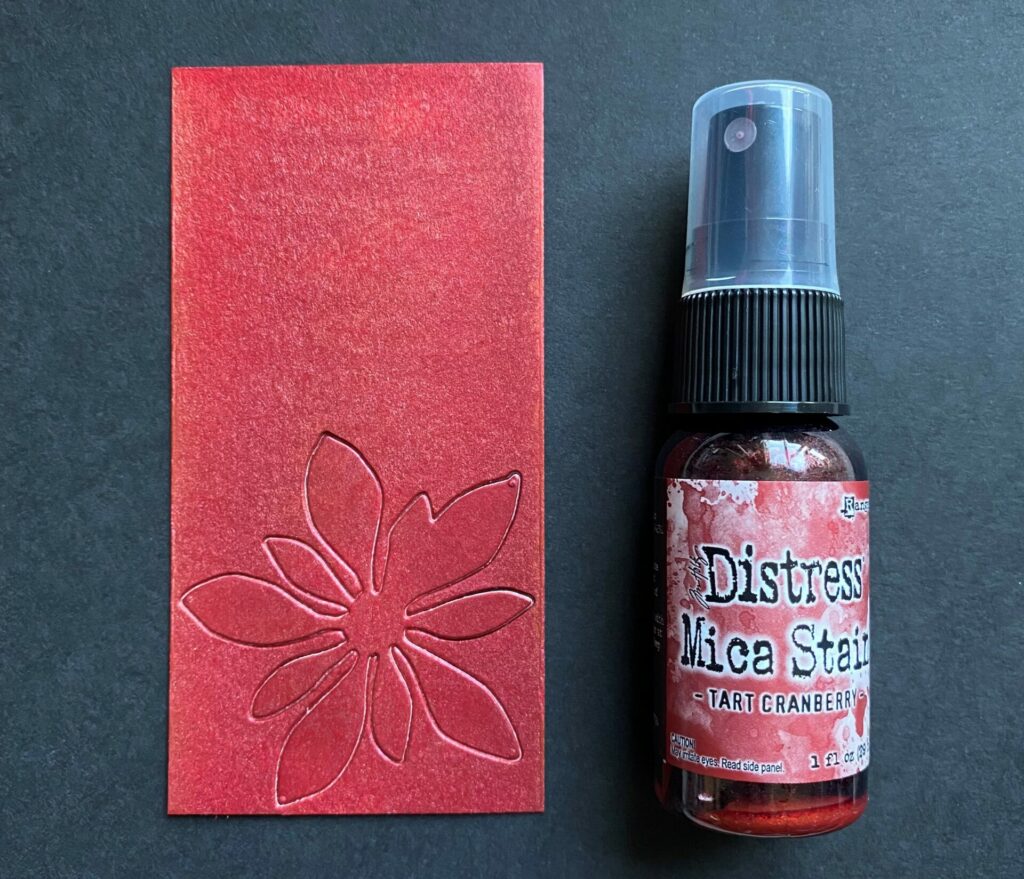
Red Mica Stain
- Trim down the watercolor paper. Your paper needs to be at least slightly bigger than the die you’ll use to cut the flower.
- Place a paper towel down in the splat box and the watercolor paper on top of the paper towel.
- Shake up the distress mica stain until the mica is thoroughly mixed in.
- Shake the bottle side to side, like your ringing a bell. This will prevent ink from leaking up through the cap.
- Mist the watercolor paper with a little bit of water.
- Spray the watercolor paper with the distress mica stain in tart cranberry.
- Let the paper air dry, or you can dry it with a heat tool.
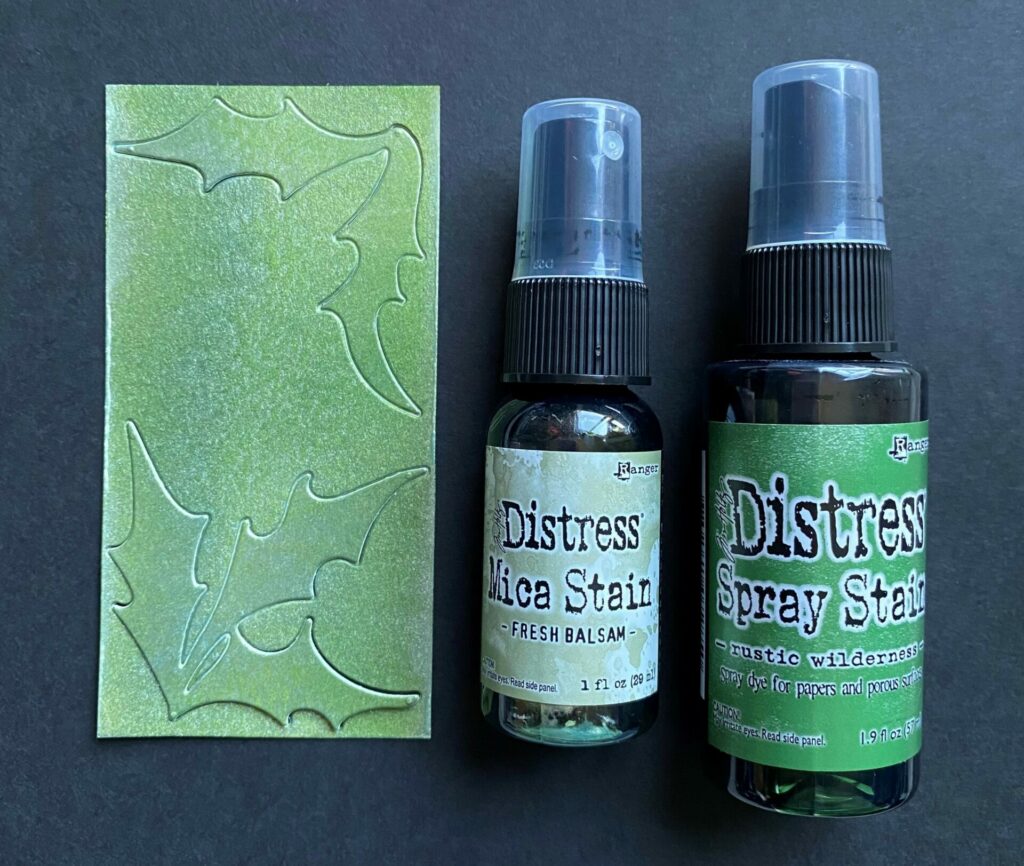
Green Mica Stain
- Trim down the watercolor paper. Your paper needs to be at least slightly bigger than the die you’ll use to cut the leaves.
- Place a paper towel down in the splat box and the watercolor paper on top of the paper towel.
- Shake up the distress mica stain until the mica is thoroughly mixed in.
- Shake the bottle side to side, like your ringing a bell. This will prevent ink from leaking up through the cap.
- Mist the watercolor paper with a little bit of water.
- Spray the watercolor paper with distress spray stain in rustic wilderness and distress mica stain in fresh balsam.
- Let the paper air dry, or you can dry it with a heat tool.
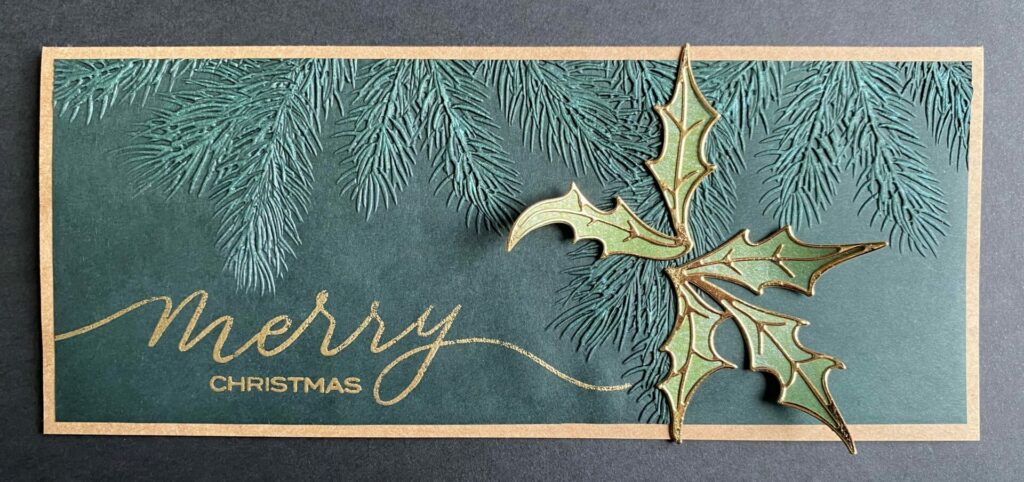
Die Cutting The Flower
Cutting The Flower Background
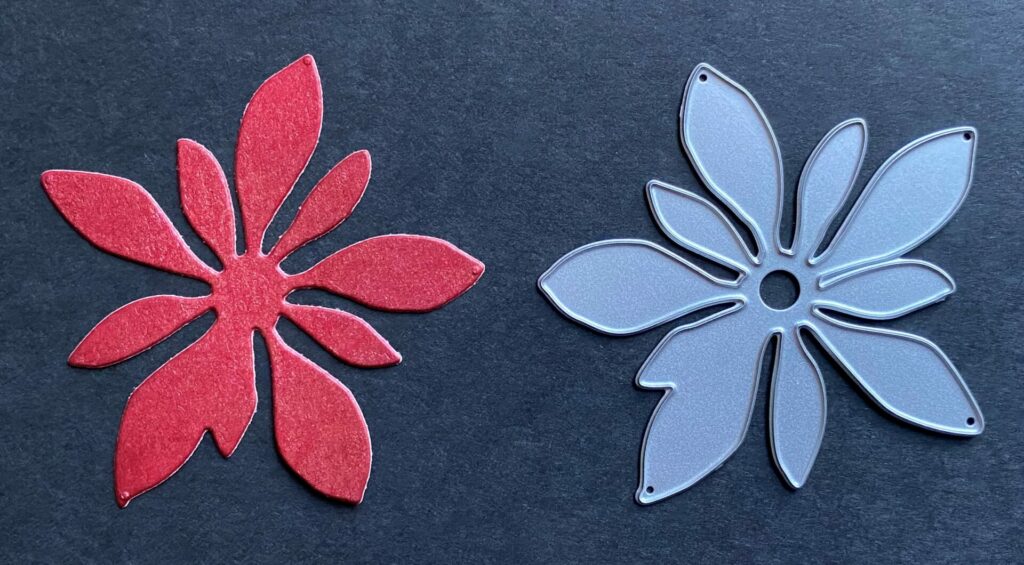
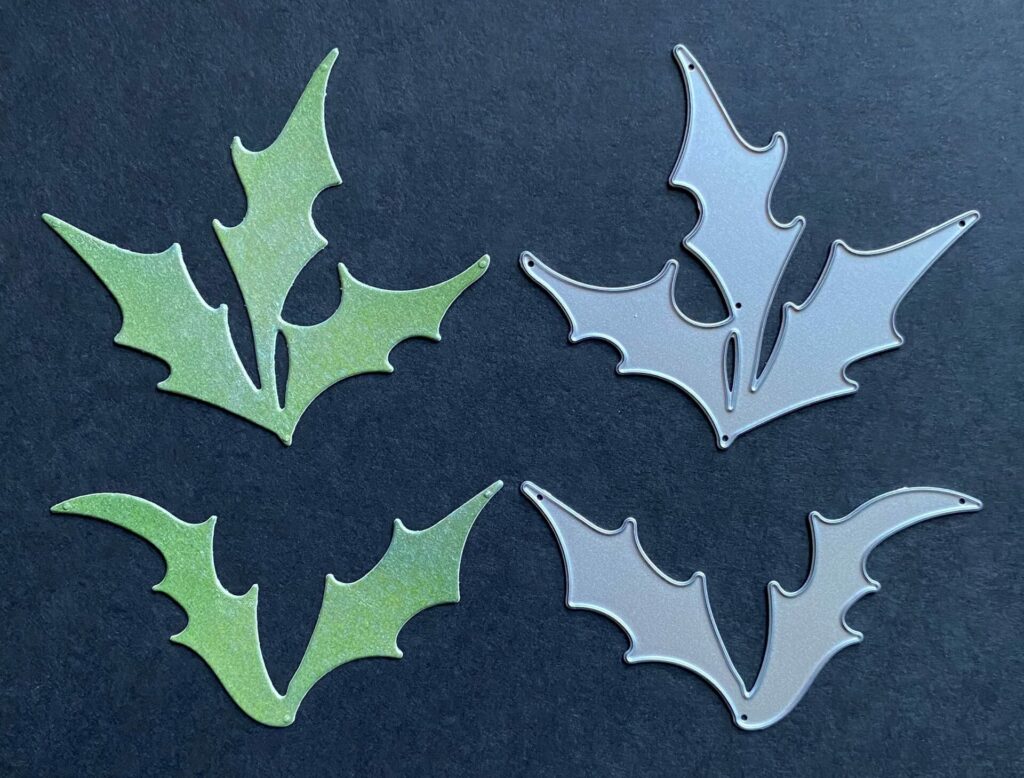
- Take out the two solid leaf dies and solid flower die from the Sizzix Seasonal Sketch die set.
- Set the flower die on the red mica inked paper and the two solid leaf dies on the green mica inked paper.
- Place the dies blade side down onto the inked mica paper and secure them down with washi tape.
- Run it through your die cutting machine.
- Remove the dies and pop out the die cuts from the paper.
- Brush off any shavings of paper left along the edges of the die cuts.
Cutting The Flower Outline
- Trim off a piece of the Sizzix Surfacez gold texture roll big enough to fit all three detailed dies from the Sizzix Seasonal Sketch die set.
- Place the dies blade side down onto the gold paper and secure them down with washi tape.
- Run it through your die cutting machine.
- Carefully pop out the die cuts from the dies with a die pick.
- Brush off any shavings of paper left along the edges of the die cuts.
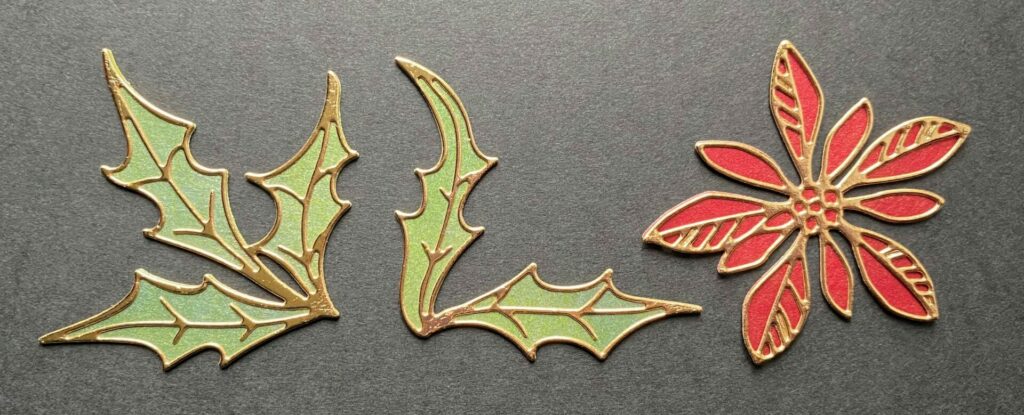
Gluing The Flower Pieces
- Glue the metallic gold outline layer on top of the red mica flower.
- Glue the metallic gold outline layer on top of the green mica leaves.
- Set something heavy on them while they dry.
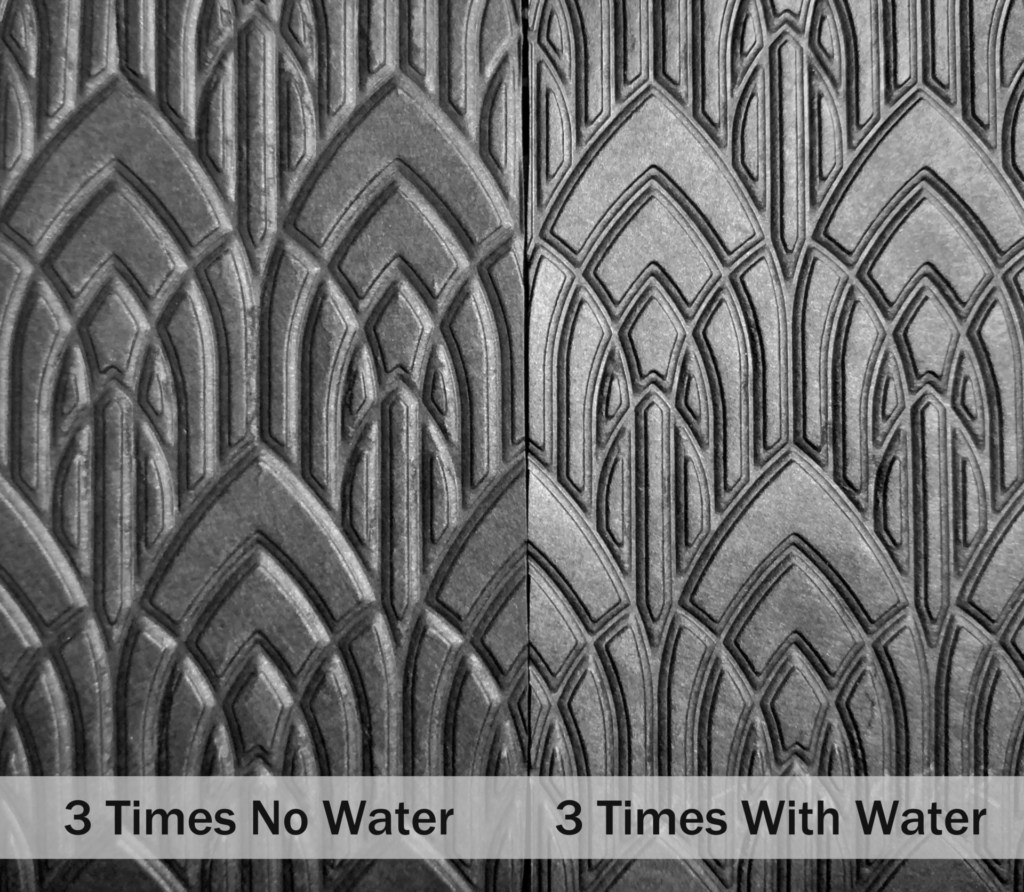
3D Embossing Tips
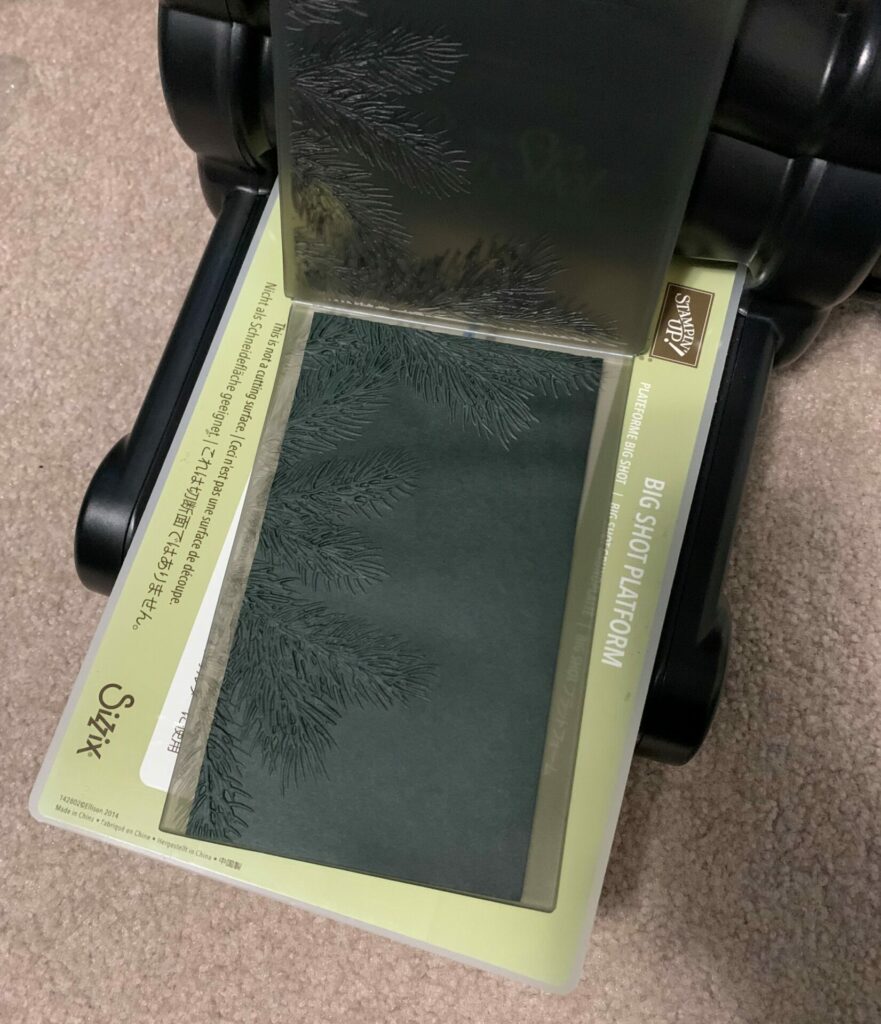
Before we emboss, here are some tips for getting the best 3D embossing.- Spritz the front and back of the paper with water before putting it into the 3D embossing folder. The water helps to soften the fibers of the paper so it doesn’t crack.
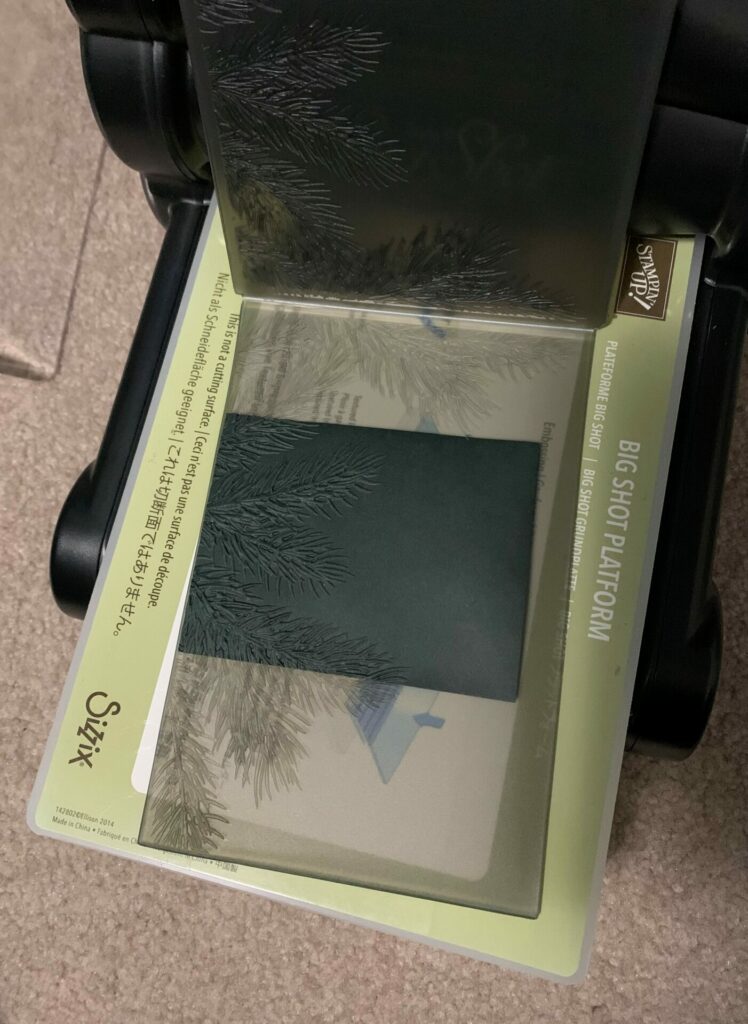
- Then, you’ll put the misted paper into the 3D embossing folder and run it through the Sizzix Big Shot/any die cutting machine 3 times. Remember, 3D = 3 times (it makes for a deeper and crisper impression.) See photo below for a side-by-side comparison.
Embossing The Pine Branch
The pine branch background has to be made in two parts because a slimline card is longer than the embossing folder.Part 1
- Take the midnight green cardstock and trim off a strip that is 4 inches wide. You should now have a 4in x 11in piece of cardstock.
- From that strip, trim it down to 4in x 6¼in. (Keep the other half for part 2.)
- Spritz the front and back of the cardstock with water.
- Place it into the center of the Sizzix Tim Holtz Pine Branches 3D embossing folder. (See below for paper placement.)
- Next run it through your die cutting machine.
- Remove the paper from the embossing folder and let it dry. Put a cutting pad on top of it so that it dries flat.
Part 2
- Take the other half of the midnight green cardstock you trimed earlier. Trim it down to 3 inches wide. You should now have a 4in x 3in piece of cardstock.
- Spritz the front and back of the cardstock with water.
- Place it in the Sizzix Tim Holtz Pine Branches 3D embossing folder. (See below for paper placement.)
- Next run it through your die cutting machine.
- Remove the paper from the embossing folder and let it dry. Put a cutting pad on top of it so that it dries flat.
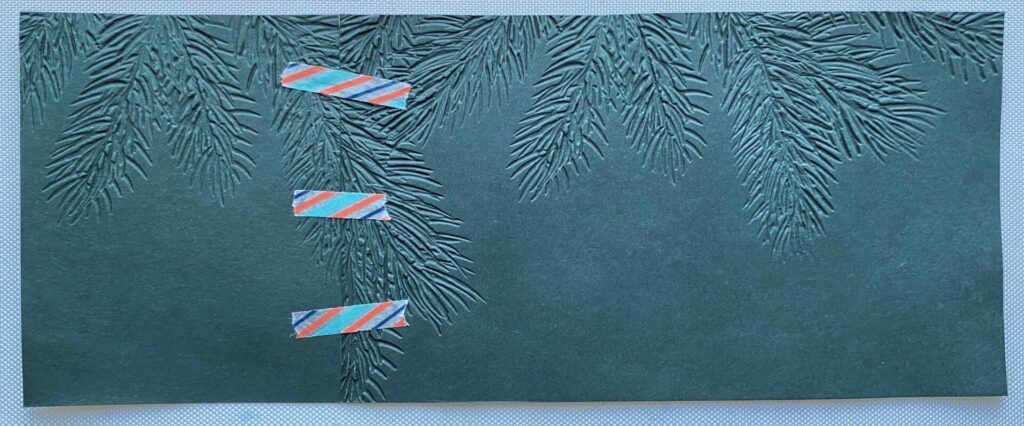
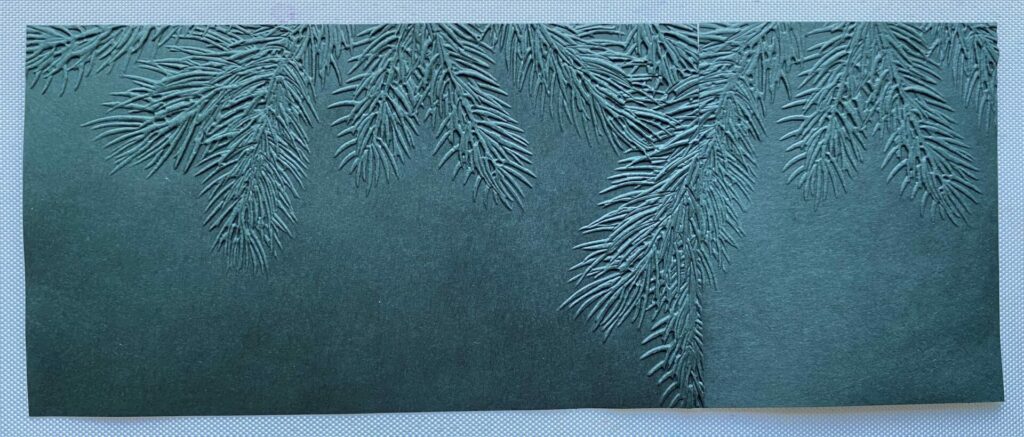
Trimming The Pine Branch Background
- Tape the two pine embossed panels together on the back side. You can use whatever tape you want for this.

- Trim the panel down to a size of 3-5/8in x 9in
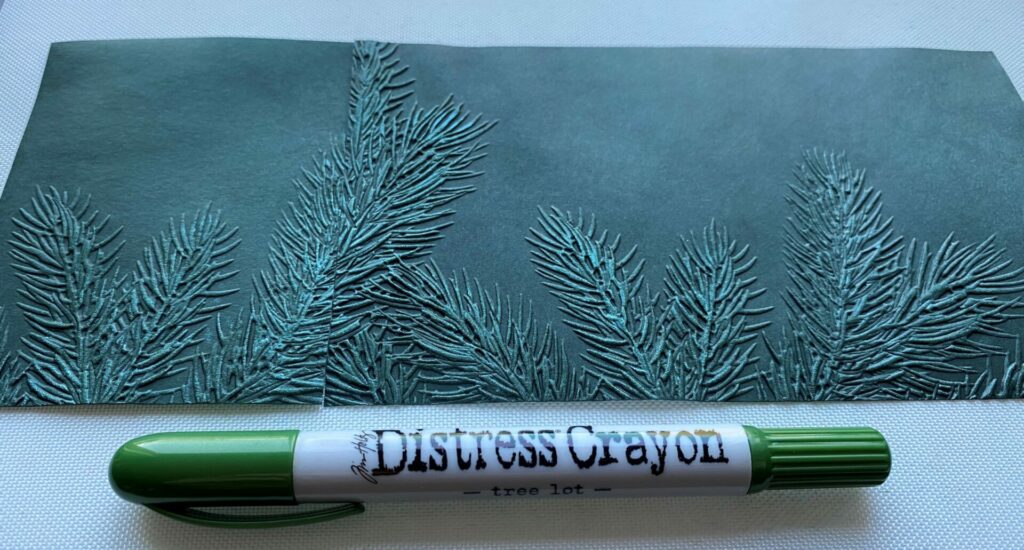
Adding The Mica Crayon
- Scribble some mica crayon on your craft sheet.
- If your crayon is dry you can add some water to the craft sheet and mix it in. But not to much water.
- Using your finger rub the crayon on the high points of all the pine branches.
Embossing The Sentiments
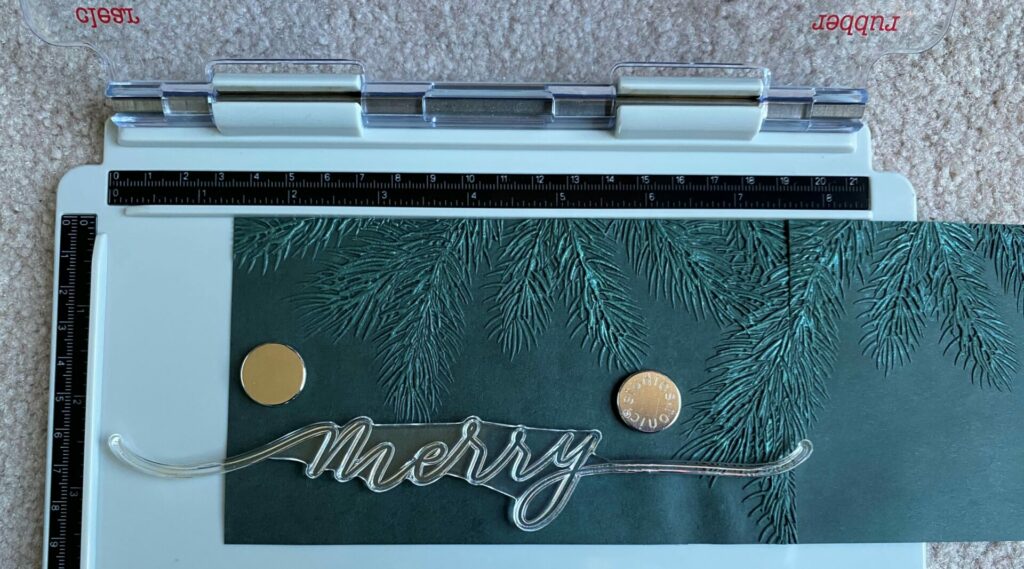
The Merry Sentiment
- Place the pine branch panel in the stamp platform with the branches at the top.
- Position the merry stamp below the branches and close your stamping tool. See below for stamp placement.
- Rub the anti-static pouch all over the panel below the branches.
- Mask off the branch with some washi tape where the “y” tail overlaps it.
- Ink the stamp with embossing ink and close the stamping tool to stamp the sentiment.
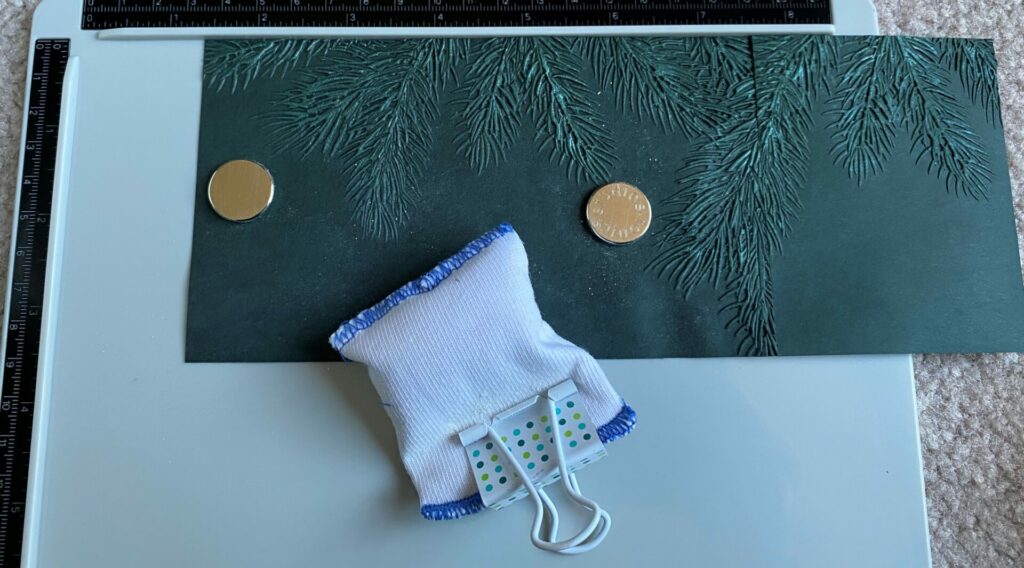
- Remove the panel from the stamping tool and pour gold fine detail embossing powder over the stamped sentiment. Tap off the excess powder over a sheet of copy paper and pour the extra powder back into the jar.
- Brush away any stray embossing powder with a small brush.
- Lastly, emboss the powder with an embossing gun.
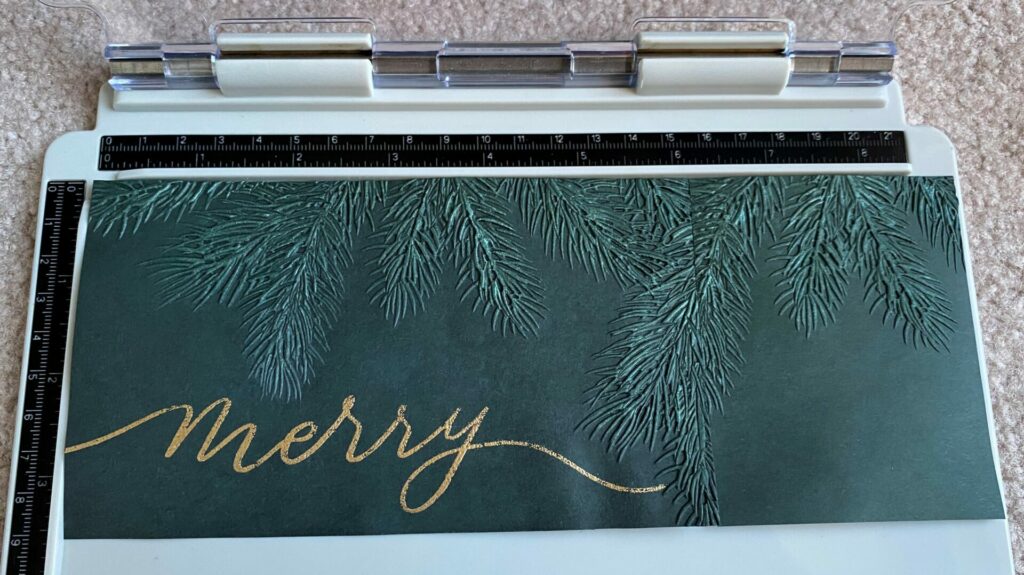
The Christmas Sentiment
Repeat steps 1-7 from above with the Christmas sentiment stamp. See below for stamp placement.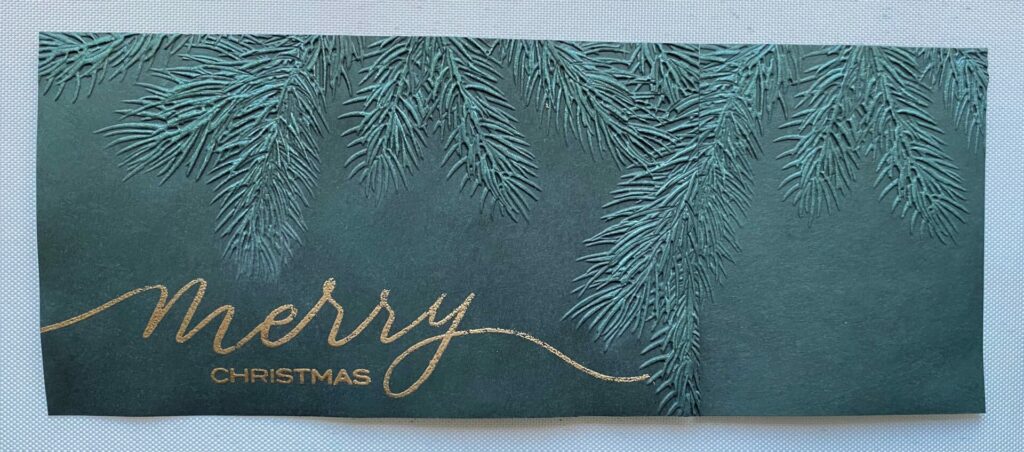
Gluing The Pine Christmas Slimline Card Together
- Firstly, glue the embossed pine branch panel to the kraft card base.
- Set something heavy on it while it dries. I like to use my big shot platform for this.
- Then, position the leaves so they cover up the seam in the paper and glue them down in place.
- The leaves that directly cover the seam, glue them all the way down.
- For the other leaves, just put the glue towards the center and not the tips.
- Set something heavy on the card while it dries.
- Curl up the three leaves that were not glued all the way down. This adds some dimension to the card.
- Next, put glue on the back center of the flower only and adhere it to the card, centering it within the leaves.
- Set something heavy on it while it dries.
- Curl up the flower petals.
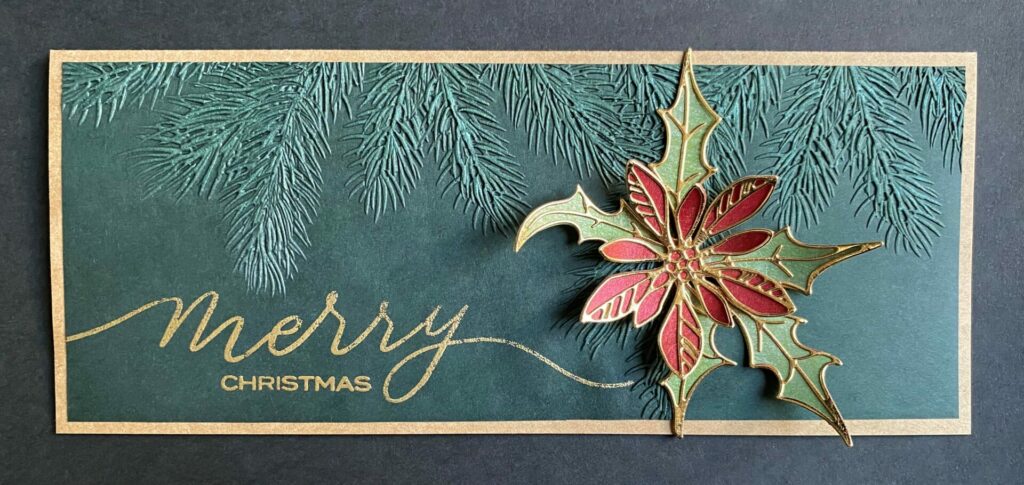
Pine Christmas Slimline Card Complete!
Congratulations! You have now completed your pine Christmas slimline card! I hope you enjoyed this tutorial and have as much fun making it as I did. If you do make this card, please use the #grovecrafted and tag me on Instagram. I’d love to see what you’ve created! Thanks for stopping by and I hope you found some new inspiration to create.
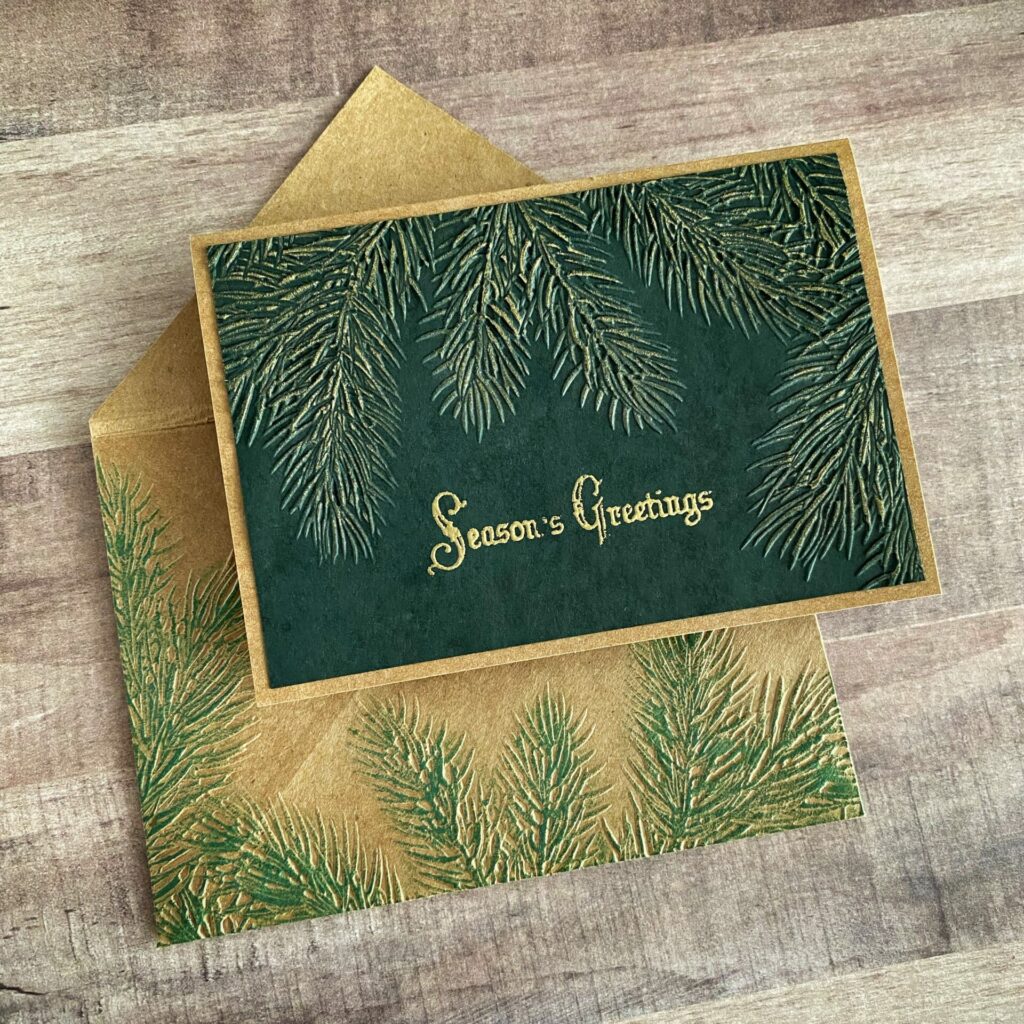
If you enjoyed making this pine season’s greetings card, you might want to check out my Pine Season’s Greetings Card tutorial.


Such an elegant, beautiful card. Thanks for sharing your how to.
Thanks so much Alison! You’re welcome, I’m glad you enjoyed the tutorial.
What a fantastic tutorial. Thank you for sharing this and all the details.
Thank you, Kathy! You’re welcome. I’m delighted to hear that you found the tutorial helpful!
Beautiful card! thank you for the very clear and precise instructions.
Thank you so much for your kind words, Darcy! I’m thrilled you enjoyed the card and found the instructions helpful. Happy crafting!
that is the most comprehensive tutorial. it really held my interest. Thankyou
Thank you so much Chris! I’m so glad you found the tutorial helpful and engaging.