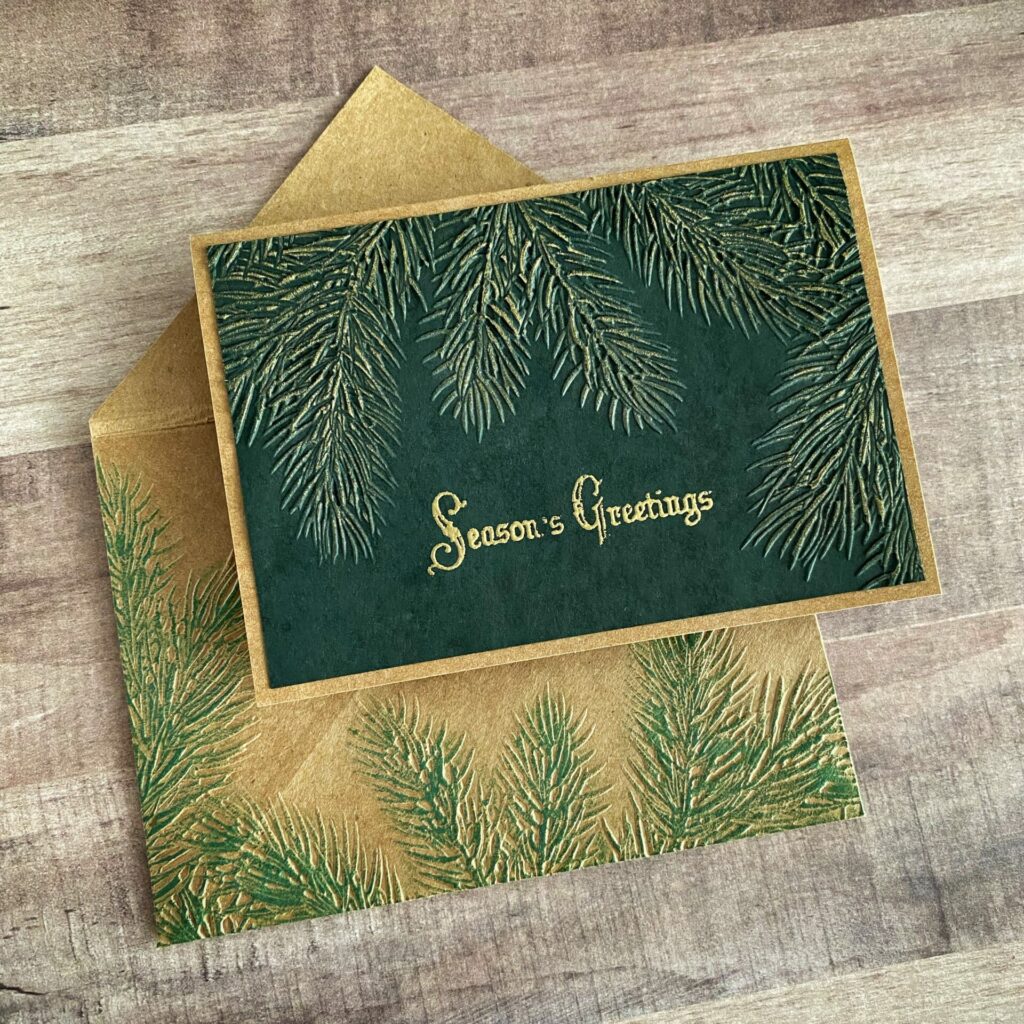
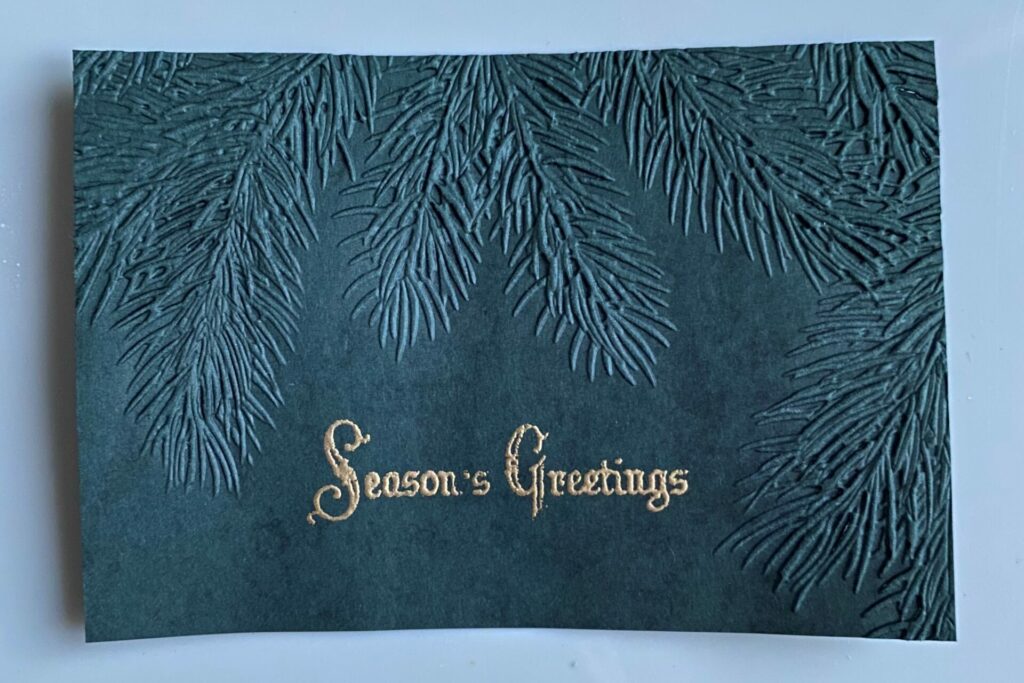
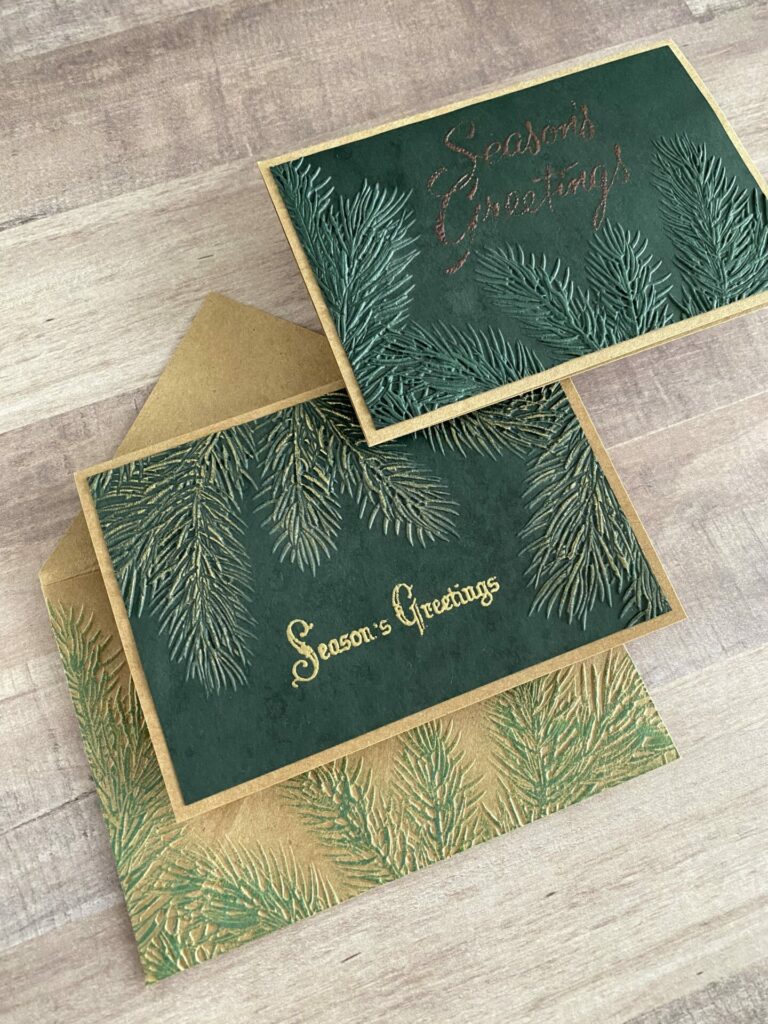
Pine Season’s Greetings Card
Hello crafty card makers! It’s holiday card making season. Today I’m sharing how I made this pine season’s greetings card. It features a 3D textured metallic finish, along with heat embossing. Also, this card is really easy to make and fast to batch produce. Perfect for anyone needing to make a lot of holiday cards. I made this a traditional holiday card, but the sentiment could easily be changed to fit your specific need. For example, it could be a thank you, hello, thinking of you, get well, or congratulations card. This pine season’s greetings card could also work for anyone with a December birthday, just by switching out the sentiment.
Link Abbreviations
- AMZ – Amazon*
- RI – Ranger Ink*
- SB – Spellbinders*
- Sb.com – Scrapbook.com*
- SIZ – Sizzix*
- SSS – Simon Says Stamp
Full Disclosure: This post contains affiliate links which are indicated with an (*). If you click on an affiliate link and later make a purchase, I may receive a small commission. Clicking on an affiliate link which earns a commission does NOT result in additional charges to you or cost you anything extra. Money earned via affiliate links helps pay the fees to keep this blog up and running. Thank you so much for shopping through my links to show your support for the brands that we love and the products that I share!
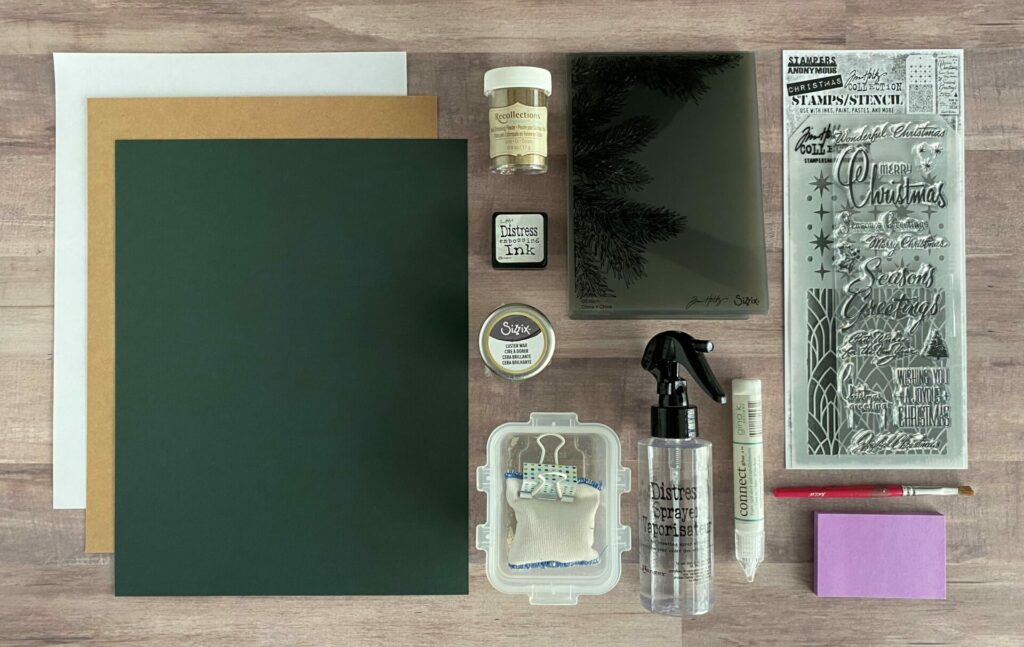
Supplies Used / Substitutions:
- Sizzix Tim Holtz 3D Embossing Folder – Pine Branches #666048 | Sb.com / Any embossing folder
- Tim Holtz Stampers Anonymous – THMM156 | SSS / Any sentiment stamp 2¼ inch wide max
- Simon Says Stamp Cardstock – Midnight Green | SSS / Any color cardstock
- Distress Kraft Heavystock | Sb.com | RI | AMZ / Any color cardstock
- Sizzix Luster Wax – Gold | Sb.com | SIZ | AMZ / Tim Holtz distress foundry wax
- Ranger Super Fine Embossing Powder – Gold | Sb.com / Any embossing powder
- Distress Embossing Ink – Mini | Sb.com / Any embossing ink
- Spray Bottle with water | Sb.com | SB | AMZ / Any spray bottle with water
- Anti Static Pouch | Sb.com |
- Gina K Connect Glue | Sb.com | SSS / Any liquid adhesive
- Scrap Piece of Paper
- Post-It
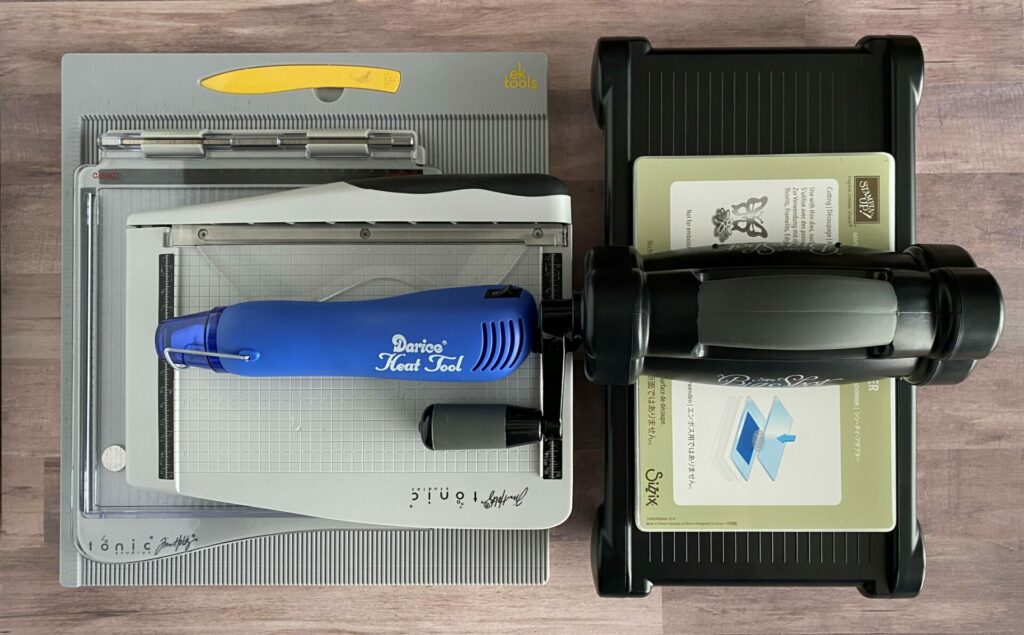
Tools Used / Substitutions:
- Sizzix Big Shot | SIZ / Spellbinders Platinum Six | SB | Sb.com / Any die cutting machine
- Tim Holtz Comfort Paper Trimmer | Sb.com | AMZ | RI | SSS / Any paper trimmer
- Tonic Tim Holtz Stamp Platform / Any stamping tool
- EK Scoring Board | AMZ | SSS /Any scoring board or optional
- Embossing Gun
Making The Card Base
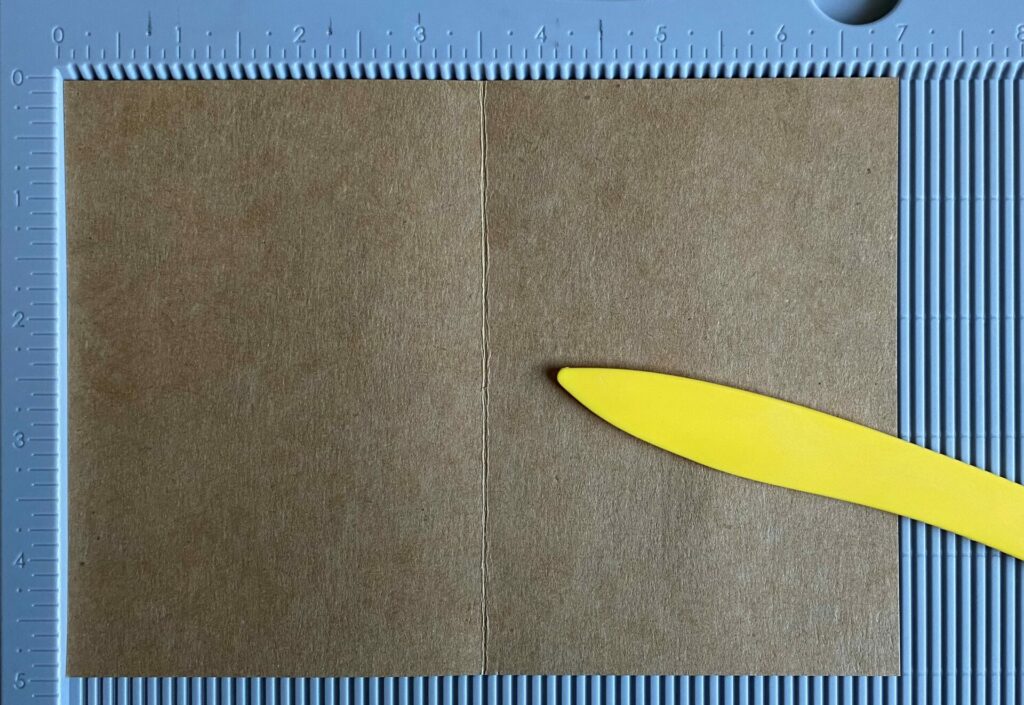
Firstly, I took a sheet of the kraft cardstock. Then, I cut the paper down to a size of 7 in x 5 in. I did this using the Tim Holtz Tonic Studios paper trimmer. Next, I scored it at 3½″ and folded it in half. This is a little bit bigger than a standard 4 Bar card size. But, you can make it whatever size you want. This is the base of the pine season’s greetings card.
Embossing The Pine Branch
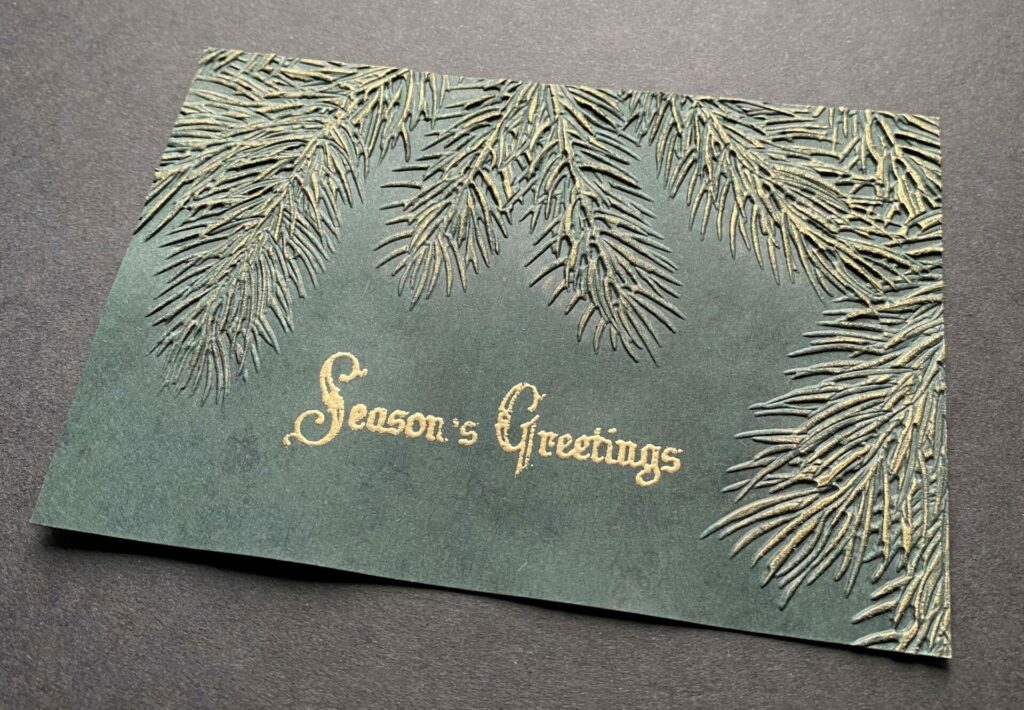
Then, I took the dark green cardstock and trimmed it to the size of 3½ in x 5 in. Following that, I spritzed the front and back of the paper with water and placed it into the Sizzix Tim Holtz Pine Branches 3D embossing folder. See below for paper placement in the embossing folder.
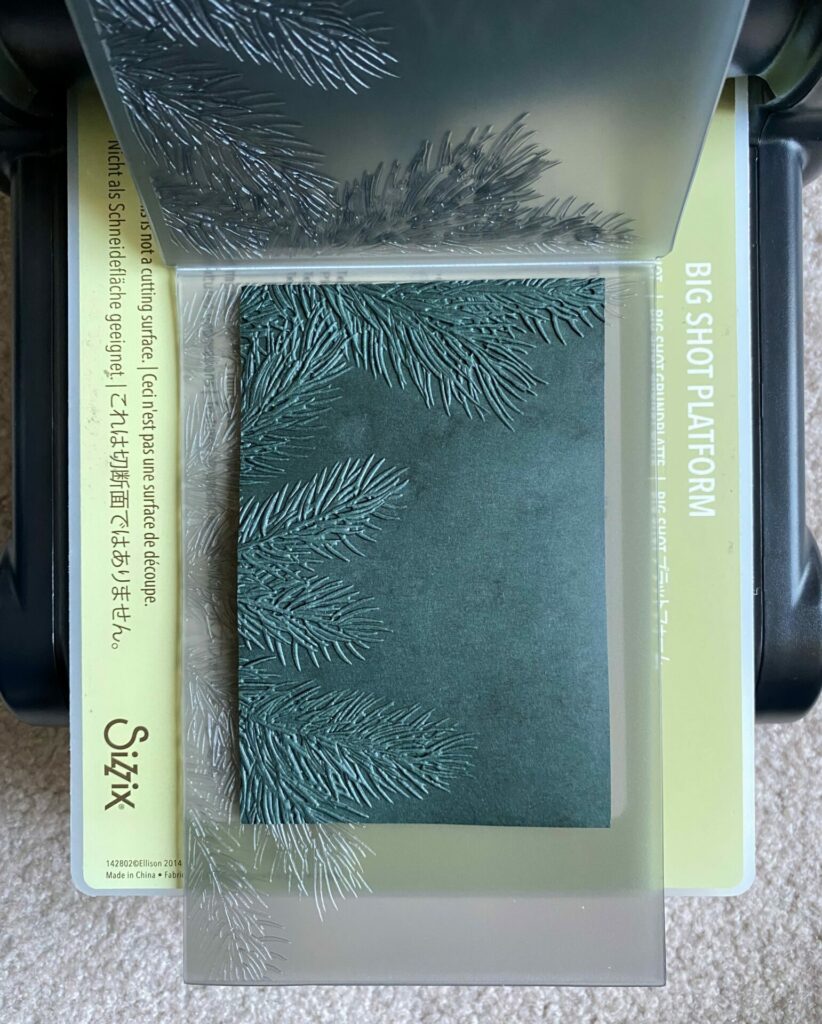
The water helps soften the fibers of the paper so it doesn’t crack. For an example of why I recommend using the water spritz, check out my side-by-side photo comparison in my Elegant & Simple Card tutorial. Next, I ran it through the Sizzix Big Shot two times (it makes for a deeper and crisper impression.) Each machine applies a different amount of pressure. So I recommend doing some small test swatches to see how many passes is ideal for your machine.
Then, I removed the panel from the 3D embossing folder and set it aside to dry. Straightaway, I set my clear cutting pad on top of it to ensure that it dried flat. Once the panel had fully dried, I trimmed off an 1/8 in on each side to square it up. The pine branch embossed panel should now be 3¼ in x 4¾ in.
Getting Ready To Heat Emboss
Firstly, I took the Season’s Greetings stamps from the Stampers Anonymous THMM156 stamp set by Tim Holtz. Then, I positioned the stamp where I wanted it to go on the card front in my stamp platform. Make sure the cardstock is placed all the way in the corner of the stamp platform. See below for stamp positioning.
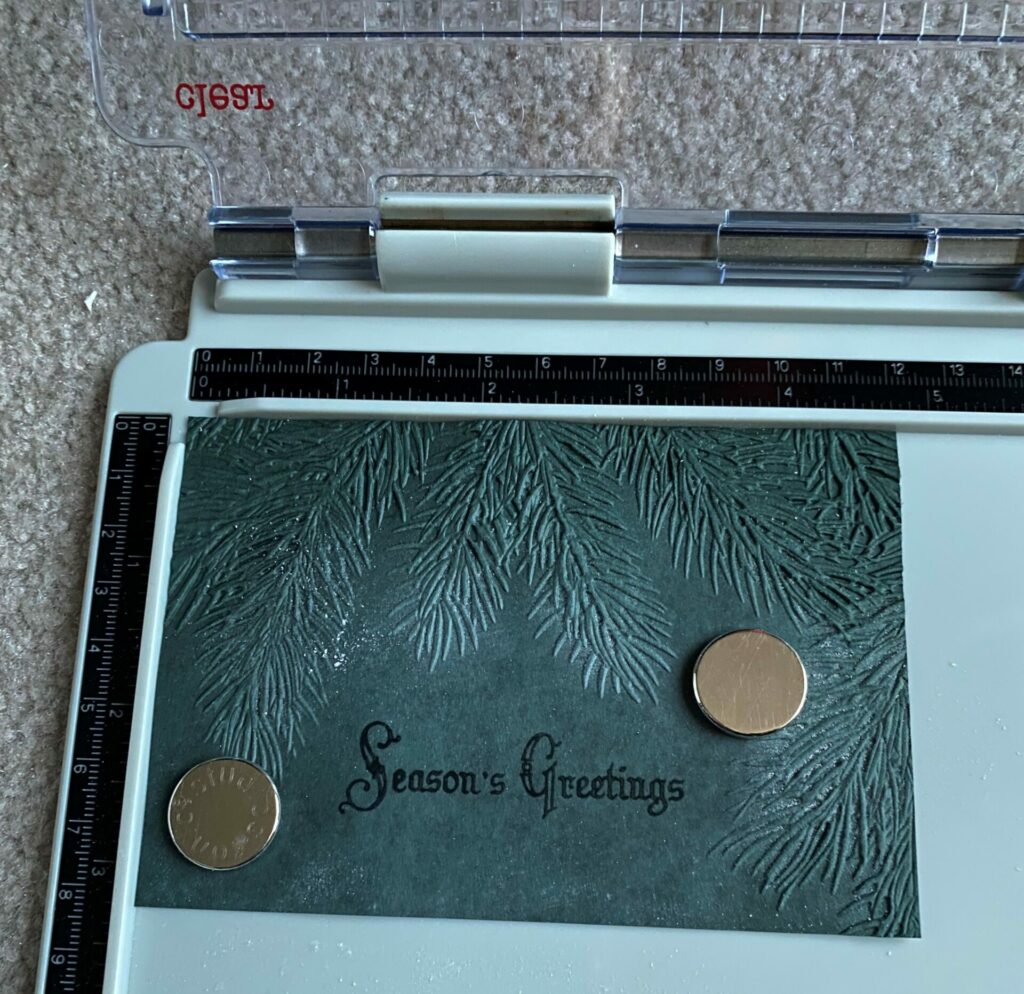
Secondly, I put the card front into the corner of the stamp platform and secured it down with the magnets. Then, I used the anti-static pouch and rubbed it all over the card front. This is an important step because cardstock can hold static and the embossing powder will cling to non-inked places on the paper. This leaves you with tiny specks of embossing powder where you don’t want it to be. We definitely don’t want that. The anti-static powder eliminates 98% of the stray embossing powder. If there are any strays, I just brush them away with a small brush. If there is some in tight spaces, like between letters, I would use a craft pick and with a steady hand, loosen the powder from the paper, and blow it away.
Heat Embossing The Sentiment
Then, I inked the stamp with distress embossing ink and stamped the paper. You might have to stamp it a couple times to get a full crisp stamping. Next, I put a scrap piece of paper down and poured the gold embossing powder all over the inked areas of the card front. Then, I gently taped off any excess powder and set it aside. Next, I folded the scrap paper and poured the excess embossing powder back into the jar. If there is any stray powder where I didn’t want, I removed it with a brush or craft pick. Then, I embossed it with a heat embossing gun. After that, wipe away any anti-static powder still left on your paper with a damp cloth or paper towel.
Also, here’s a pro tip for heat embossing. Let the embossing gun run for a bit and heat up before you aim it at the paper. Then, heat the embossing powder from the back of the paper. This way you won’t over heat the embossing powder and subsequently lose the metallic shine.
Applying The Luster Wax
Next, I took the pine season’s greetings card panel and rubbed the Sizzix gold luster wax over the embossed branches.
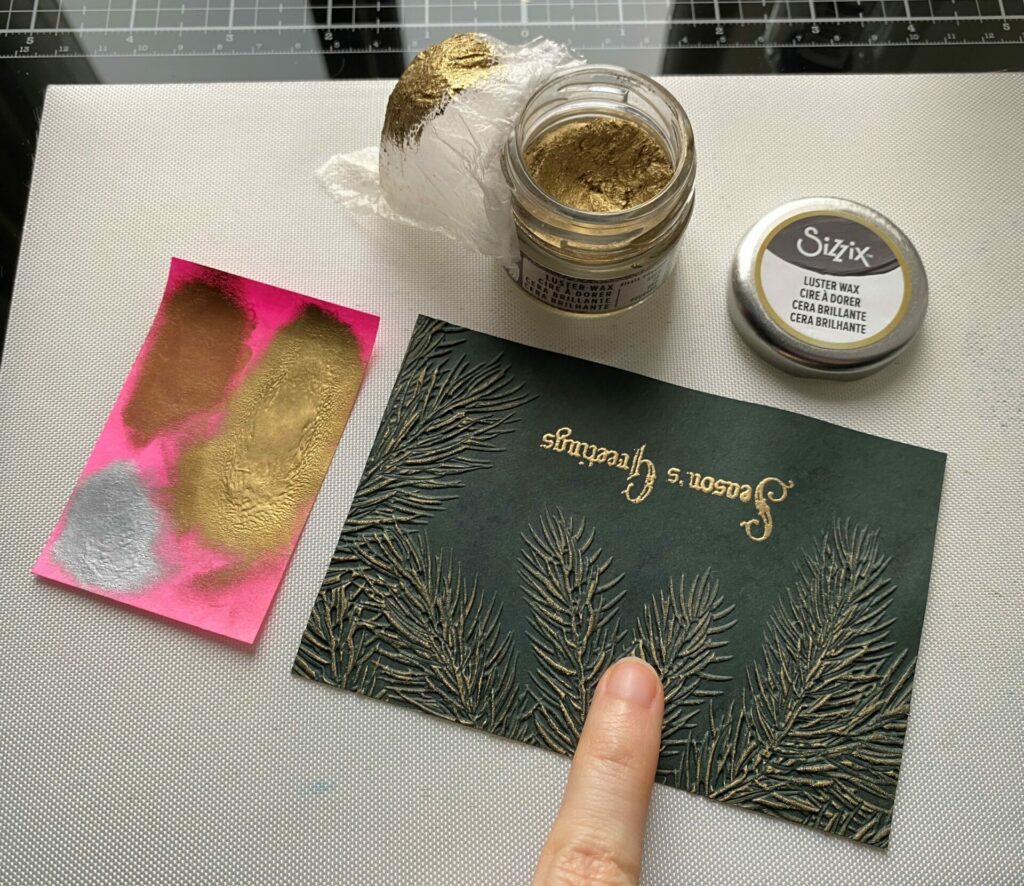
First, take a little bit out of the jar with your finger tip and rub it onto the Post-it note or scrap piece of paper. This removes some of the excess wax globs and will save you from ruining your project with hot spots of wax all in one area. It also makes for an even application of the luster wax. Then, I rubbed the wax onto the high points of the embossed pine branches. Here you’ll want to use a light touch and take your time. Lastly, I washed the luster wax off my hands with soap and water when I was done.
Gluing It Together
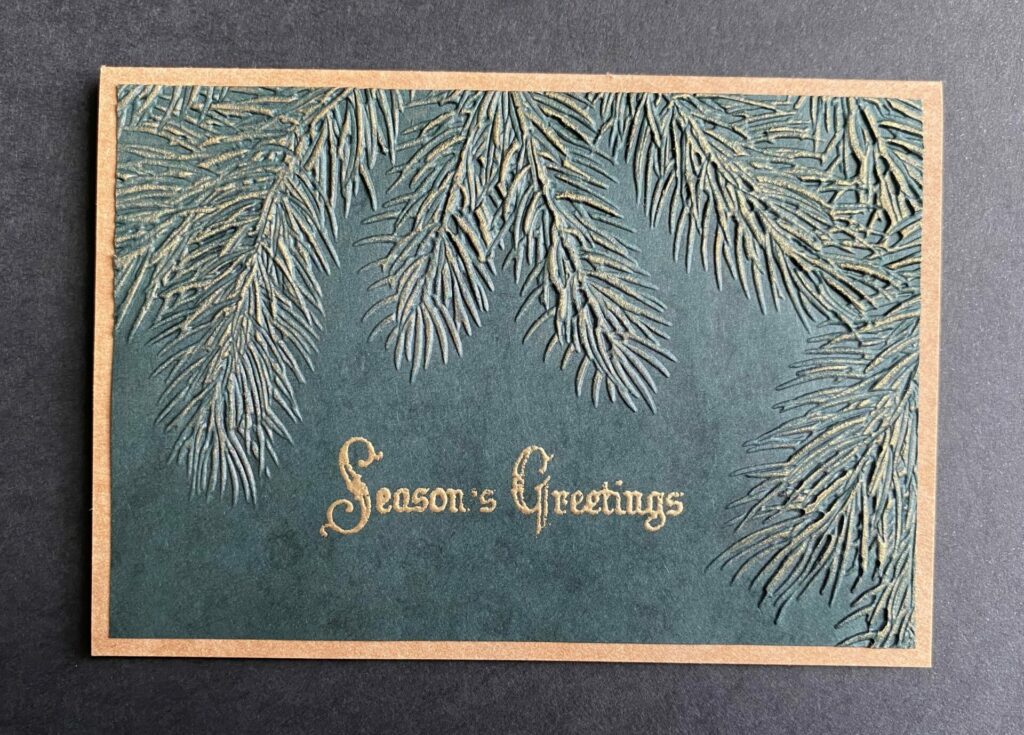
Finally, it’s time to glue the card together. Take the pine branch embossed panel and put glue on the back of it. The glue I used was Gina K connect. Then, I adhered it to the front center of the card base. Straightaway, I put something heavy on top of it while it dries (I use my big shot platform).
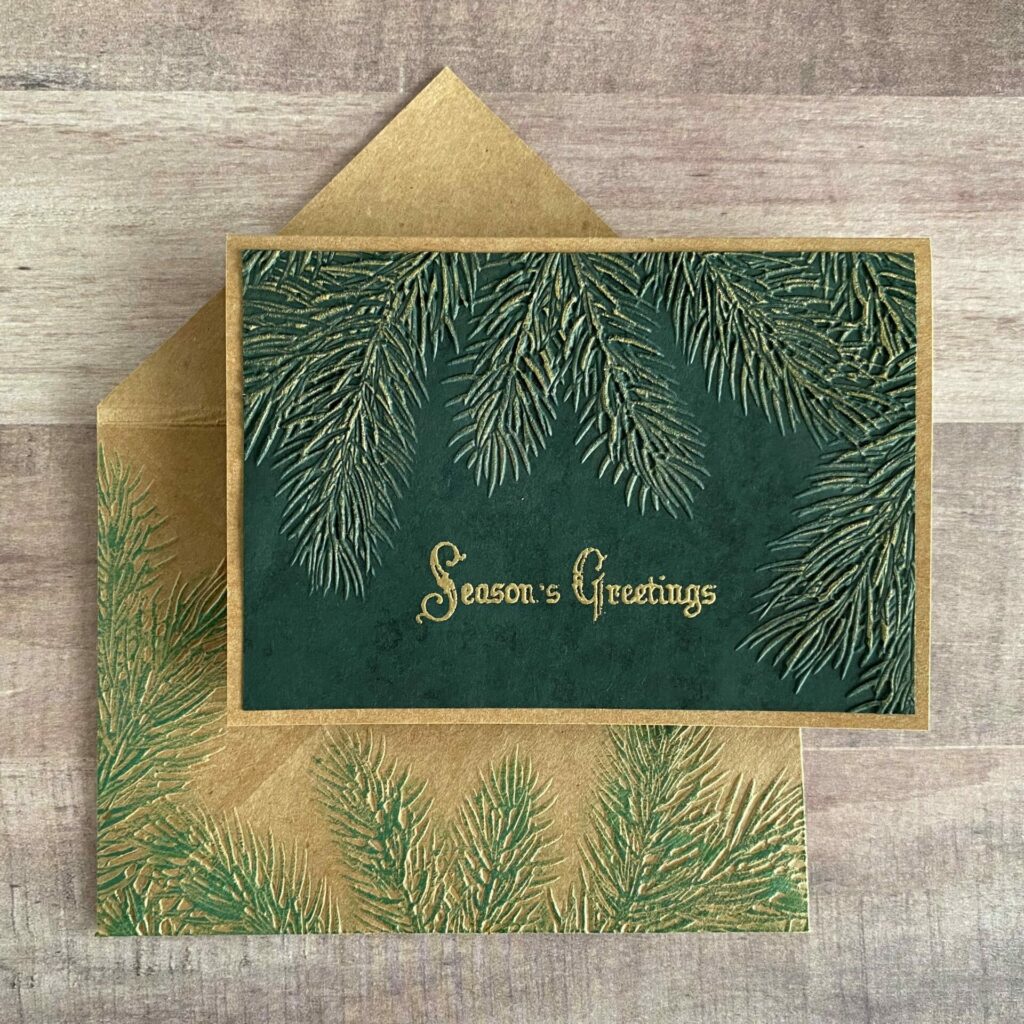
Pine Season’s Greetings Card Complete!
Congratulations! You have now completed your pine season’s greetings card! I hope you enjoyed this tutorial and have as much fun making it as I did. If you do make this card, please use the #grovecrafted and tag me on Instagram. I’d love to see what you’ve created! Thanks for stopping by and I hope you found some new inspiration to create.
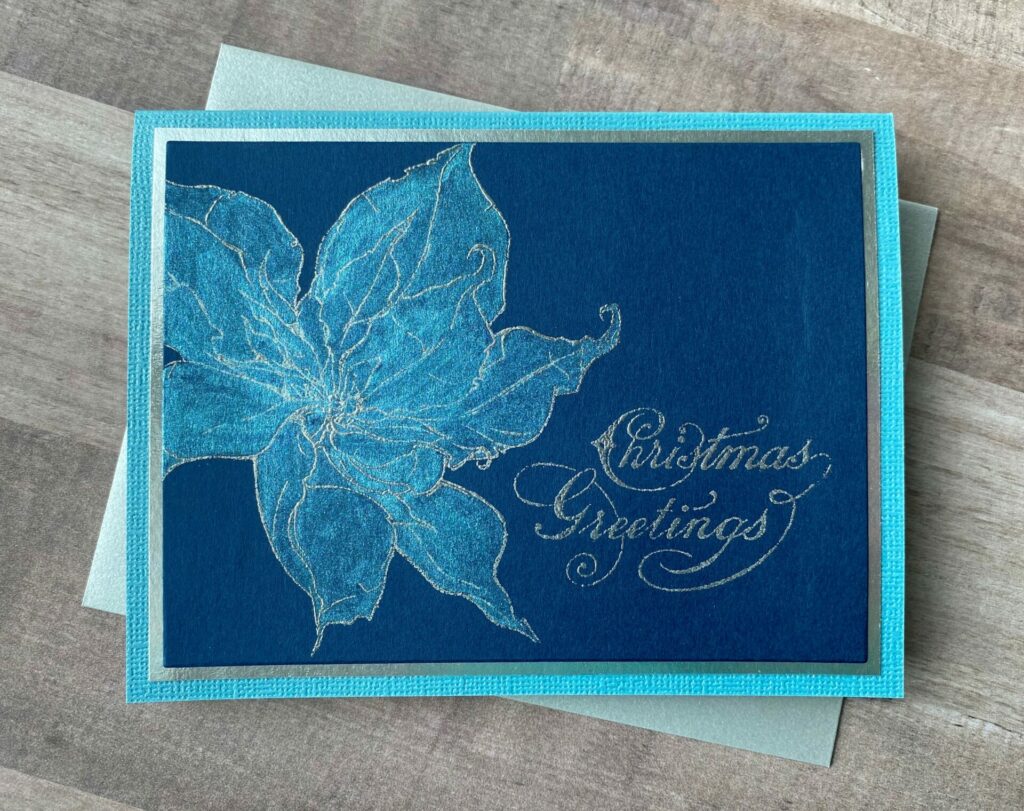
If you enjoyed making this pine season’s greetings card, you might want to check out my Poinsettia Christmas Greetings Card tutorial.


Thank you!
You’re welcome!
Lovely, going to try it out next.
Your tutorial was excellent!
Thank you
You’re welcome! I’m so glad you enjoyed the tutorial!
Beautiful card. Thank you for describing each step so carefully and in detail. So much appreciated!!
Thank you! I’m so happy you enjoyed the card and found the instructions easy to follow!