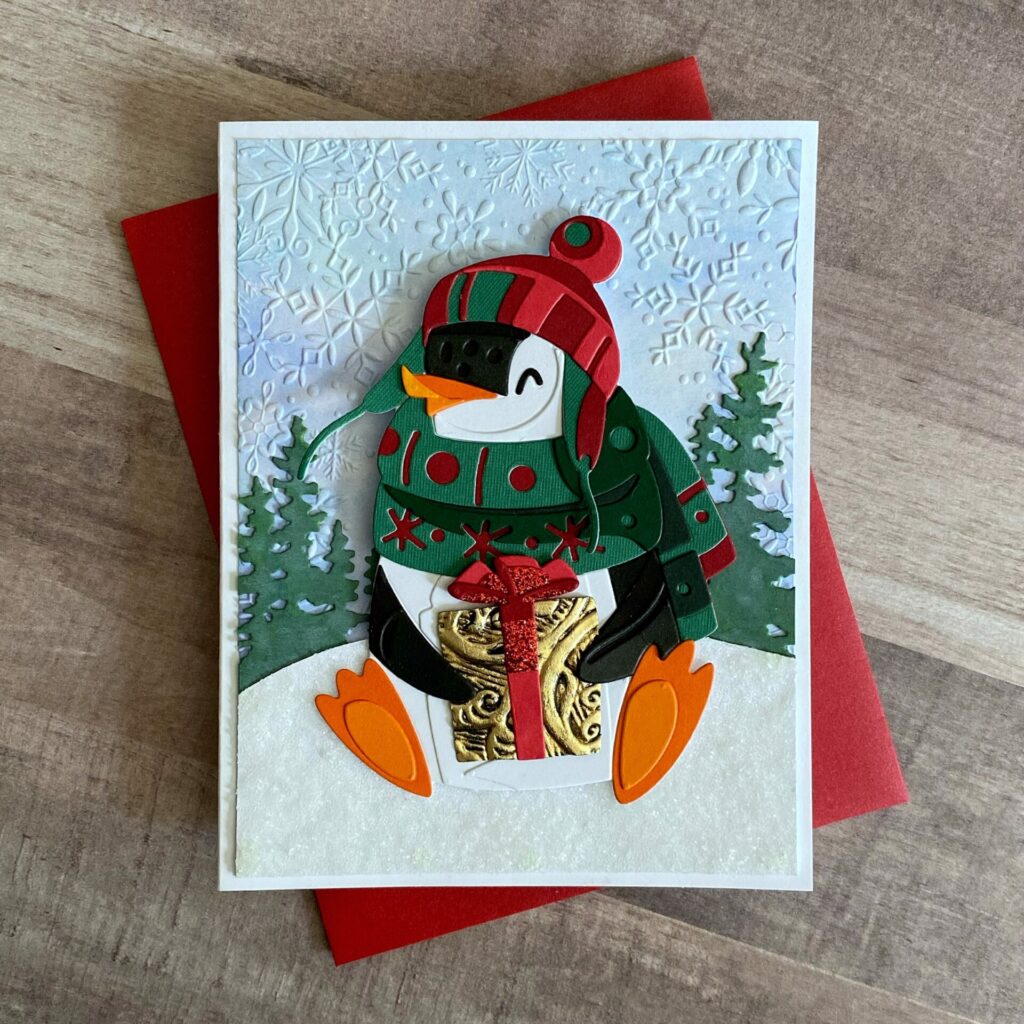
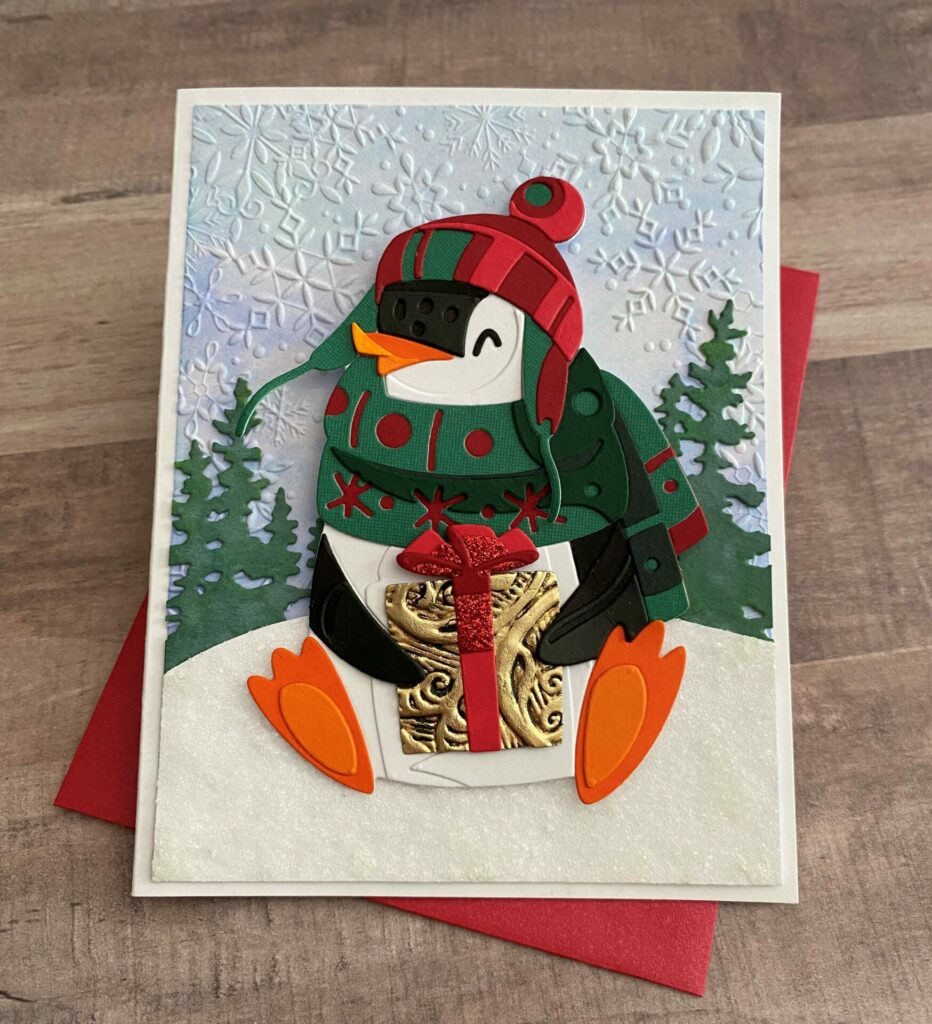
Eugene Christmas Card
Hello crafty card makers! Continuing with Christmas in July, I have another holiday card tutorial for you! Today I’m sharing how I made this Eugene Christmas card. It features lots of die cutting, along with some embossed texture. You can make this card in traditional Christmas colors, or even go for a cool wintry pallet. This cute fun card is perfect for the holidays. I made this card for Christmas, but the color pallet could easily be changed to fit your specific need. This Eugene Christmas card could also work for other occasion, just by switching up the colors, accessories and adding a sentiment.
Link Abbreviations
- AMZ – Amazon*
- Sb.com – Scrapbook.com*
- SIZ – Sizzix*
- SSS – Simon Says Stamp
- RI – Ranger Ink*
- BA – Blick Art Materials*
Full Disclosure: This post contains affiliate links which are indicated with an (*). If you click on an affiliate link and later make a purchase, I may receive a small commission. Clicking on an affiliate link which earns a commission does NOT result in additional charges to you or cost you anything extra. Money earned via affiliate links helps pay the fees to keep this blog up and running. Thank you so much for shopping through my links to show your support for the brands that we love and the products that I share!
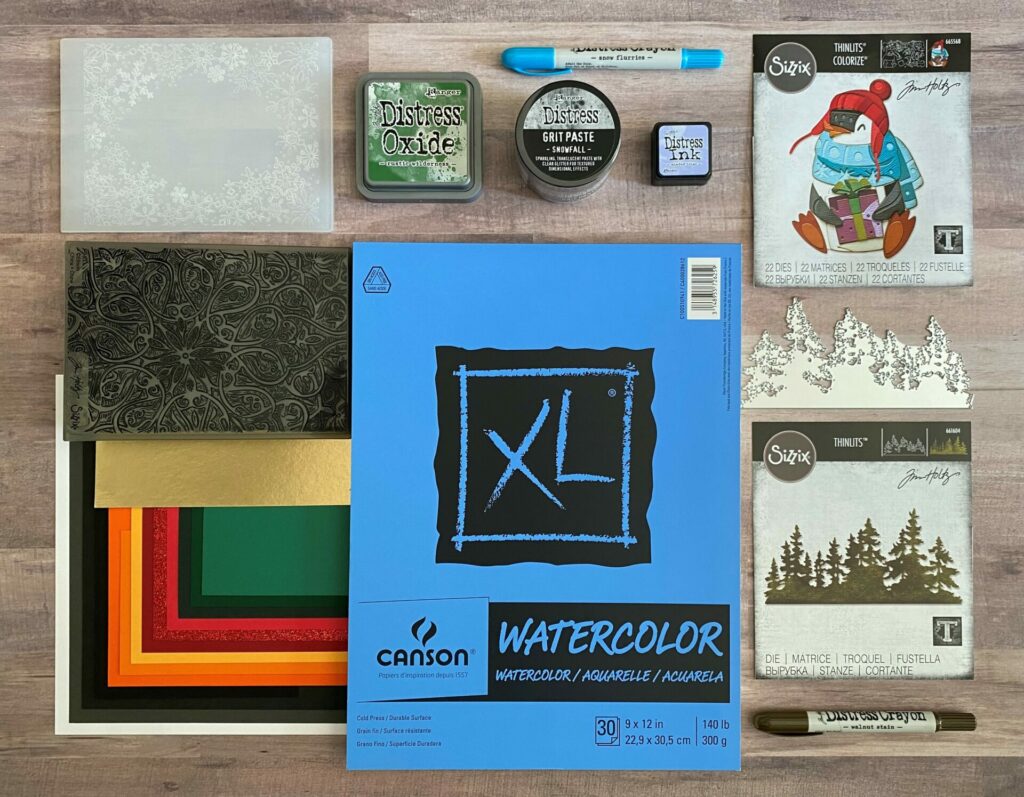
Supplies Used / Substitutions:
- Tim Holtz Sizzix Thinlits Colorize Dies – Eugene #665568 | Sb.com | AMZ | SSS |
- Tim Holtz Sizzix Thinlits Dies – Tree Line #661604 | Sb.com | SIZ | AMZ | SSS |
- Simon Says Stamp Embossing Folder – Snowflake Oval Frame #sf208 | SSS / Any snowflake embossing folder
- Sizzix Tim Holtz 3D Embossing Folder – Engraved #664249 | SIZ | AMZ | SSS / Any embossing folder
- Canson XL 140lb Watercolor Paper – Cold Press | BA | AMZ / Any watercolor paper
- White Heavyweight Cardstock
- Black Cardstock – 3 shades / Black inked watercolor paper with black soot distress ink
- Orange Cardstock – 3 shades / Orange inked watercolor paper with carved pumpkin distress ink
- Green Cardstock – 3 shades / Green inked watercolor paper with pine needles distress ink
- Red Cardstock – 2 shades & red glitter paper / Red inked watercolor paper with lumberjack plaid distress ink
- Tim Holtz idea-ology Metallic Kraft Stock – Gold | Sb.com | RI | SSS / Any metallic cardstock
- Distress Grit Paste – Snowfall | Sb.com | SSS / Distress Grit Paste – Icicle
- Distress Ink – Shaded Lilac | Sb.com | RI | SSS / Light blue watercolor
- Distress Oxide Ink – Rustic Wilderness | Sb.com | RI | SSS / Distress Oxide Spray
- Ranger Tim Holtz Distress Crayons:
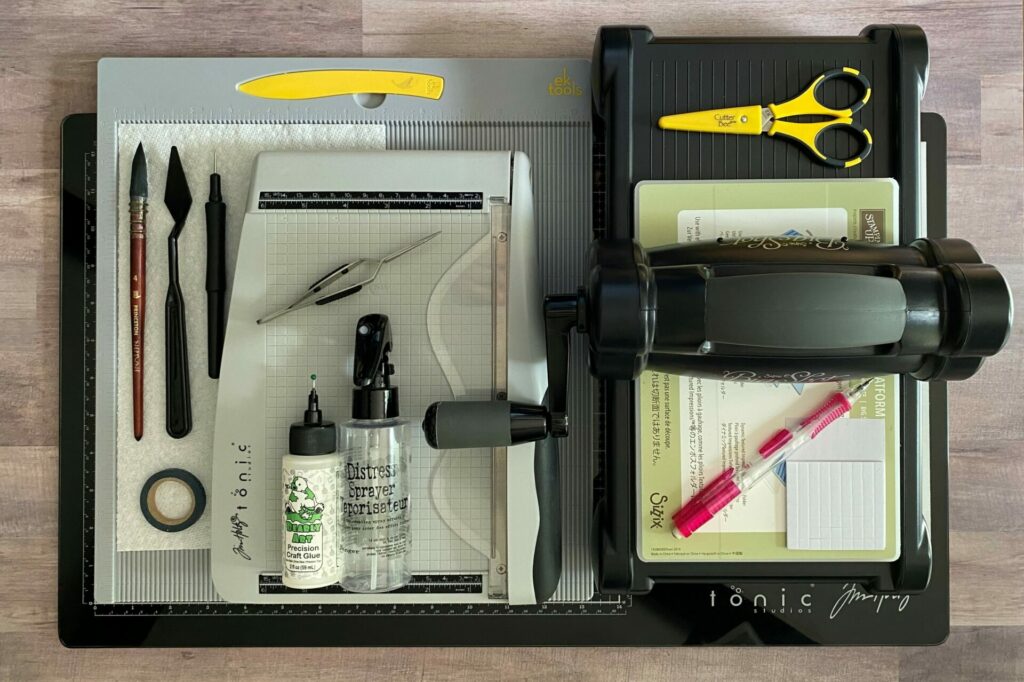
Tools Used / Substitutions:
- Sizzix Big Shot | SIZ / Any die cutting machine
- Tim Holtz Tonic Guillotine Comfort Paper Trimmer | Sb.com | AMZ | RI | SSS / Any paper trimmer
- EK Scoring Board | AMZ | SSS / Any scoring board
- Tim Holtz Glass Media Mat | Sb.com | AMZ | SSS / Non-stick craft sheet or optional
- Neptune Synthetic Brush Short Handle – Quill #4 | BA / Any watercolor brush
- Bearly Art Glue | Sb.com | AMZ | SSS / Any liquid adhesive
- Spray Bottle with water | Sb.com | AMZ / Any spray bottle with water
- Sizzix Die Pick | Sb.com | SSS / Toothpick
- Tim Holtz Reverse Action Tweezers #665304 | Sb.com | SIZ | SSS / Any reverse action tweezers
- EK Scissors | Sb.com | AMZ / Any scissors
- Mechanical Pencil | AMZ / Any pencil
- Foam Squares | SSS / Optional
- Palette Knife | Sb.com | SSS |
- Paper Towel
- Washi Tape / Any low tack tape
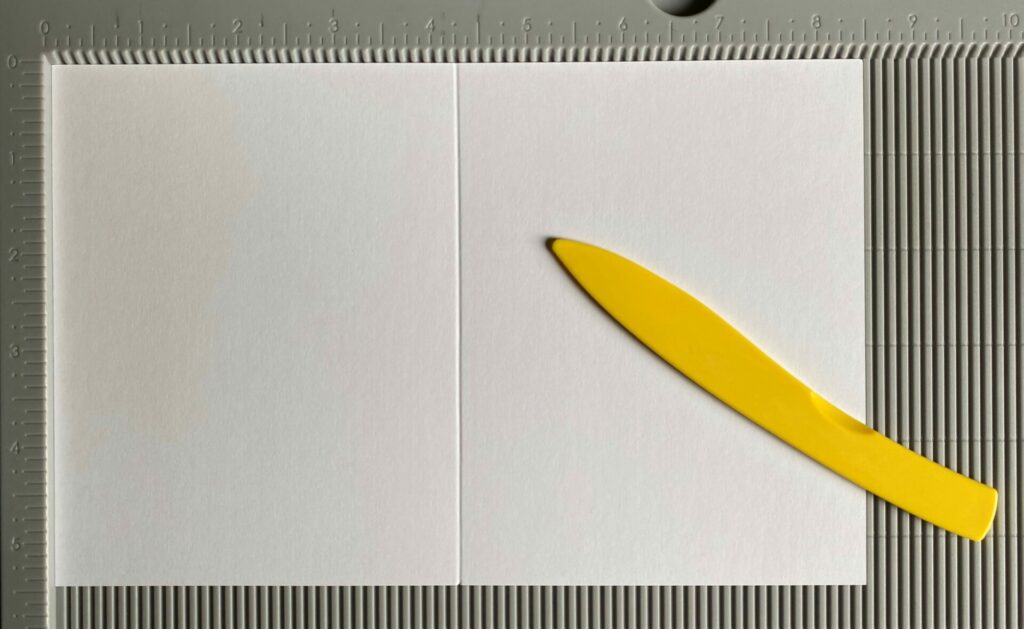
Making The Card Base
- Take a sheet of white cardstock and cut it in half with your paper trimmer. You should now have two 8½ x 5½ inch pieces of cardstock.
- Score the half sheet of cardstock at the 4¼ inch line.
- Fold on the score line and reinforce the fold with a bone folder.
Your card base should be 4¼ x 5½ inches. A standard A2 card size.
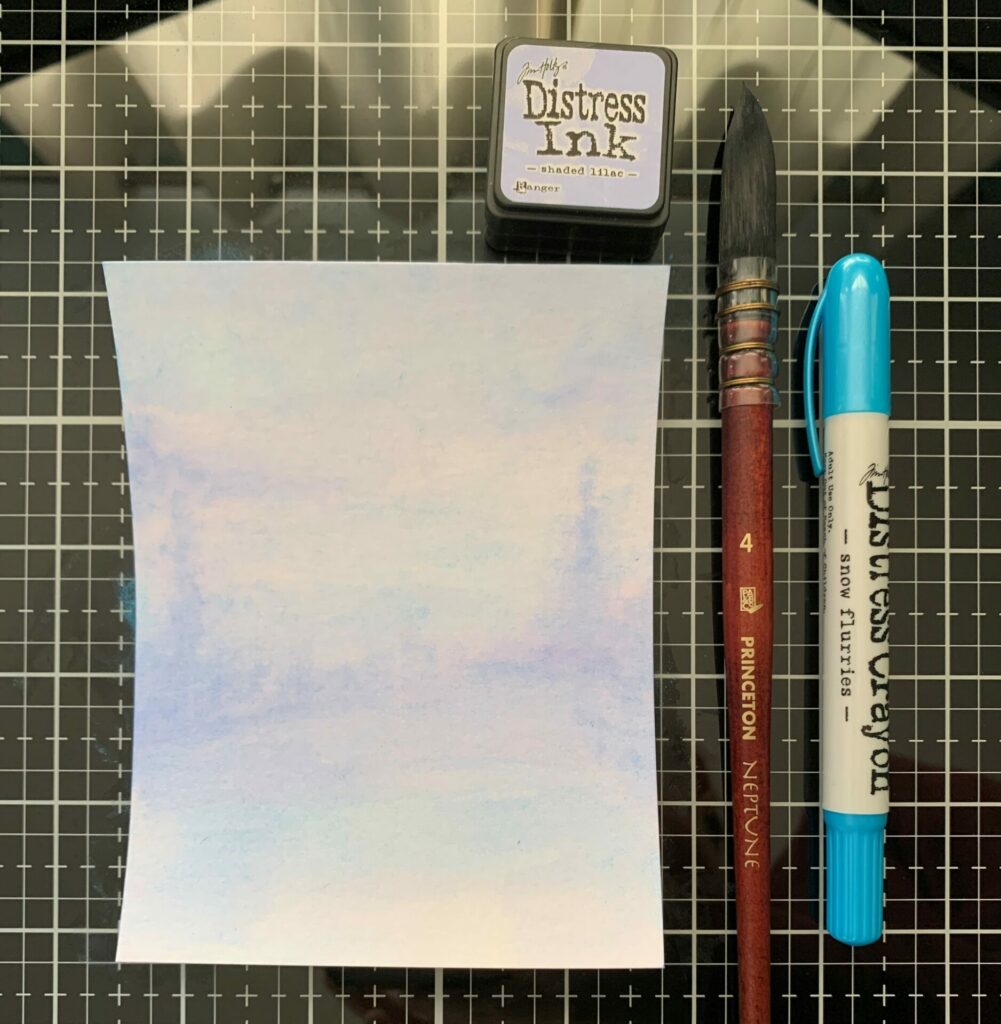
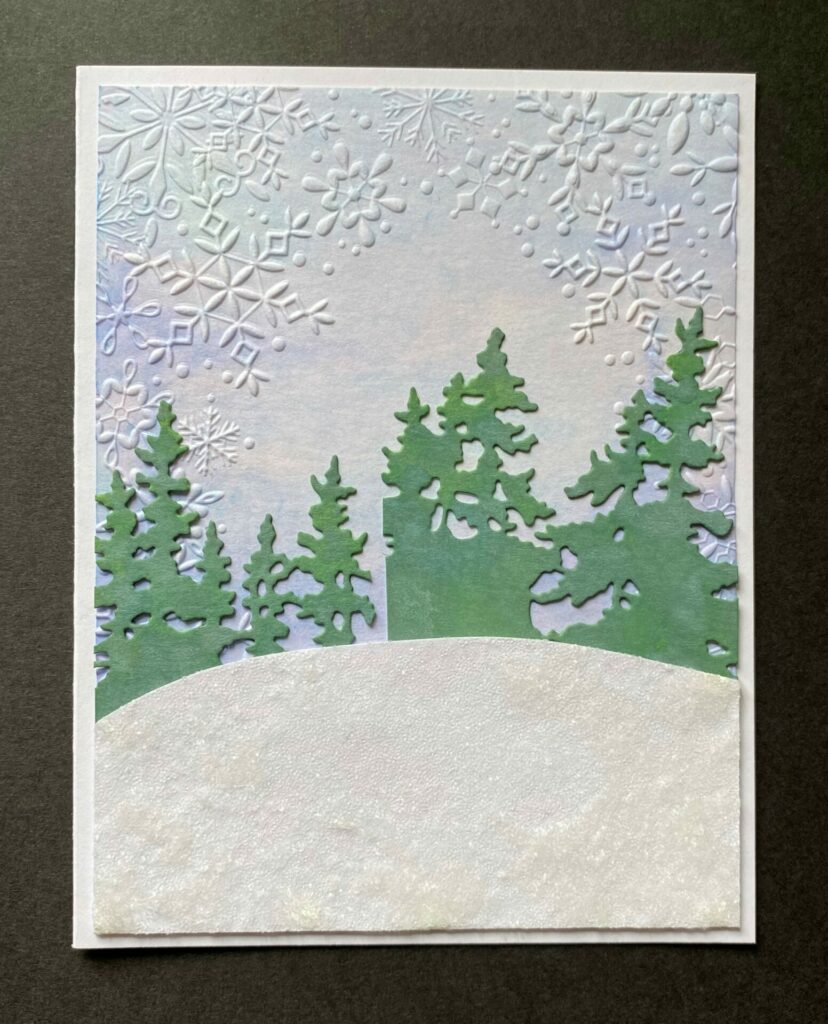
Inking The Snowflake Background
- Cut the watercolor paper to a size of 4 x 5¼ inch.
- Press some shaded lilac distress ink onto your craft mat.
- Scribble some snow flurries distress crayon on the mat too. (This will add a subtle shimmer to your background.)
- Spray the ink and crayon with some water and mix them together with your brush.
- Spray the watercolor paper with water.
- Add the ink to the paper with your watercolor brush.
- Add a much ink a you like to get the intensity you desire.
- Keeping the paper wet while working ensures a blended winter like look.
- Let it dry.

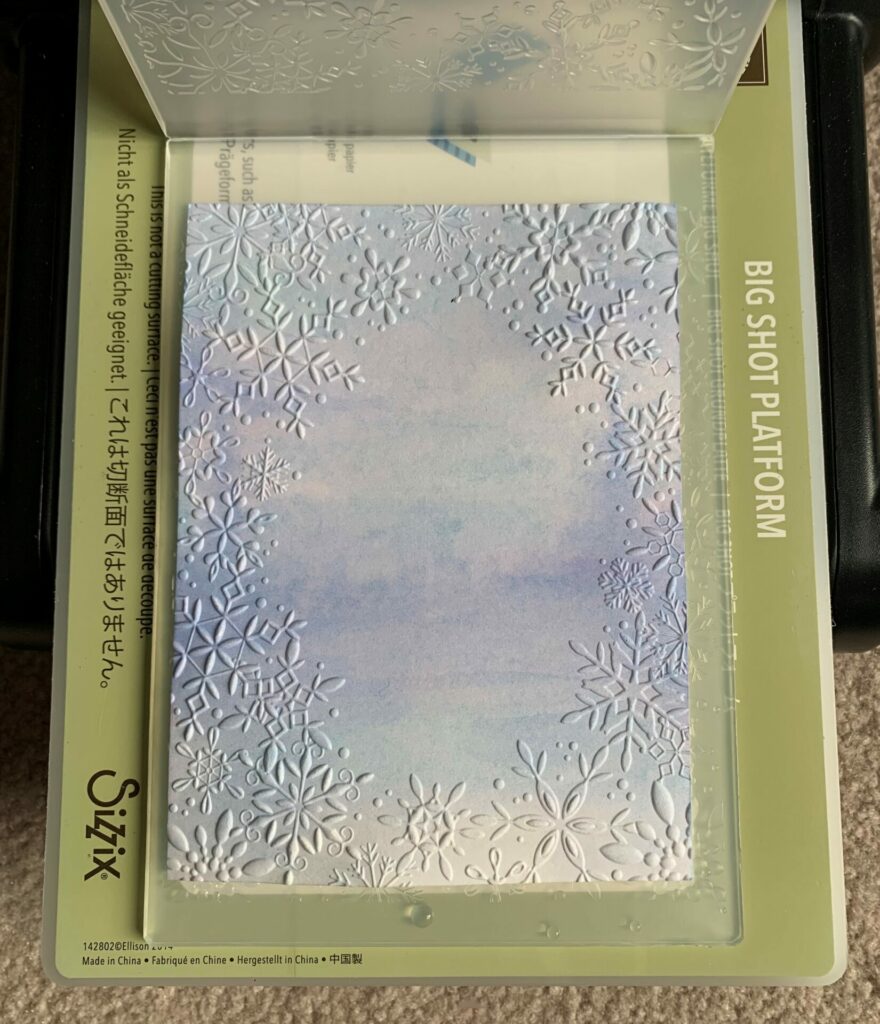
- Place the water colored panel in the snowflake oval frame embossing folder.
- Run it through your die cutting machine to emboss it.
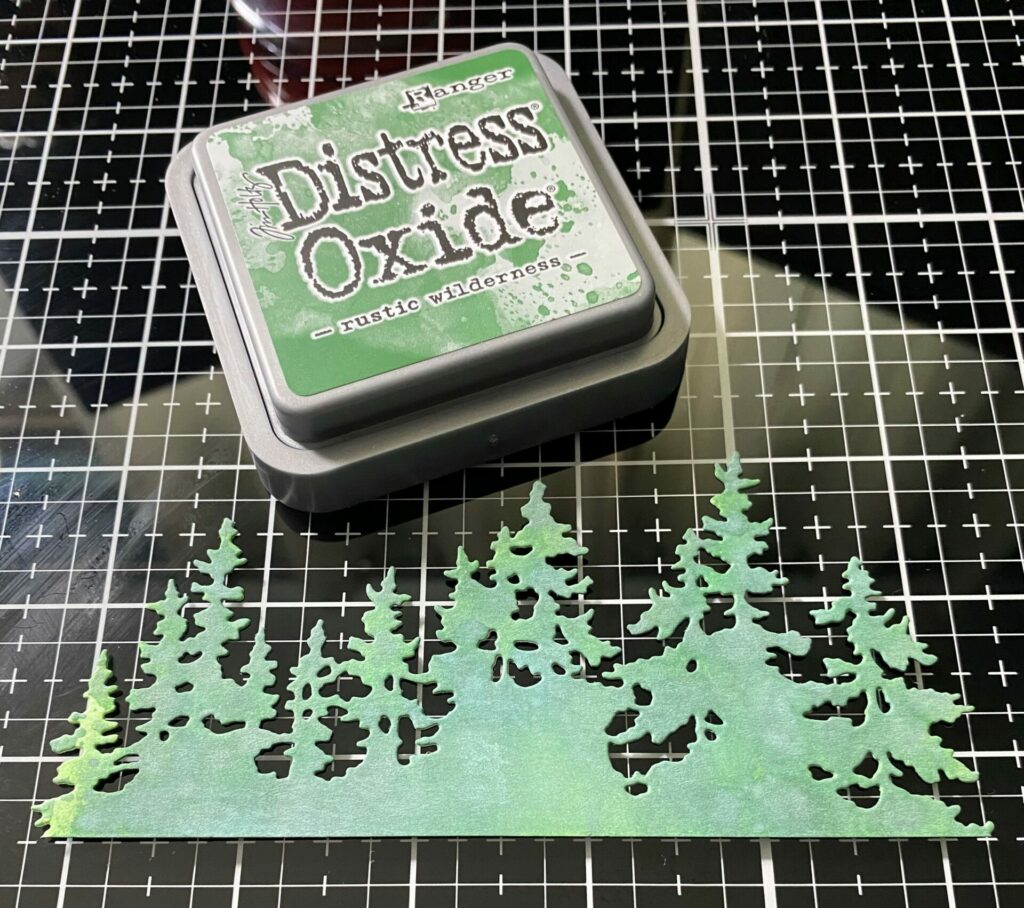
Making The Tree Line
- Cut watercolor paper down to a size slightly larger than the tree line die.
- Ink the watercolor paper with distress oxide ink in the shade rustic wilderness.
- Spritz it with some water to give it the oxidized effect.
- Let it fully dry.
- Die cut the tree line from the inked green watercolor paper.
- If you have any lighter inked areas you can add more ink with your finger.
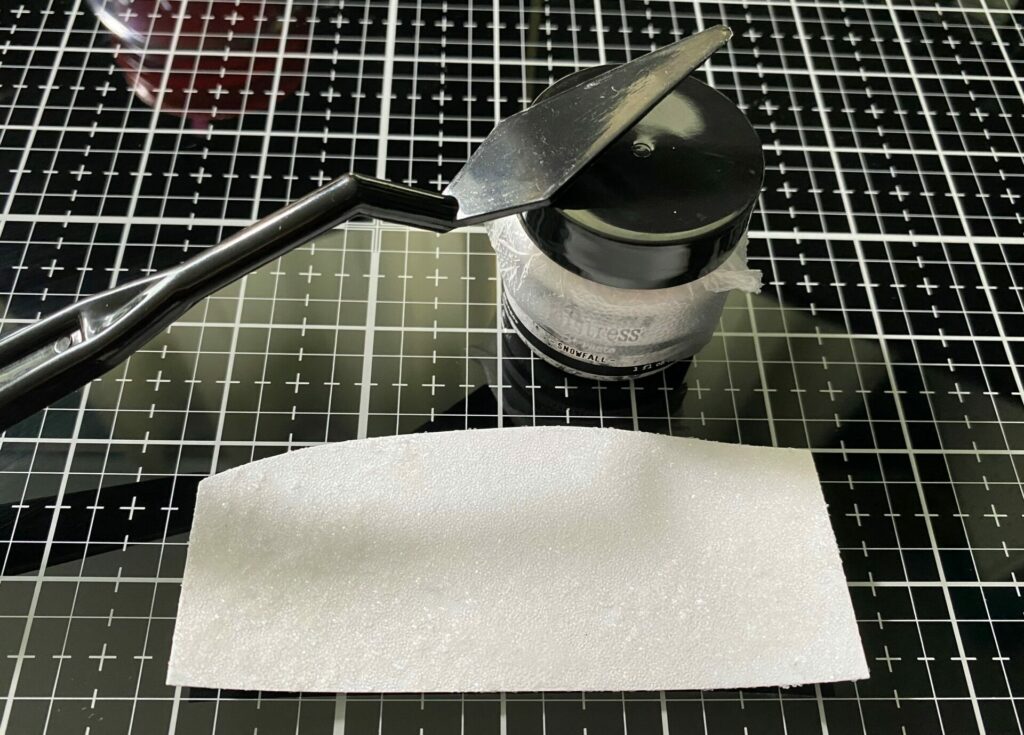
Creating The Snow Hill
- Cut a piece of white cardstock down to a size of 2 x 4 inch.
- Using a pencil, draw a curved line on the white cardstock.
- Starting at about 1¼ inches up on the left side to just under 2 inches in the middle and 1½ inches on the right side.
- It doesn’t have to be precise. Any curved line will do.
- Cut off the curved line with scissors.
- Using a pallet knife spread snowfall grit paste all over the white cardstock.
- Work on a scrap piece of paper.
- Put your pallet knife in a tray of water and immediately wash it when you are done.
- Run your finger along all the edges to smooth out any paste hanging off the sides of the paper.
- Wash the paste off your hands and let the snow hill dry.
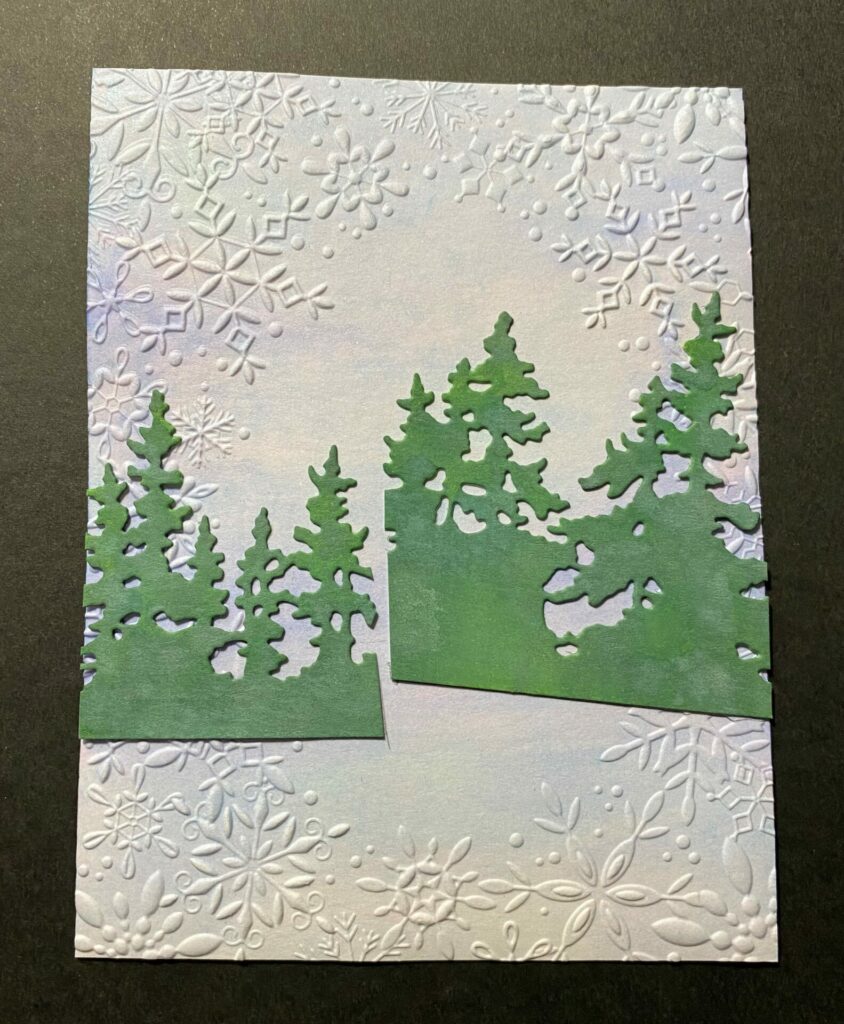
Gluing The Trees & Snow Hill
- Aline the snow hill up with the bottom edge of the snowflake embossed panel.
- Trace the curve of the hill onto the snowflake embossed panel.
- Glue down the tree line with the bottom edge just below the top of the snow hill line.
- I sniped my trees apart because I wanted the taller tree on the right to show more.
- I sniped my trees apart because I wanted the taller tree on the right to show more.
- Set something heavy on it while it dries.
- Trim off any tree branches hanging off the card.
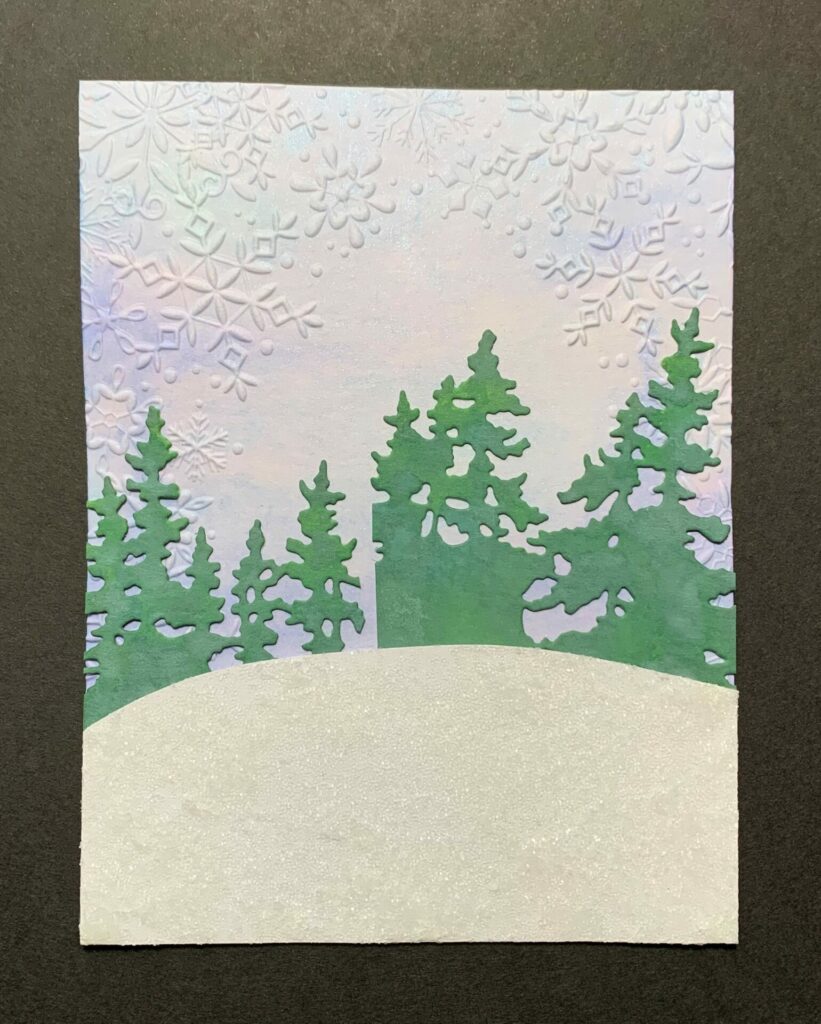
- Then, glue down the snow hill aligning it to the bottom of the snowflake panel.
- Set something heavy on it while it dries.
- Lastly, glue the snowy background panel to the front of the white card base.
Gather Cardstock Colors
Gather the following shades of cardstock.
- White
- Black – 3 shades – darkest black, black, & light black (aka really dark gray)
- Orange – 3 shades – dark orange, orange, & light orange
- Green – 3 shades – darkest green, dark green, & green
- Red – 3 shades – dark red, red, & red glitter
- Gold Metallic
If you don’t have all theses shades of cardstock, you could always make your own. All you need is some watercolor paper, ink/watercolors, a brush, and water.
- Apply a light wash of color to the whole piece of watercolor paper.
- Let it dry.
- Apply another wash of color to 2/3 of the watercolor paper.
- Let it dry.
- Apply another wash of color to the last 1/3 of the watercolor paper.
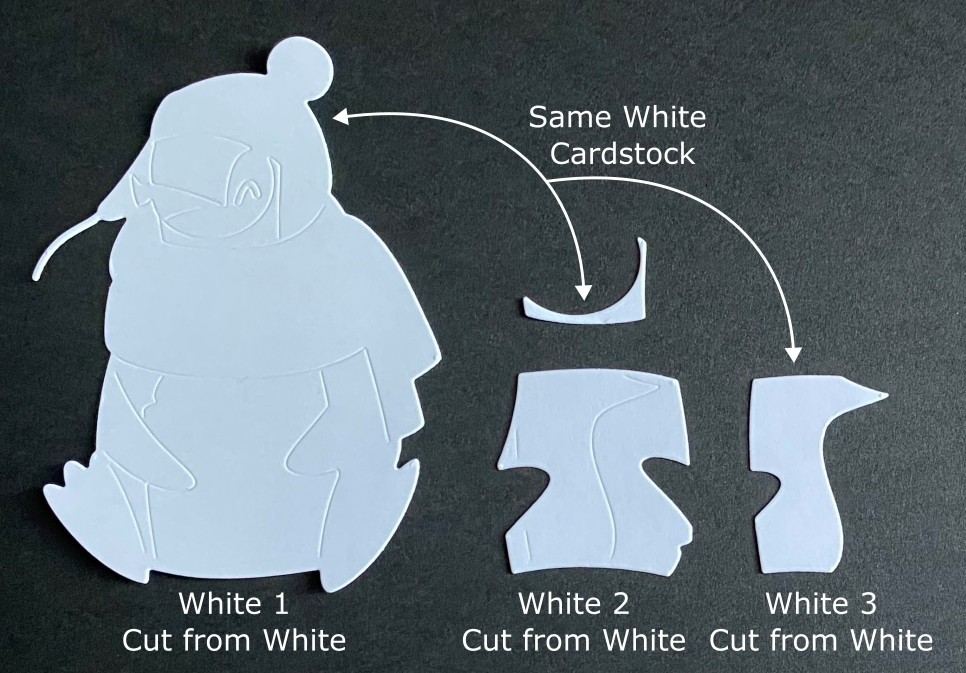
Die Cutting Eugene
White Layer Dies (Whole body & belly)
- Cut white 1-3 from the same white cardstock.
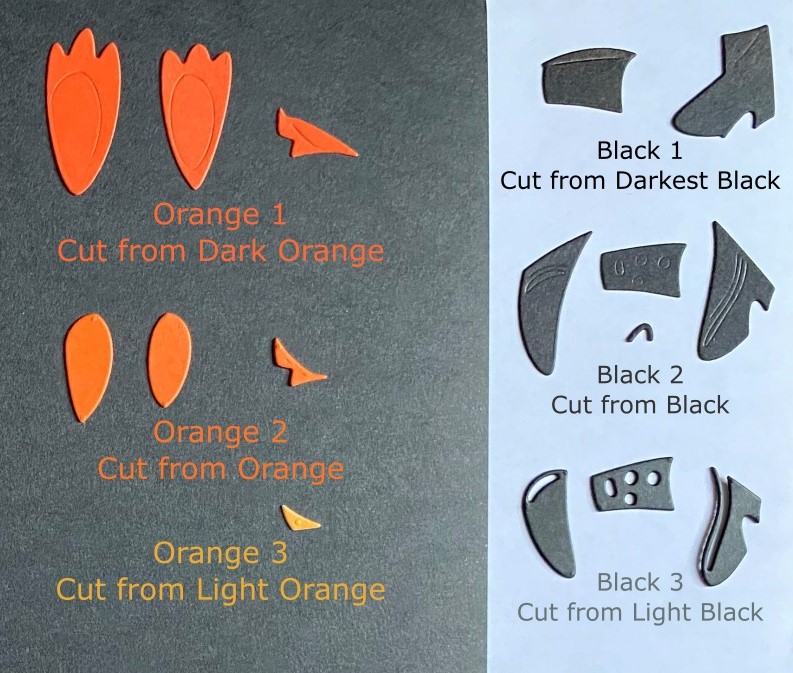
Black Layer Dies (Arms, Head & Eye)
- Black 1 – Cut with darkest black cardstock.
- Black 2 – Cut with black cardstock.
- Black 3 – Cut with light black cardstock.
Orange Layer Dies (Beak & Feet)
- Orange 1 – Cut with dark orange cardstock.
- Orange 2 – Cut with orange cardstock.
- Orange 3 – Cut with light orange cardstock.
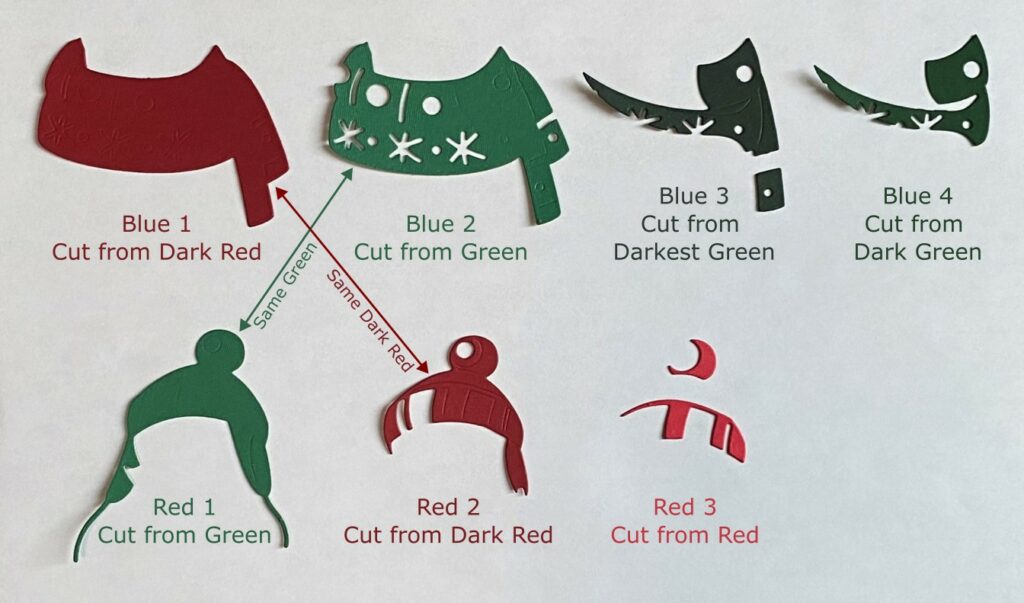
Blue Layer Dies (Scarf)
- Blue 1 – Cut with dark red cardstock .
- Blue 2 – Cut with green cardstock.
- Blue 3 – Cut with darkest green cardstock.
- Blue 4 – Cut with dark green cardstock.
Red Layer Dies (Hat)
- Red 1 – Cut with green cardstock. (Use the same green used for blue 2.)
- Red 2 – Cut with dark red cardstock. (Use the same dark red used for blue 1.)
- Red 3 – Cut with red cardstock.
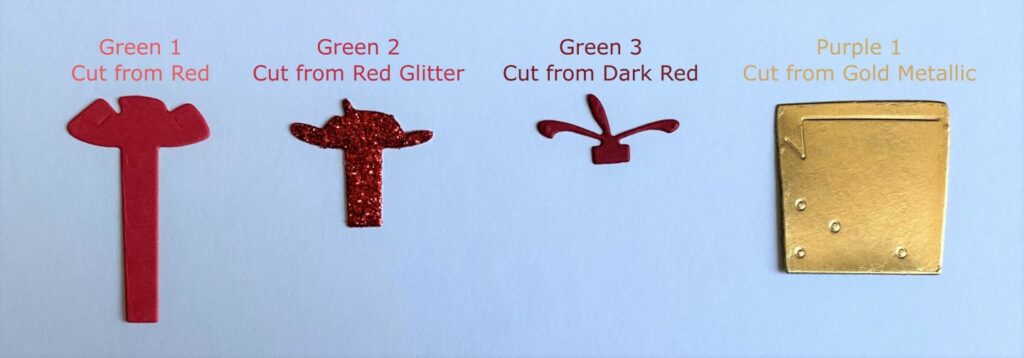
Die Cutting The Present
Purple Layer Dies (Present)
- Purple 1 – Cut with gold metallic kraft stock.
I didn’t use purple layers 2 & 3.
Green Layer Dies (Bow)
- Green 1 – Cut with red cardstock. (Use the same red used for red 3.)
- Green 2 – Cut with red glitter cardstock.
- Green 3 – Cut with dark red cardstock. (Use the same dark red used for blue 1 & red 2.)
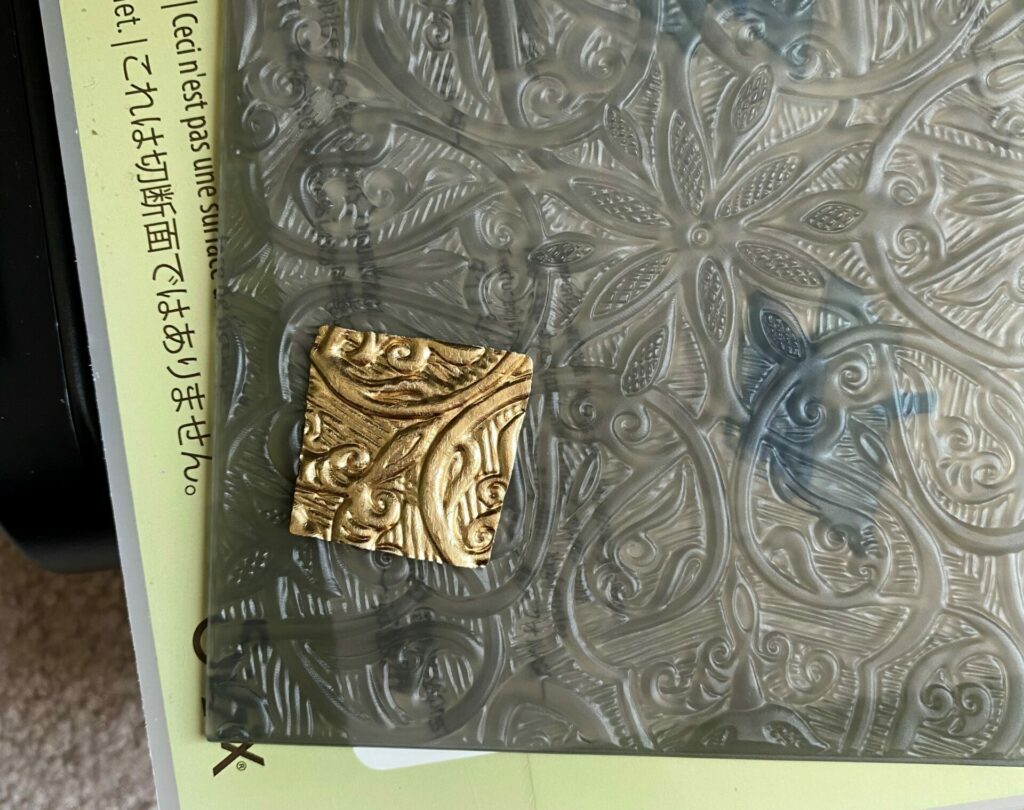
Embossing The Present
- Mist the back of the gold present with water and place it in the Engraved 3D embossing folder.
- Run it through your die cutting machine. I did two passes for mine.
- Remove the embossed present from the folder and let it dry.
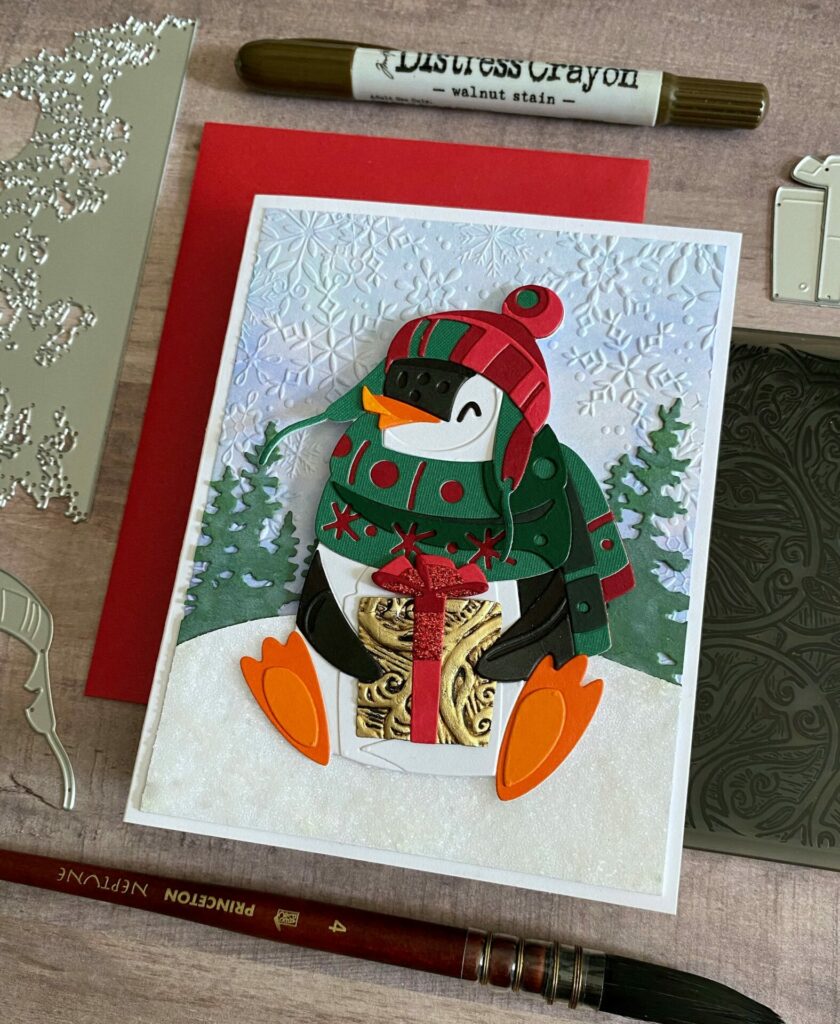
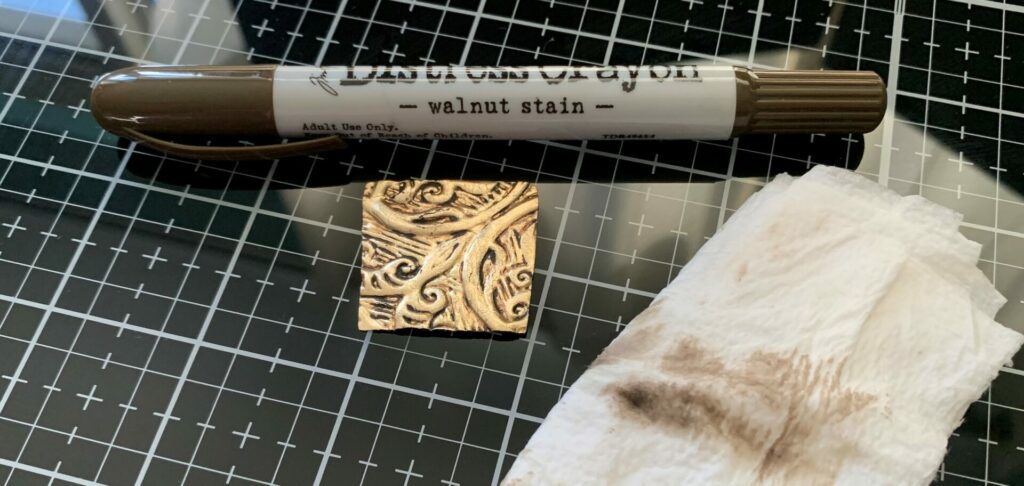
- Scribble the walnut stain crayon along the engraved lines.
- Rub it in with your finger. You’ll want to work the crayon into all the lines and crevices.
- Take a wet paper towel (wring out most of the water) and gently rubbed it over the present.
- Rub off and remove any crayon that gets on the back and sides of the present.
- Let it dry.
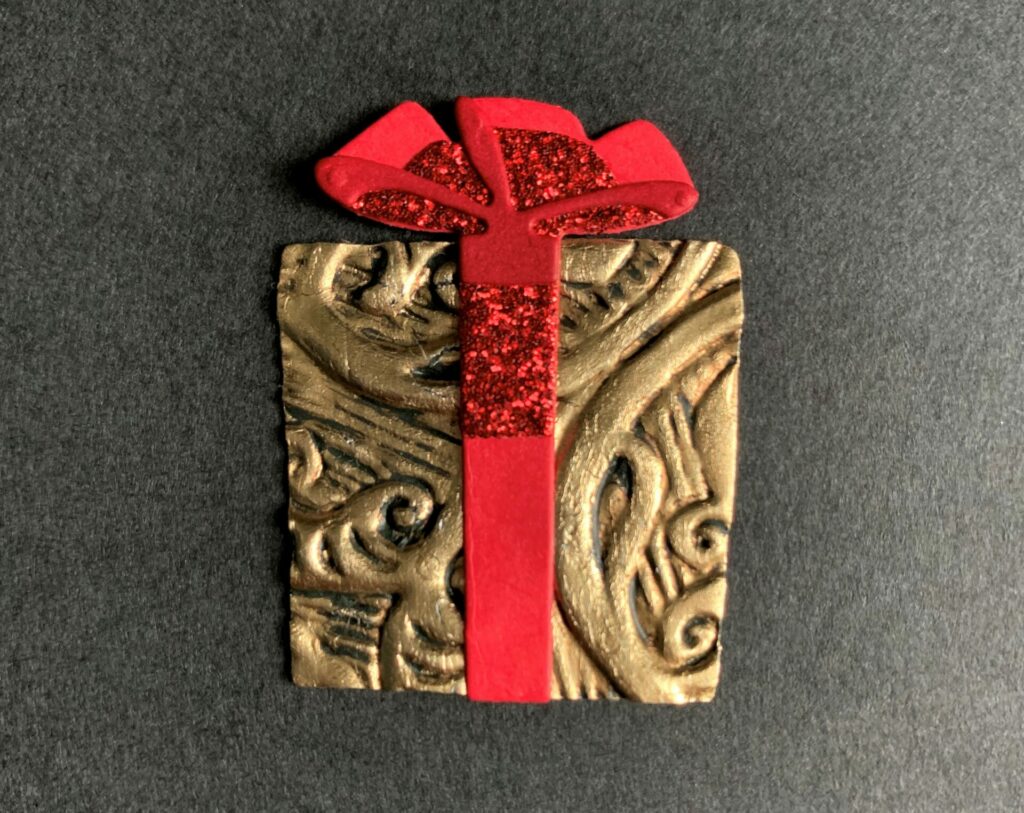
- Glue all 3 red bow layers together.
- Glue the bow to the present.
- Adhere a foam square with some glue to the back of the present.
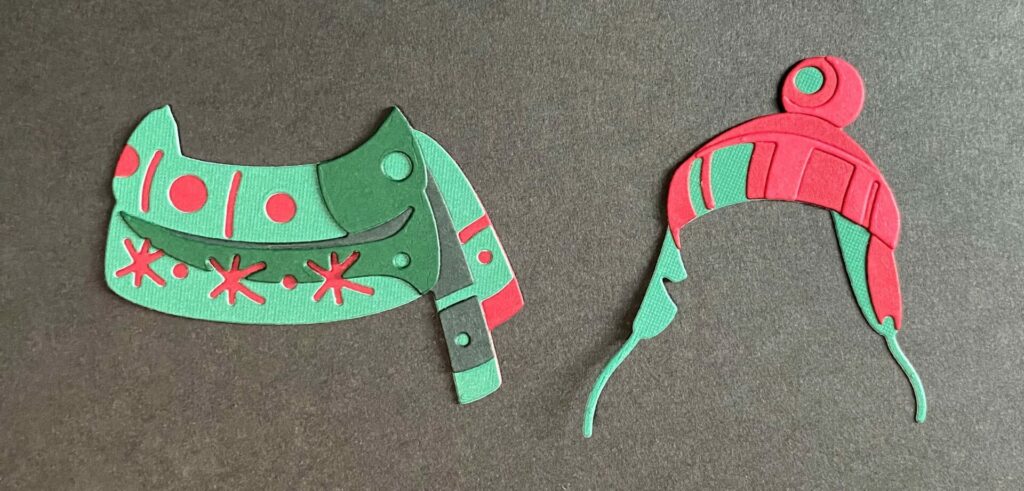
Assembling The Hat & Scarf
Hat
- Glue hat layer 2 on top of hat layer 1.
- Then, glue hat layer 3 on top of hat layer 2.
Scarf
- Glue scarf layer 2 on top of scarf layer 1.
- Next, glue scarf layer 3 on top of scarf layer 2.
- Then, glue scarf layer 4 on top of scarf layer 3.
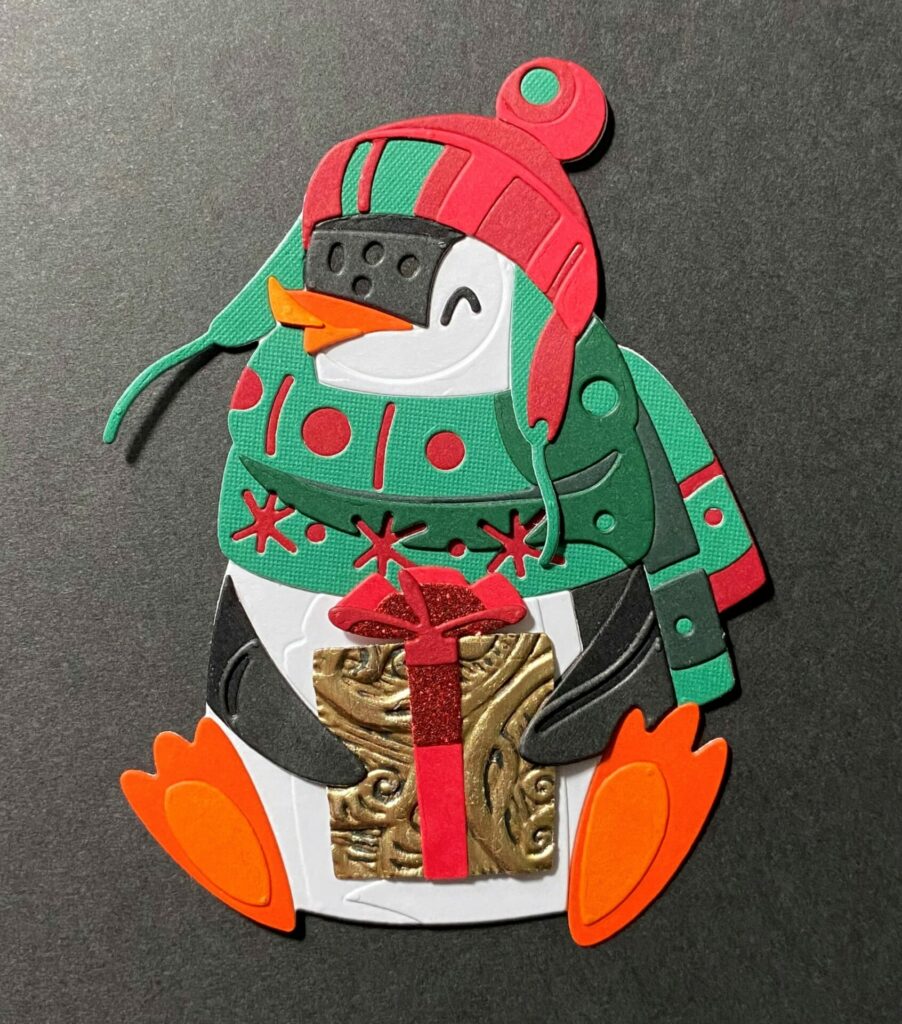
Assembling Eugene
Next, it was time to glue Eugene together. Sizzix has made a YouTube video showing how to assemble Eugene. You can find that video here.
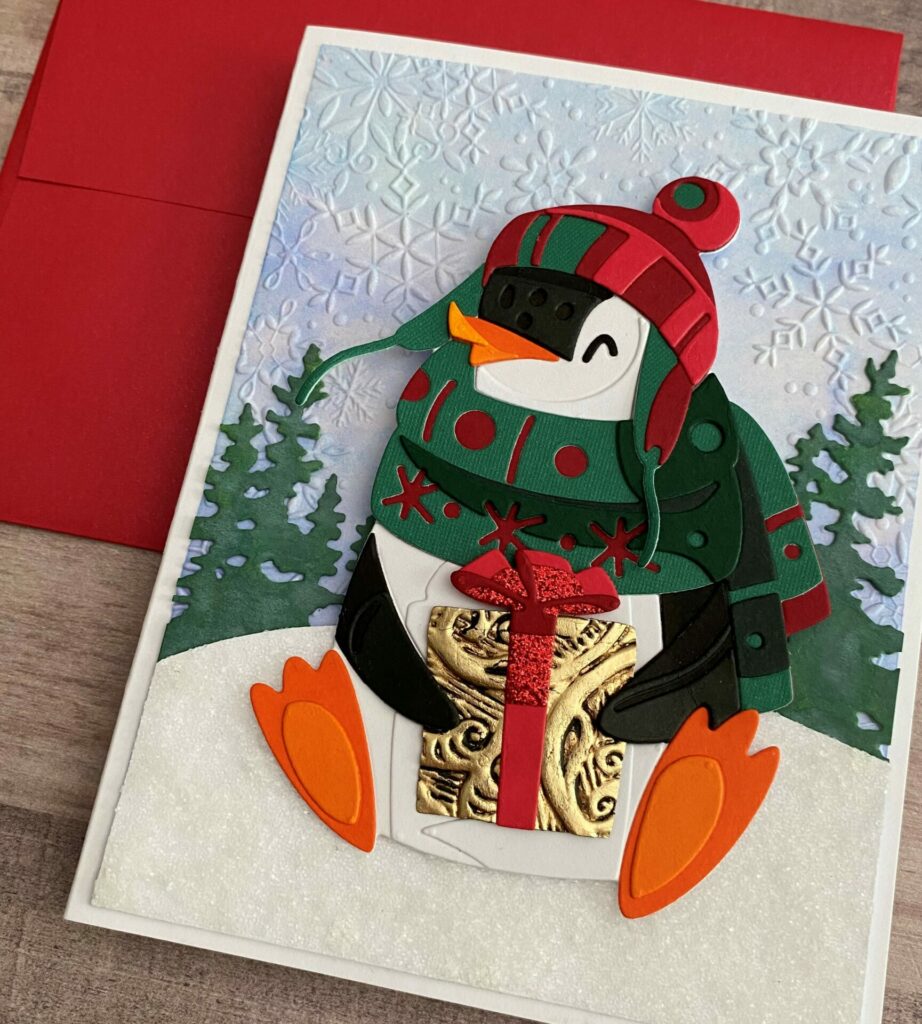
When he’s all glued together Eugene should look something like this. How stinkin’ cute is he!
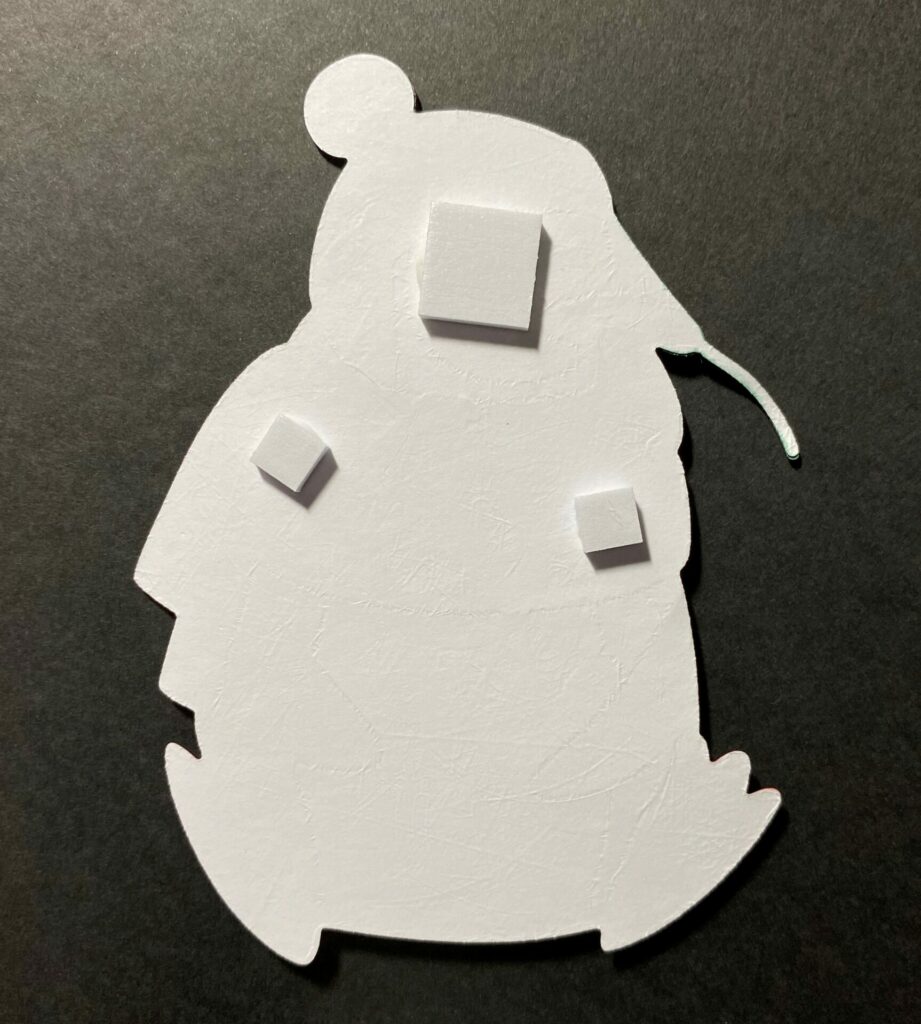
Gluing It All Together
- Then, add some foam squares with glue to the back of Eugene.
- On the back, apply some glue to the bottom area of Eugene around the feet.
- Remove the release paper and put a dot of glue on each of the foam squares.
- Adhere him to the front center of the card.
- Set something heavy on it while the glue dries.
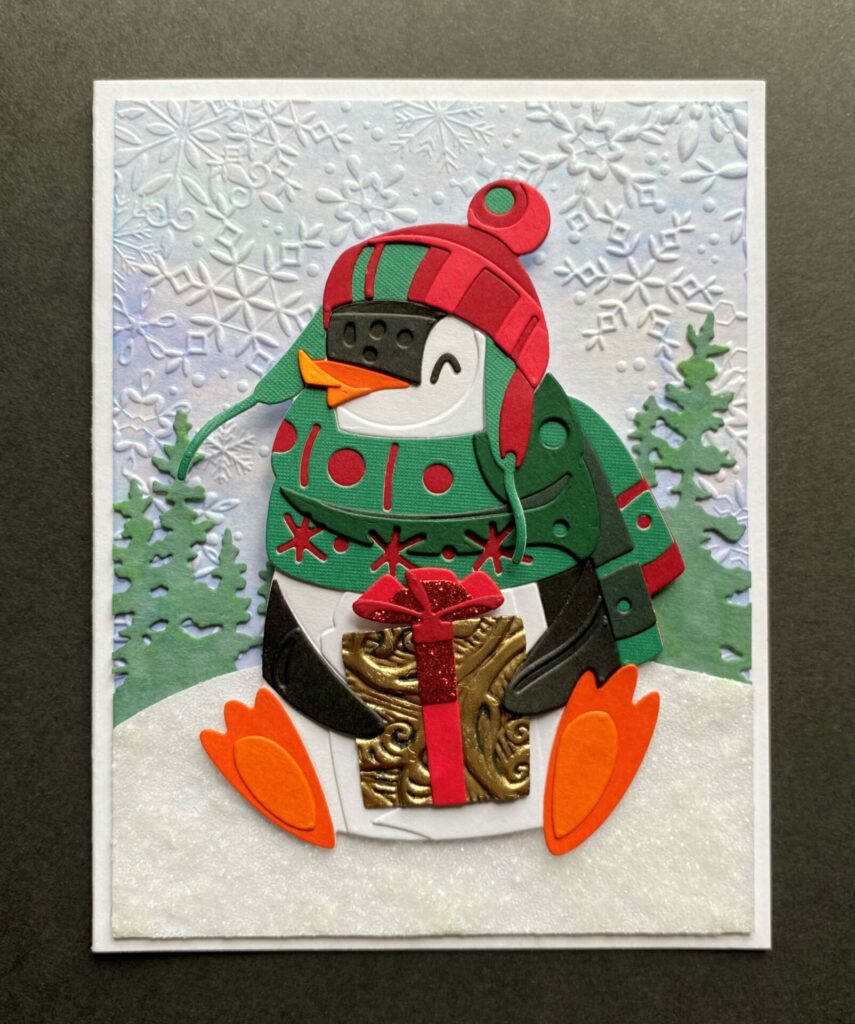
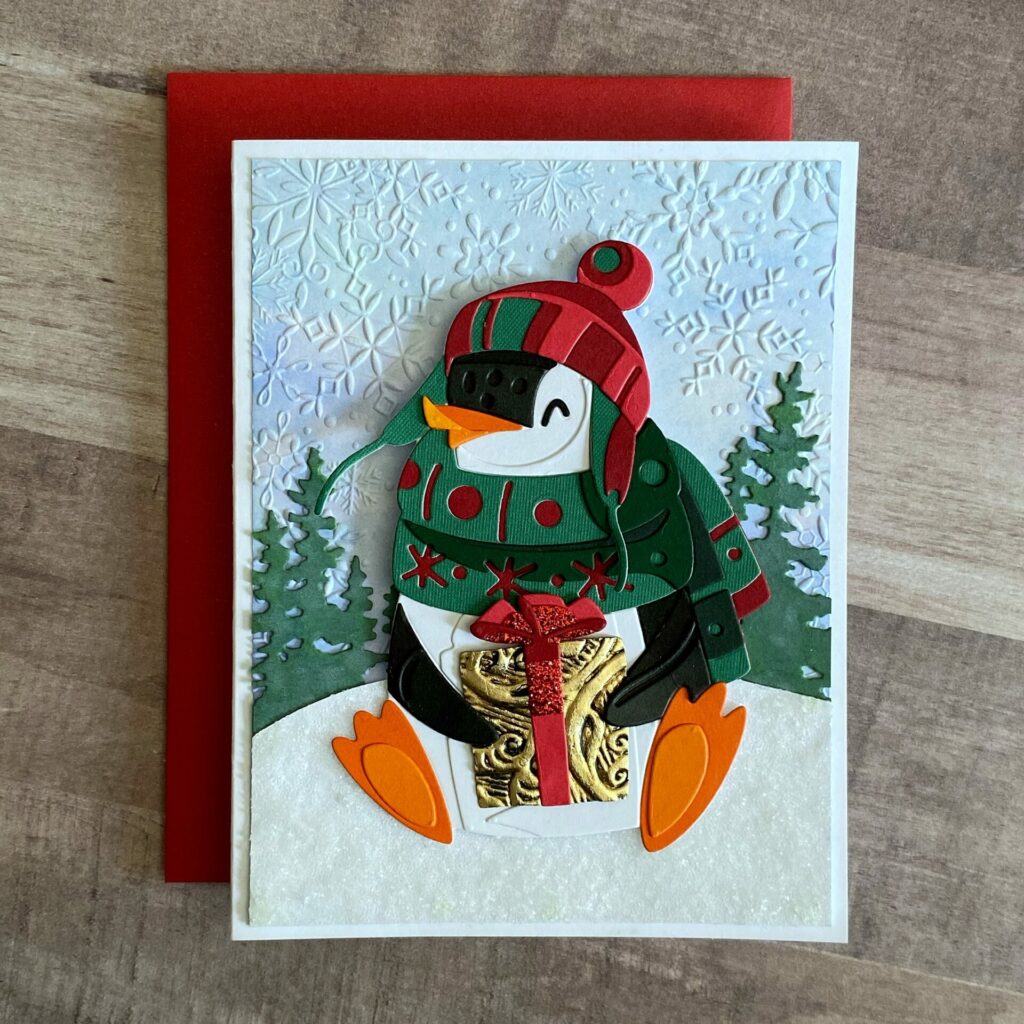
Eugene Christmas Card Complete!
Congratulations! You have now completed your Eugene Christmas card! I hope you enjoyed this tutorial and have as much fun making it as I did. If you do make this card, please use the #grovecrafted and tag me on Instagram. I’d love to see what you’ve created! Thanks for stopping by and I hope you found some new inspiration to create.
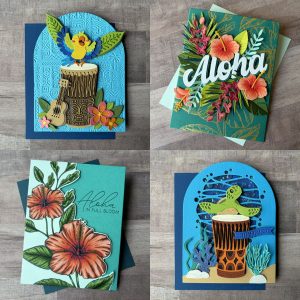
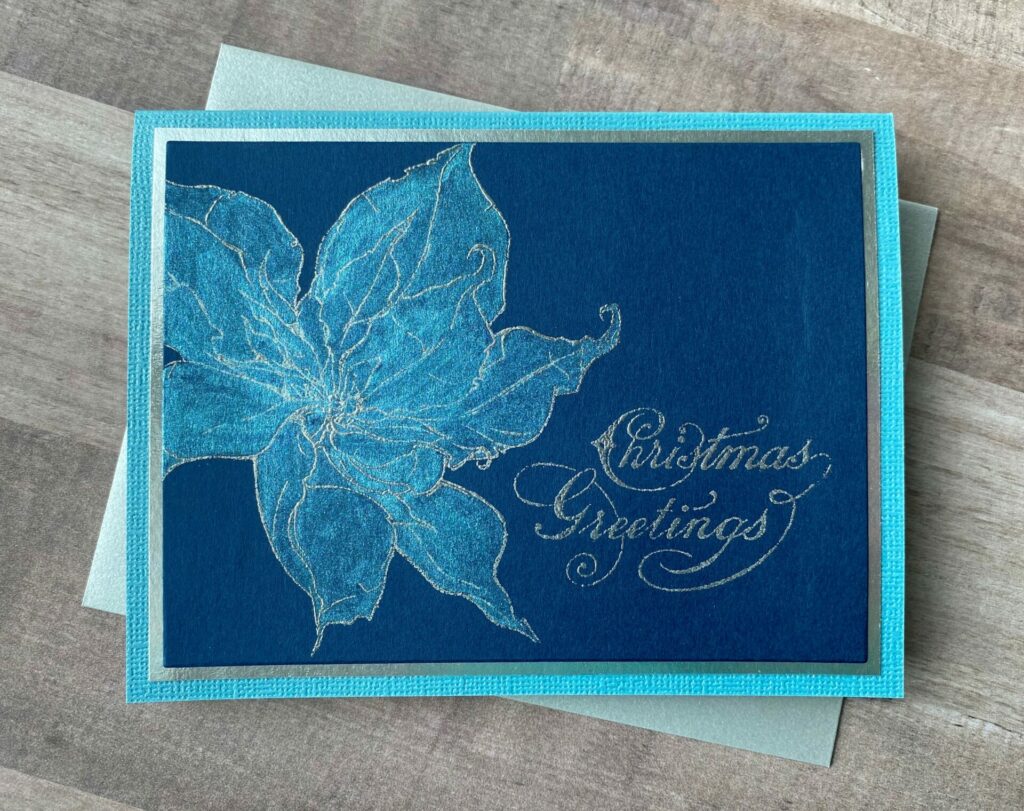
If you enjoyed making this Eugene Christmas card, you might want to check out my Poinsettia Christmas Greetings Card tutorial.
Looking for more handmade Christmas card options? Click here to see more.