
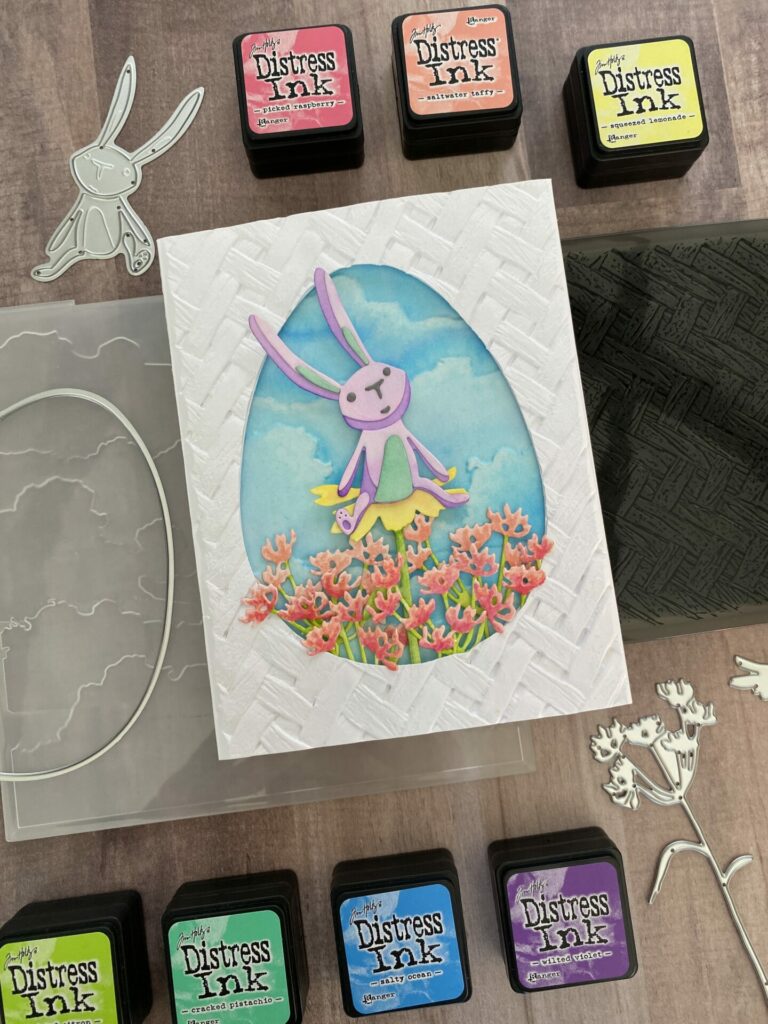
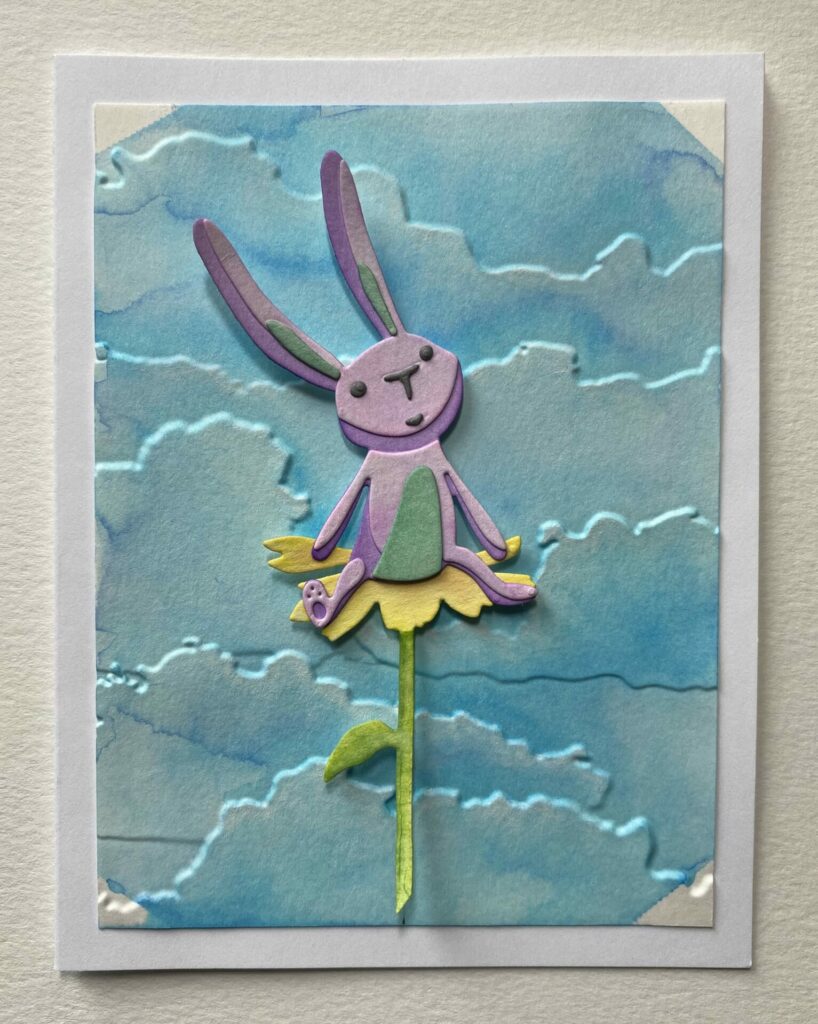
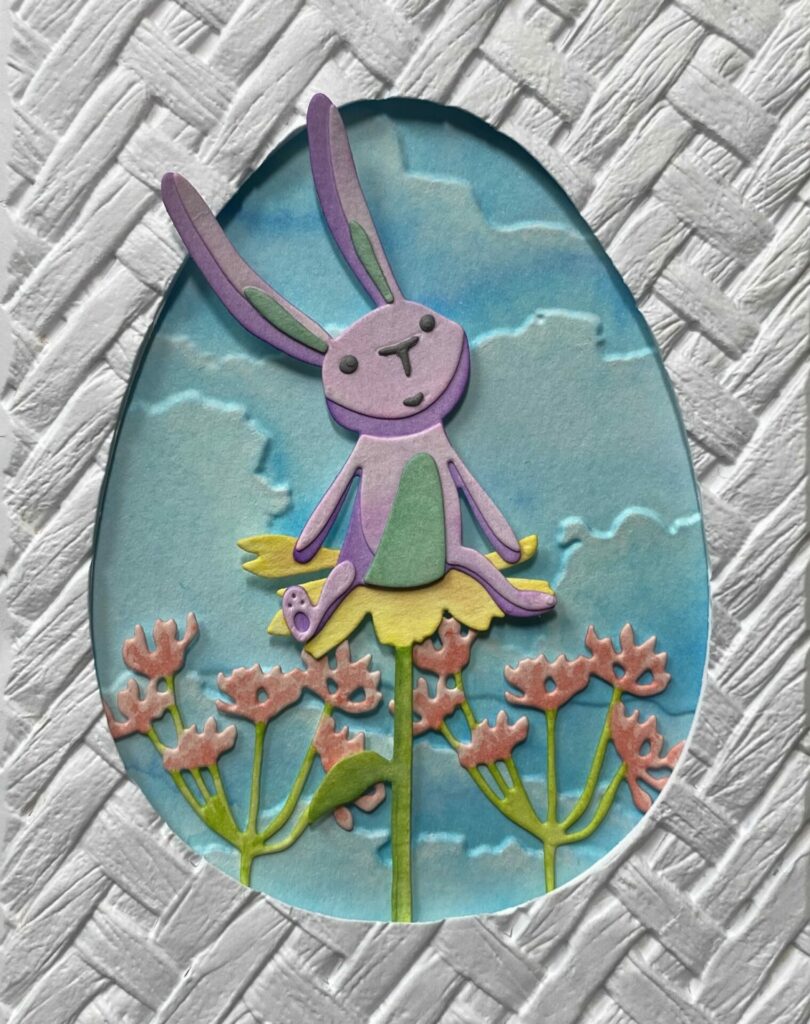
Bunny Daydreams Easter Card
Hey card makers! Hope you’re enjoying the start of spring! Easter is just around the corner, so I wanted to share how I made this cute bunny daydreams Easter card with water colored die cuts and a 3D embossed background. If you’re not a fan of water coloring, feel free to use colored cardstock as an alternative. You can also substitute the egg-shaped window to fit any occasion, not just Easter. This bunny daydreams Easter card could also work for saying hello, welcoming a new baby, or celebrating a springtime birthday.
Link Abbreviations
- AMZ – Amazon*
- Sb.com – Scrapbook.com*
- SIZ – Sizzix*
- RI – Ranger Ink*
- SB – Spellbinders*
- BA – Blick Art Materials*
- SSS – Simon Says Stamp
Full Disclosure: This post contains affiliate links which are indicated with an (*). If you click on an affiliate link and later make a purchase, I may receive a small commission. Clicking on an affiliate link which earns a commission does NOT result in additional charges to you or cost you anything extra. Money earned via affiliate links helps pay the fees to keep this blog up and running. Thank you so much for shopping through my links to show your support for the brands that we love and the products that I share!
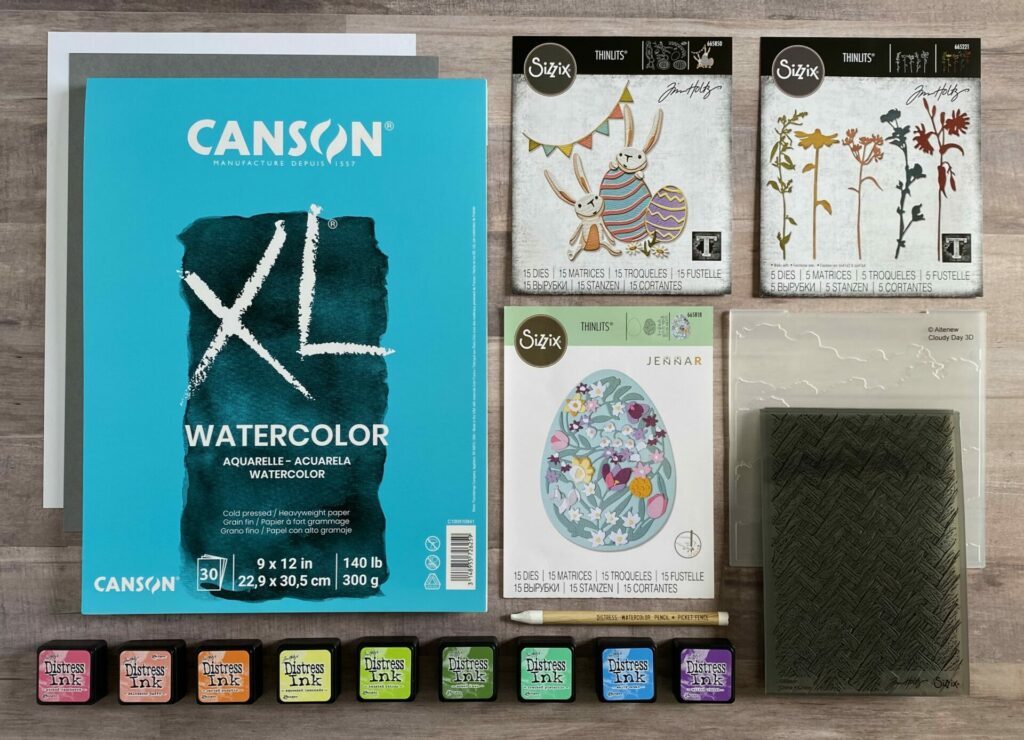
Supplies Used / Substitutions:
- Tim Holtz Sizzix Thinlits Dies – Bunny Games #665850 | Sb.com | SIZ | AMZ | SSS / Sizzix TH Vault Bunny + Chick #666561 | Sb.com | SIZ |
- Tim Holtz Sizzix Thinlits Dies – Wildflower Stems #3 #665221 | Sb.com | SIZ | AMZ | SSS |
- Sizzix Thinlits Dies – Intricate Floral Easter Egg #665818 | Sb.com | SIZ | AMZ / Any Easter egg die
- Sizzix Tim Holtz 3D Embossing Folder – Intertwine #664759 | Sb.com | SIZ | AMZ | SSS / Any embossing folder
- Altenew 3D Embossing Folder – Cloudy Day ALT6207 | Sb.com | SSS / Optional or any cloud stencil
- Canson 140lb Watercolor Paper – Cold Press | BA | AMZ / Any watercolor paper
- Distress Heavystock – White | Sb.com | RI | AMZ / Any white heavyweight cardstock
- Gray Cardstock
- Distress Watercolor Pencil – Picket Fence | Sb.com | RI | SSS / Optional
- Distress Ink Pads – full size & mini ink pads linked below / Distress spray stains, watercolor pencils, or any watercolors
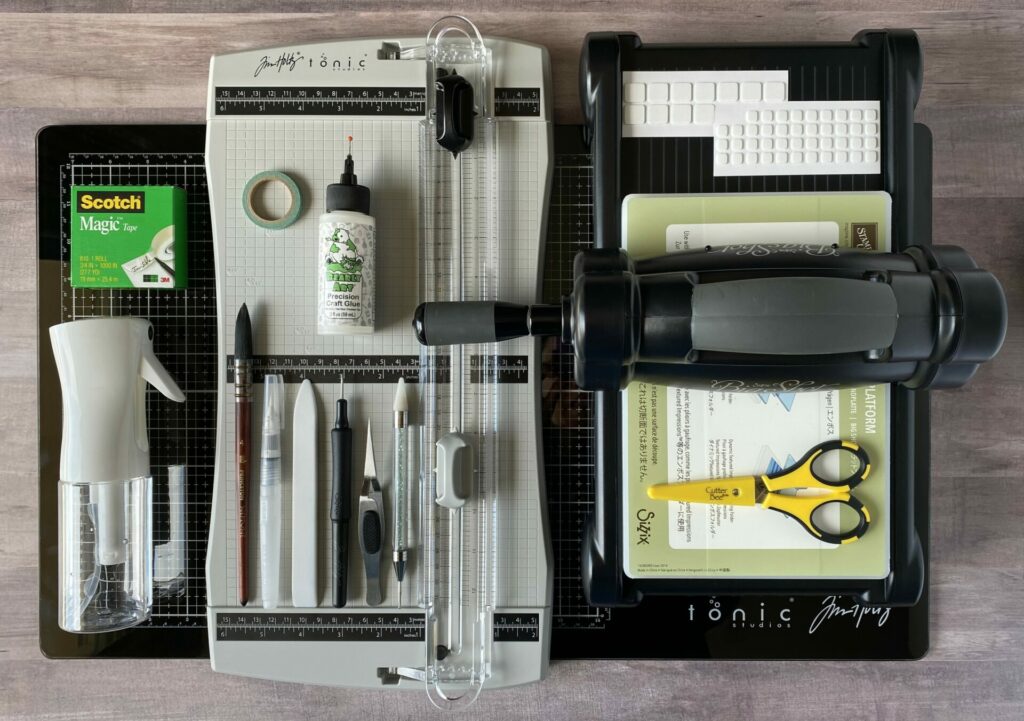
Tools Used / Substitutions:
- Sizzix Big Shot | SIZ / Spellbinders Platinum Six | Sb.com | SB / Any die cutting machine
- Tim Holtz Tonic Precision Trimmer | Sb.com | RI / Any paper trimmer
- Tim Holtz Glass Media Mat | Sb.com | AMZ / Non-stick craft sheet
- Princeton Neptune Watercolor Brush – Quill #4 | BA / Water brush | Sb.com | AMZ |
- Spray Bottle with water | SB | AMZ / Any spray bottle
- Bearly Art Glue | Sb.com | SB | AMZ / Any liquid adhesive
- Embellishment Wand | SSS / Reverse tweezers
- Die Pick | Sb.com / Toothpick
- Bone Folder | SSS |
- EK Scissors | Sb.com | AMZ / Any scissors
- White Foam Squares | SSS |
- Scotch Tape – Magic / Blue painters tape
- Washi Tape / Any low tack tape
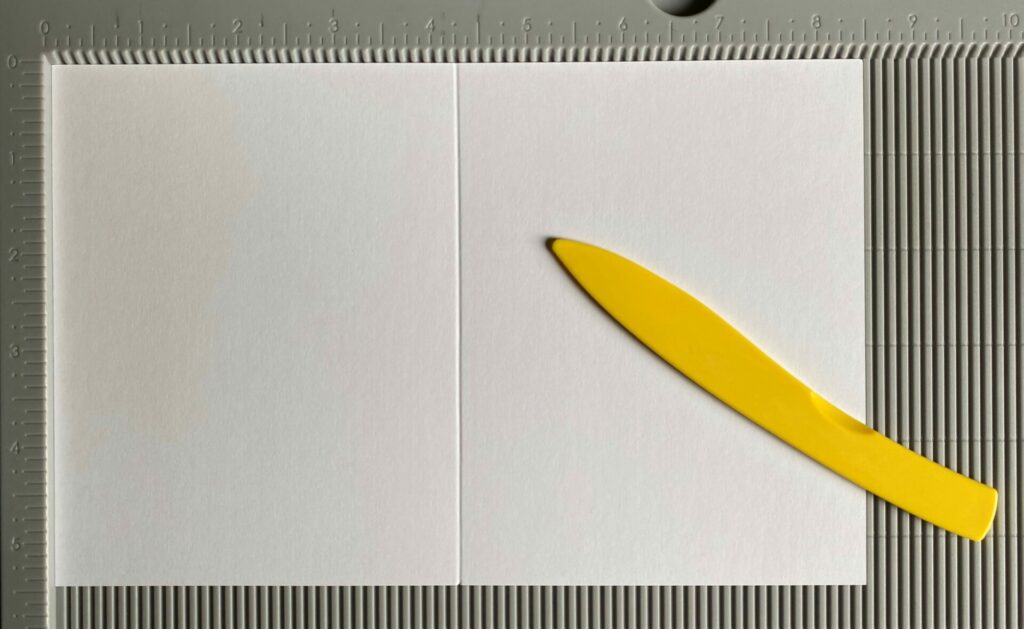
Making The Card Base
- Take a sheet of white cardstock and cut it in half using your paper trimmer. You should now have two pieces of cardstock measuring 8½ x 5½ inches.
- Score the half sheet of cardstock at the 4¼ inch line.
- Fold along the score line and reinforce the fold with a bone folder.
Your card base should now measure 4¼ x 5½ inches, which is a standard A2 card size.
3D Embossing Tips
Before we emboss, here are some tips for getting the best 3D embossing.
- Spritz the front and back of the paper with water before putting it into the 3D embossing folder. The water helps to soften the fibers of the paper so it doesn’t crack.
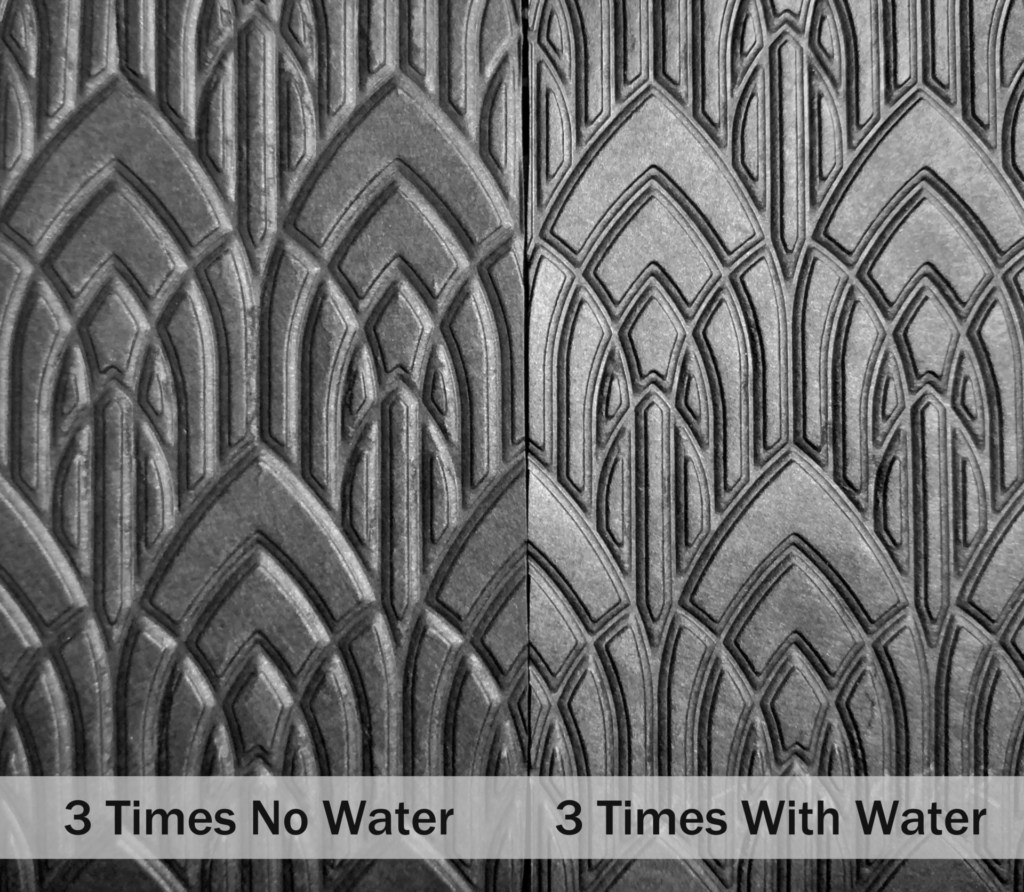
- Then, you’ll put the misted paper into the 3D embossing folder and run it through your die cutting machine 3 times**. Remember, 3D = 3 times (it makes for a deeper and crisper impression.) See photo below for a side-by-side comparison.
**NOTE: Each machine applies a different amount of pressure. Older machines tend to be well loved and will probably need the three passes. Newer machines don’t need as many passes. For instance, the Sizzix big shot foldaway machine applies a lot of pressure, and would only need one pass for a 3D embossing folder. The weight of your paper is also a contributing factor. The thinner the paper, the less number of passes you’ll need to run it through. For heavier weight paper, you may need an extra pass through the machine. I recommend doing some small test swatches to see how many passes is ideal for your machine with the different weights of paper that you will be using. For more examples of why I recommend using the water spritz, check out my side-by-side photo comparisons in my Elegant & Simple Card tutorial.
Creating The Cloud Background
3D Embossing
- Trim the watercolor paper to a size of 3¾ x 5 inches.
- Lightly spritz both sides of the watercolor paper with water.
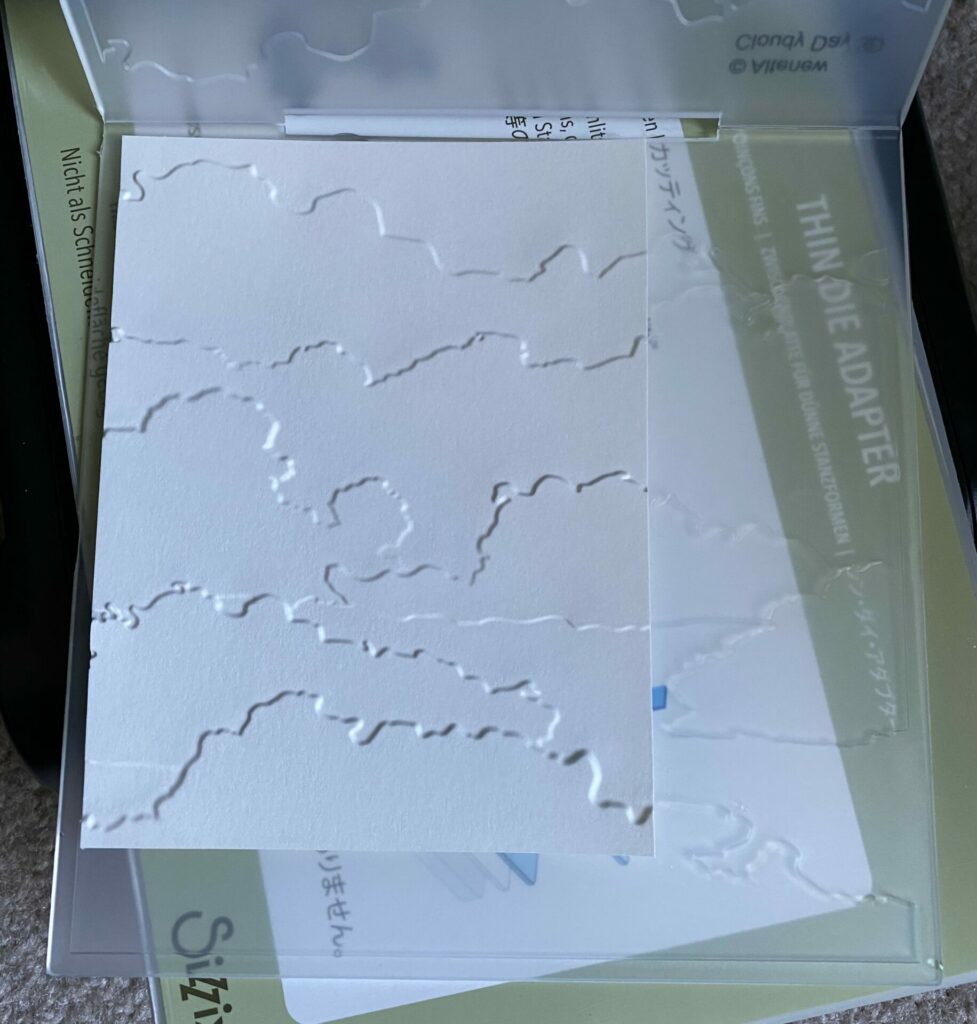
- Then, place it in the Altenew Cloudy Day 3D embossing folder.
- Next, run it through your die cutting machine.
- Take the paper out of the embossing folder and allow it to dry. Place a cutting pad on top to ensure it dries flat.
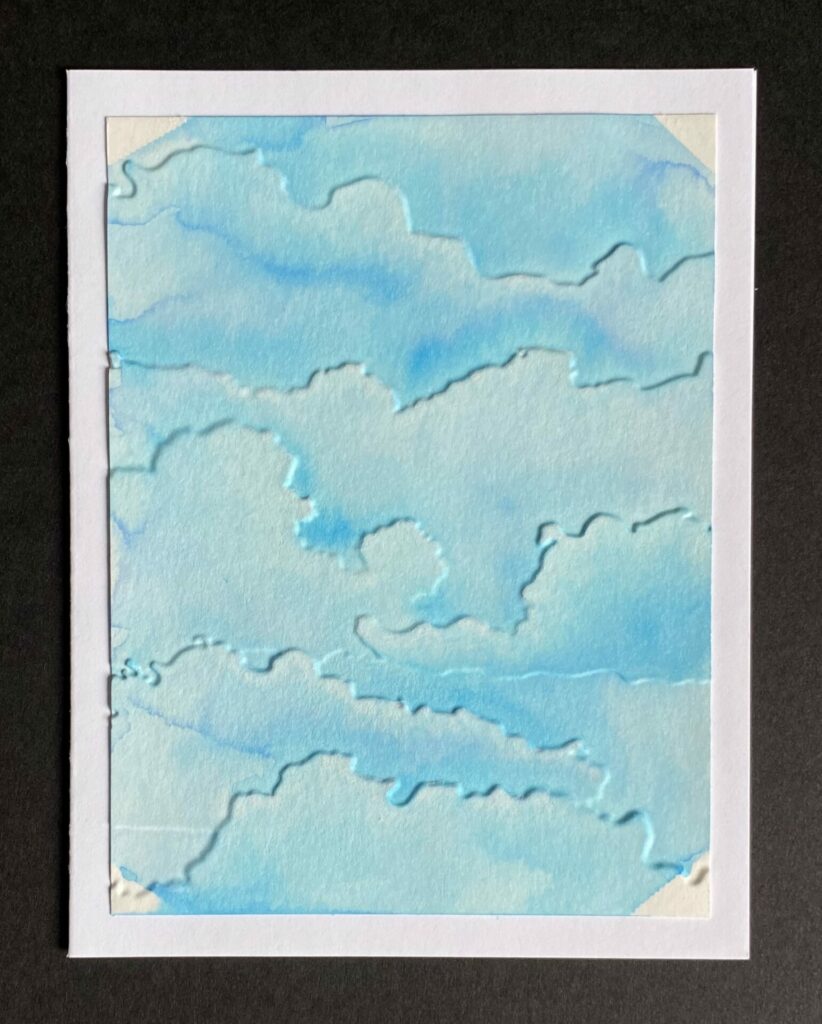
Water Coloring
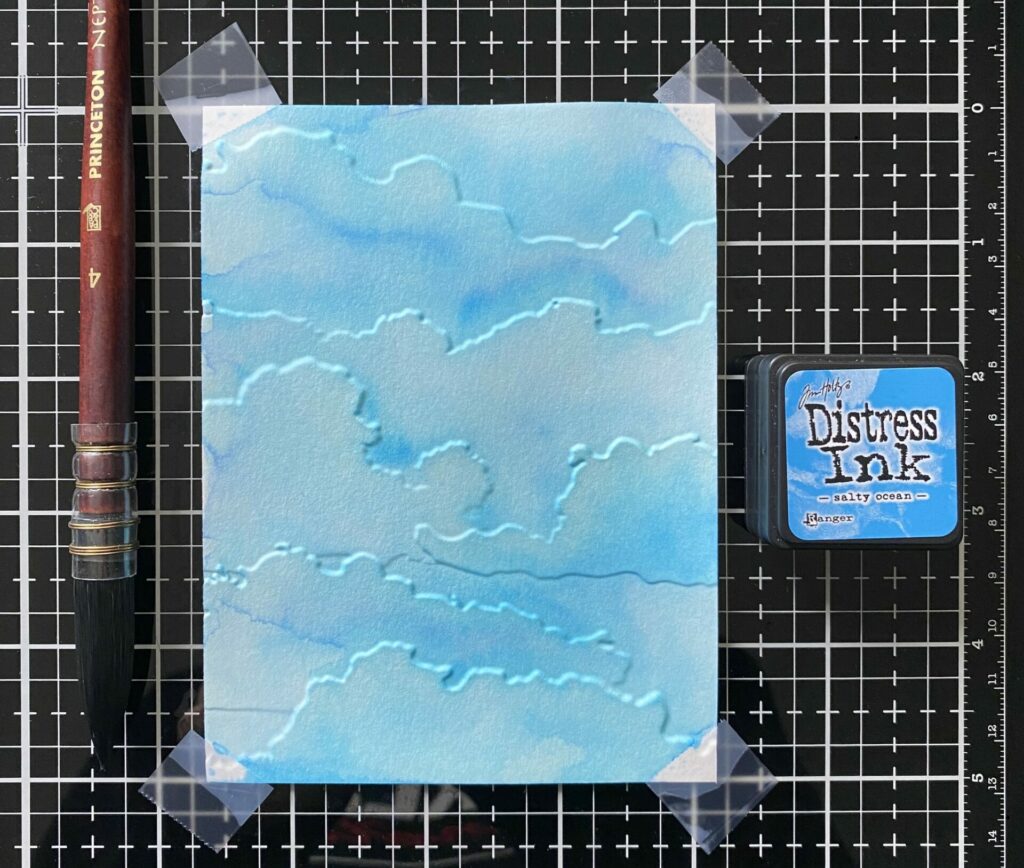
- Tape down the corners of the embossed cloud panel to your glass mat/work surface. Scotch magic tape works well for this, but you can also use blue painters tape.
- Press some salty ocean distress ink onto your craft mat.
- Wet the entire watercolor panel by applying water with your brush, but don’t use too much water.
- Then, add a layer of the blue ink to the panel and let it dry.
- Wet the whole panel with water again and add more blue ink. Focus on applying the ink more heavily in the debossed areas and at the bottom of the clouds.
- Let the panel dry.
- Repeat this process until the color intensity it to your liking. I think I did 3 layers.
White Highlights
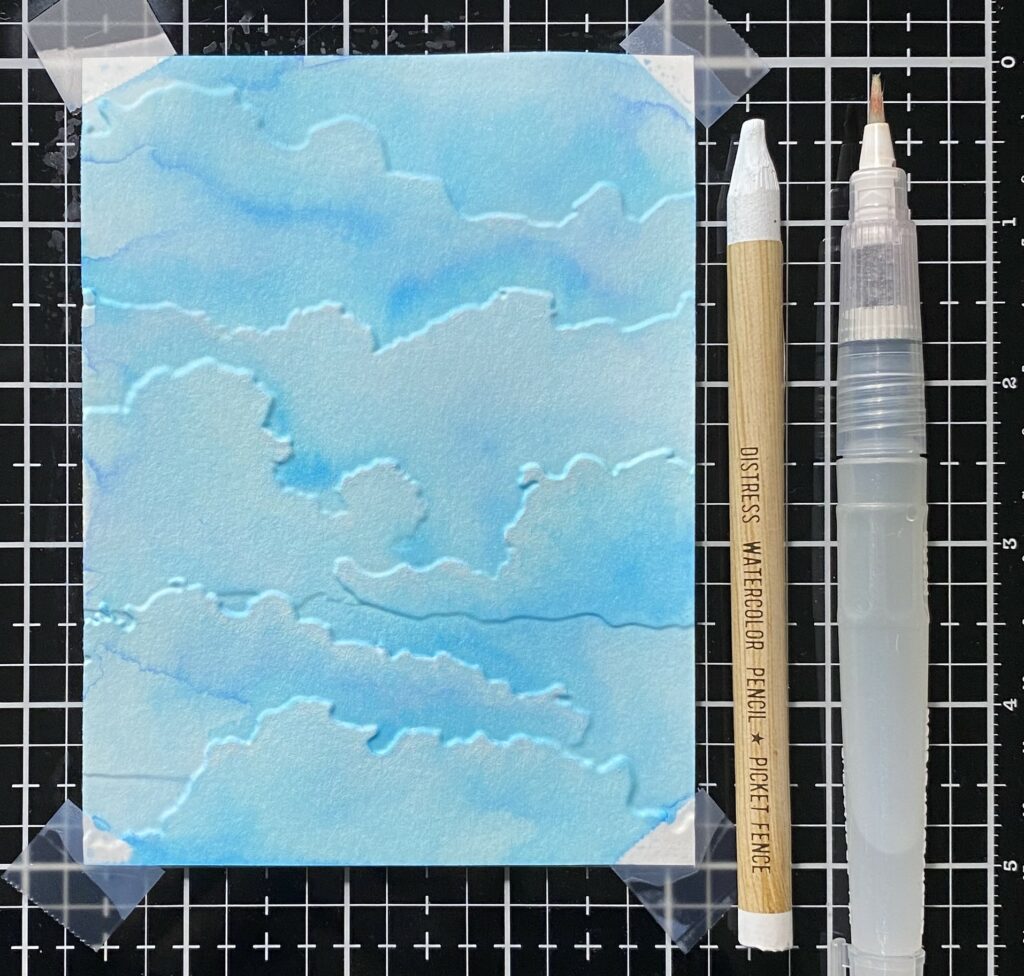
- Color along the top of the clouds with the distress watercolor pencil in the shade picket fence.
- Use a water brush to blend out the white pencil.
- Then, pick up some white pigment from the tip of the pencil with your water brush.
- Apply the white pigment to the tops of each cloud.
- Let it dry and repeat step 4 again.
Glue It
- Carefully remove the tape.
- Apply glue to the back of the water colored cloud panel.
- Adhere it to the front of the card base and place something heavy on top of it while it dries.
Making The Egg Shaped Window
Die Cutting & Embossing
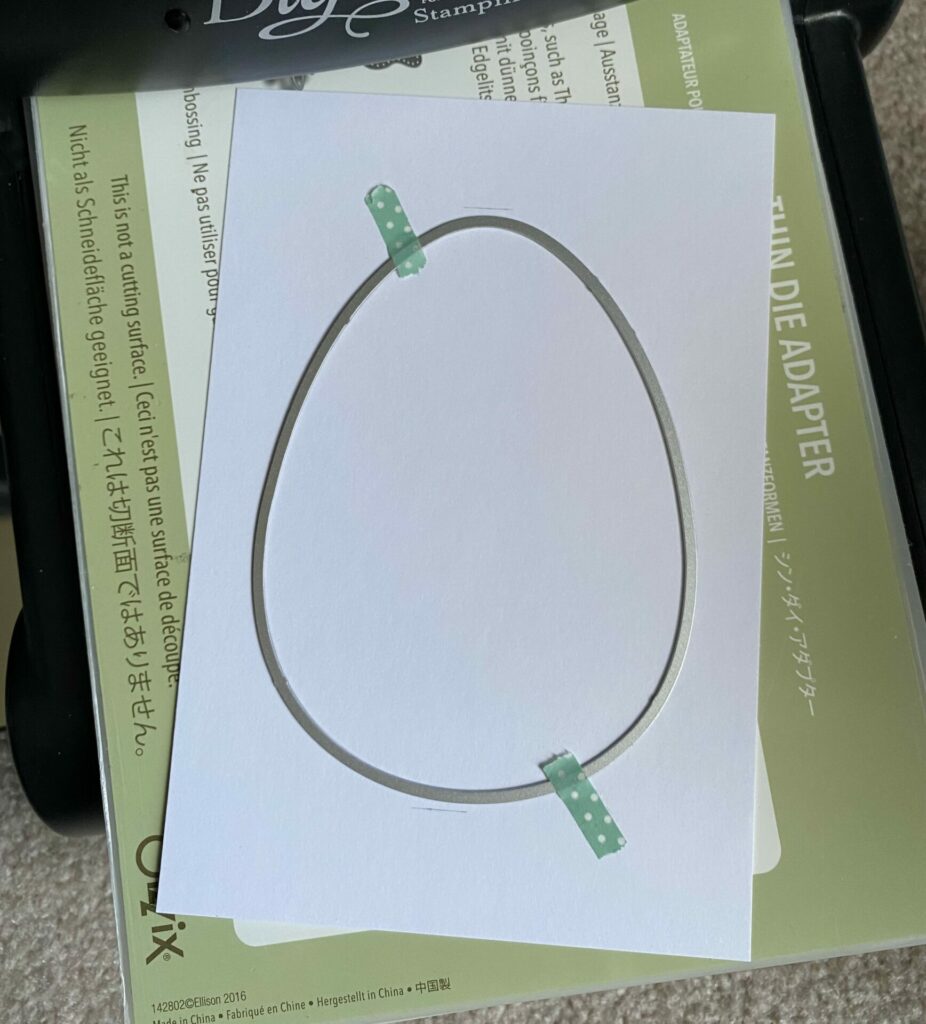
- Trim the white cardstock to 4¼ x 6¼ inches.
- Center the large egg frame die on the cardstock and secure it with washi tape.

- Run it through your die cutting machine and remove the egg die cut and die.
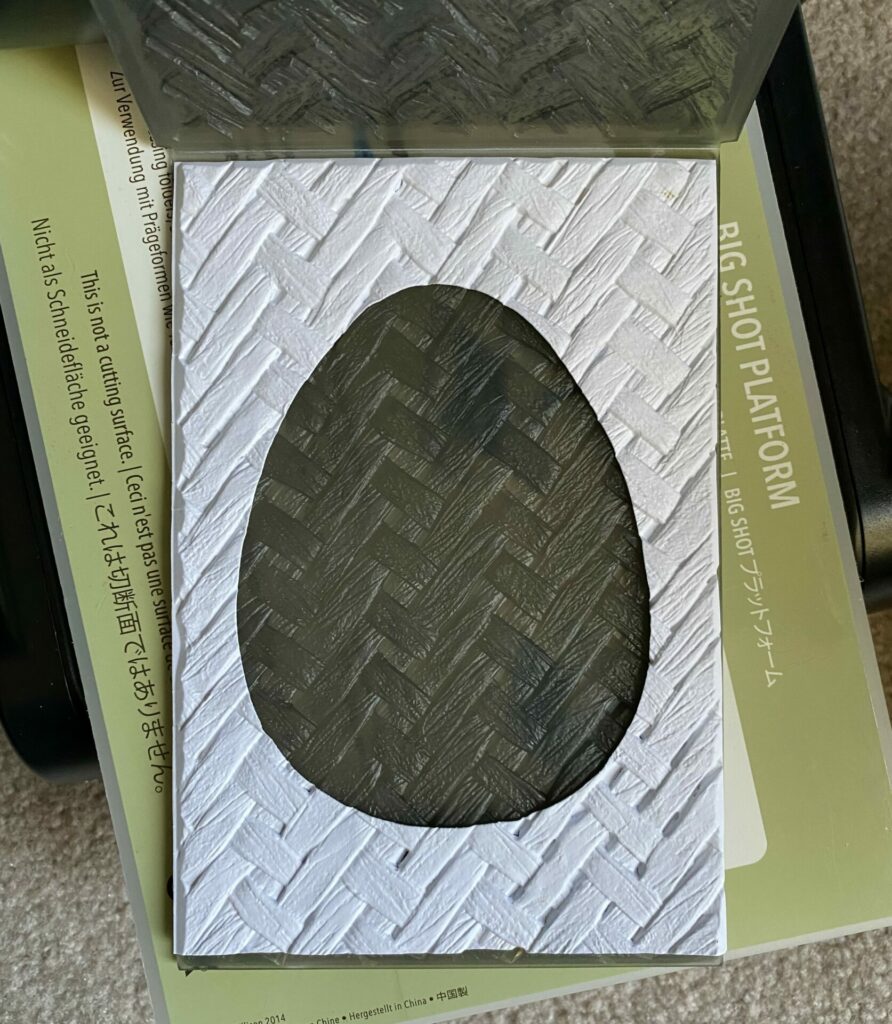
- Lightly spray water onto both sides of the egg window cardstock.
- Then, place it in the Tim Holtz Intertwine 3D embossing folder.
- Next, run it through your die cutting machine.
- Take the paper out of the embossing folder and allow it to dry. Place a cutting pad on top to ensure it dries flat.
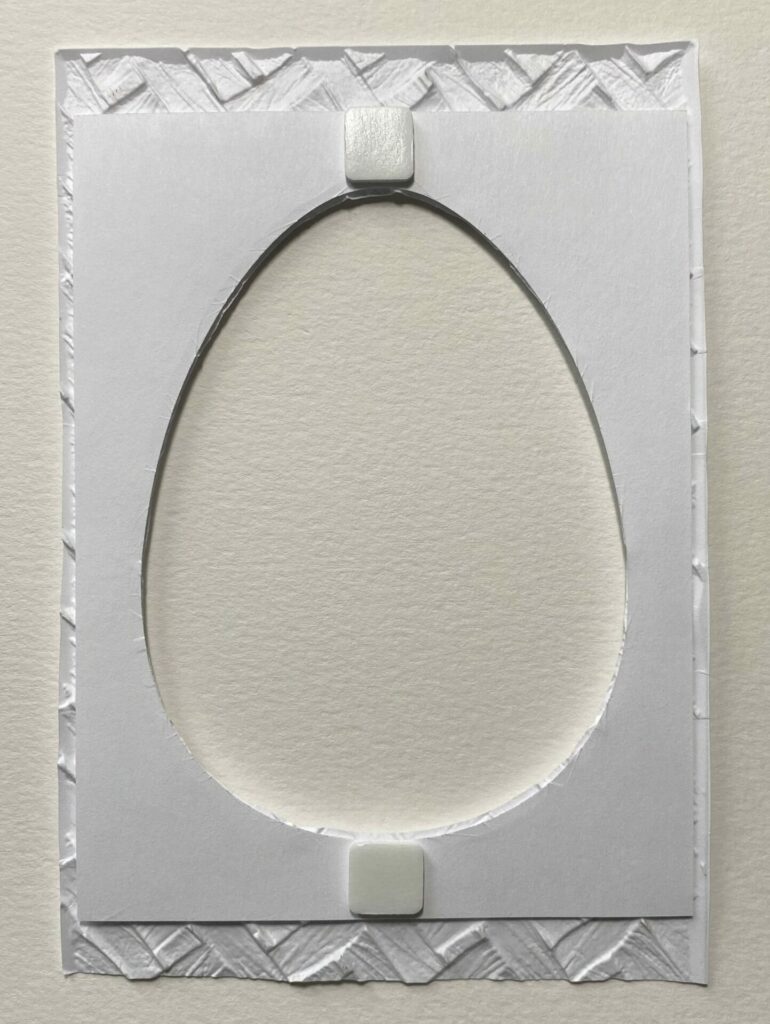
Adding Some Structure
- Cut another piece of white cardstock to 4 x 5¼ inches.
- Center the large egg frame die on the cardstock and secure it with washi tape.
- Run it through your die cutting machine and remove the egg die cut and die.
- Apply glue to all areas except underneath the egg window. (This space will be reserved for tucking in the front row of wildflowers at a later stage.)
- Glue it behind the embossed egg window panel. Make sure both eggs are evenly lined up.
- Add a large foam square on both the top and bottom of the back of the panel.
- Trim off the top and bottom evenly so the egg window is 5½ inches high. (Image below taken before I trimmed it.)
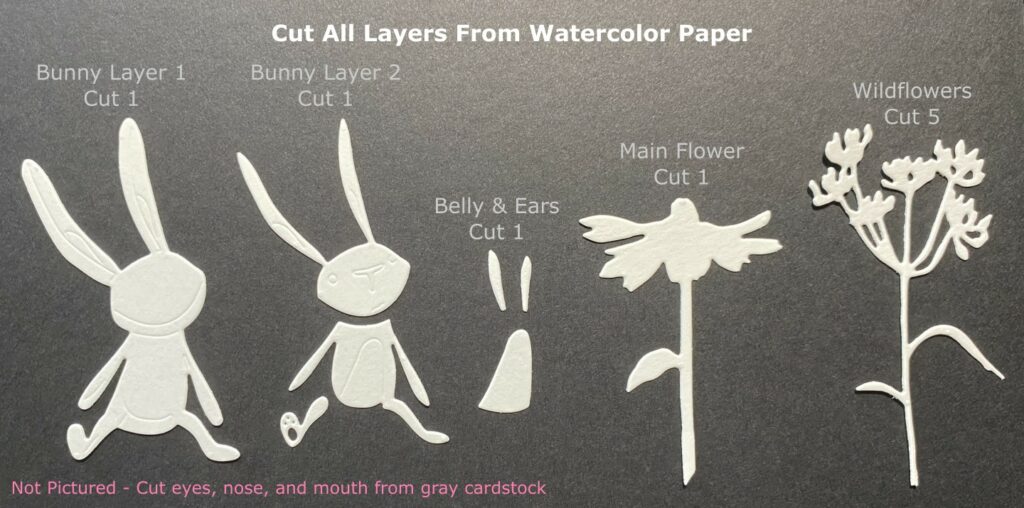
Die Cutting The Bunny And Flowers
If you are substituting the bunny games bunny die with the vault bunny + chick die, keep in mind that the vault bunny is a little bit bigger. Therefore, the bunny will be larger in relation to the main flower.
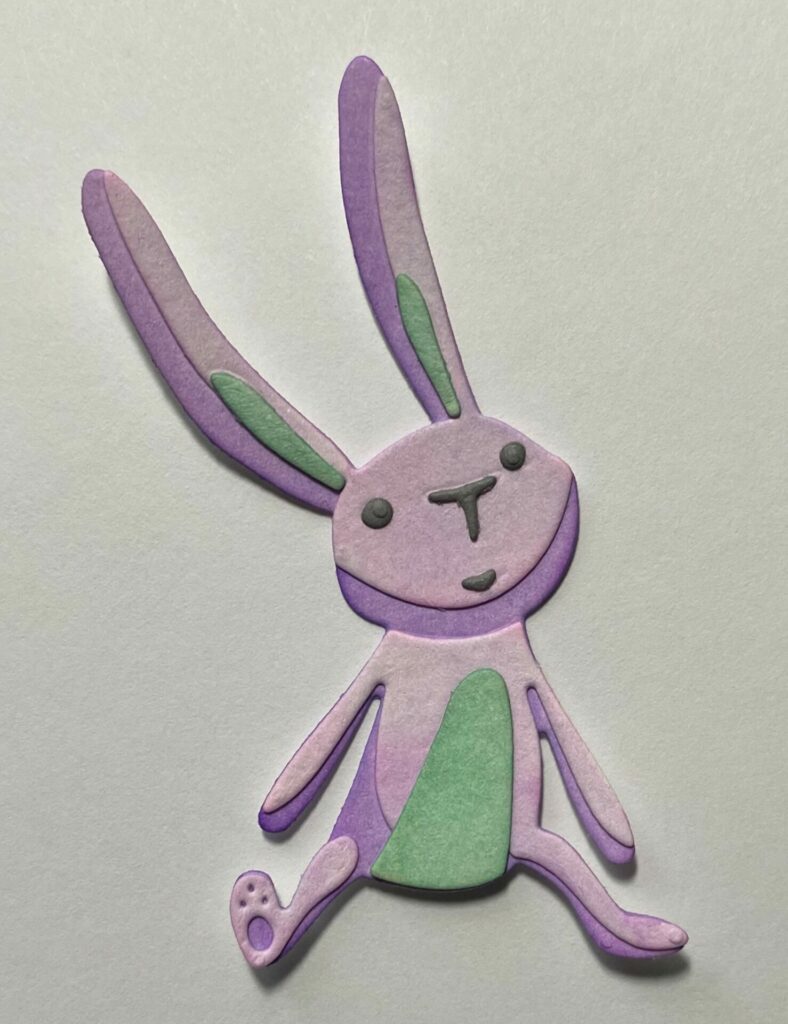
- Cut all three layers of the sitting bunny from watercolor paper.
- Cut the face layer (eyes, nose, and mouth) from gray cardstock. Leave the pieces in the die for now so they don’t get lost. (Not shown below)
- Then, cut one main flower from watercolor paper.
- Lastly, cut five wildflowers stems from watercolor paper.
Water Coloring Tips
The Wet On Wet Method = Blended Colors
Wet On Wet – wet paint is applied to wet paper, or added to a wash of fresh wet paint.
- Before adding color wet your watercolor paper with a clean brush with just water.
- Don’t use too much water.
- Creates a tie-dye blended look.
- Keep in mind color theory when using this method. Complementary colors next to each other may create mud, aka brown.
- Typically used at the beginning of your painting.
The Wet On Dry Method = Hard Edges
Wet On Dry – wet paint applied onto dry paper, or wet paint onto an area of dry paint.
- Applying ink with your brush to dry watercolor paper.
- Creates lines with a hard edge.
- Great for adding detail to your painting.
- Typically used towards the end of your painting.
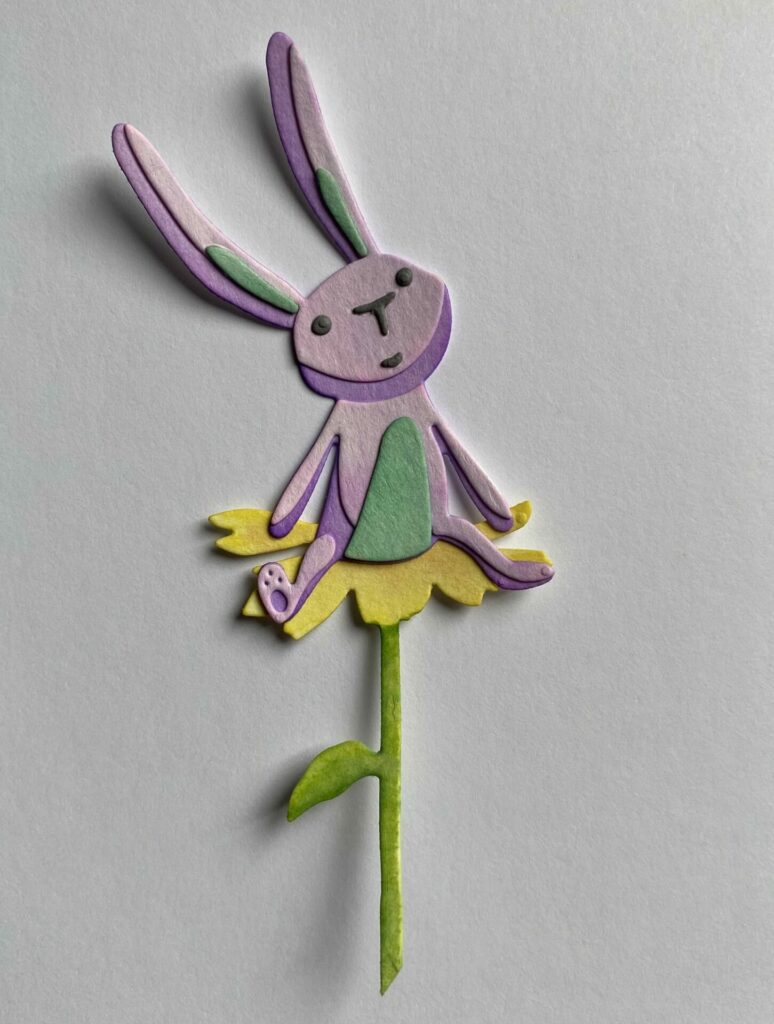
Water Coloring The Flowers
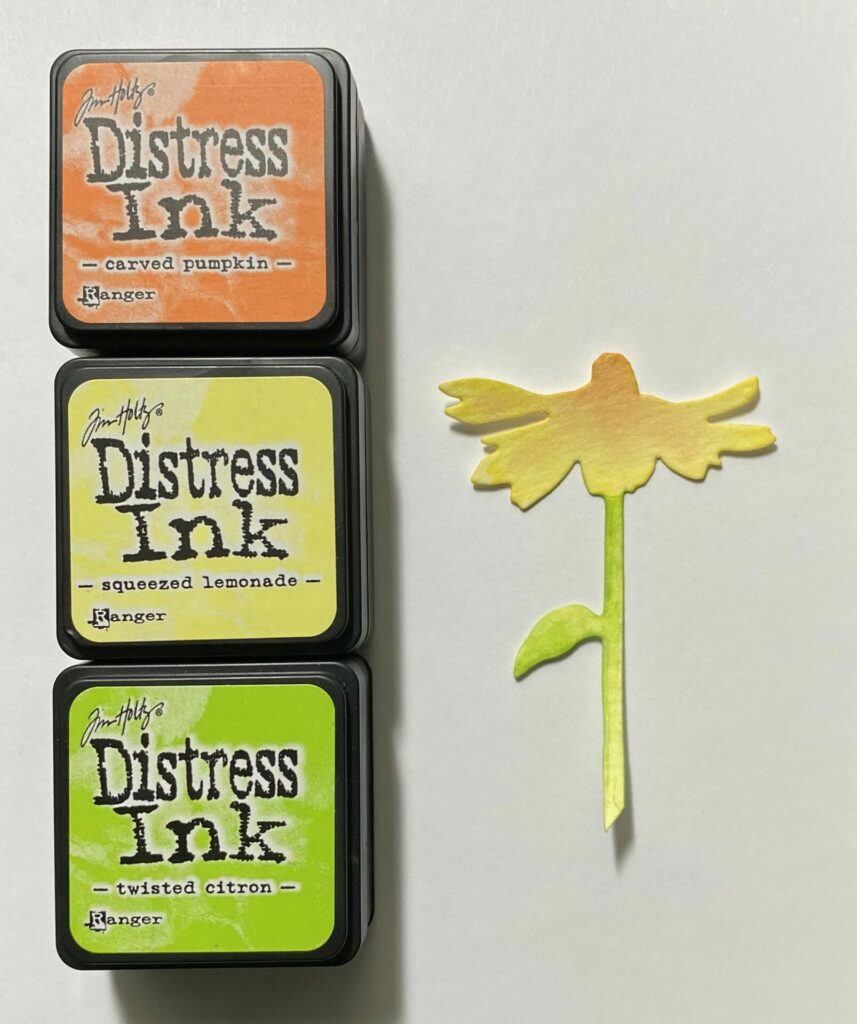
Main Flower
- Watercolor only the flower with squeezed lemonade ink.
- Allow it to dry between layers.
- Use your brush to wet the flower, then add some carved pumpkin ink only to the top center. Let it dry.
- Watercolor the stem with twisted citron ink and let it dry.
- Add another layer of twisted citron ink to create shadows. Let it dry.
- Add a layer of mowed lawn ink to the stem.
Wildflowers
Saltwater Taffy
Paint all five wildflower stems with the saltwater taffy and twisted citron inks.
- Watercolor only the flowers with saltwater taffy ink. (Layer 1)
- Allow it to dry between layers.
- Then, add another layer of saltwater taffy ink at the bottom of each flower to create some depth. (Layer 2)
- Let it dry. You can use a heat tool to speed up the drying process if you want.
- Watercolor the stem with twisted citron ink and let it dry. (Layer 1)
- Add another layer of twisted citron ink to create shadows. (Layer 2)

Picked Raspberry
Here just paint three of the watercolor stems with the picked raspberry ink. Leave the other two stems as they are from the previous step.
- Add a small amount of picked raspberry ink to the bottom of each flower to create even more depth.
- Allow it to dry between layers.
- Add a third layer of shading to the stems with twisted citron ink for more depth.
- Let them dry.
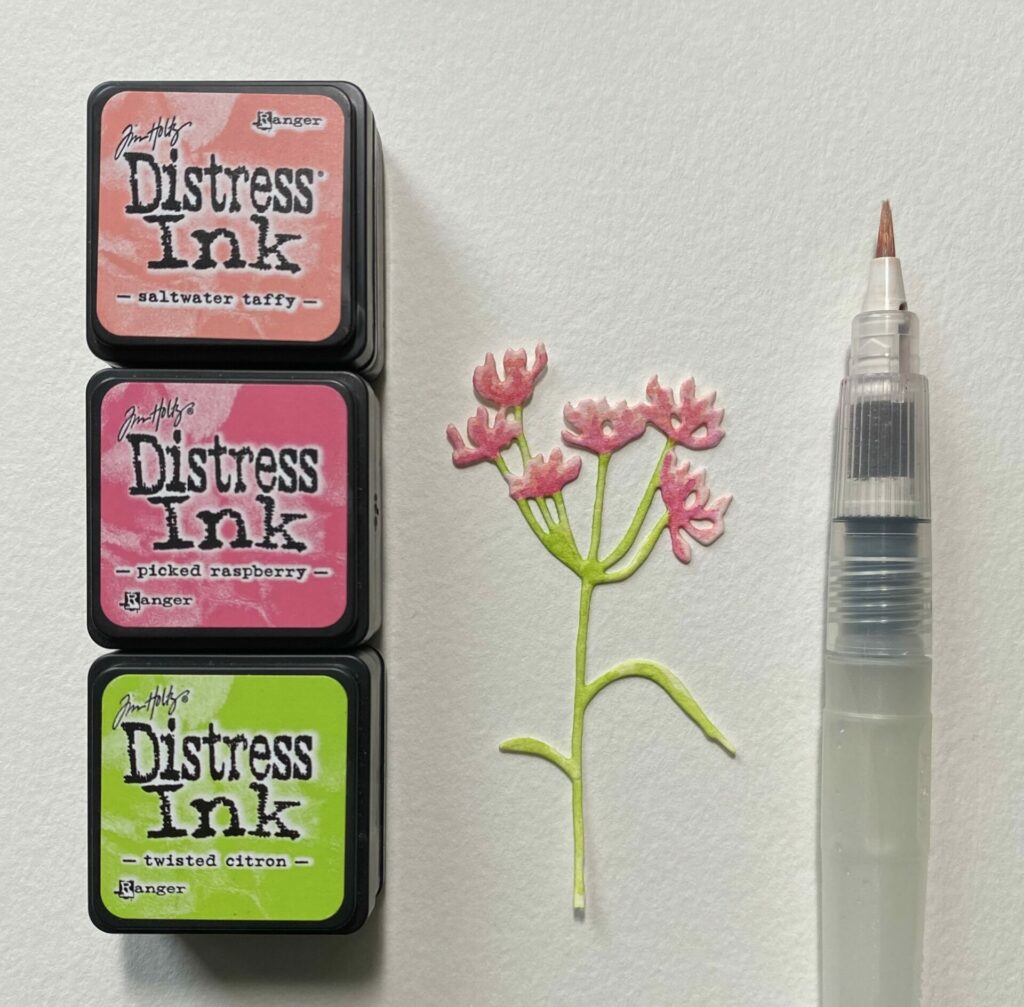
You should now have a total of five wildflower stems: two saltwater taffy and three picked raspberry.
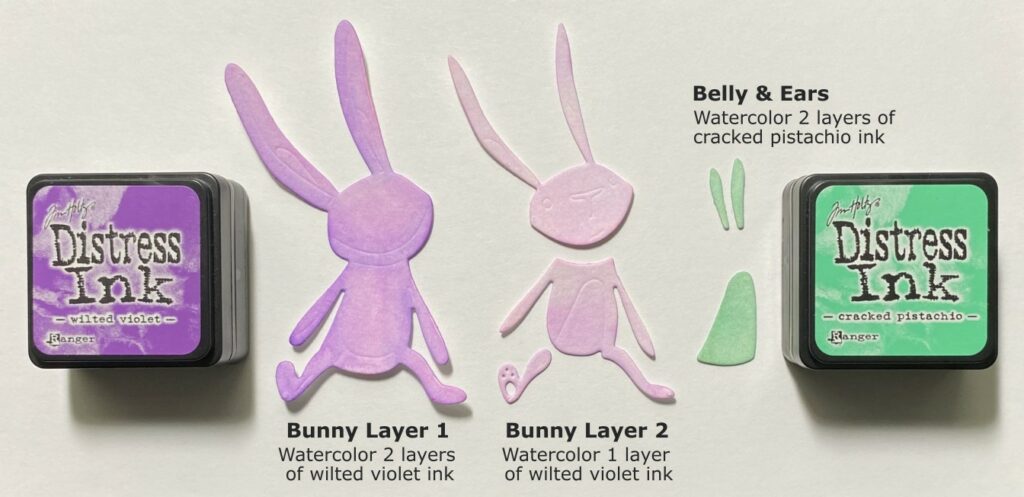
Water Coloring The Bunny
- Watercolor both bunny layer 1 and 2 with a layer of wilted violet ink.
- Allow it to dry between layers.
- Add a second layer of wilted violet ink to bunny layer 1.
- Watercolor the belly & ears with a layer of cracked pistachio ink.
- Let it dry.
- Add a second layer of cracked pistachio ink to the belly & ears.
Assembling The Bunny
I used tweezers for step 1 & 2, and the sticky embellishment wand for step 3.
- Glue all three pieces of bunny layer 2 on top of bunny layer 1.
- Then, glue the belly and ears on top of bunny layer 2.
- Glue the eyes, nose, and mouth on top of bunny layer 2.
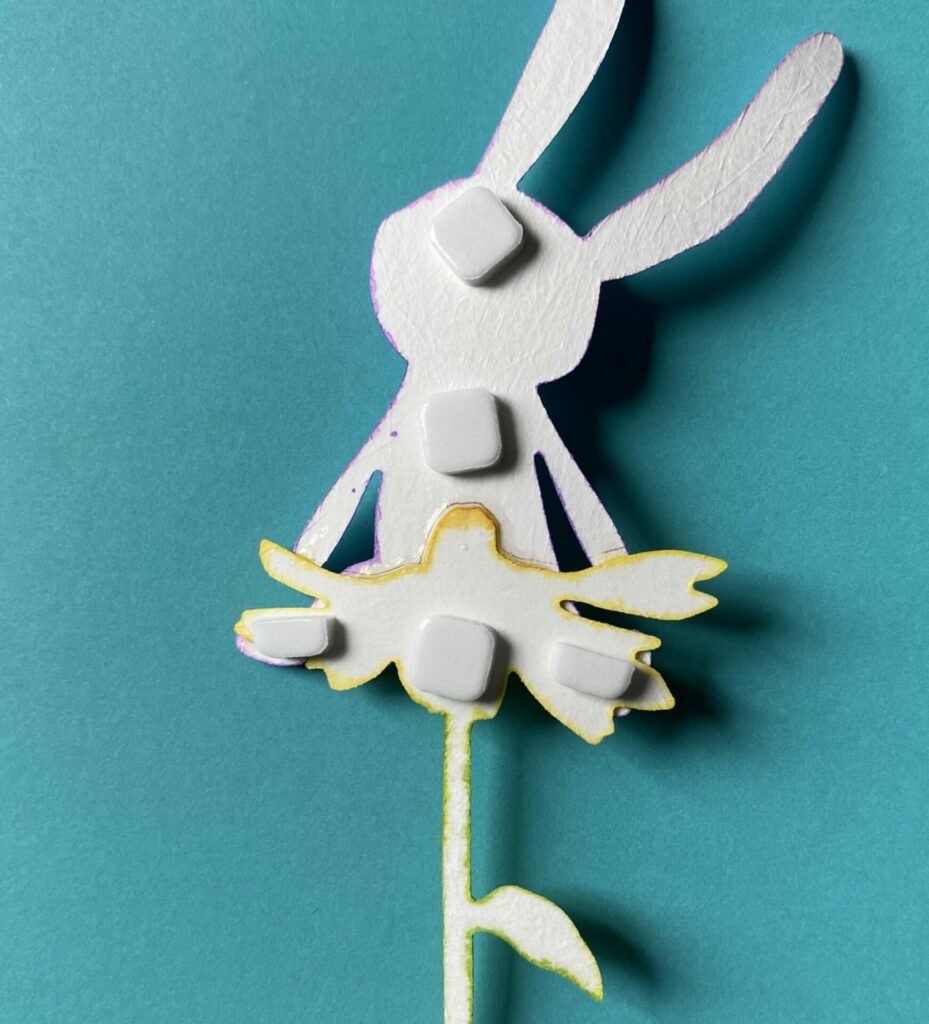
Attaching The Bunny
- Position the bunny so it looks like it sitting on top of the yellow flower.
- Glue the bunny to the top of the yellow flower die cut.
- Put some small foam squares on the back of the bunny and flower.
- Position the bunny flower stem so that its vertically centered on the card front.
- Then, adhere it to the front of the card base.
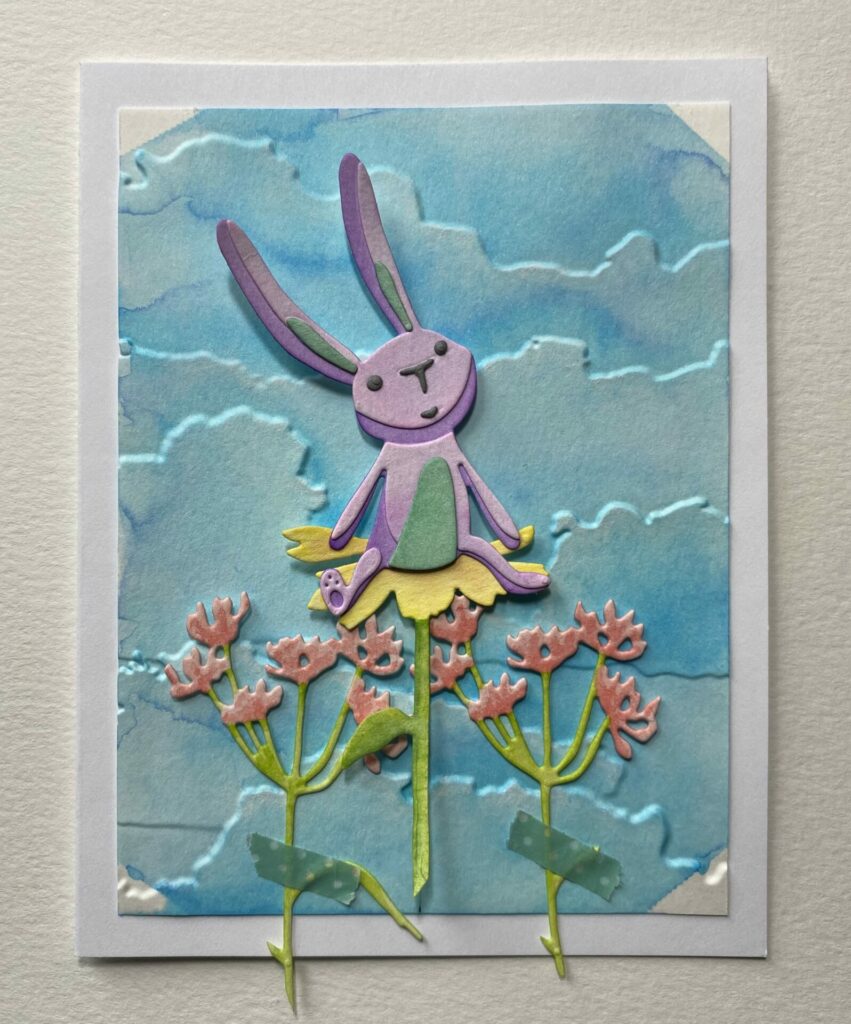
Assembling The Flower Field
Back Row – Saltwater Taffy
- Position a saltwater taffy wildflower stem on each side of the main yellow flower.
- Use washi tape to temporarily hold them in place.
- Check how the flowers fit within the frame by placing the egg window on top of the card base.
- Remove the egg window frame.
- Gently lift up the flowers and apply a small amount of glue to the back of each one before adhering it to the card.
- Once the glue has dried, carefully peel off the washi tape and trim any stems hanging off the card.
Front Row – Picked Raspberry
- Glue the embossed egg window panel to the front of the card base.
- This row of flowers will be tucked between the two layers of the egg window at the bottom
- Tuck in one wildflower stem and place it in front and to the right of the main yellow flower.
- Use glue to secure it in place.
- If you want to add some depth, use small foam squares behind a few flowers. (Quarter cut the small foam square with your scissors.)
- Cut apart the last two wildflower stems into clusters of two or three flowers.
- Arrange them at the bottom of the egg window, filling in the remaining spaces in the front row.
- Secure them in place with glue.

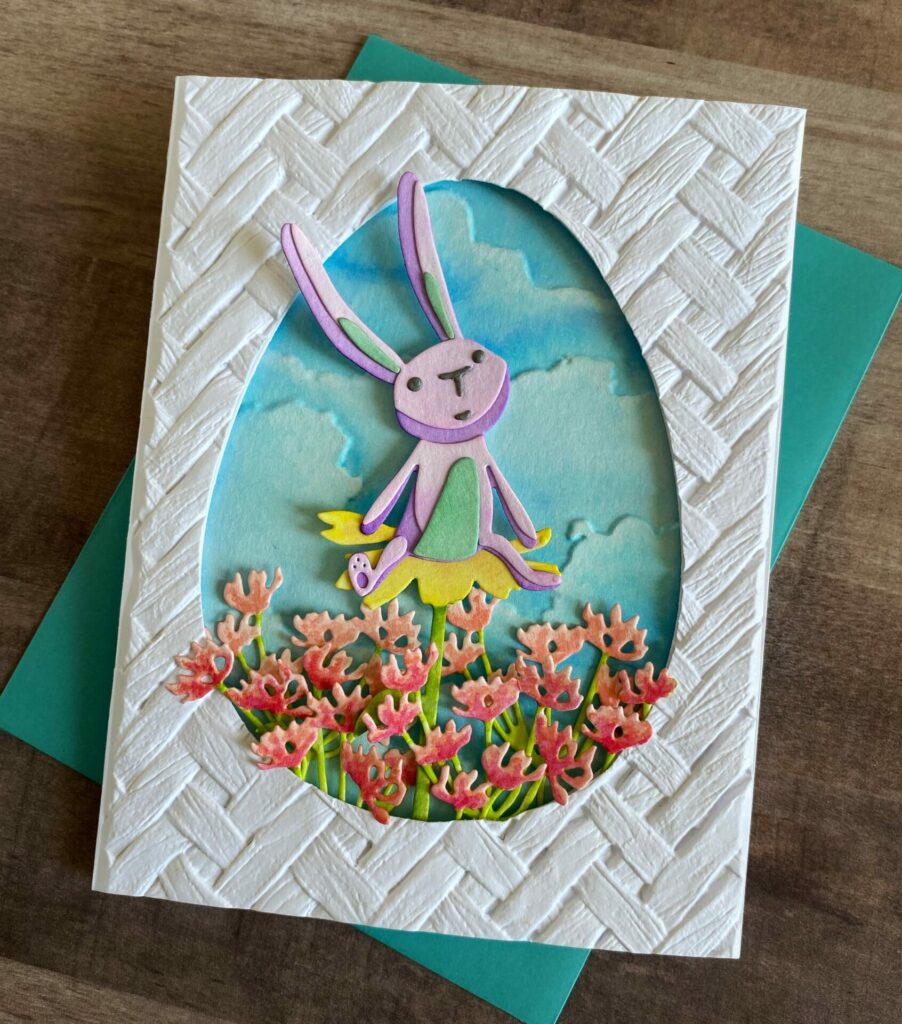
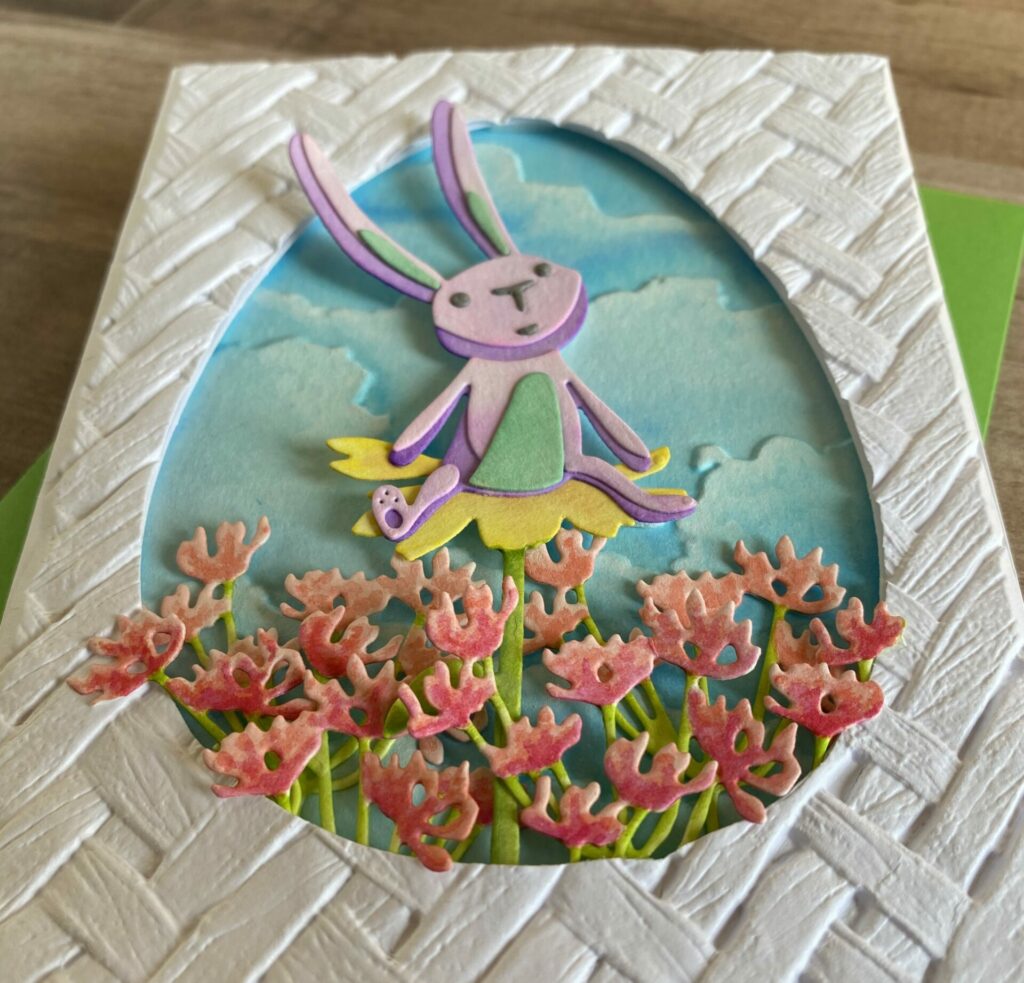
Bunny Daydreams Easter Card Complete!
Hey, congrats! You’ve finished making your Bunny Daydreams Easter Card! I really hope you had a blast following this tutorial, just like I did. If you decide to give it a go, don’t forget to tag me (@silversgrove or @grovecrafted) on Instagram. I’m super excited to see what you’ve come up with! Thanks for checking this out, and I hope it sparked some fresh ideas for your own creations. Have a great time crafting!
Discover more Easter card tutorials! If you loved creating the Bunny Daydreams Easter Card, you’ll definitely enjoy exploring my previous designs.
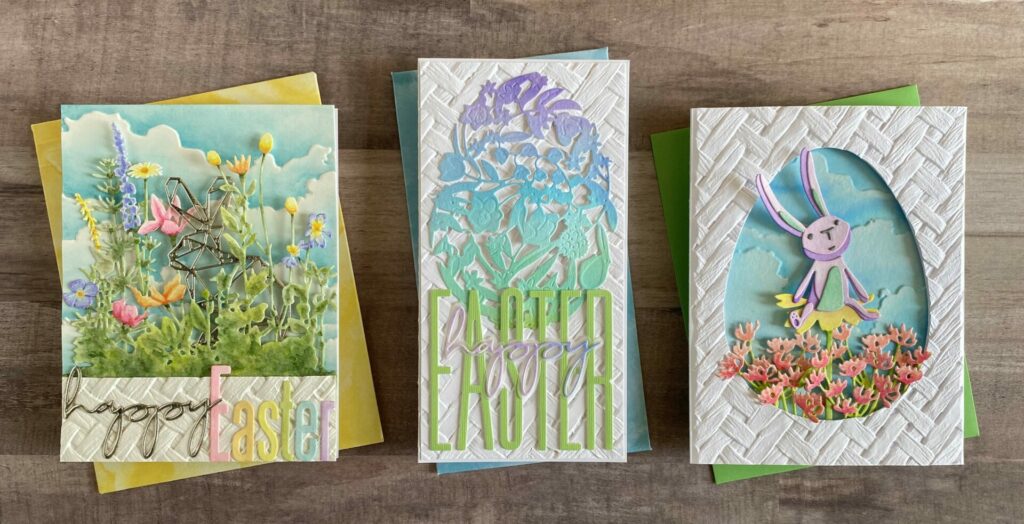
Easter Wildflowers Card (on the left), Floral Easter Egg Card (in the middle), and Bunny Daydreams Easter Card (on the right).
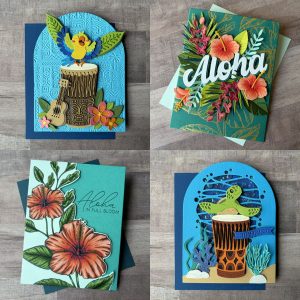
Check out all my other Easter Tutorials for additional inspiration and ideas.

Wow this is such amazing blog post . So much work . Thank you this card is absolutely gorgeous
Thank you, Bibi, for your kind words! I am pleased to hear that you enjoyed this blog post. You’re welcome!