Marbled Alloy Easter Eggs
Hello crafty makers. Happy Easter! Today I’m sharing how I made these beautiful marbled alloy Easter eggs. They feature a marbled look with rose gold metallic veining. They’re pretty simple to make and perfect for spring. You can use these for home décor and even decorate your Easter table with them.

Link Abbreviations
- AMZ – Amazon*
- HL – Hobby Lobby
- RI – Ranger Ink*
- Sb.com – Scrapbook.com*
- SSS – Simon Says Stamp
Full Disclosure: This post contains affiliate links which are indicated with an (*). If you click on an affiliate link and later make a purchase, I may receive a small commission. Clicking on an affiliate link which earns a commission does NOT result in additional charges to you or cost you anything extra. Money earned via affiliate links helps pay the fees to keep this blog up and running. Thank you so much for shopping through my links to show your support for the brands that we love and the products that I share!
Supplies Used / Substitutions:
- Plastic Easter Eggs | HL / Any plastic or craft eggs
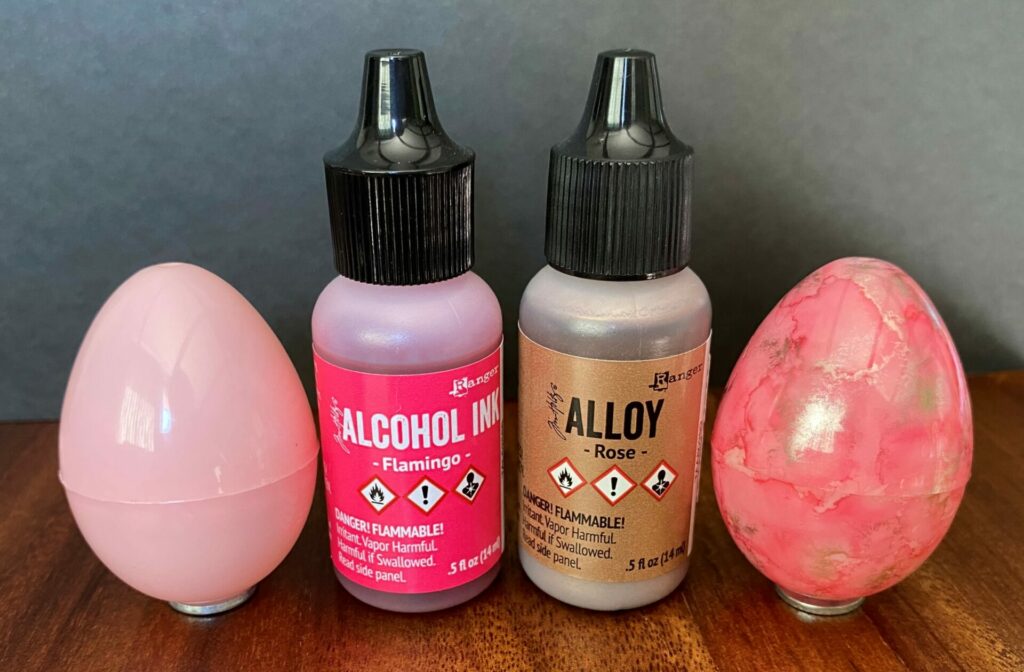
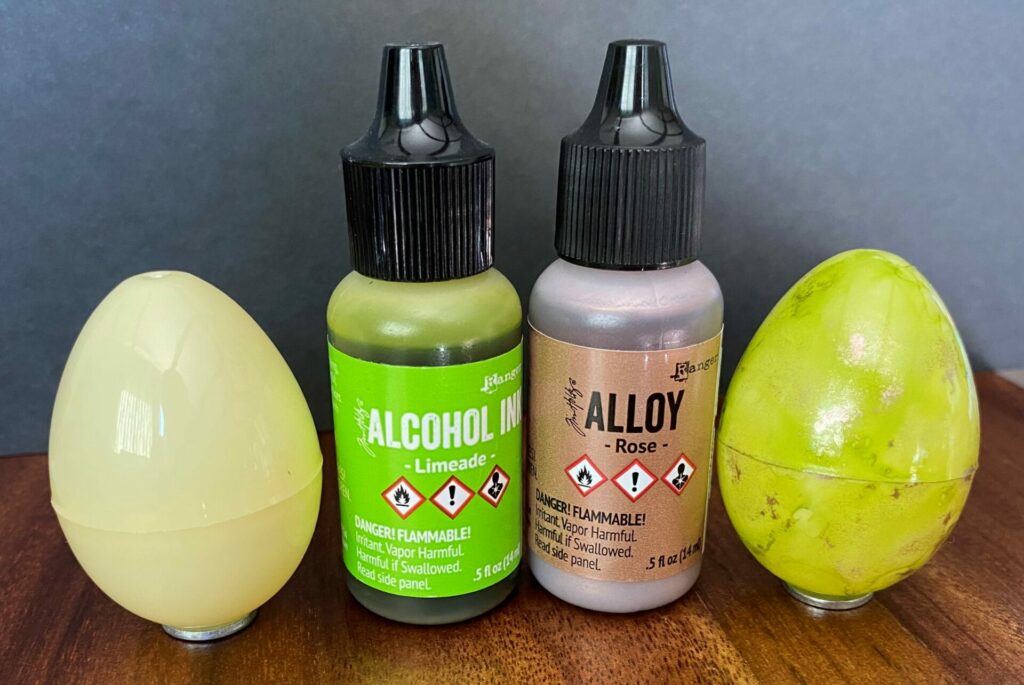
- Tim Holtz Alcohol Ink – Flamingo | RI | SSS / Any alcohol ink in any color
- Tim Holtz Alcohol Ink Alloy – Rose | Sb.com | RI / Any color alloy
- Ranger Tim Holtz Alcohol Blending Solution | Sb.com | RI |
- Alcohol Ink Mini Applicator Tool & Felts | Sb.com |
- Tim Holtz Glass Media Mat | Sb.com | AMZ / Cardboard
- Gloves
- Paper Towels
- Plastic Trash Bag
- Yarn
About Alcohol Inks & Advice
If you’re new to alcohol inks, here’s a little info about them. For this project, I used the Tim Holtz alcohol inks from Ranger Ink. Ranger’s website describes the inks as follows:
“Alcohol Inks are fast drying, acid free, fade resistant dye inks specially formulated to create gorgeous backgrounds and vivid pops of color on non-porous surfaces.”
“Tim Holtz Alloys are reflective metallic acid free inks specially formulated with unique metal powders to create intense metallic highlights when combined with Alcohol Inks and Alcohol Blending Solution on non-porous surfaces.”
When using the Alloys, you NEED to use at least a drop of Tim Holtz Alcohol Blending Solution along with it. Now I know what you’re thinking, “Can’t I just use 91% Isopropyl Alcohol instead of blending solution?” The answer is NO. To get the result I achieved, you CANNOT substitute the blending solution for 91% Isopropyl Alcohol. I’m not sure on the exact science behind it, but all I know is the blending solution helps the Alloys to do a magical dance to create the beautiful gilded veining. If you use the 91% Isopropyl Alcohol instead of the blending solution, the Alloys won’t perform as they were designed and it will be a hot mess.
Important Safety Warnings
Alcohol Inks do have an odor, so if you are sensitive to smells, this might not be the medium for you. Also, this is an adult project, and is not intended for children.
- Work in a well ventilated area.
- Open up doors and windows and/or wear a respirator.
- Wear gloves.
- Keep away from heat, sparks, and flame.
- Keep out of reach of children
- Do not use a straw to blow ink. Use an air blower tool instead.
- Never ever spray alcohol inks or blending solution.
Below is a safety note from Ranger’s website:
Note: Ranger does not recommend using Tim Holtz® Alcohol Inks, Metallic Mixatives, Snow Cap Mixative or Alcohol Ink Blending Solution in spray bottles as these contents contain alcohol and should not be airborne.
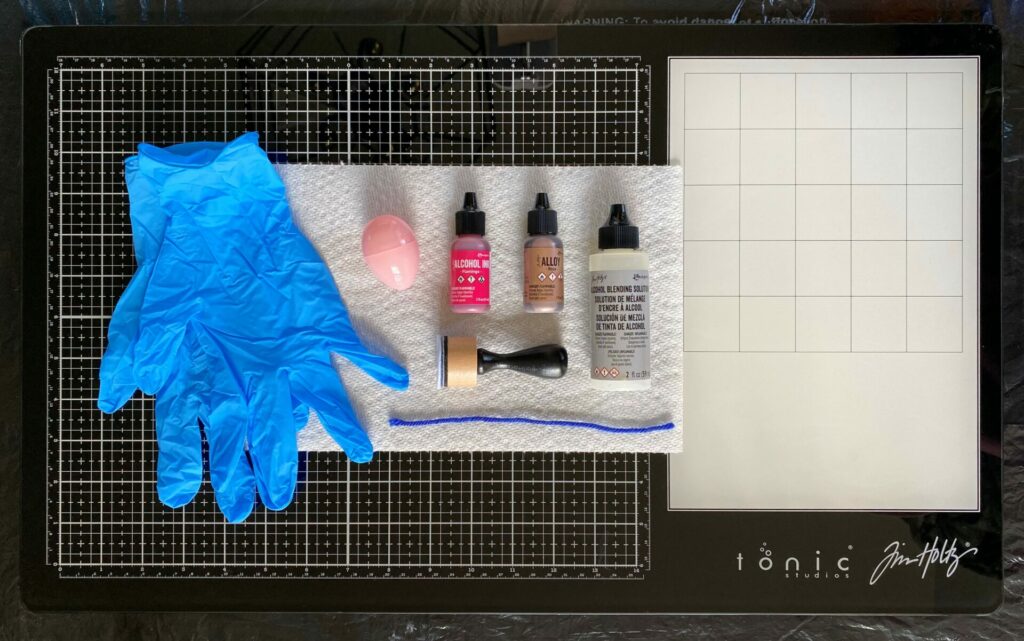
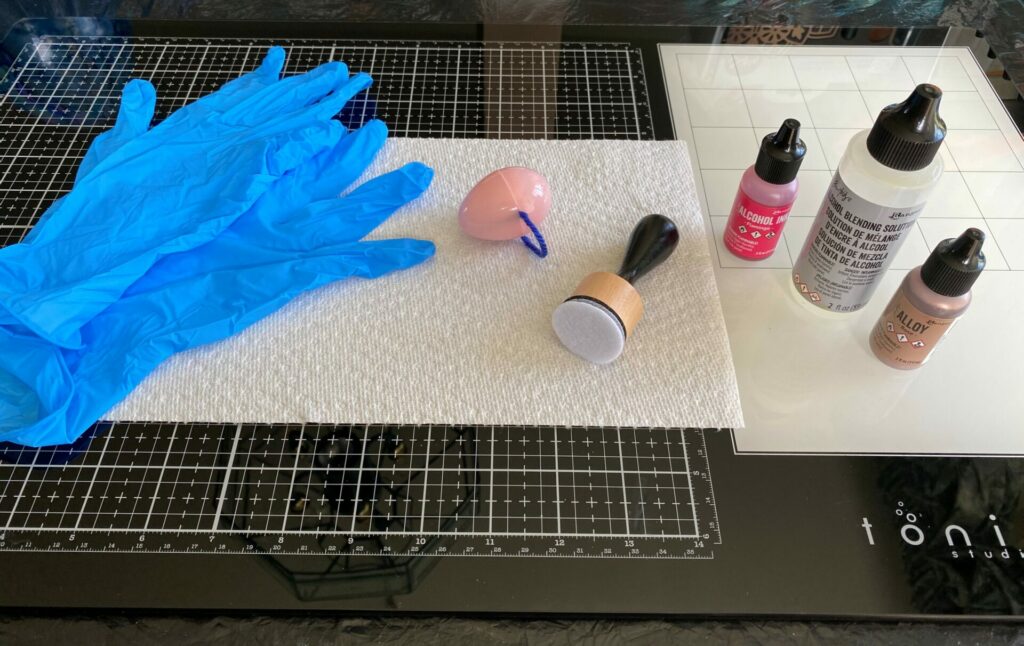
Setup Work Surface & Supplies
Firstly, I setup my work surface and collected my supplies. You might want to put a plastic trash bag under the glass media mat to protect the table. If you don’t have a glass media mat, you could work on a piece if cardboard. Also, you want to work in a well ventilated area, so crack a window while your working. Gather the supplies listed below and let’s get started.
- Glass Media Mat (remove kraft sheet from mat)
- Plastic Trash Bag
- Plastic Easter Eggs
- Alcohol Ink
- Alcohol Ink Alloy
- Blending Solution
- Alcohol Ink Mini Applicator Tool & Felt
- Paper Towels
- Gloves
- Yarn cut to 4 inches
Applying The Alcohol Inks
After your work surface is all setup, it’s time to start inking. Firstly, watch the video below to get a visual understanding on my inking process. Then, follow the steps below the video.
- Open a window for ventilation.
- Place the yarn ends inside the egg and close it shut. This creates a loop to hold the egg while inking.
- Put on gloves.
- Place a felt pad on the mini applicator tool.
- Apply a drop of rose alloy alcohol ink to the center of the felt.
- Then, apply two drops of blending solution on top of the alloy.
- Next, apply a drop of flamingo alcohol ink on top of the alloy and all around it in a circle.
- Start stamping the egg with the felt mini applicator tool. If the alloy clumps together and looks like polka dots, just stamp right over top of it and it should reactivate the ink and make it move.
- Keep stamping the egg until it’s fully covered with ink.
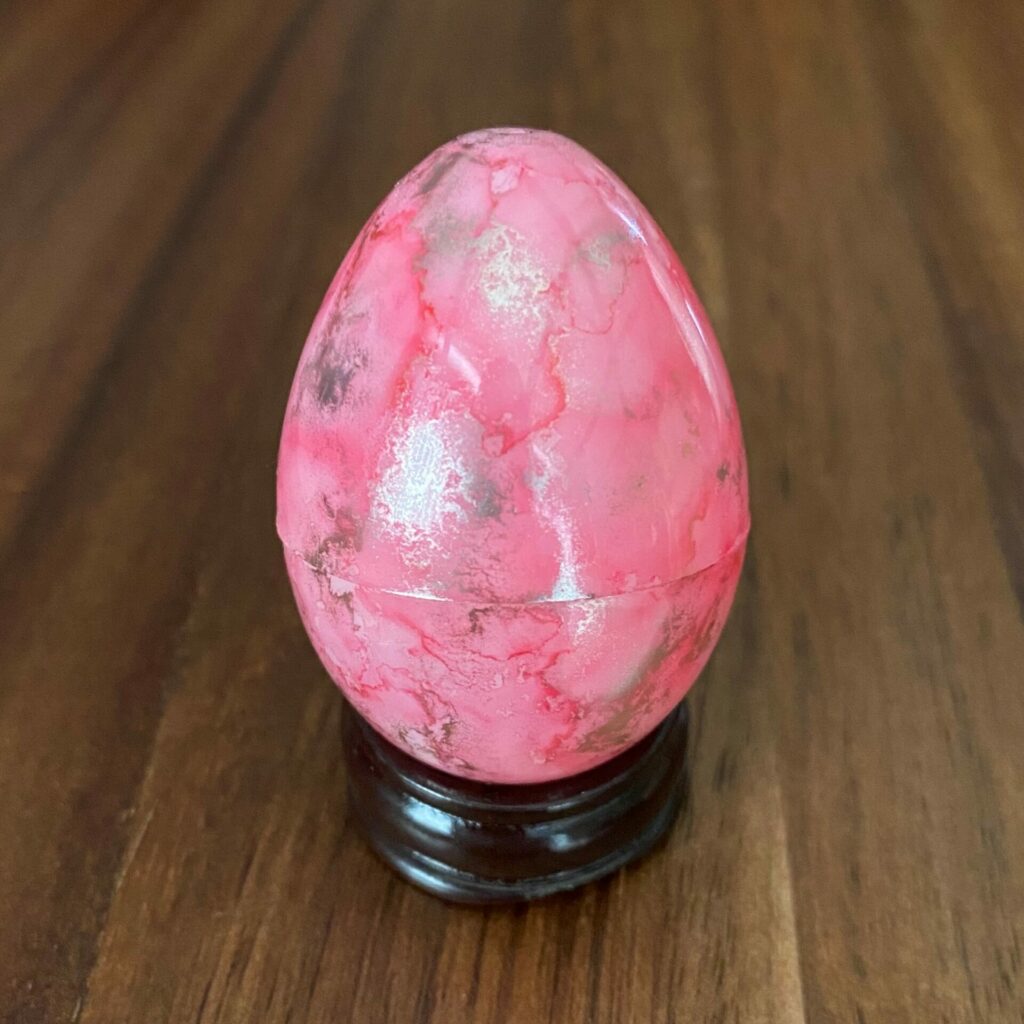
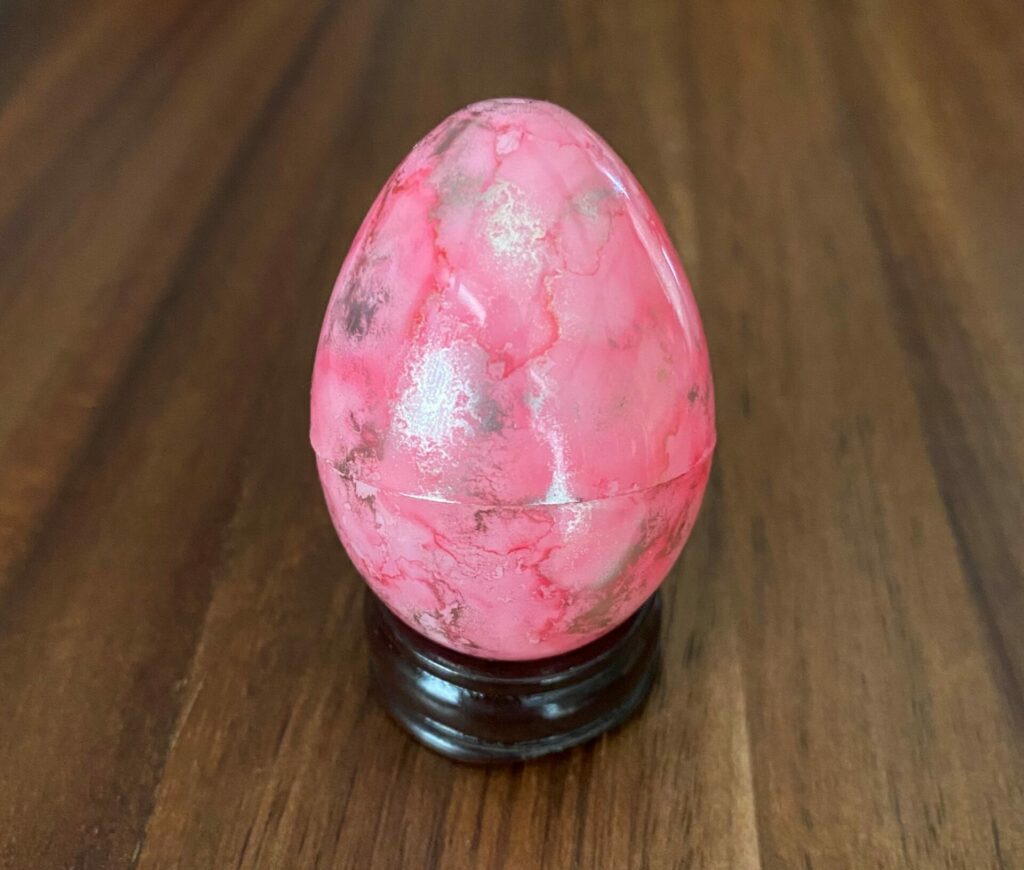
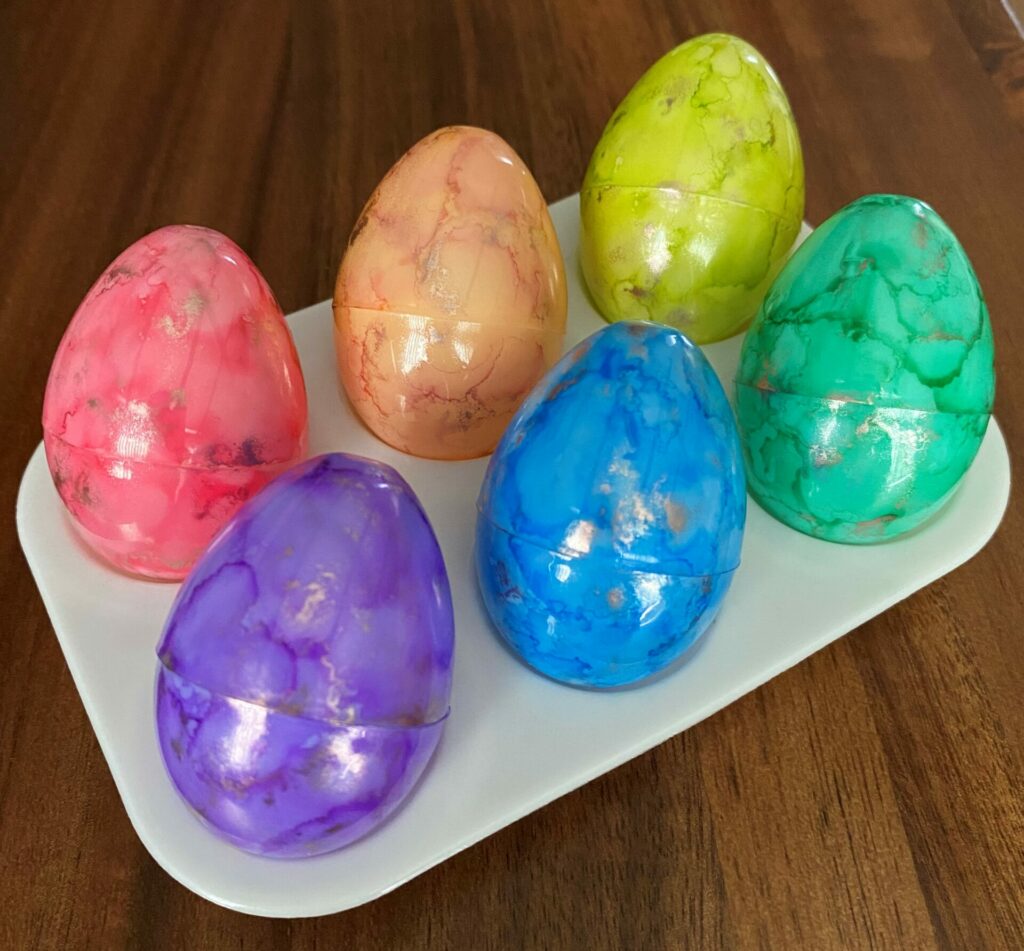
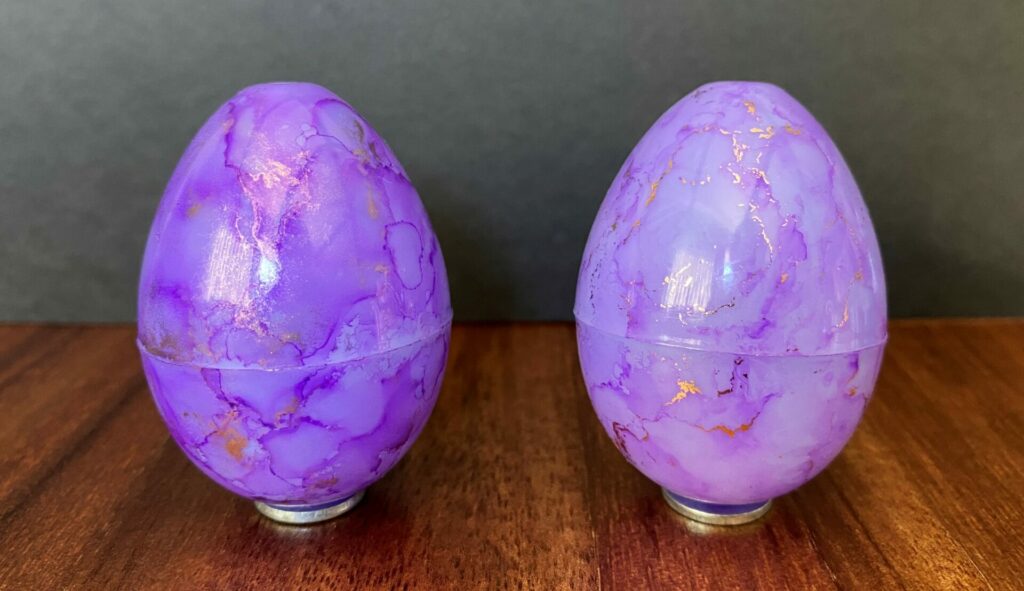
When you’re finished inking, the marbled alloy Easter eggs should look like this.
Tips For Making Multiples
If you plan on making more eggs in different colors, I recommend getting a new glove for the hand that holds the egg because the new ink you stamp will reactivate the dried ink on your glove fingers. Say you ink a purple egg first and then you want to make a yellow egg. If you’re still wearing the same glove then you’re probably going to end up with a yellow egg with some purple spots. I would have a glove dedicated for each color family and label them with a sharpie. Just a word of advice from one maker to another.
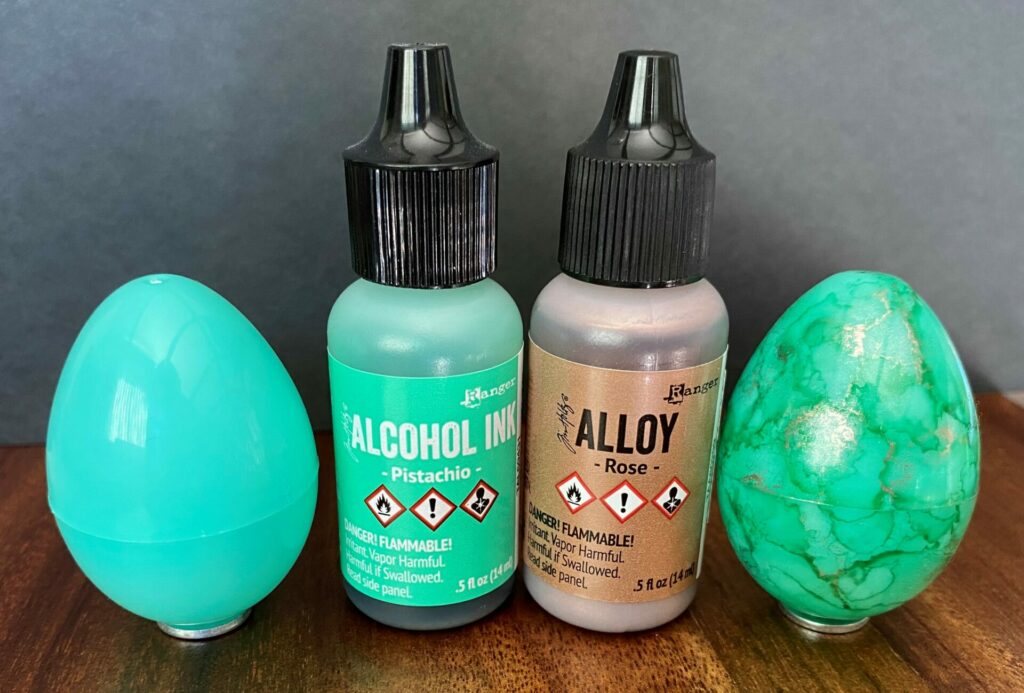
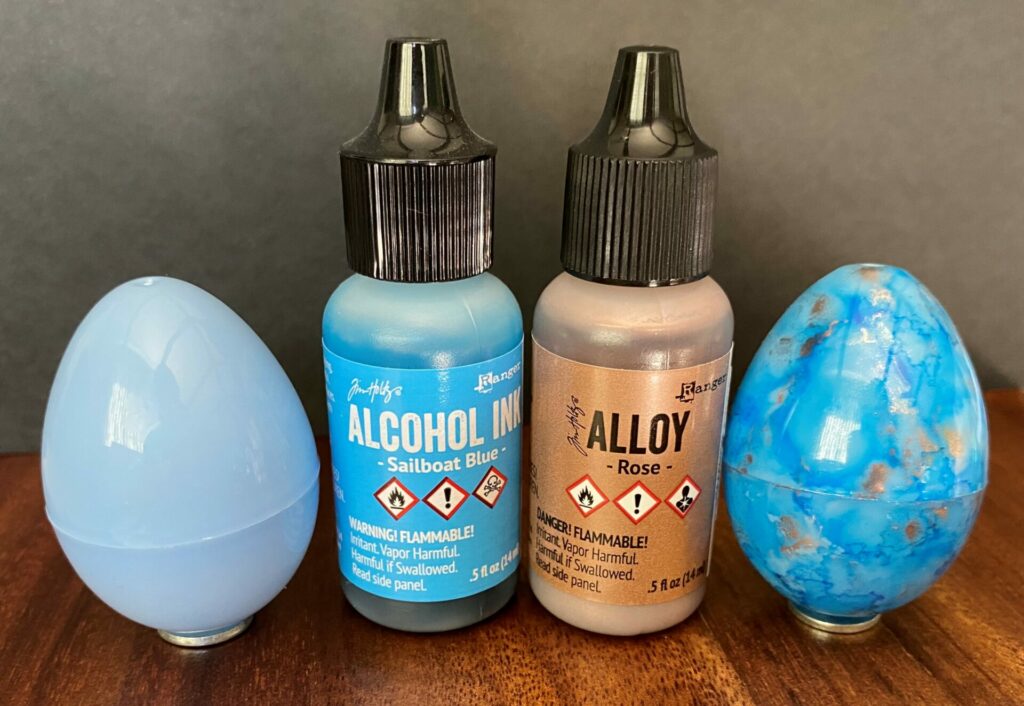
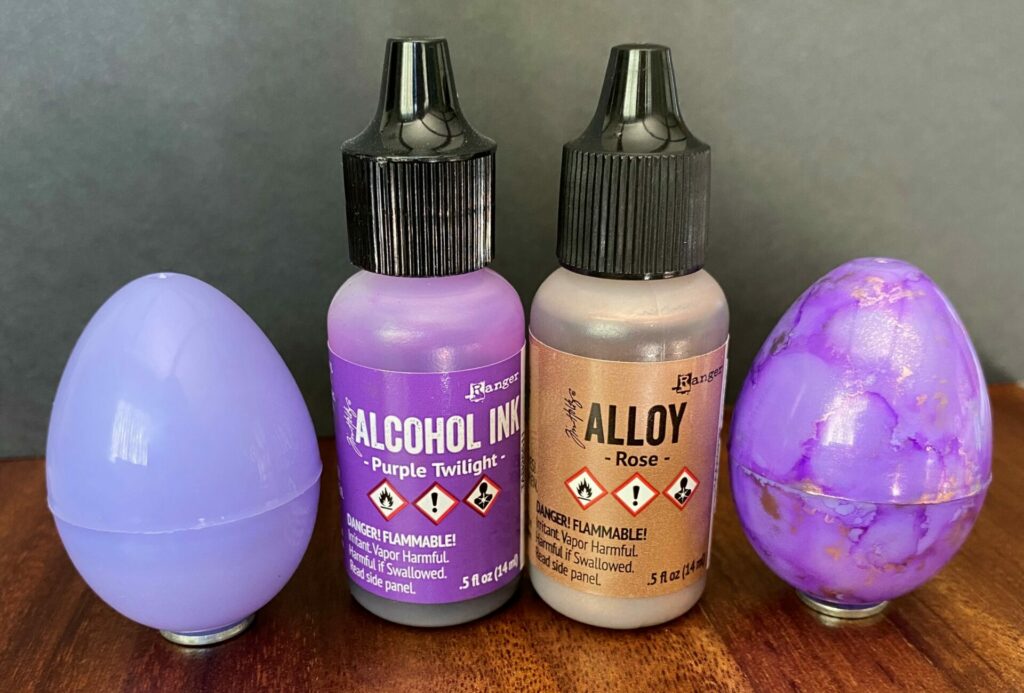
Egg Color Combinations
Below are some color combinations I came up with. However, you can use any colors of alcohol ink you want. For this tutorial, I was keeping true to the pastel Easter pallet. But, I will say the alloys really pop against the darker alcohol ink colors. Also keep in mind the color of your egg will alter the way the ink shows through because these inks are translucent. This matters mostly when you’re using lighter colors of alcohol ink on the colored plastic eggs.

Marbled Alloy Easter Eggs Complete!
Congratulations! You have now completed your marbled alloy Easter eggs! I hope you enjoyed this tutorial and have as much fun making it as I did. If you do make these eggs, please use the #grovecrafted and tag me (@grovecrafted) on Instagram. I’d love to see what you’ve created and the color combinations you used! Thanks for stopping by and I hope you found some new inspiration to create.


If you enjoyed making these marbled alloy Easter eggs, you might want to check out another one of my alcohol ink tutorials called Foiled Marble Easter Eggs. This tutorial follows mostly the same steps, but instead of using alloy alcohol ink, I used foil. Below the foiled egg is on the right and the alloy alcohol ink egg is on the left.
If you’re interested in even more Easter themed tutorials, you can find them here.